Tamiya Wild One Project
Page 1: Assembly
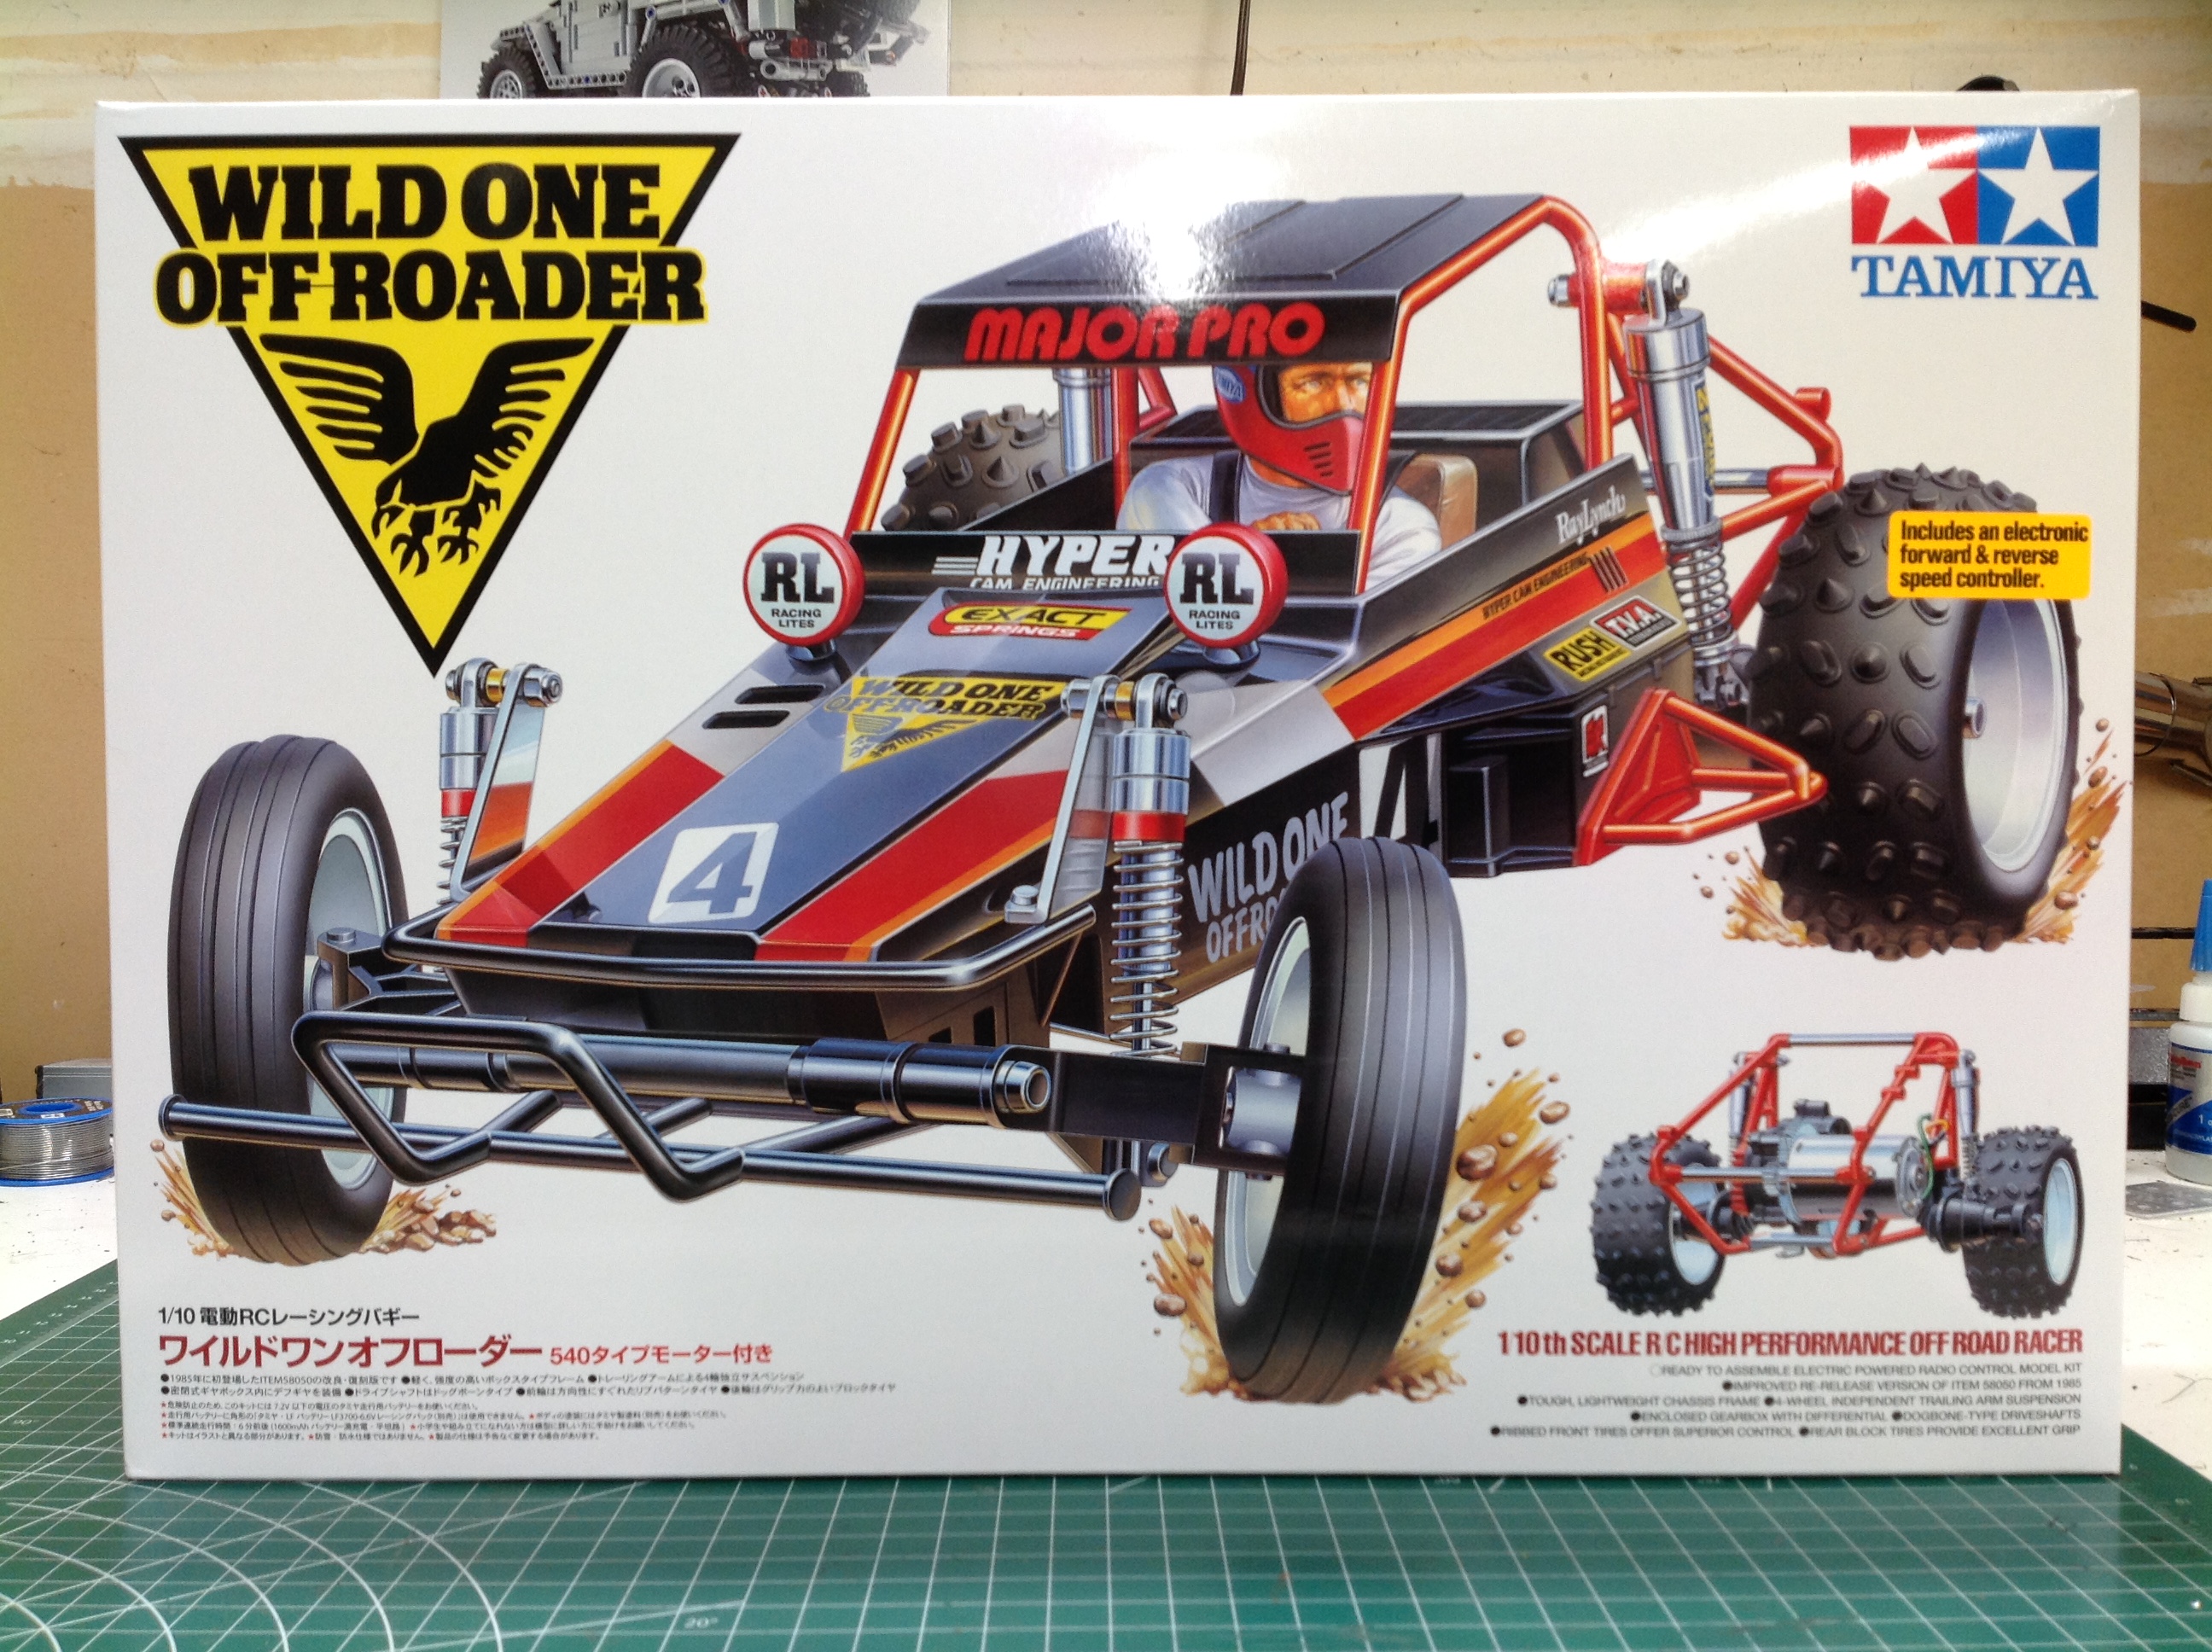
The Wild One comes in a big, colorful box with classic hand drawn
art. Looking closely, I think I can even see the Ackerman
correction on the steering angle! Too bad I can't make the driver
turn his head like that. Inside the box the contents are carefully
organized as shown.
This is a pretty simple kit as you can see from the smallish number of
parts. There are 3 numbered hardware bags. The main chassis
tub consumes the bulk of the volume.
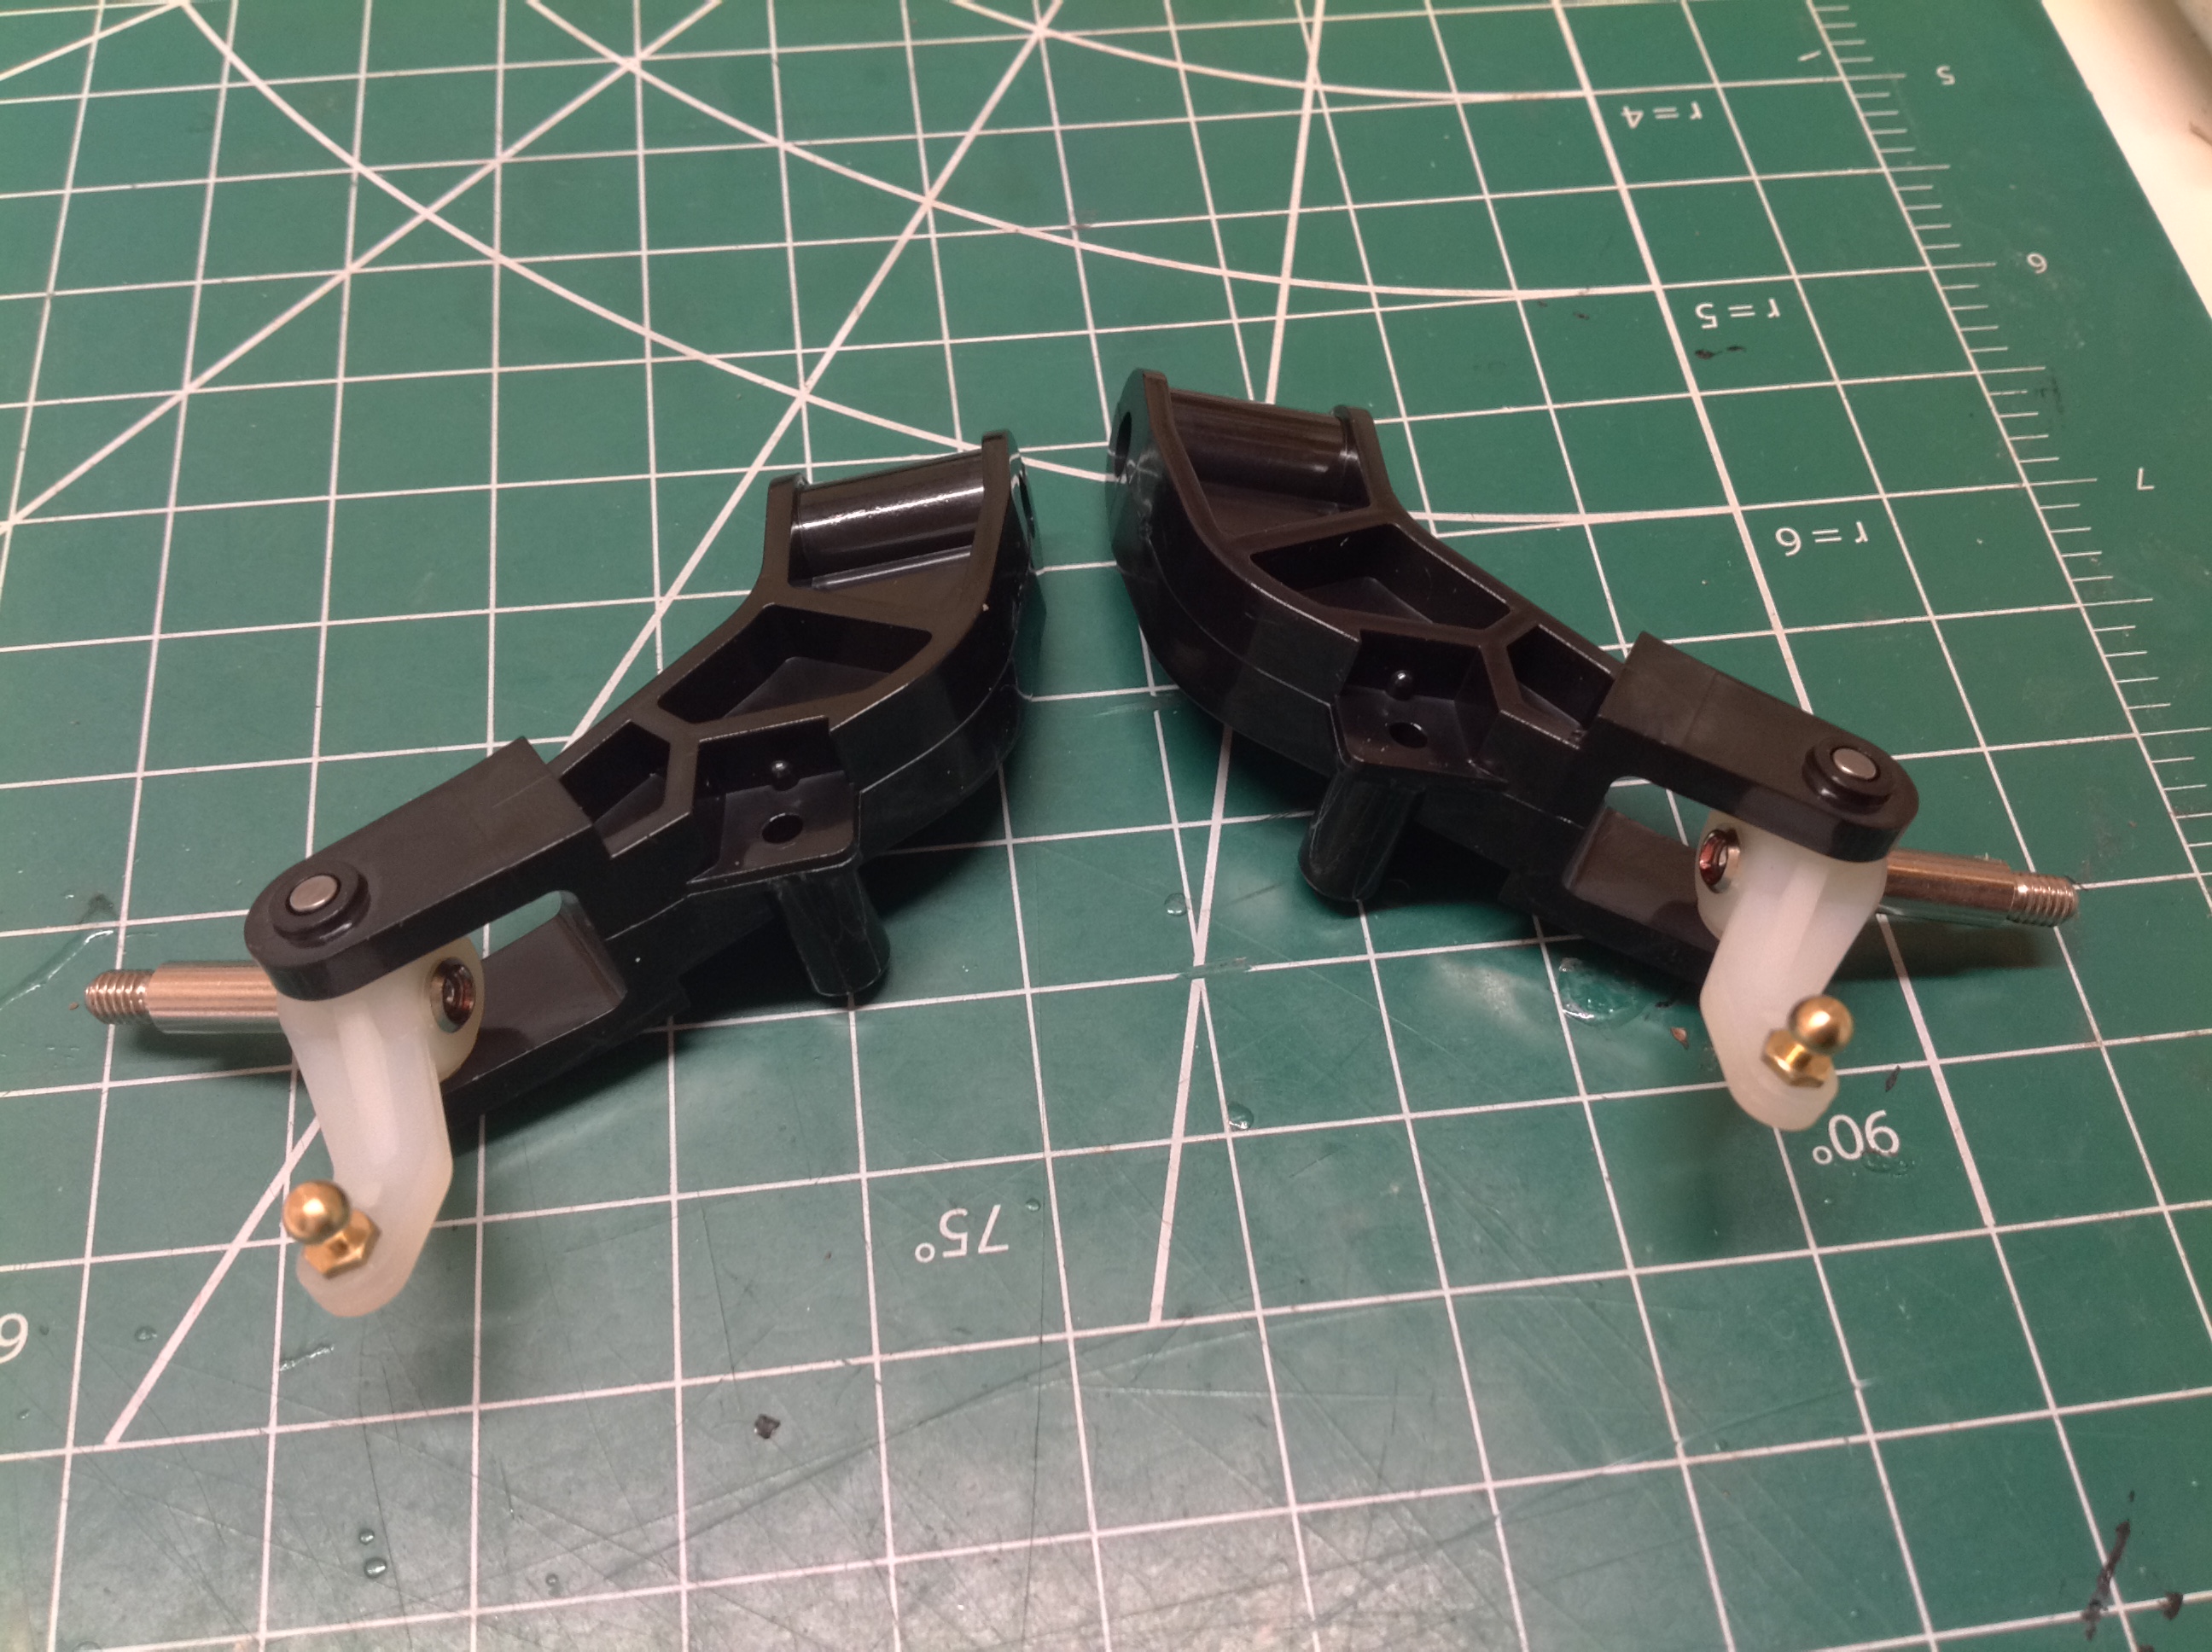
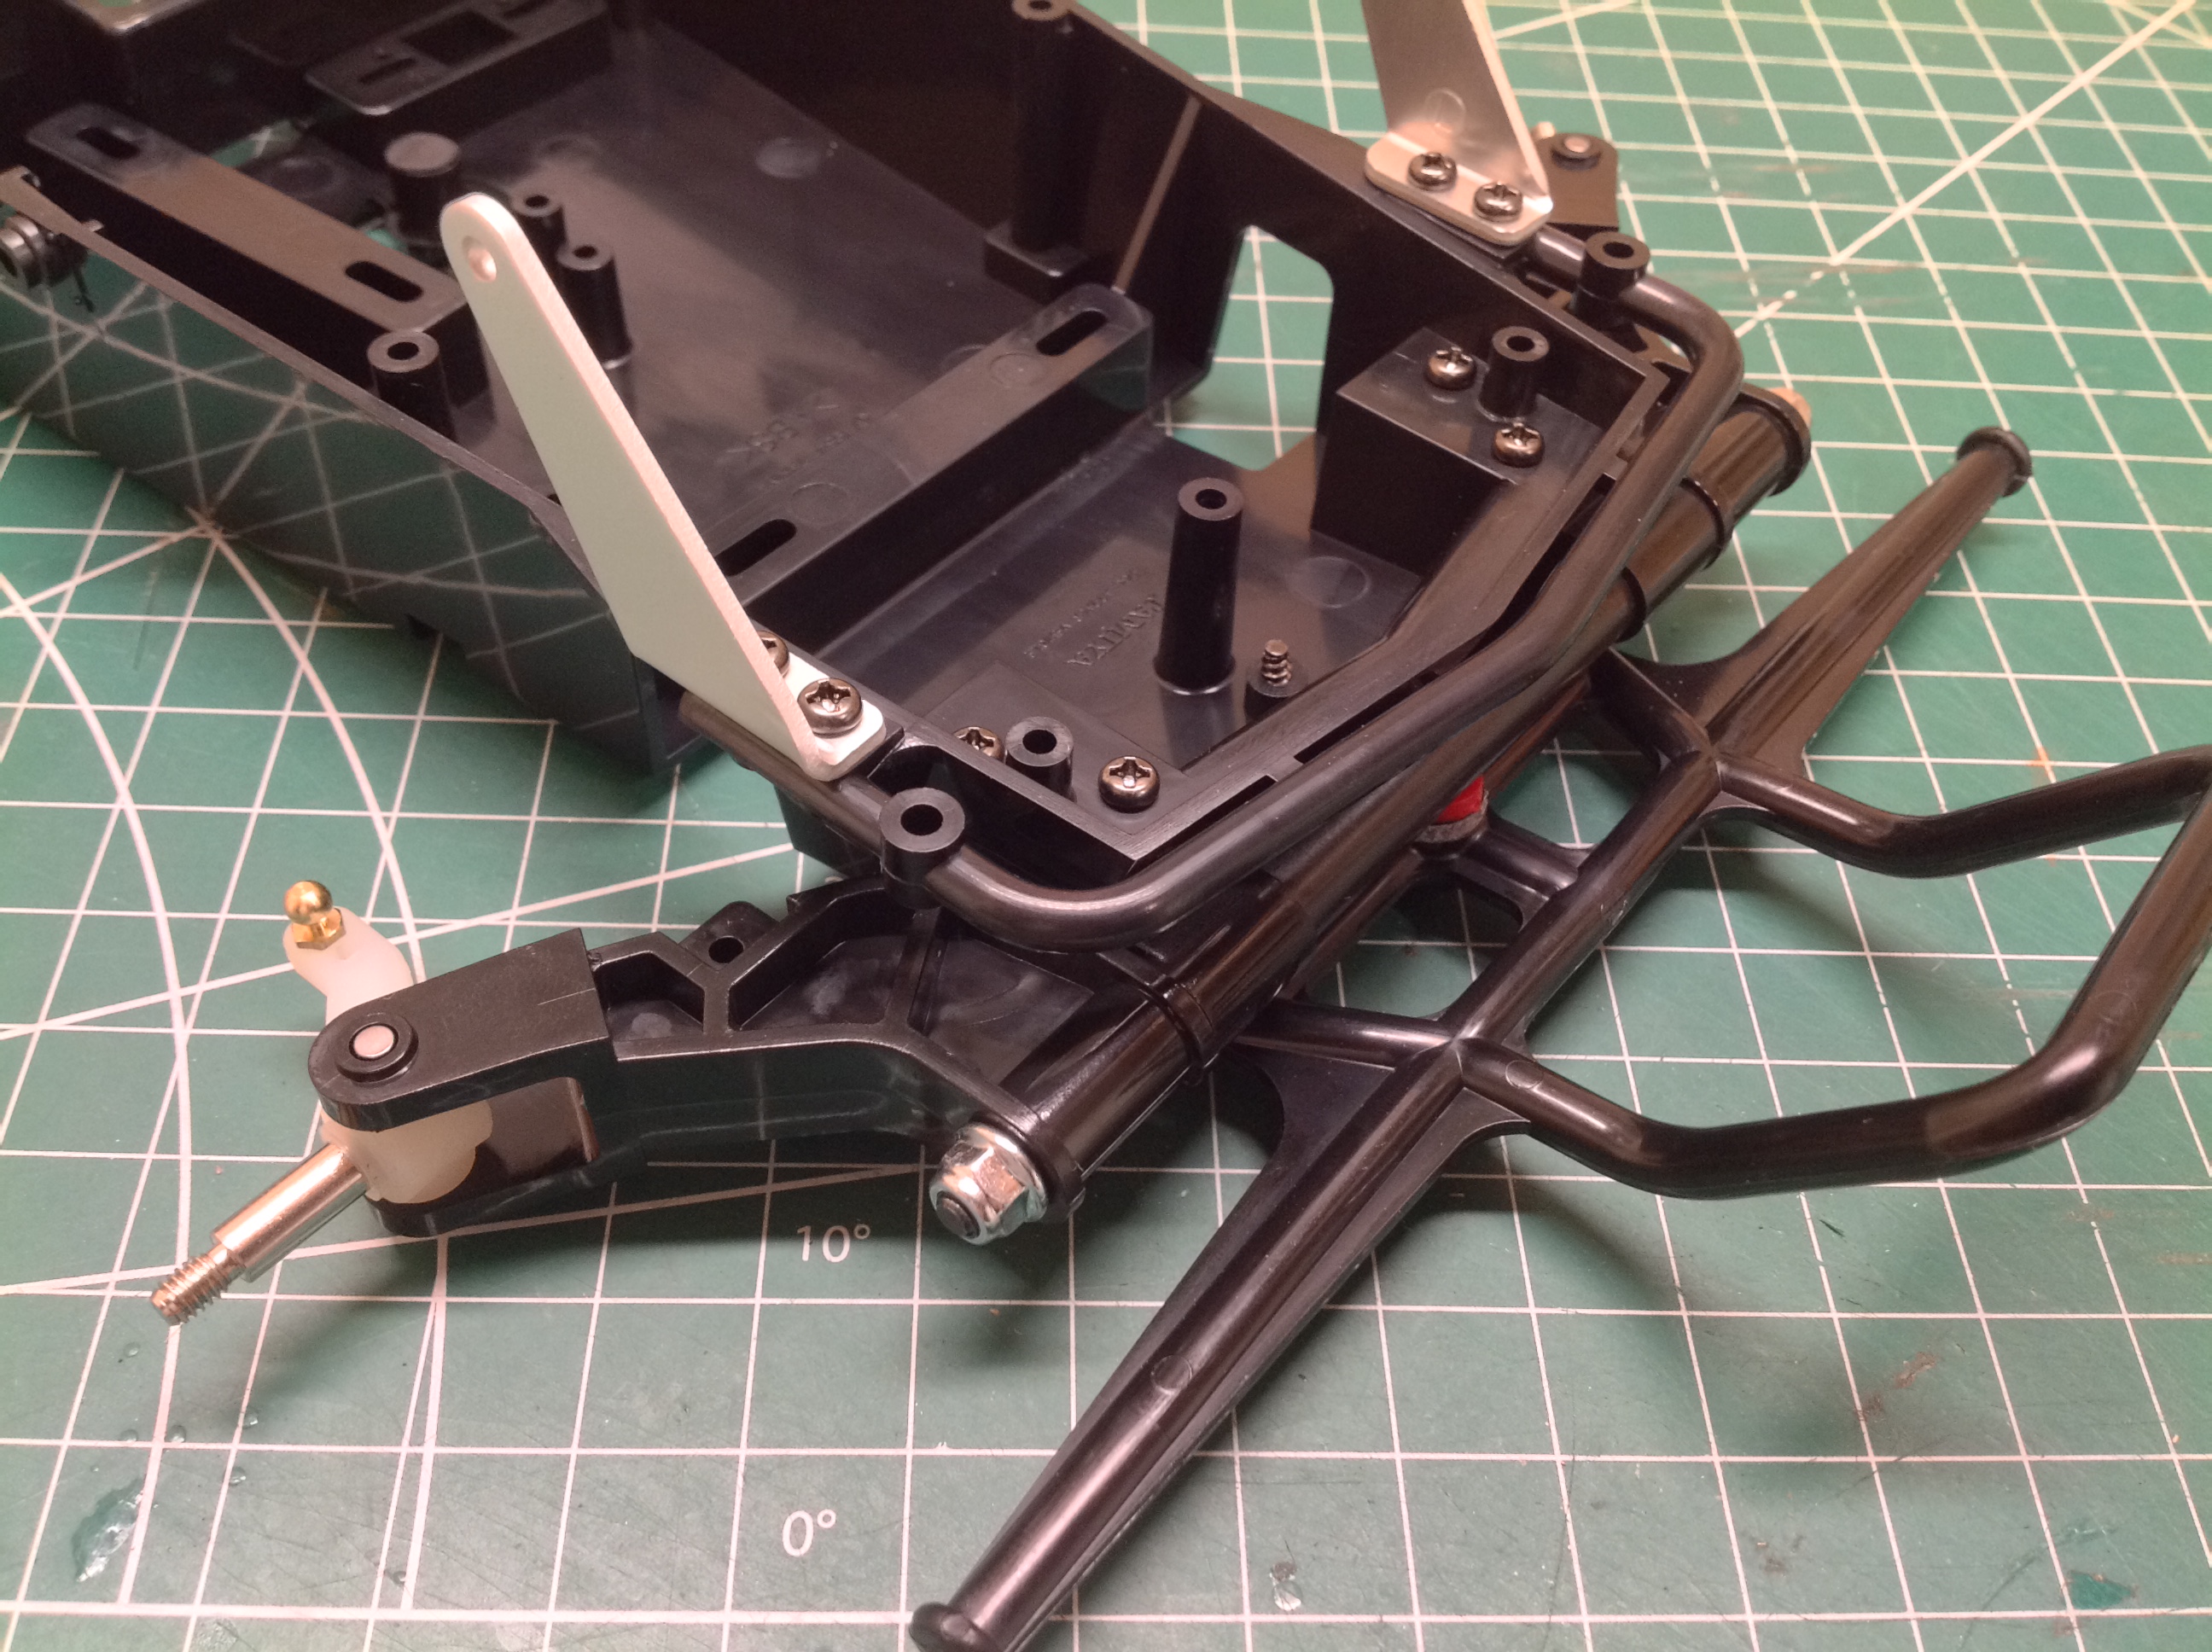
The front suspension uses curved trailing arms. The arms connect
to a steel axle which spans the front bumper as shown. This
solution allows for a lot of vertical travel without the change in
camber you would get from swing arms, and avoids the use of any ball
joints. Harder to see is the black FRP plate which spans the
support blocks beneath and stiffens the whole assembly to prevent
cracking the chassis tub.
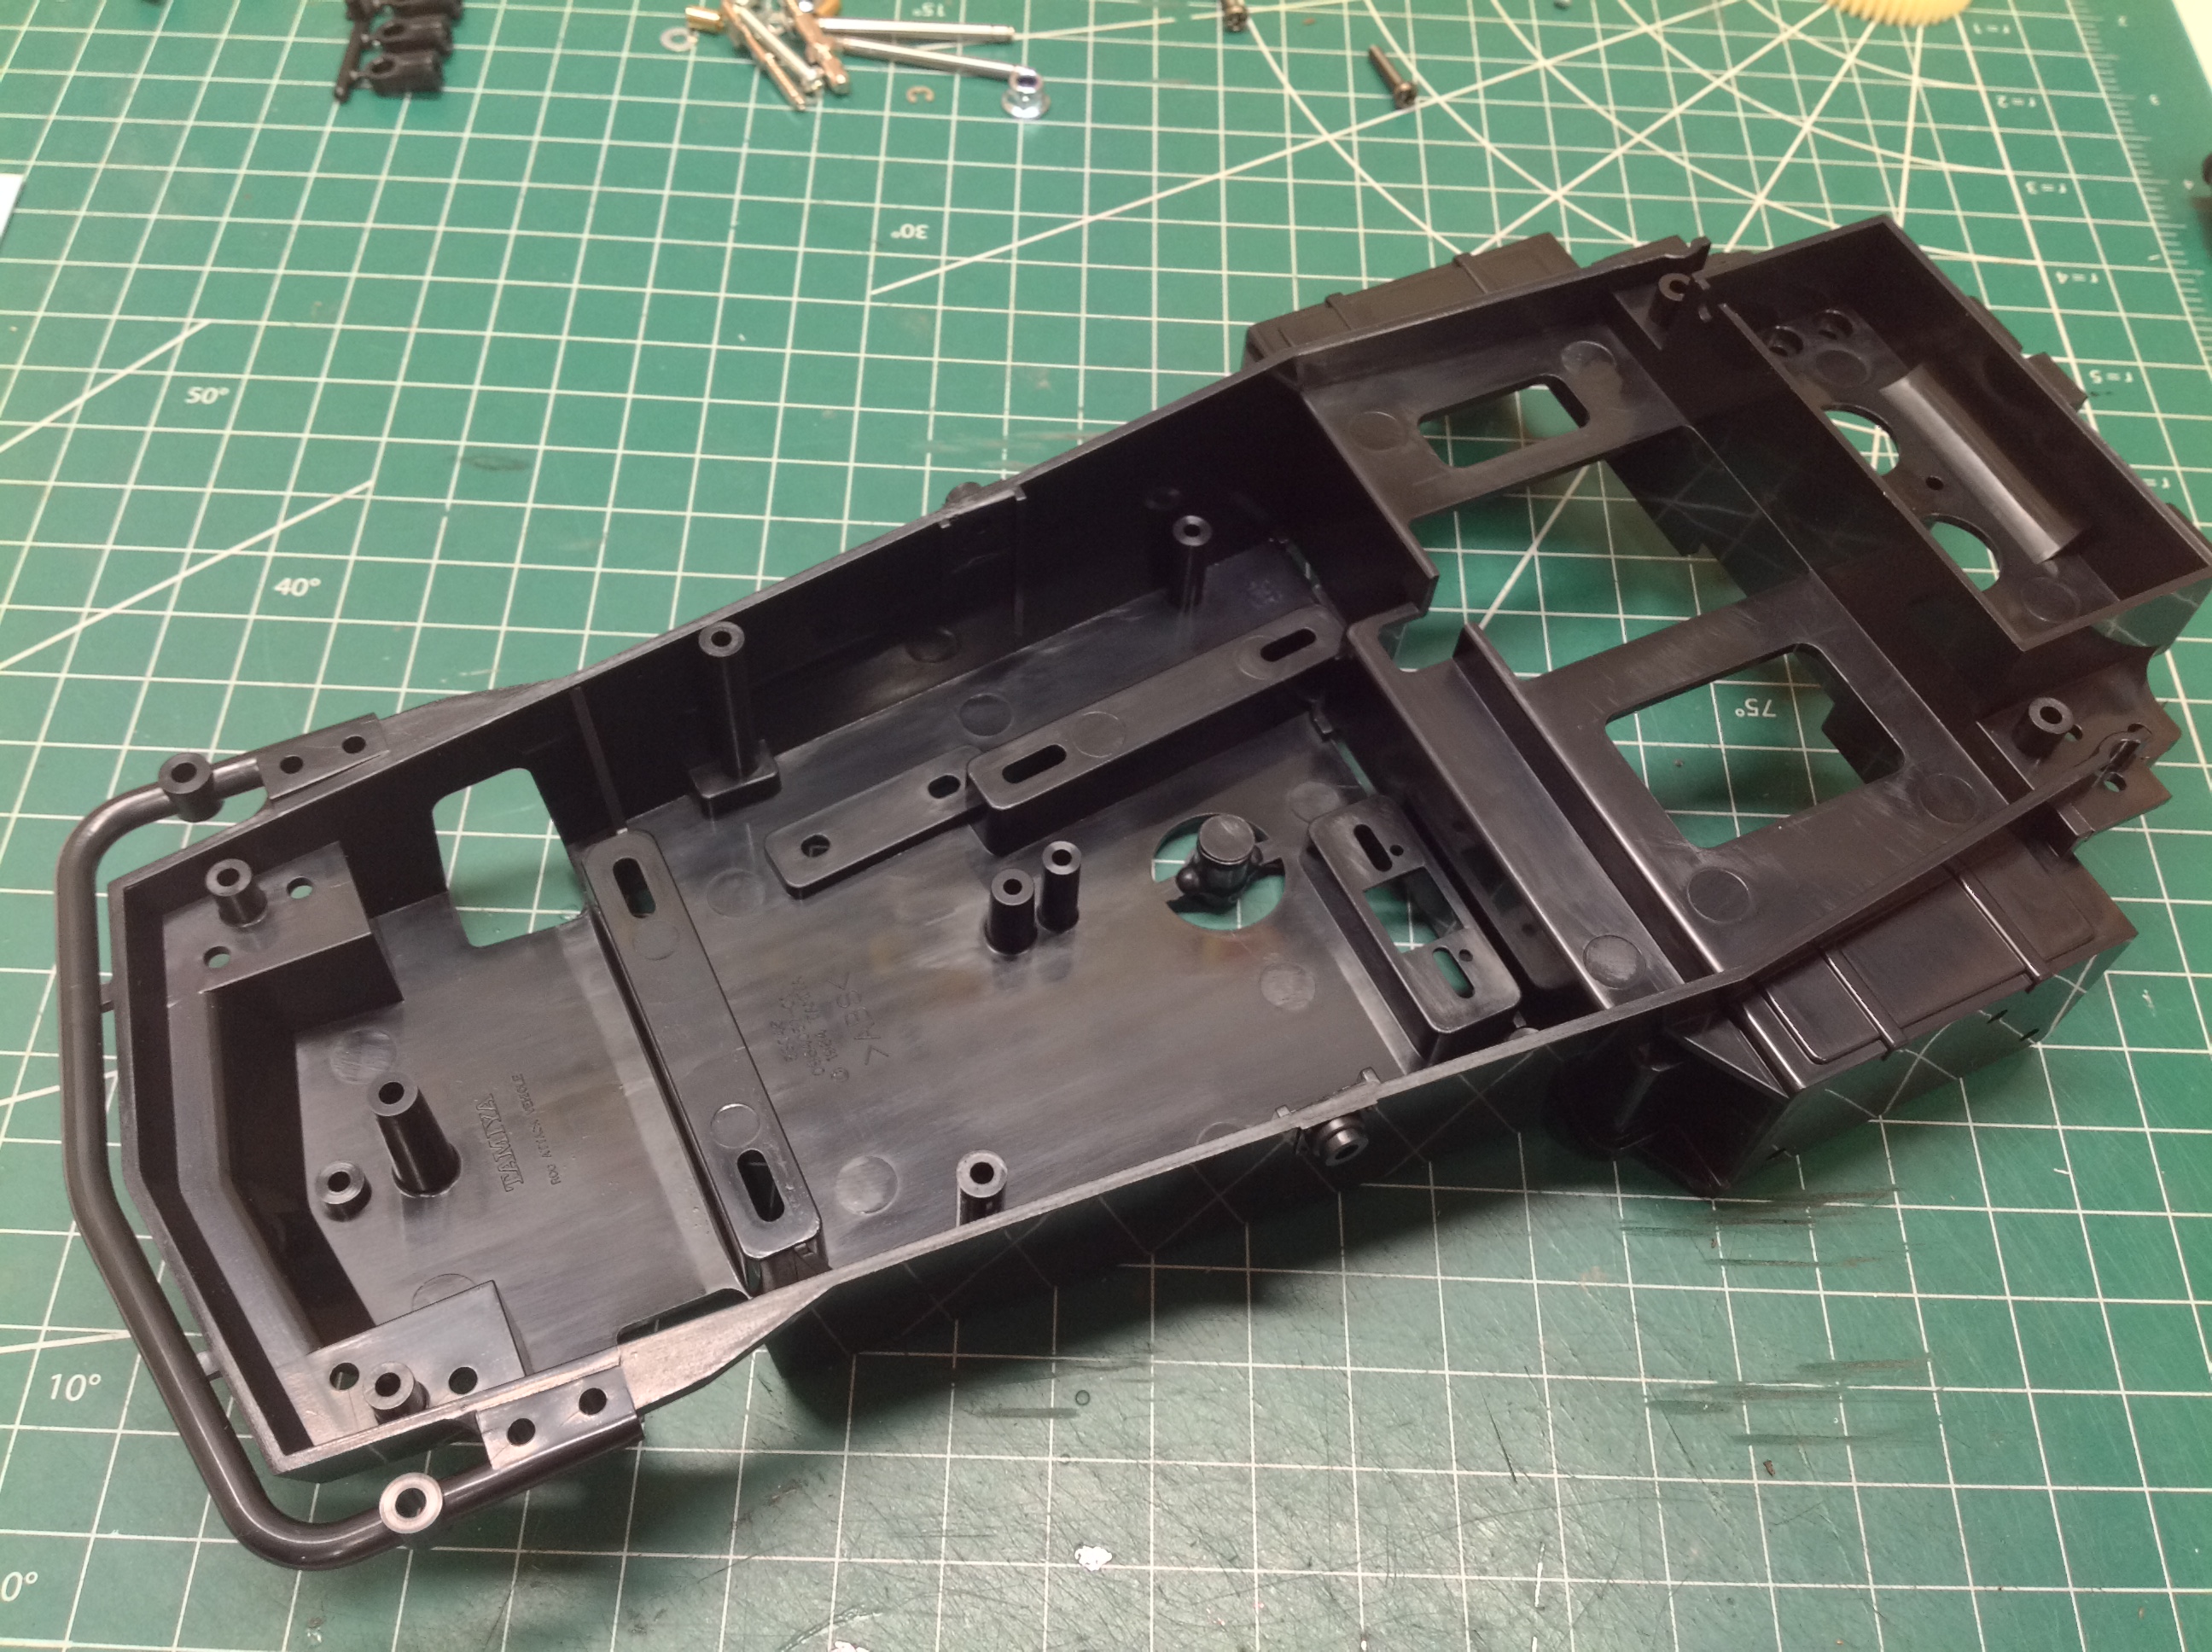
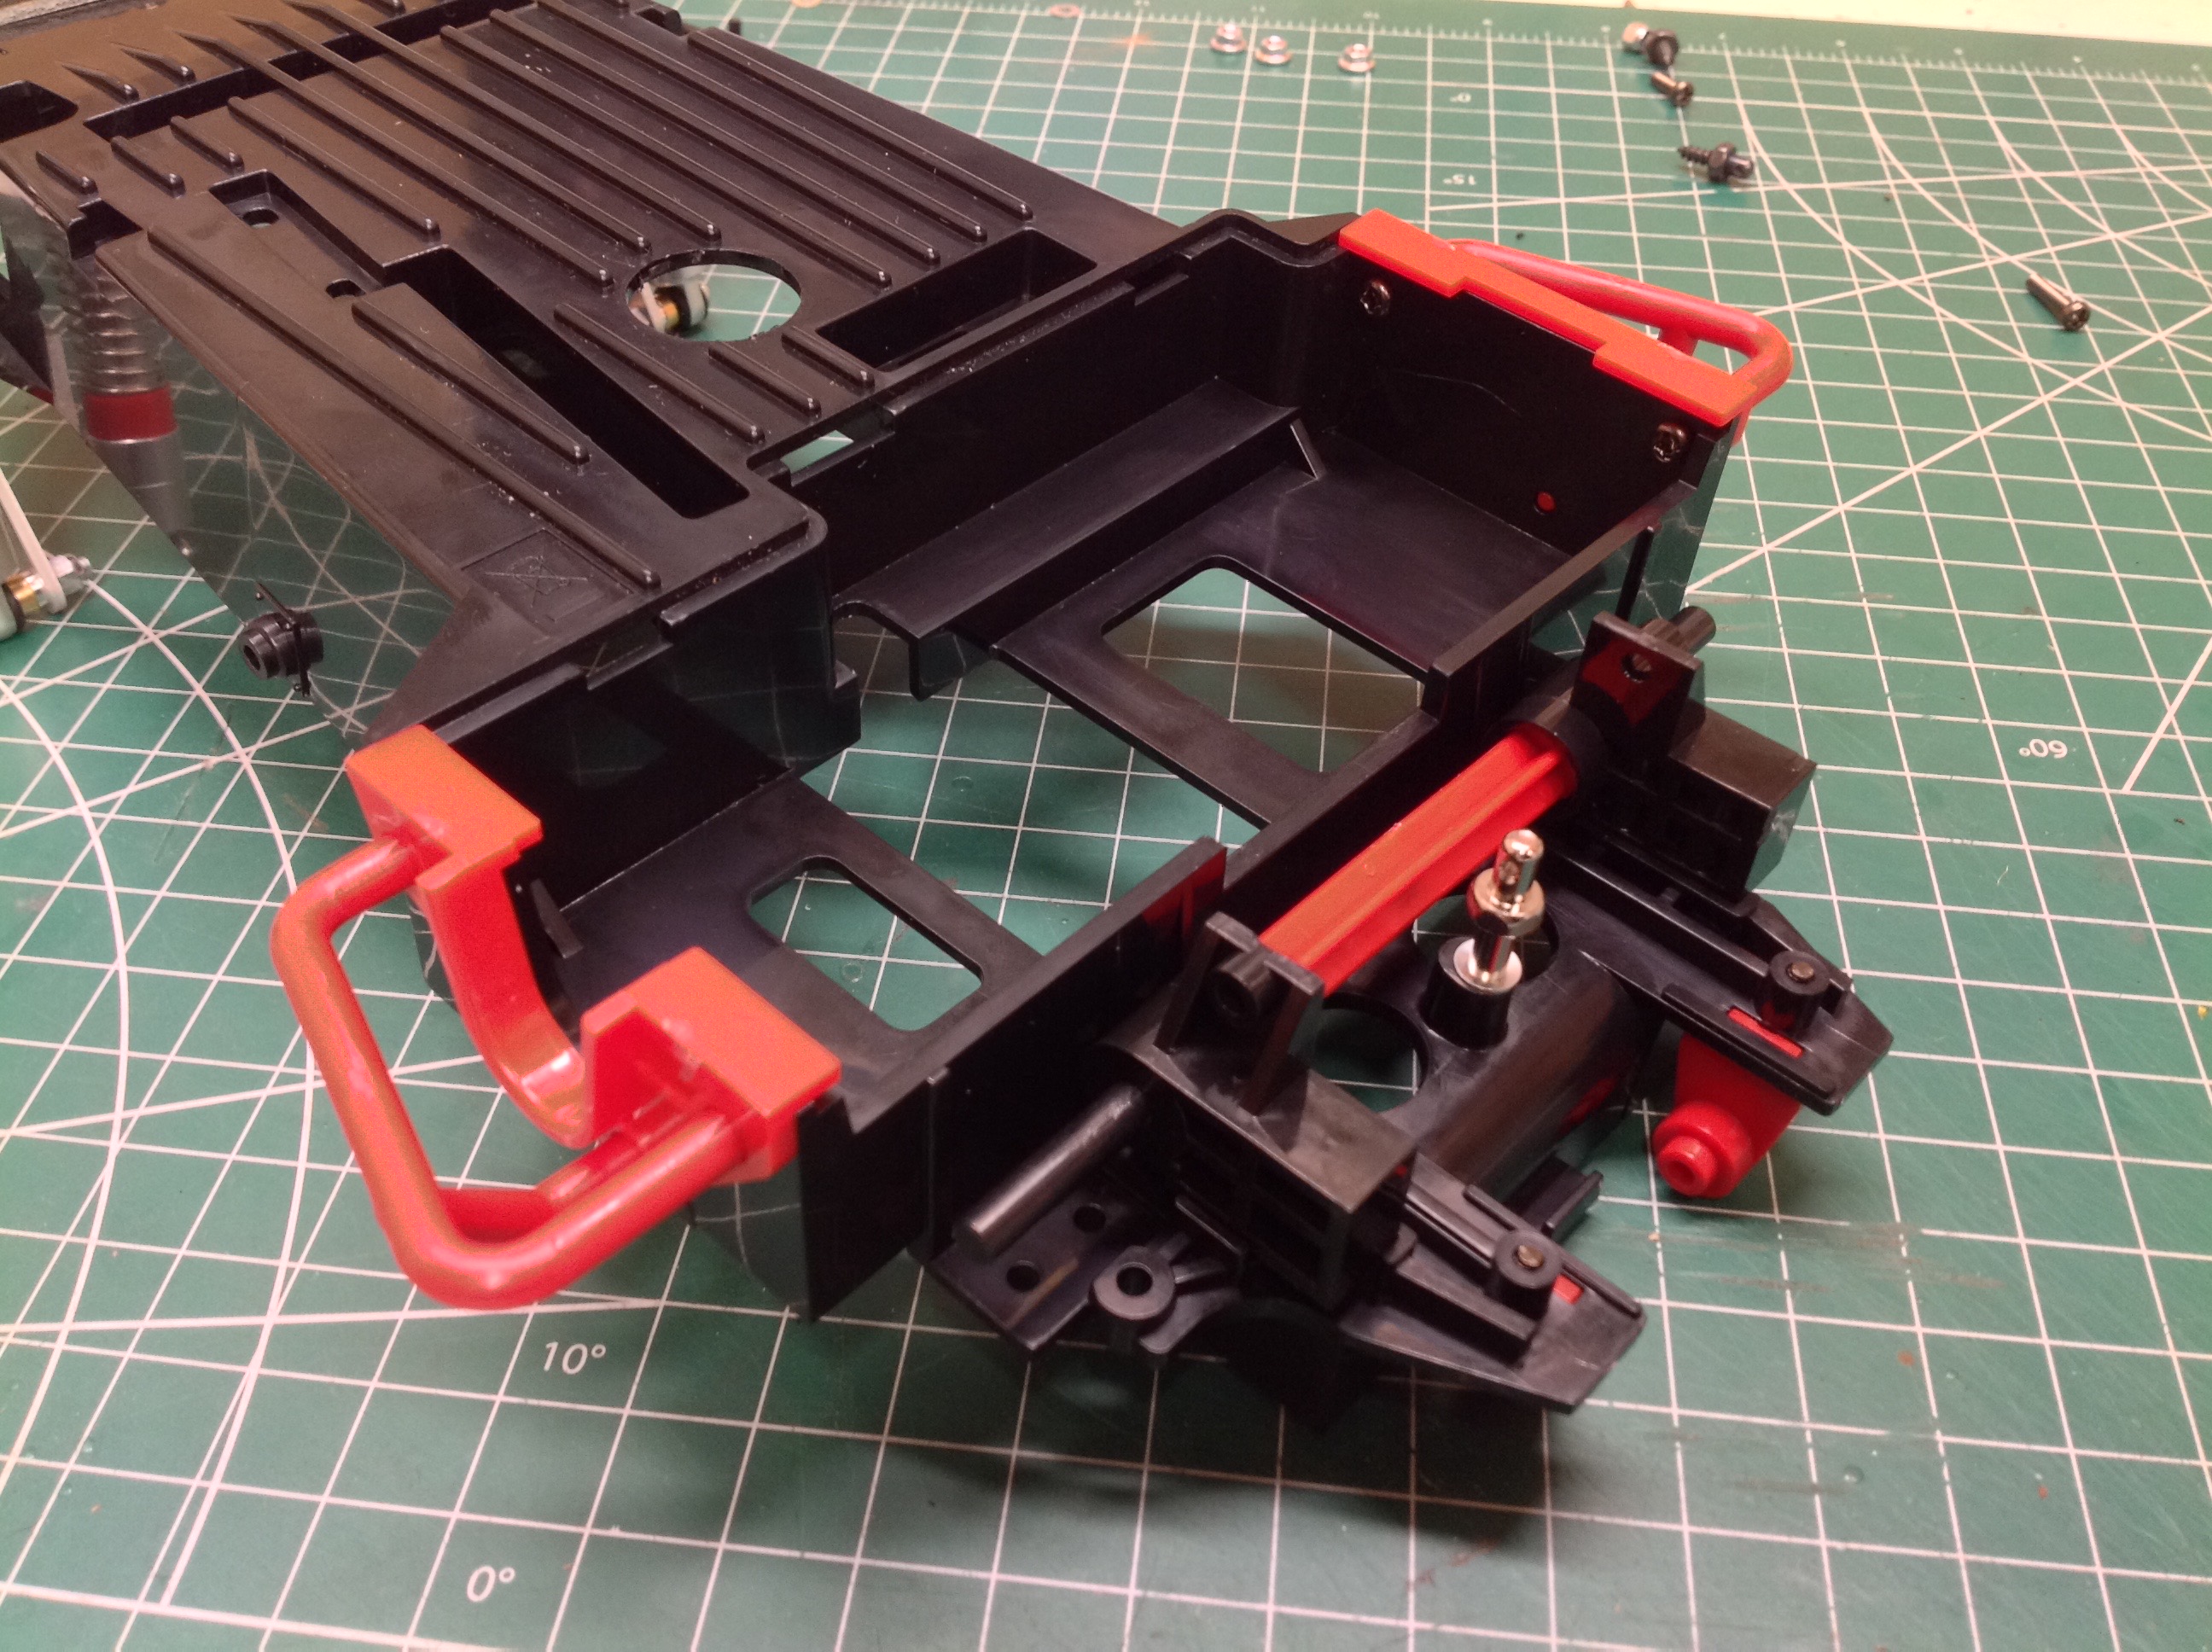
The one piece bathtub is about as complex as any Tamiya bathtub chassis
I've seen. It integrates the battery holder, an on-off switch
slot, a receiver battery holder, slots for the steering rods, a bumper,
and plenty of space for electronics all in one part. The right
hand picture shows how the front suspension assembly attaches to the
bottom with a handful of screws. The dual tall shock towers are
bent aluminum plate.
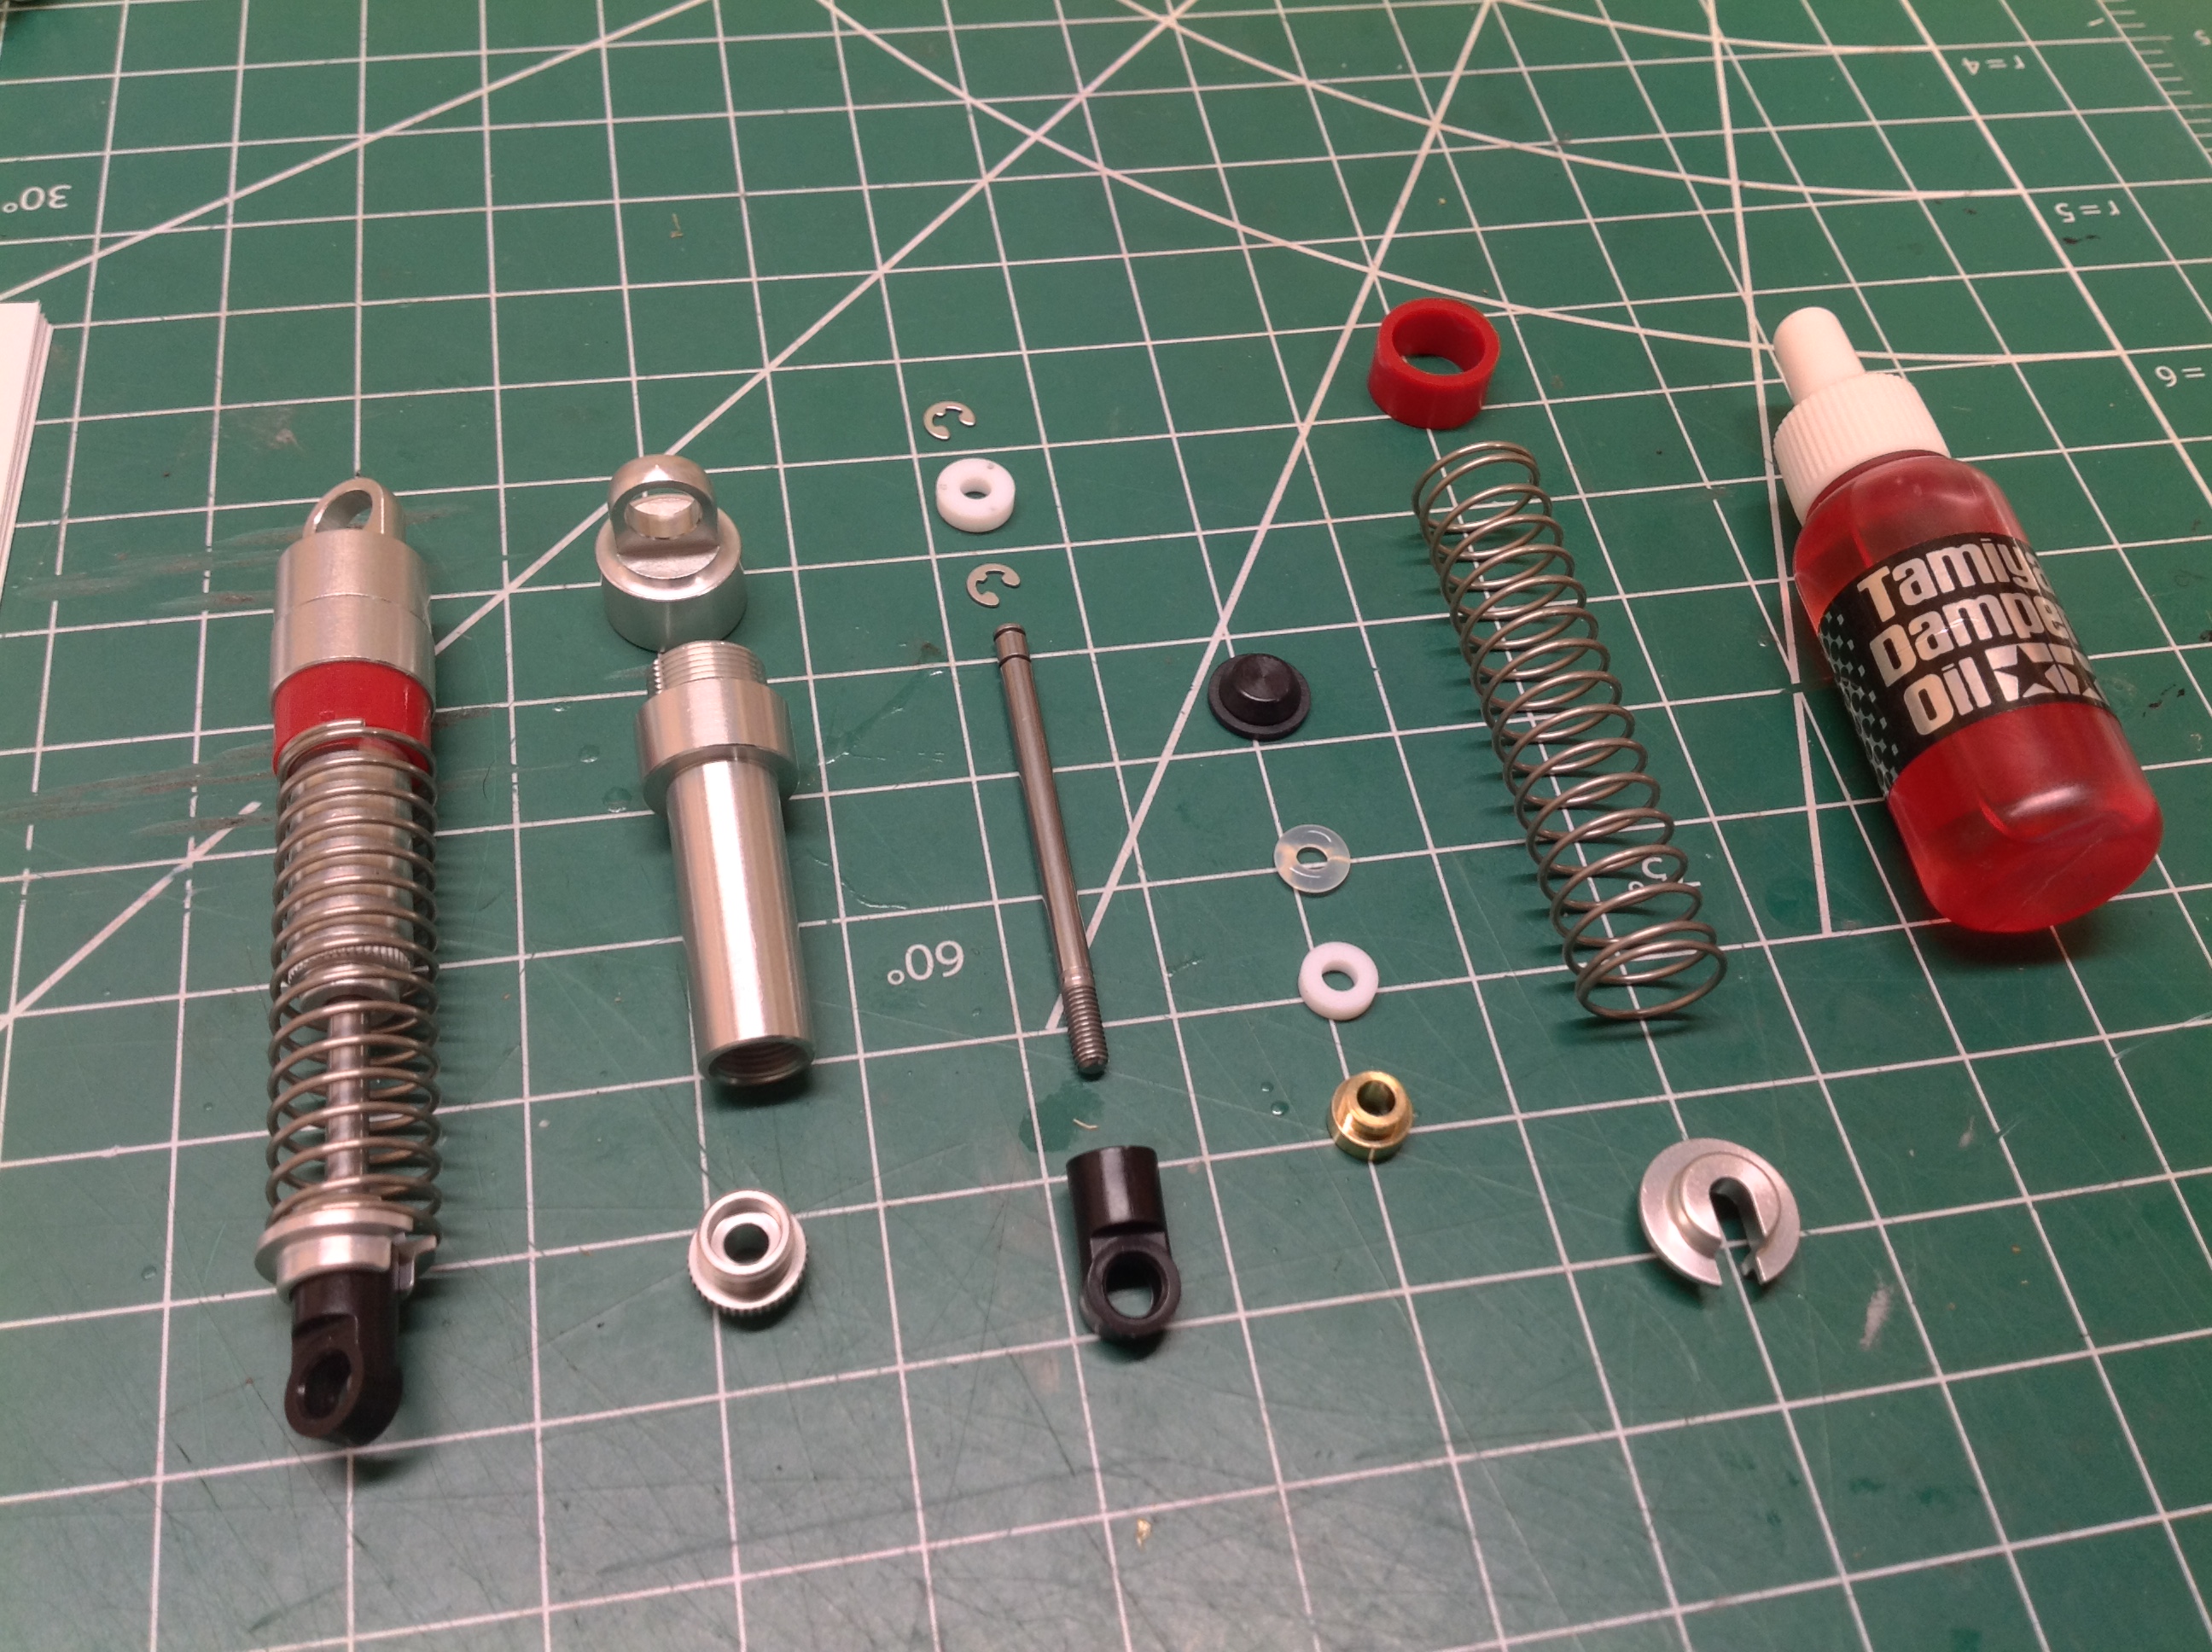
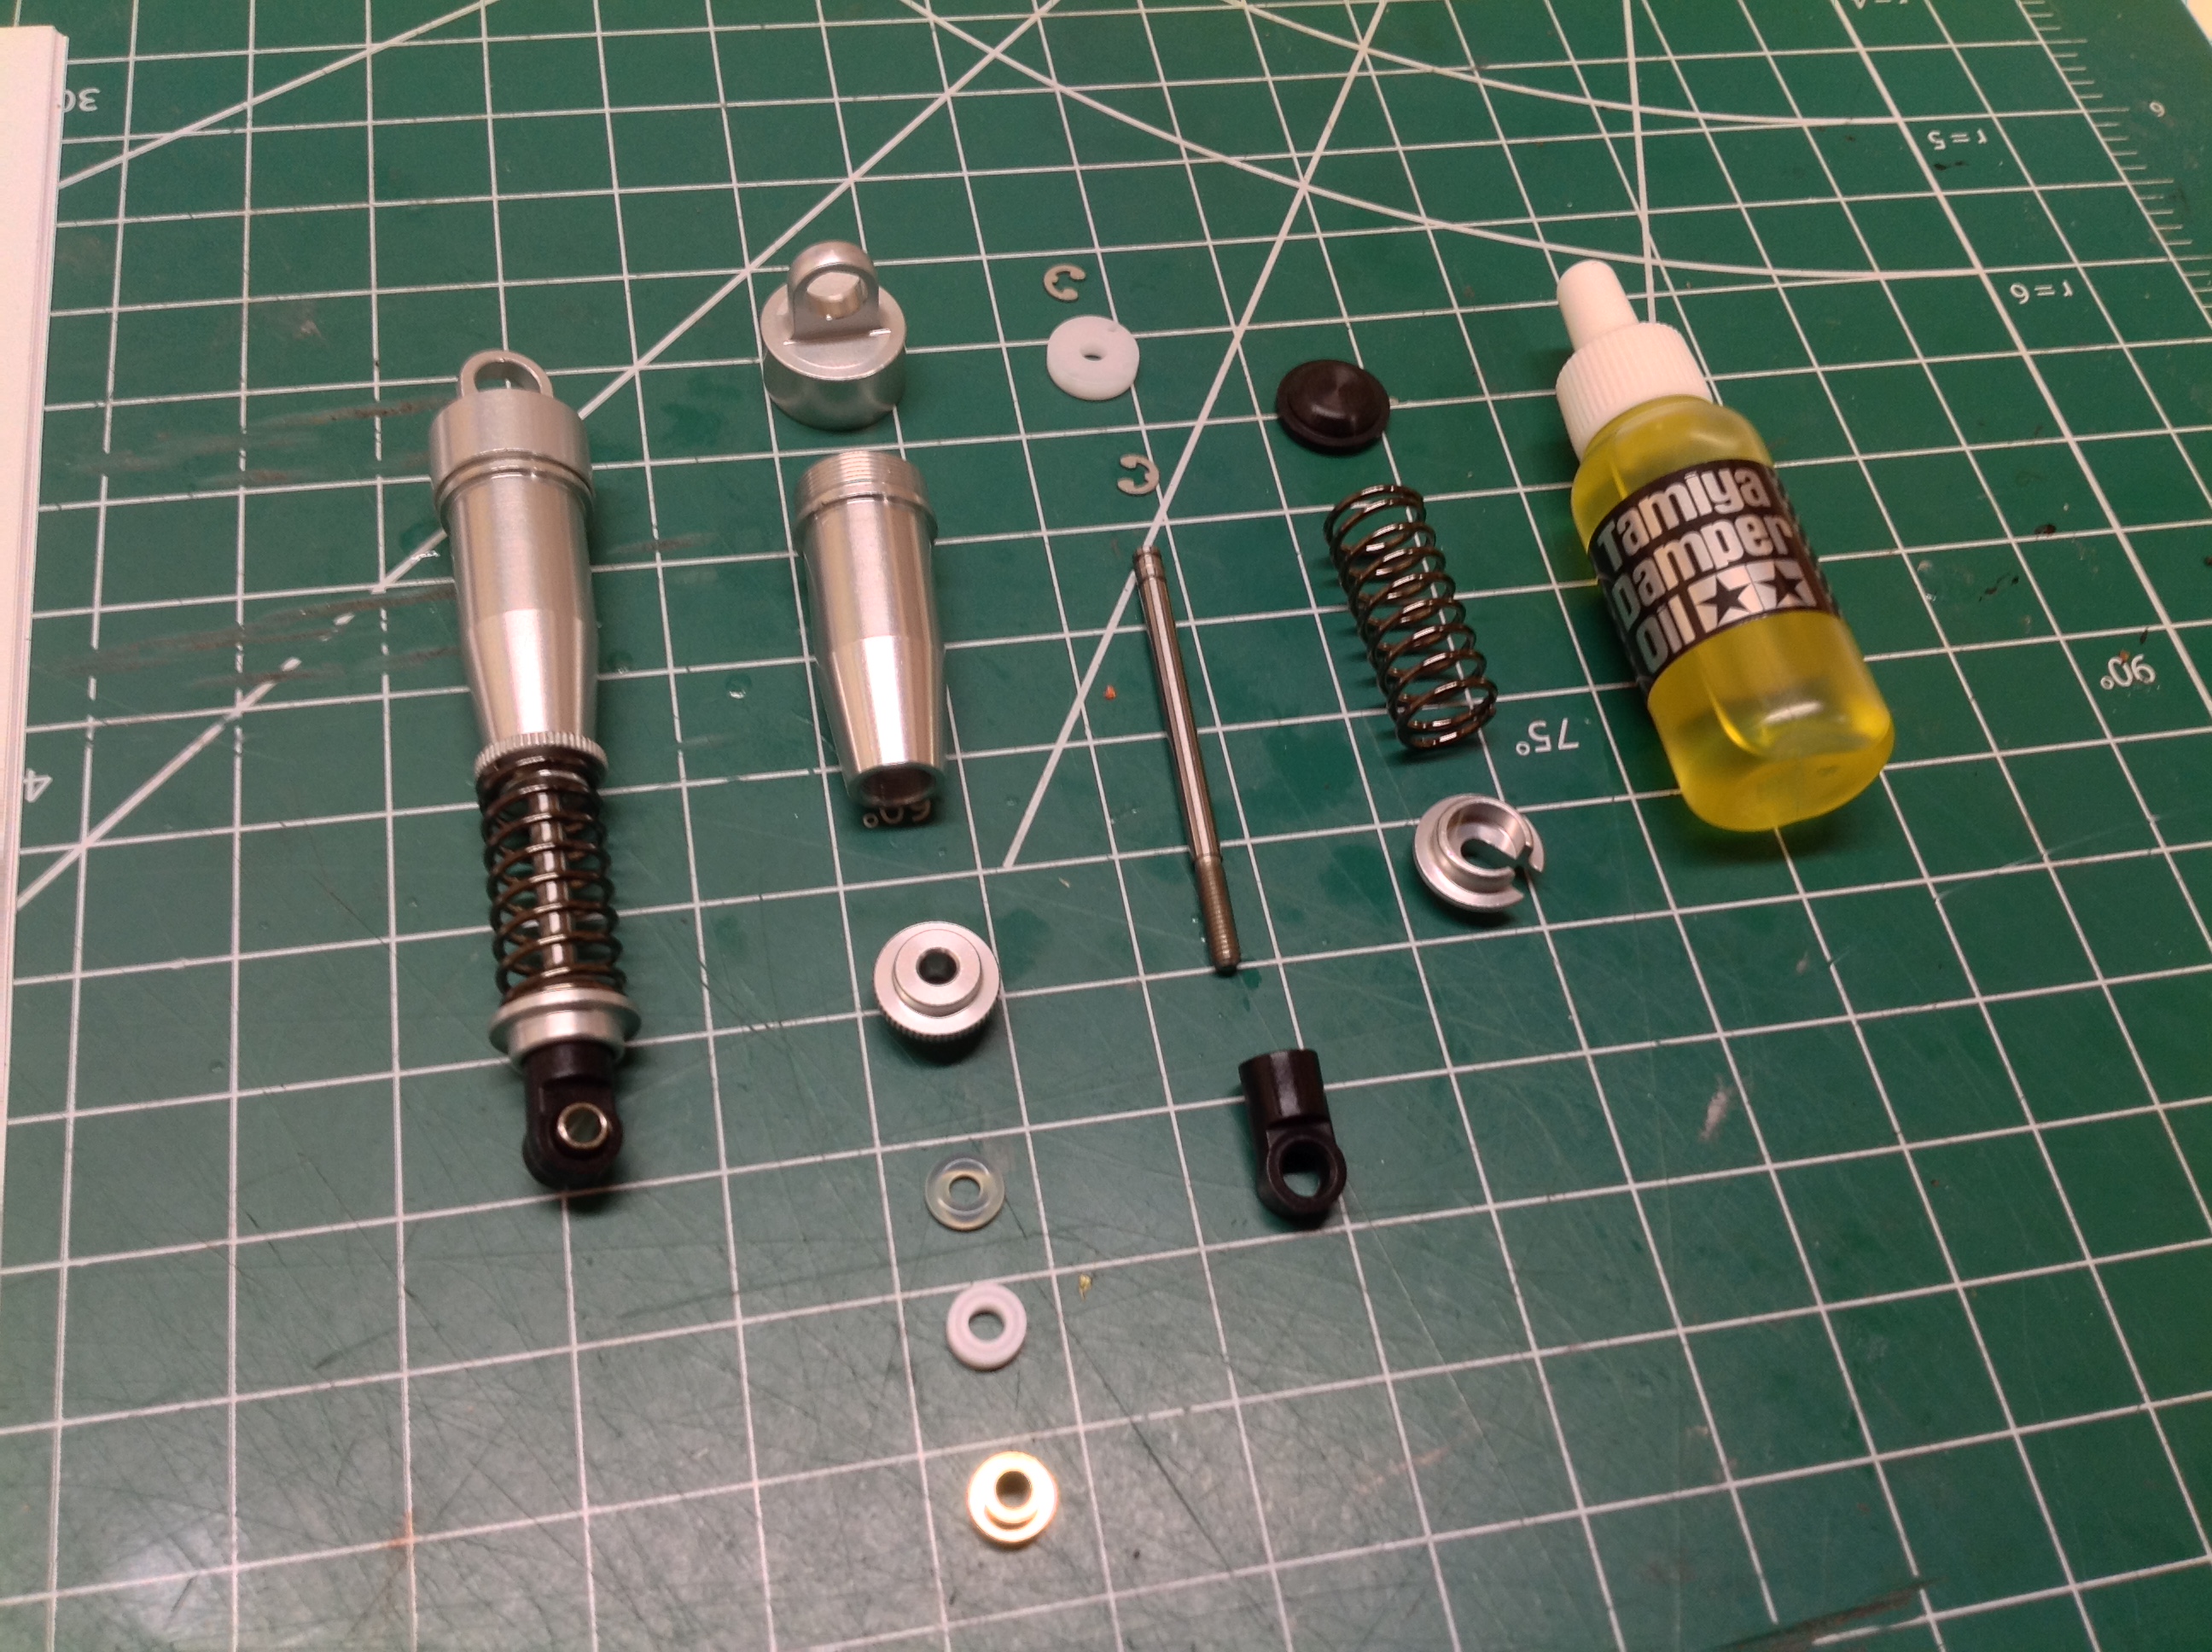
One of the biggest things that differentiates the Wild One from the Fast
Attack Vehicle is the beautiful aluminum shocks. These have been
modified from the original Wild One by replacing the internal floating
piston and spring with a much simpler rubber bladder. The original
shocks also had seals which were locked inside and not
serviceable. The newer shocks have a threaded cap. These are
very small diameter shocks which use some of the thinnest (red) Tamiya
damper oil which is almost like water.
Now we'll start working on the rear suspension. The axles for the
rear trailing arms are separate steel parts separated by the red spacer
shown on the left. The little red side bumpers shown on the right
protect the battery. You can see the horseshoe shaped slot for the
wires. The shiny steel post will be the lock for the battery
door.
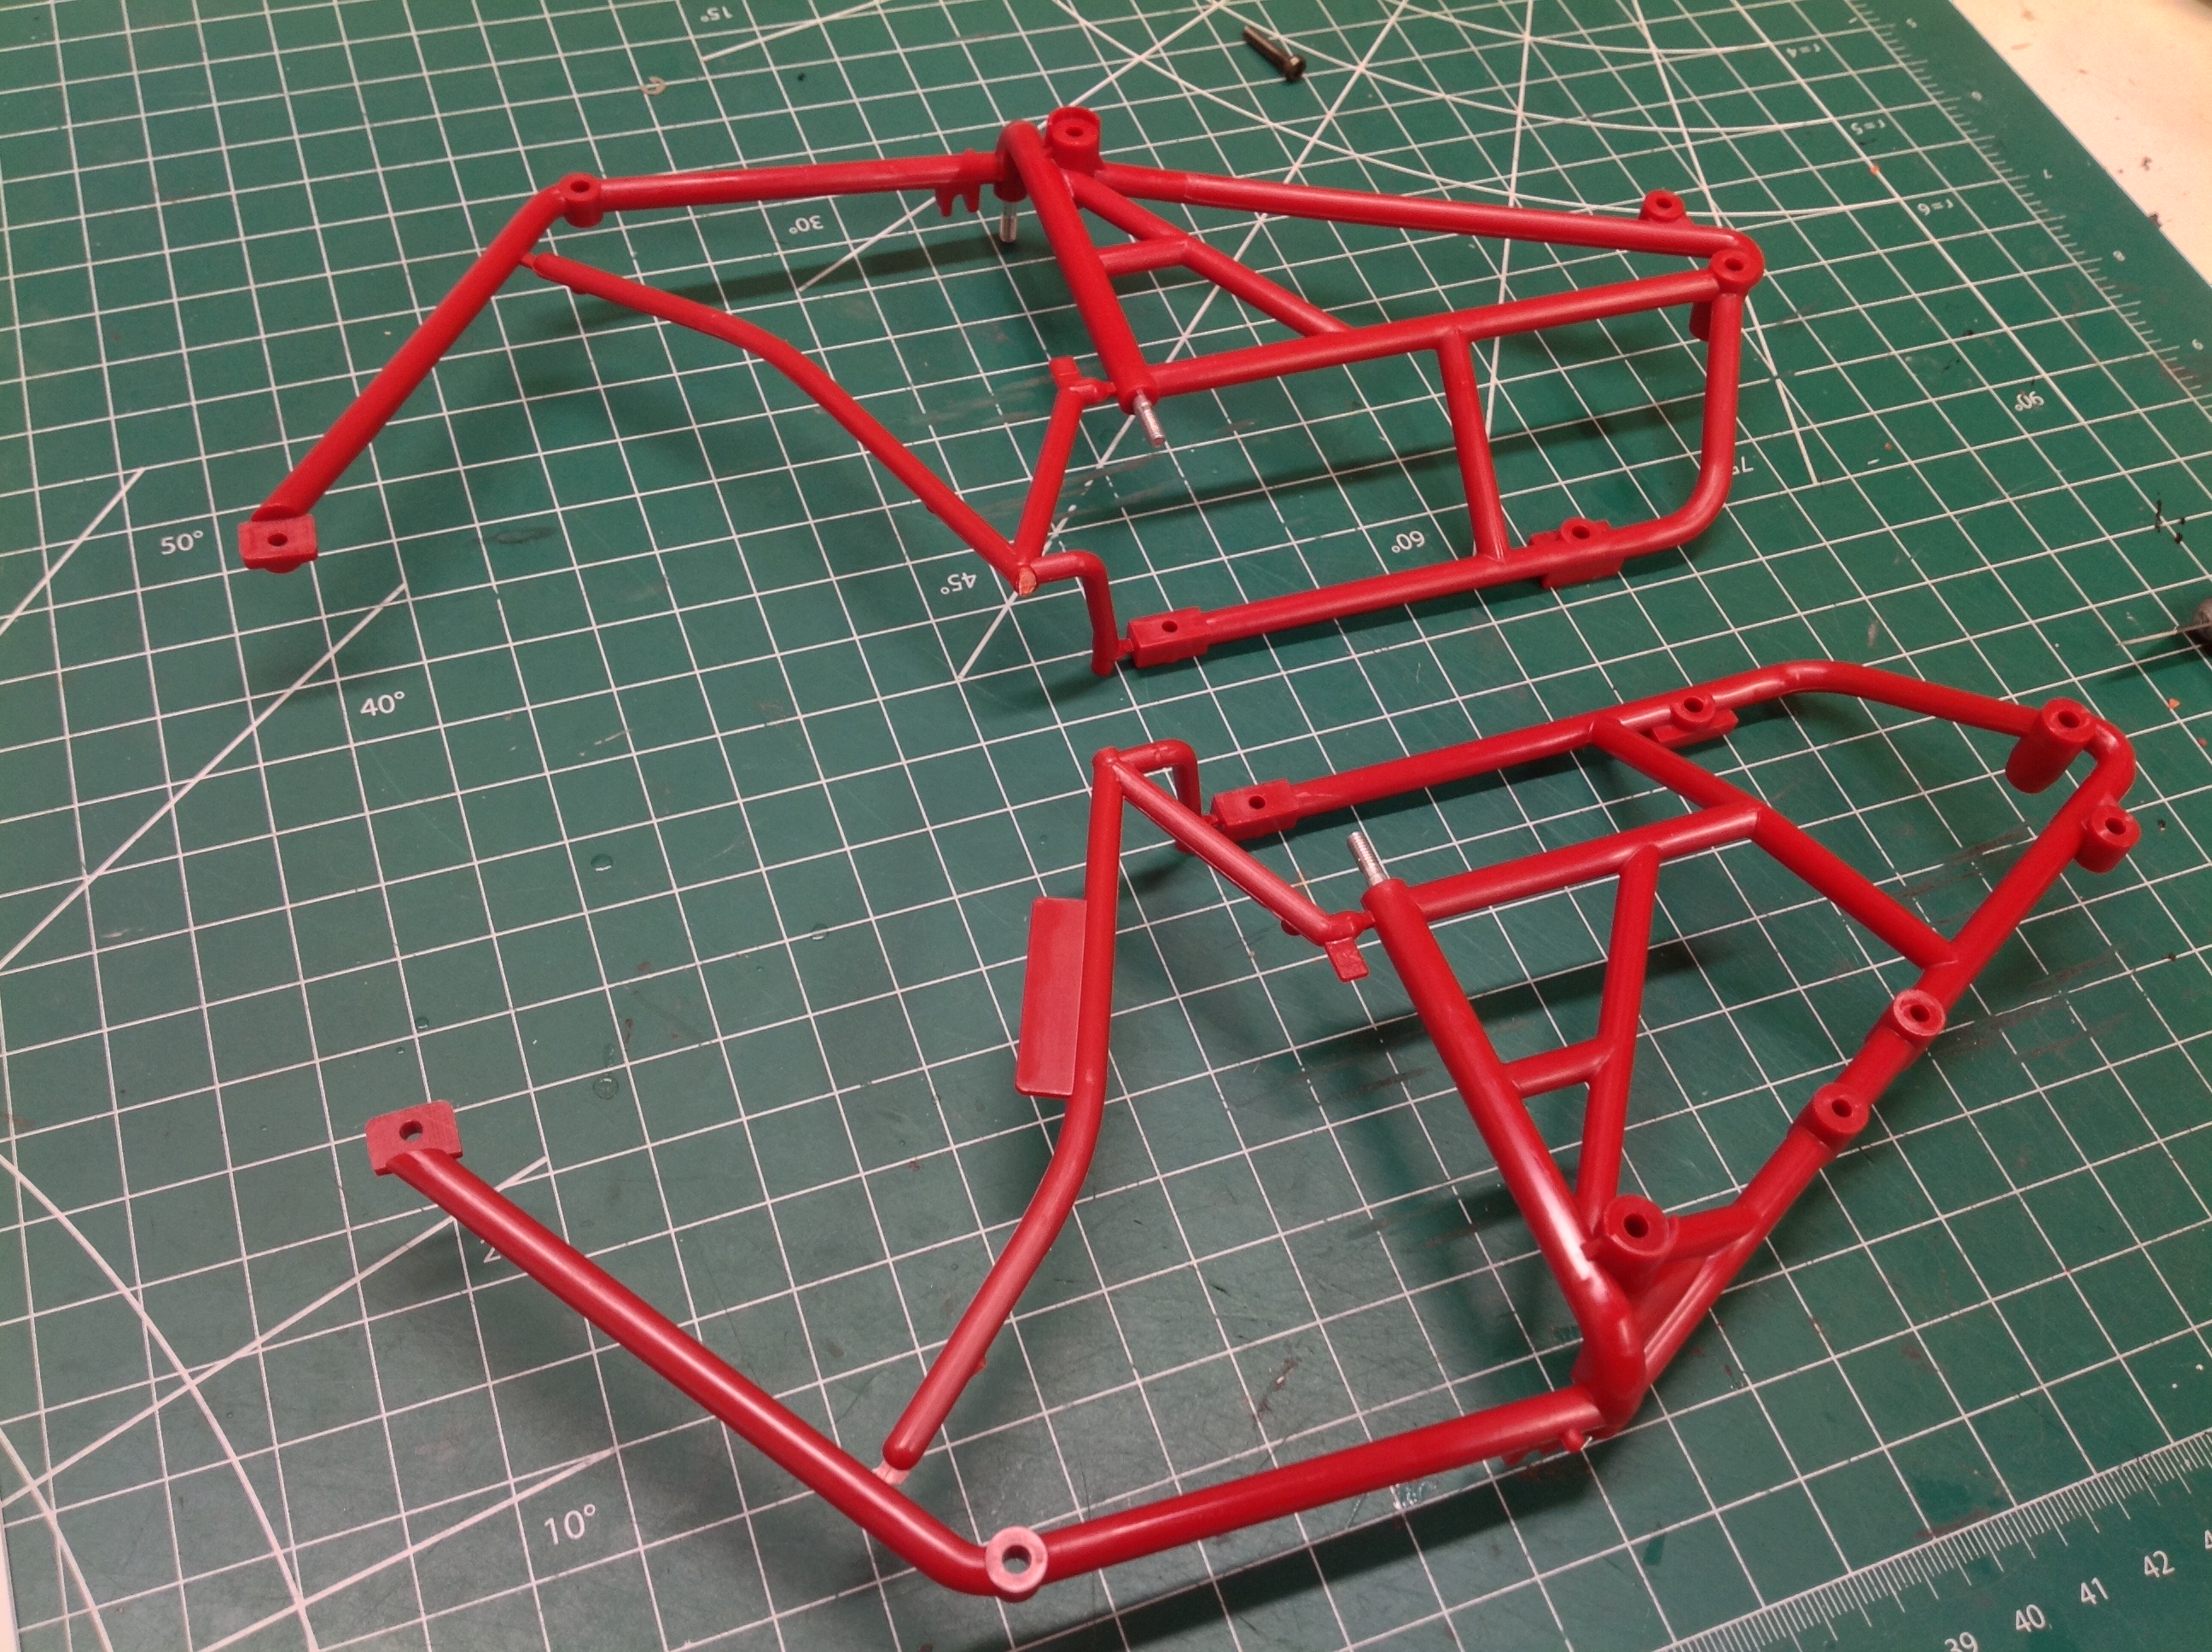
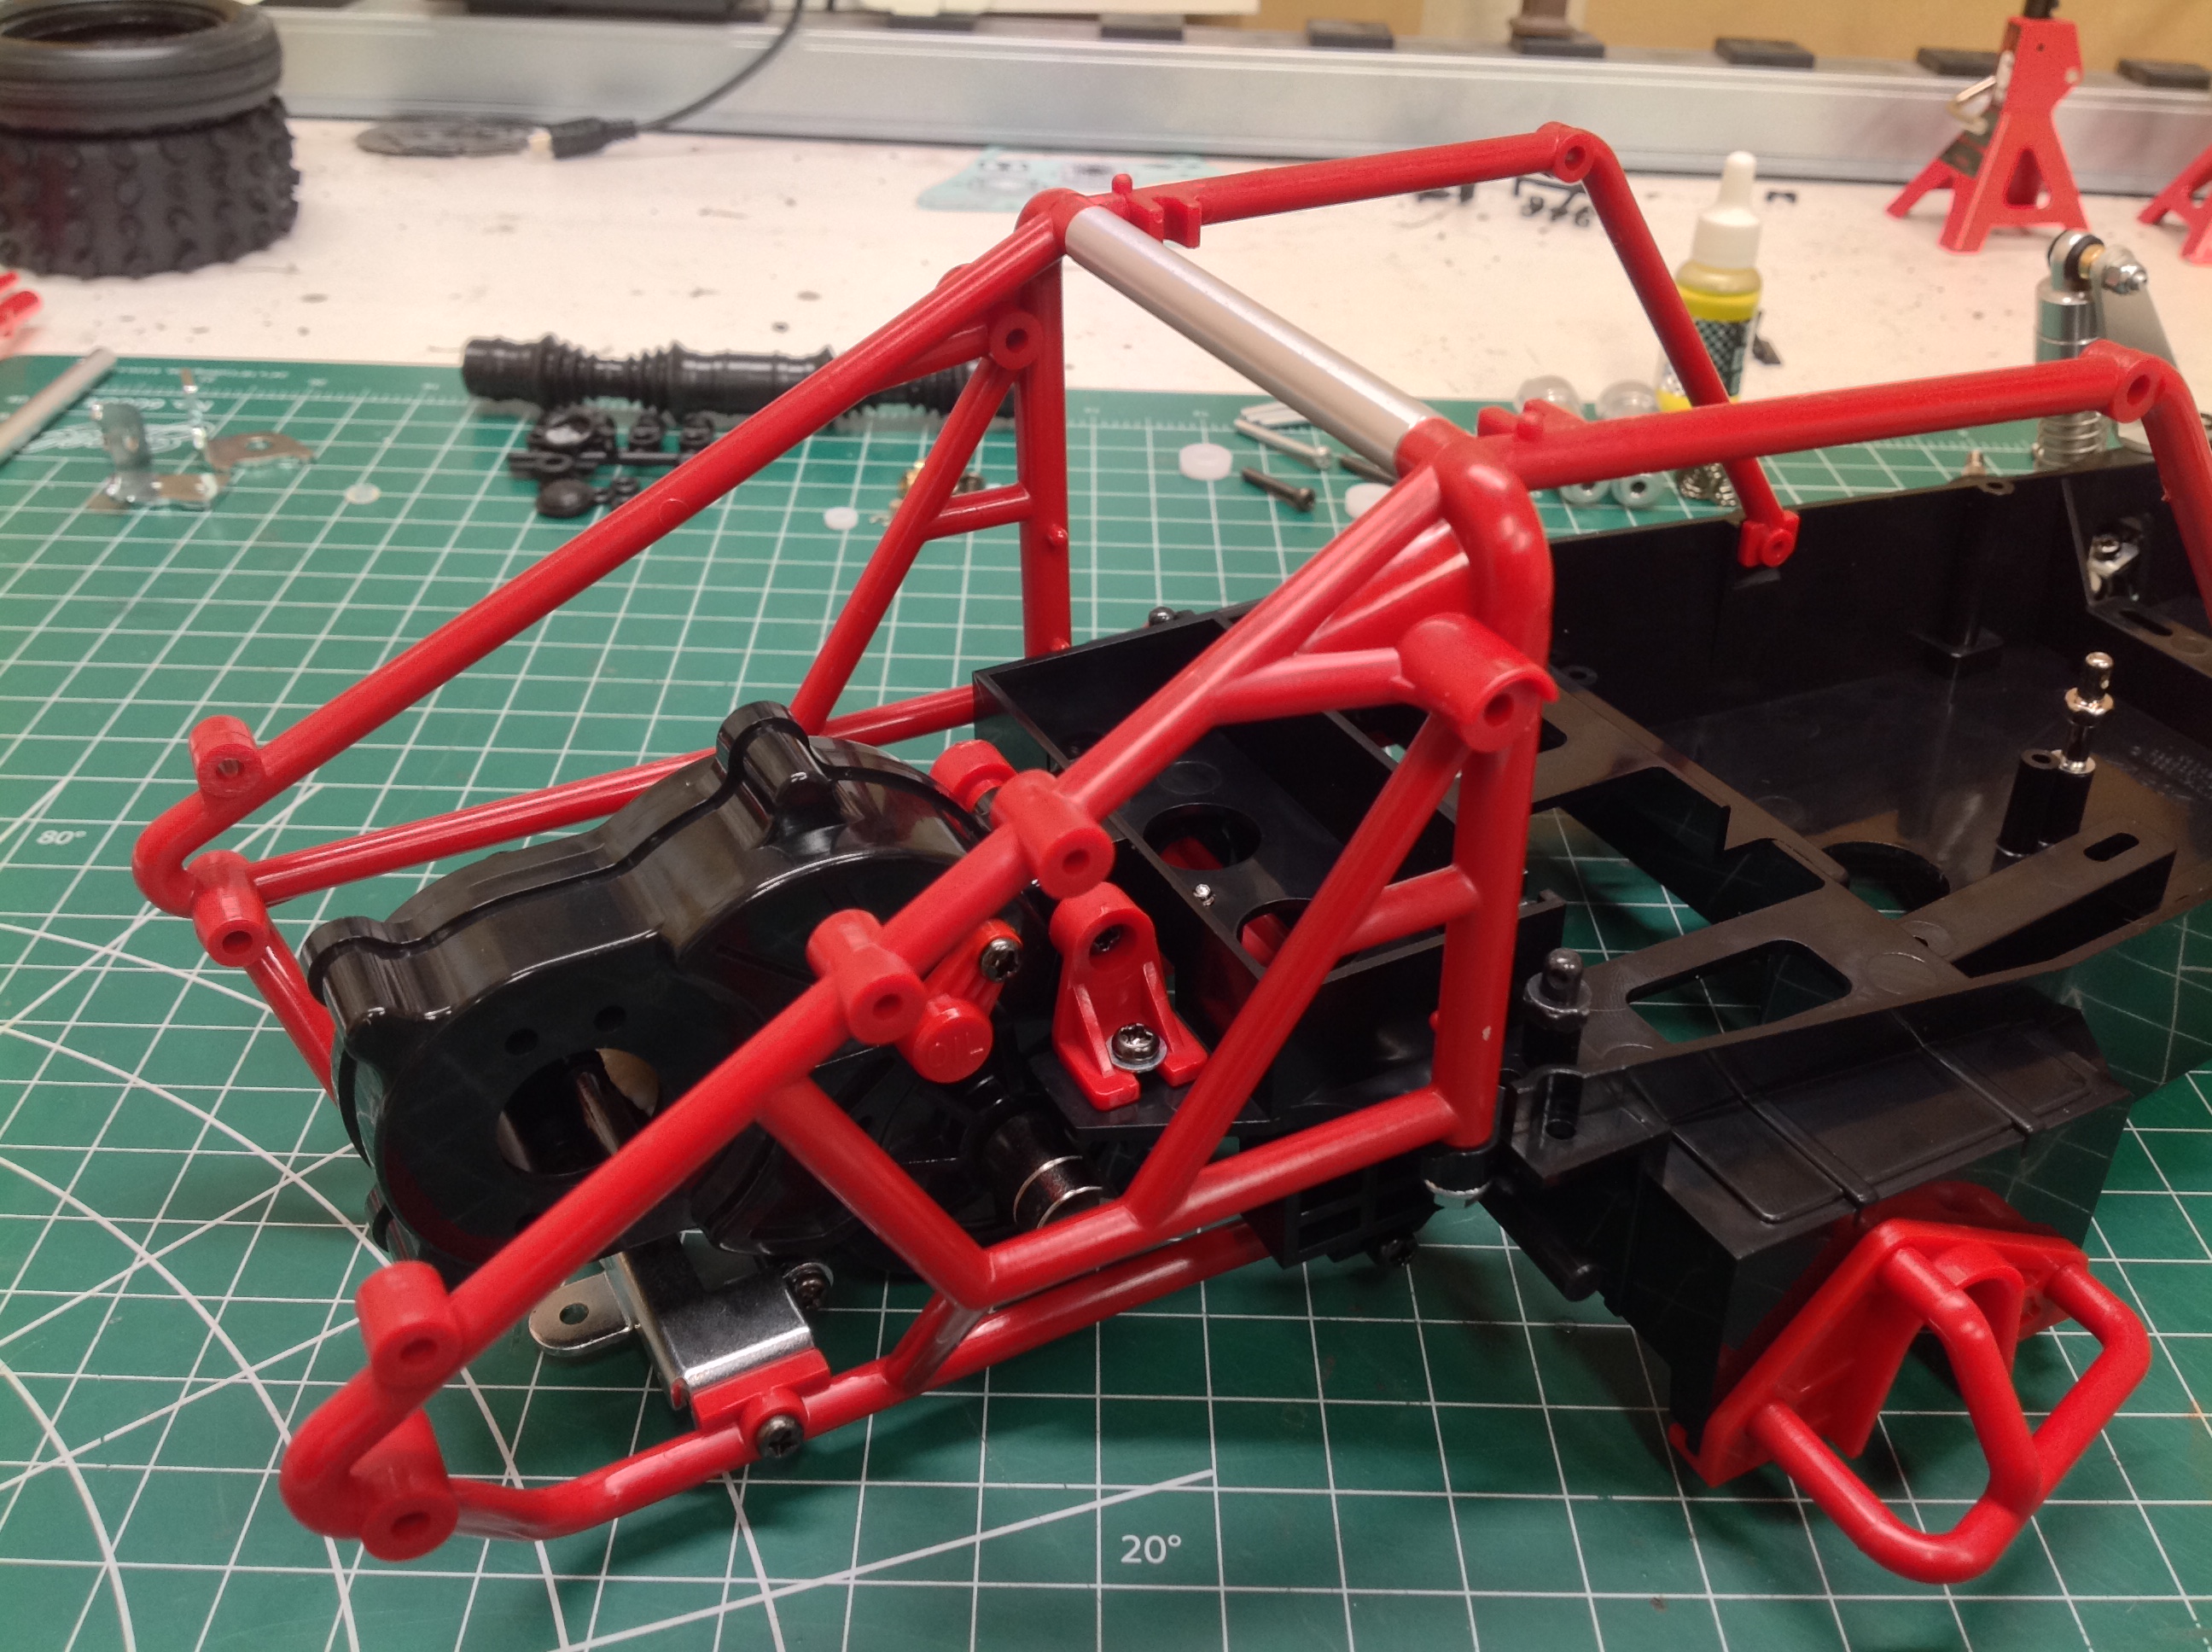
The cage is made from some fascinating plastic parts which have metal
threaded studs molded right into them. Presumably these are placed
into the mold before the plastic is injected. Once the molding
supports are cut away the parts can be screwed to the chassis tub as
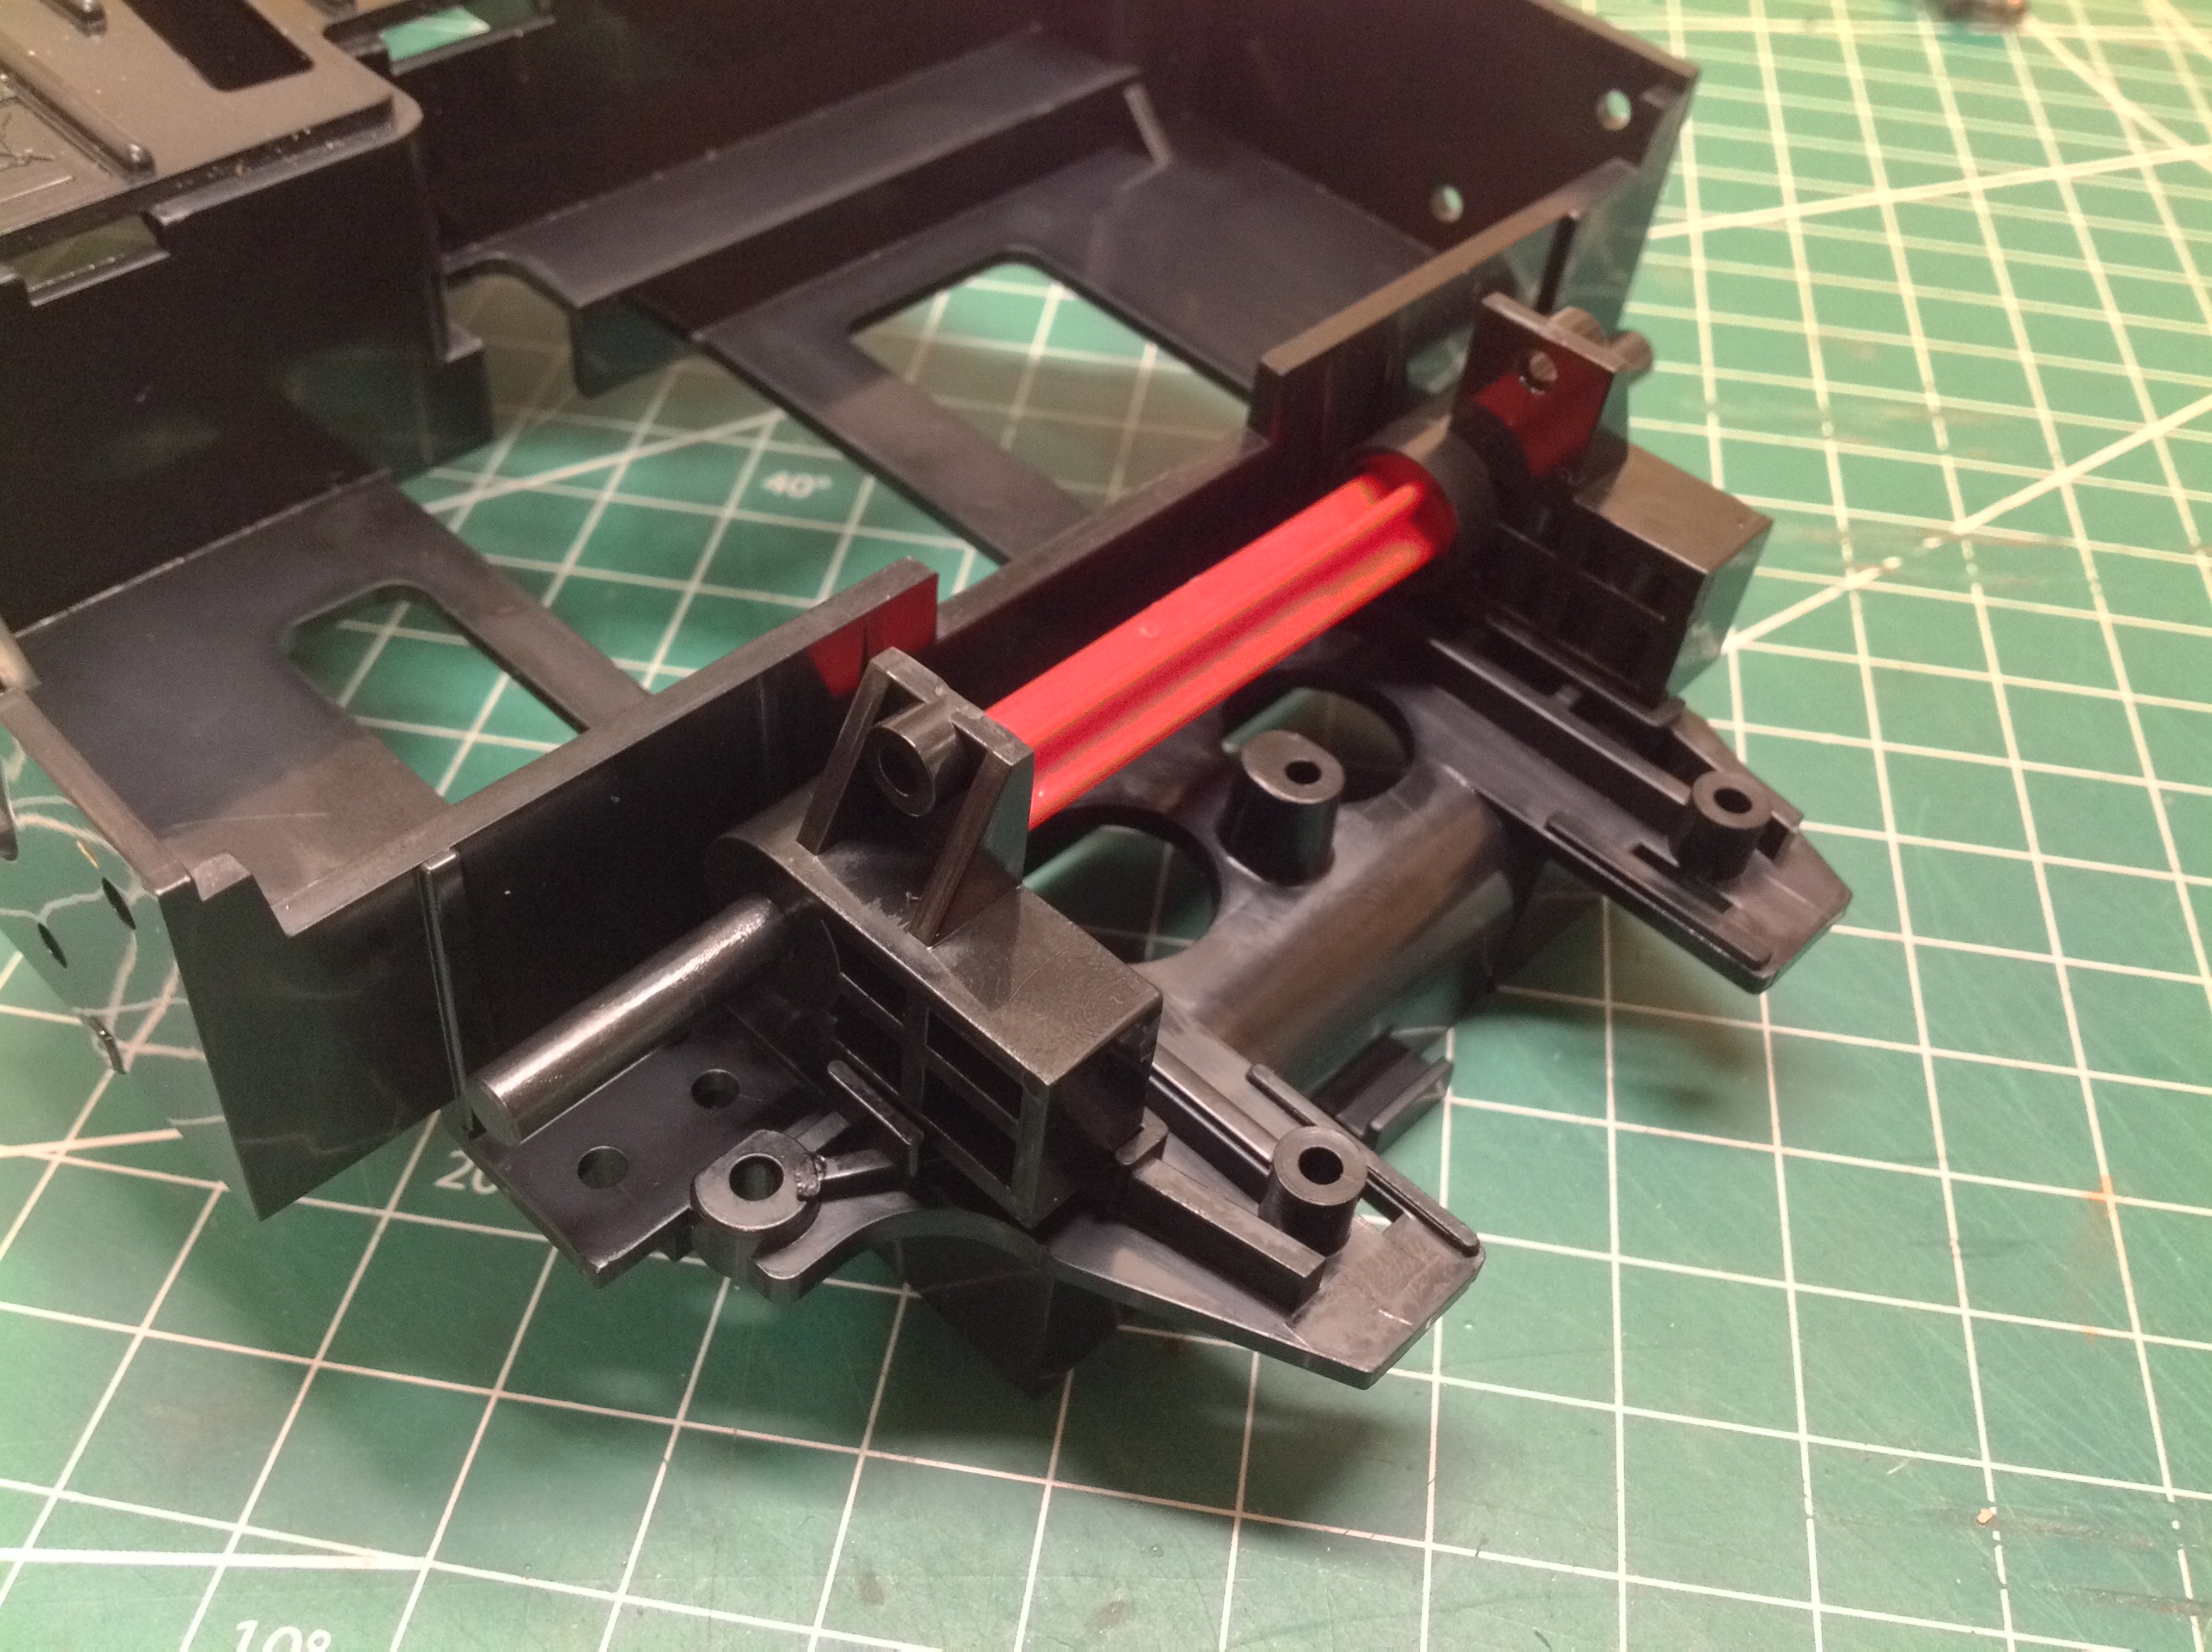
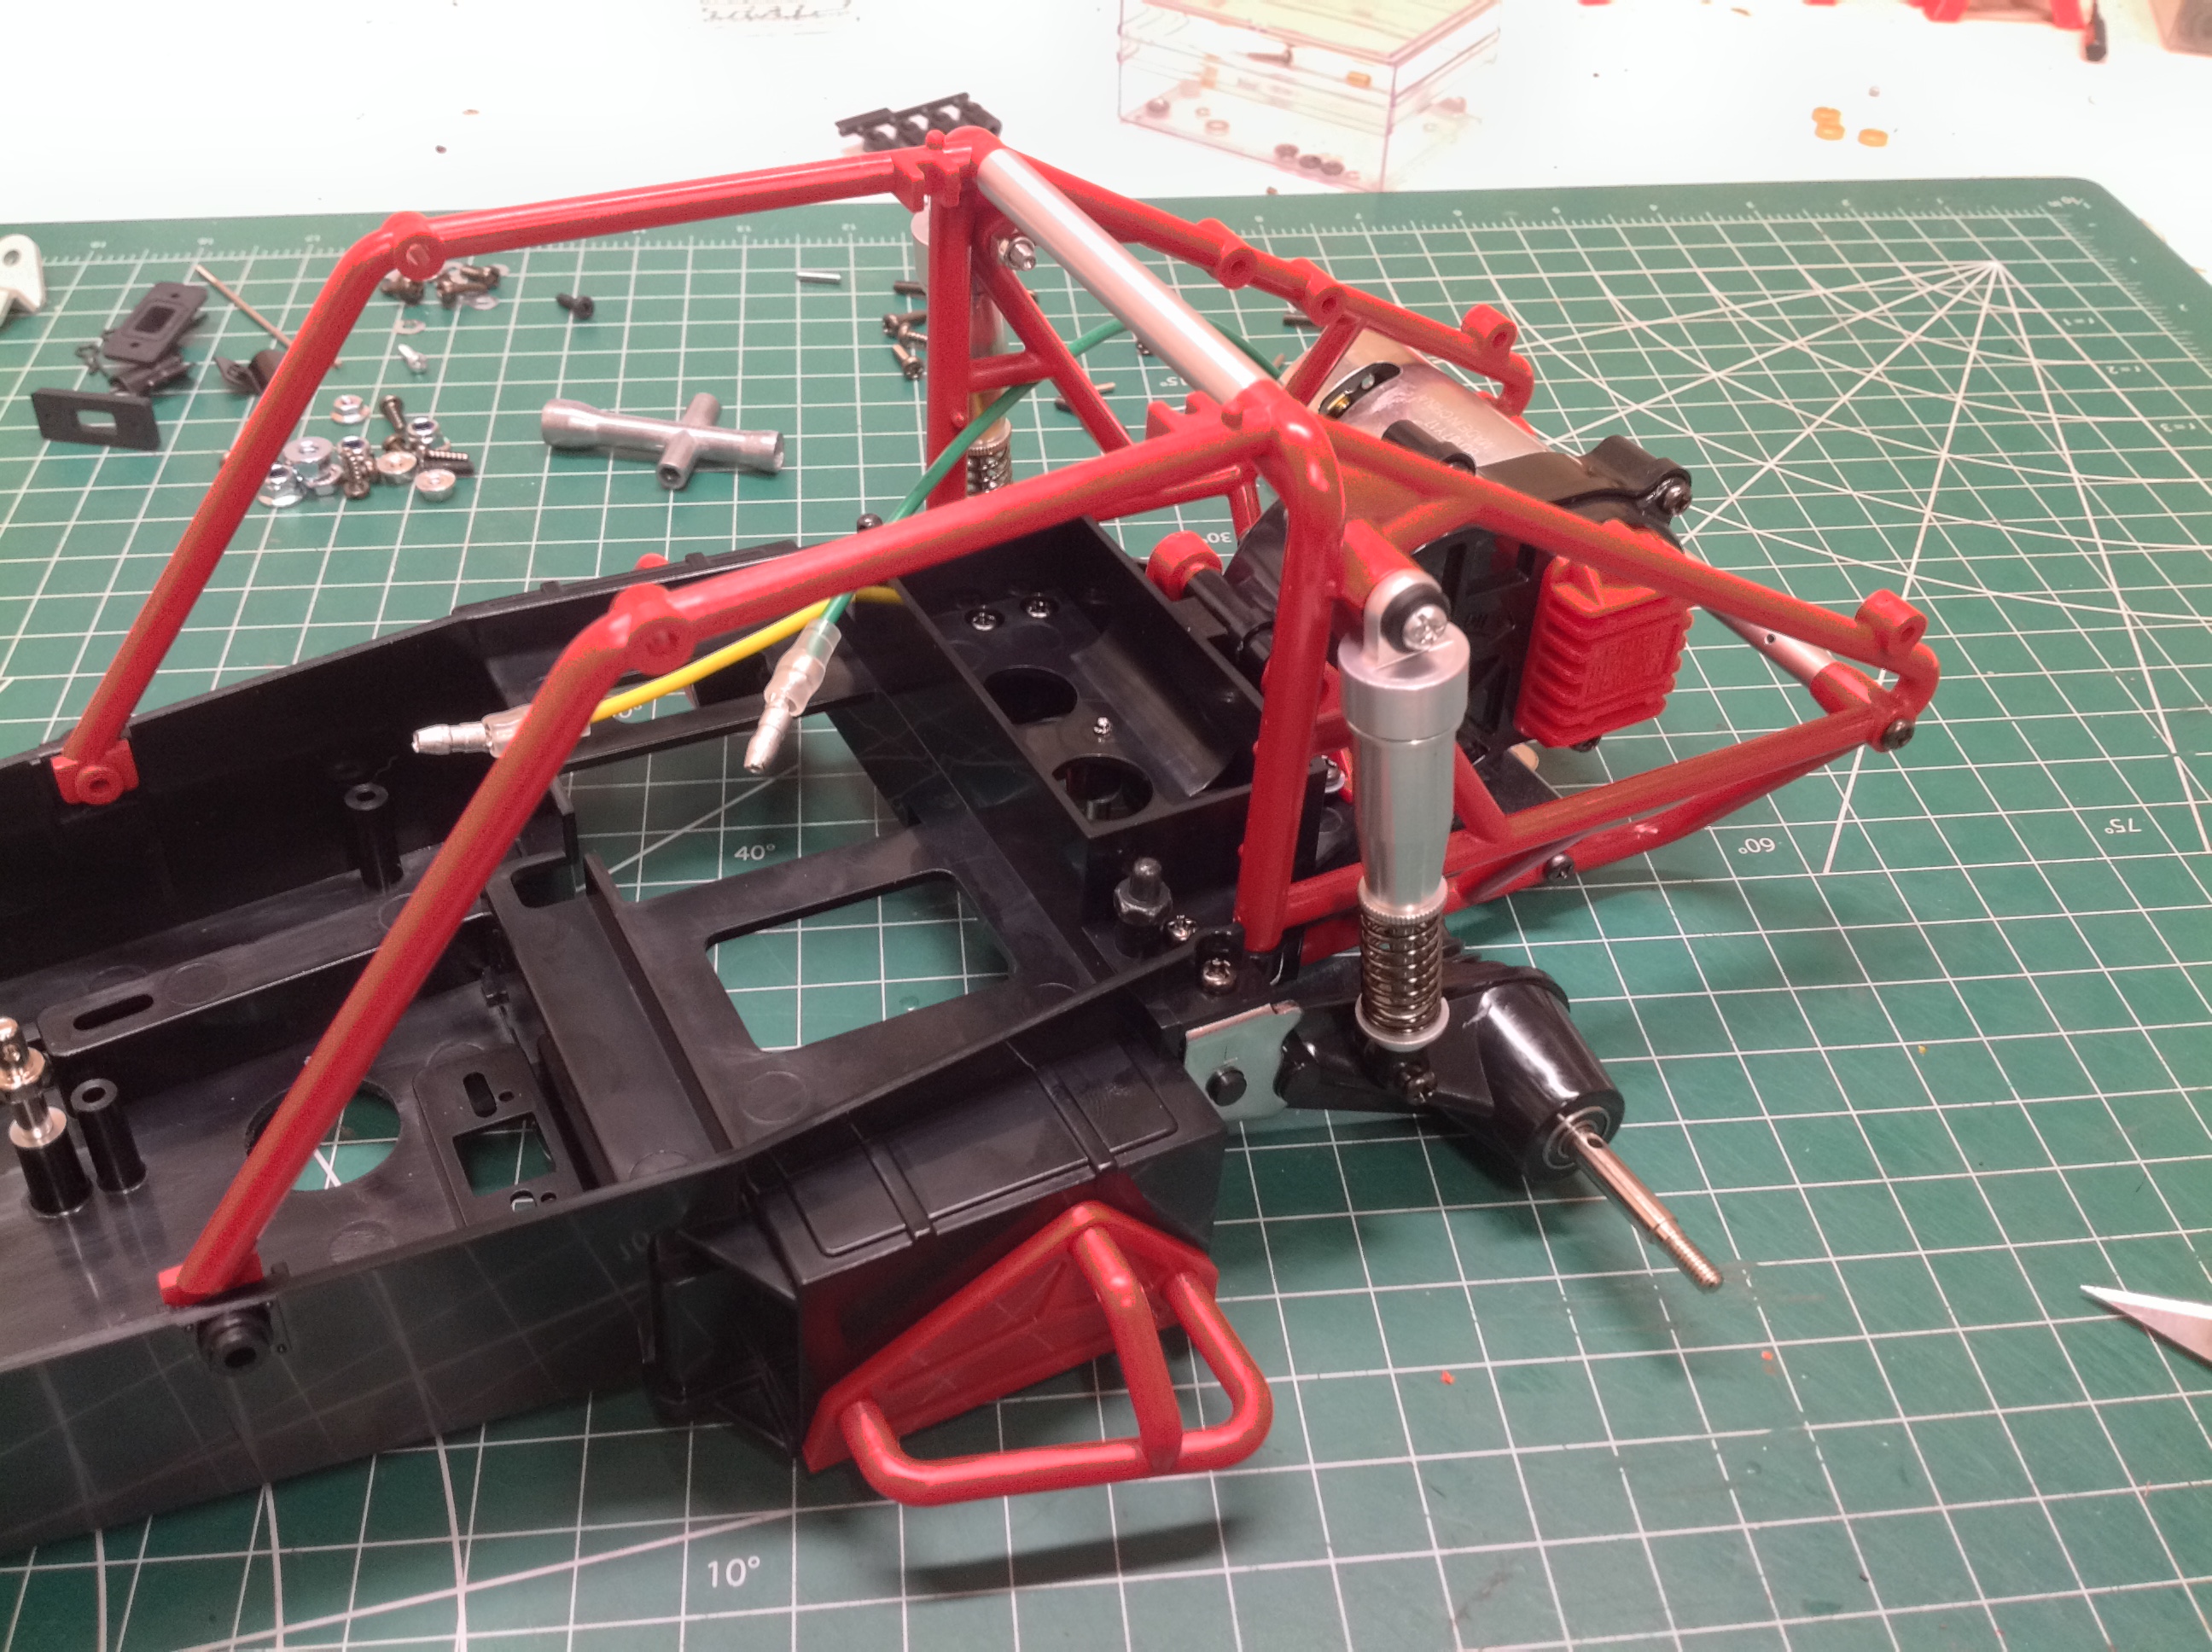
shown. The cross bar is an aluminum tube.
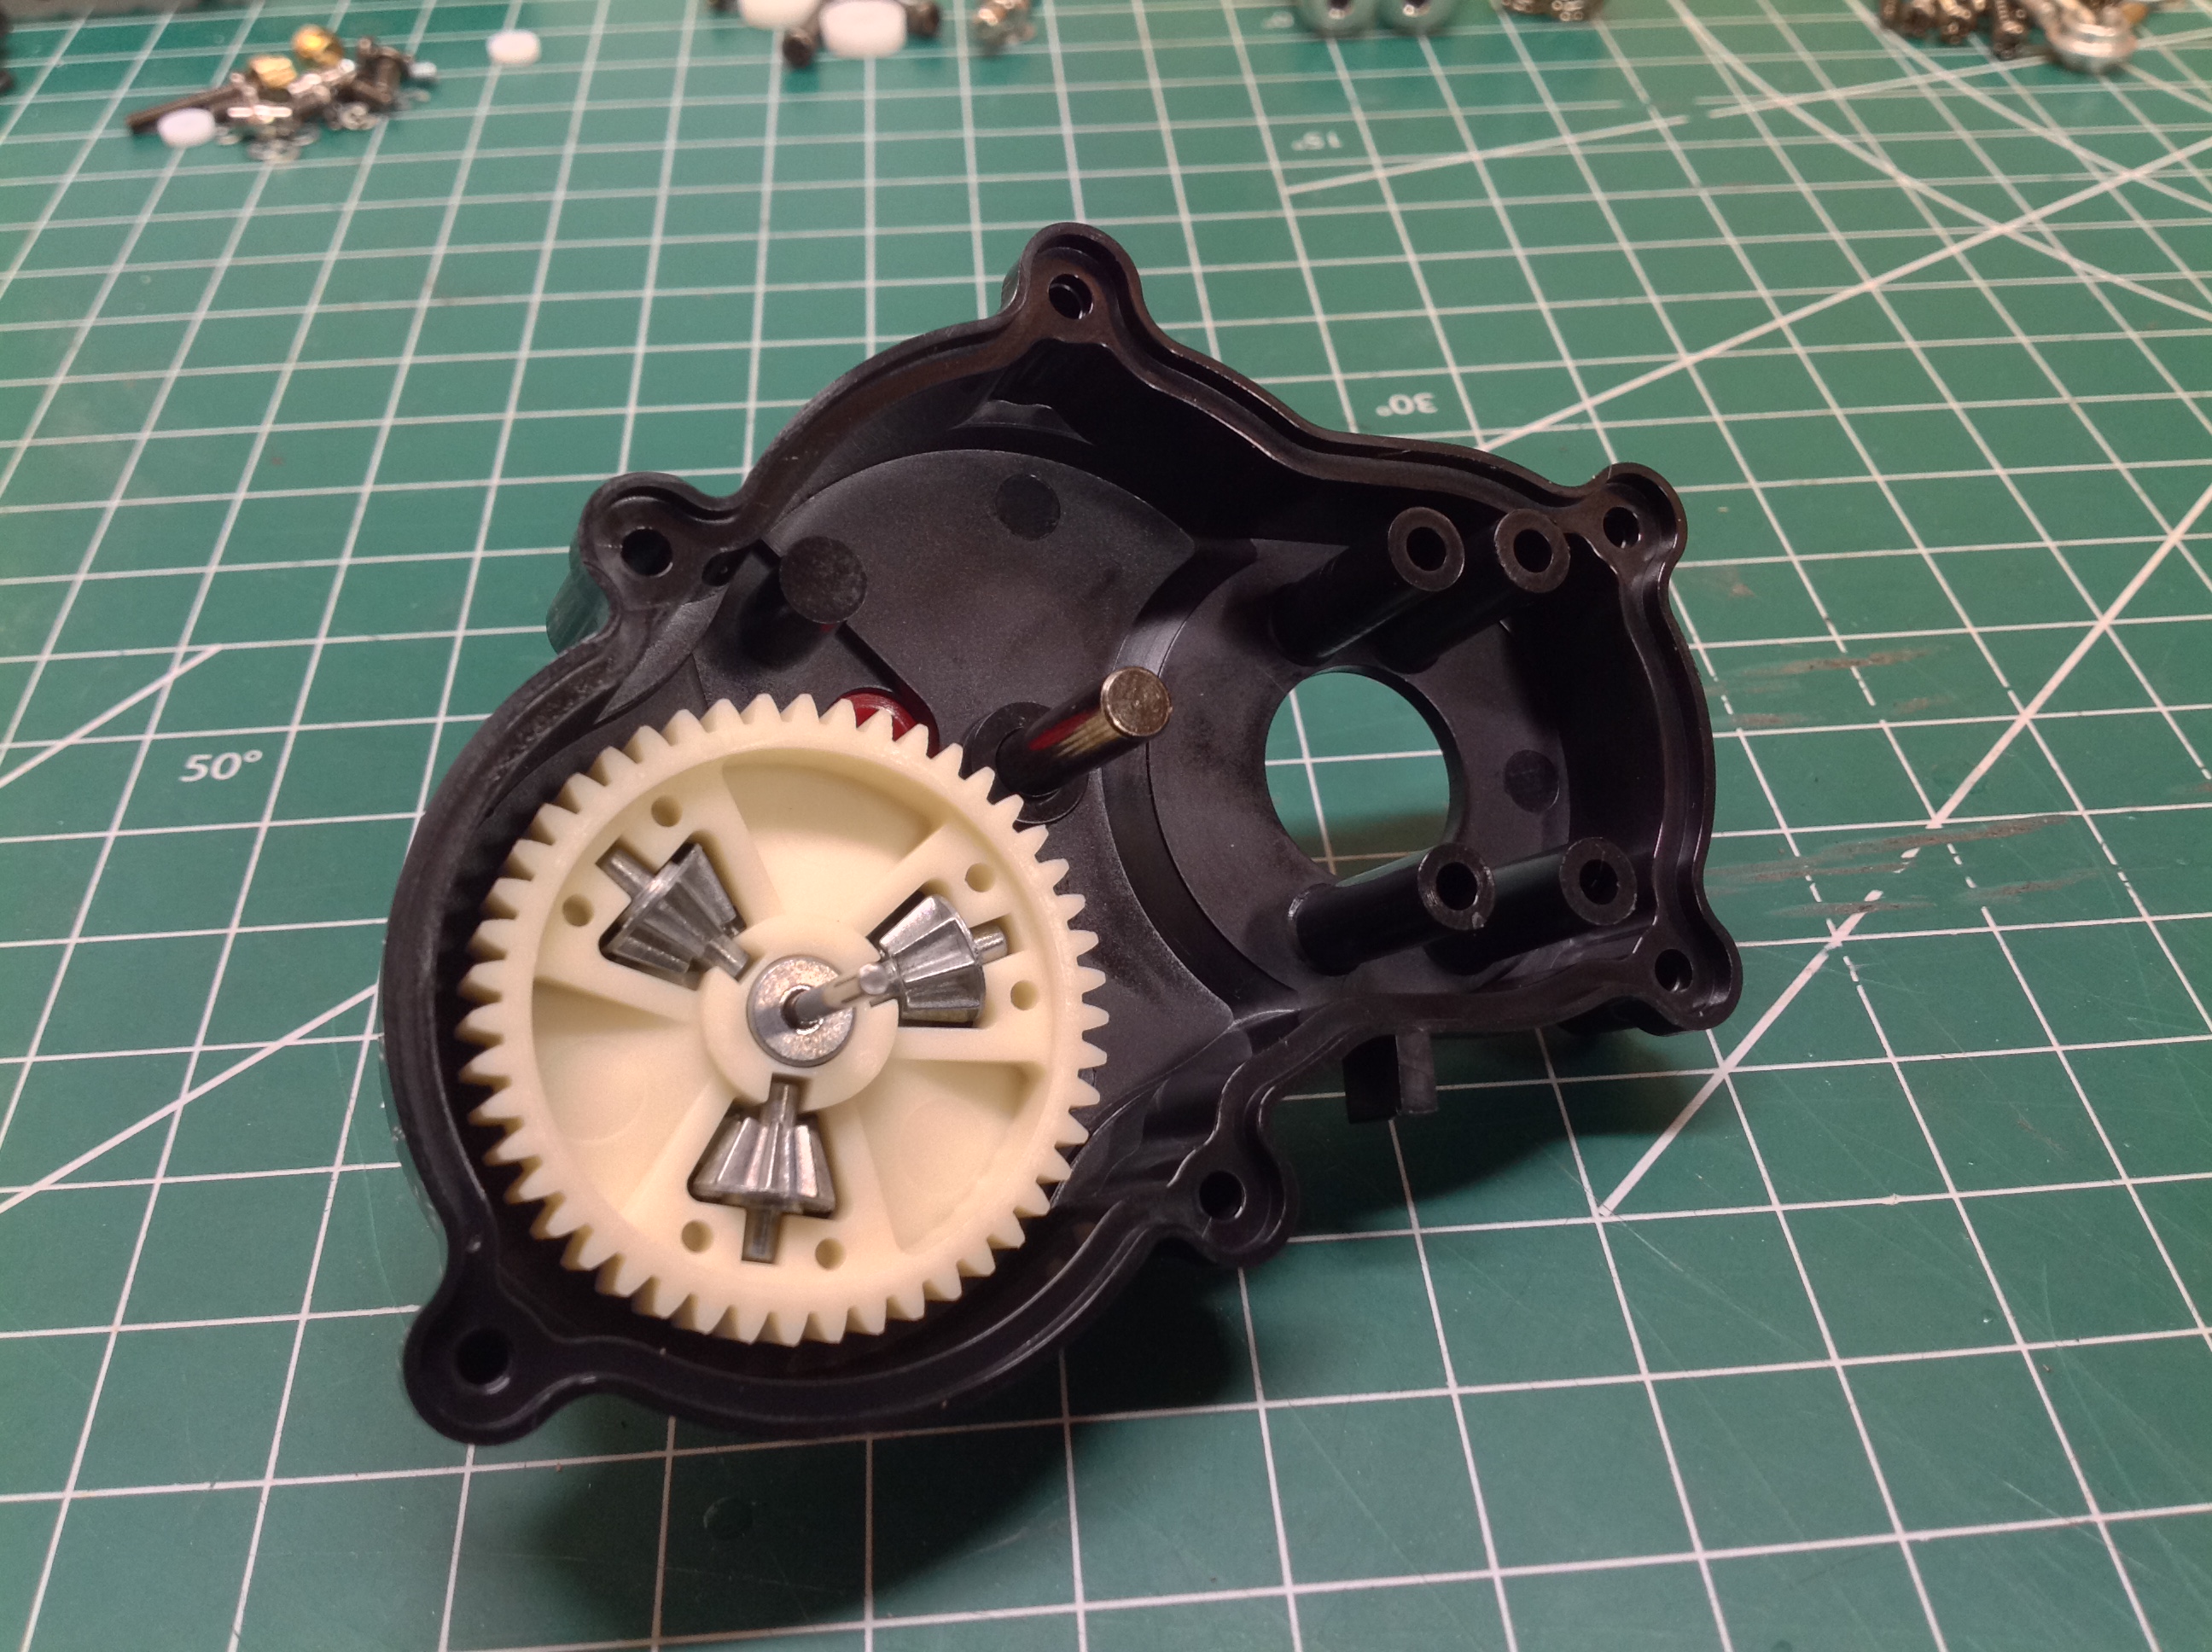
The differential is a very simple gear unit with a thin ring gear and 3
spider gears sandwiched between the beveled outdrives. As usual, I
added ball bearings to my build but not many are required for this
model.
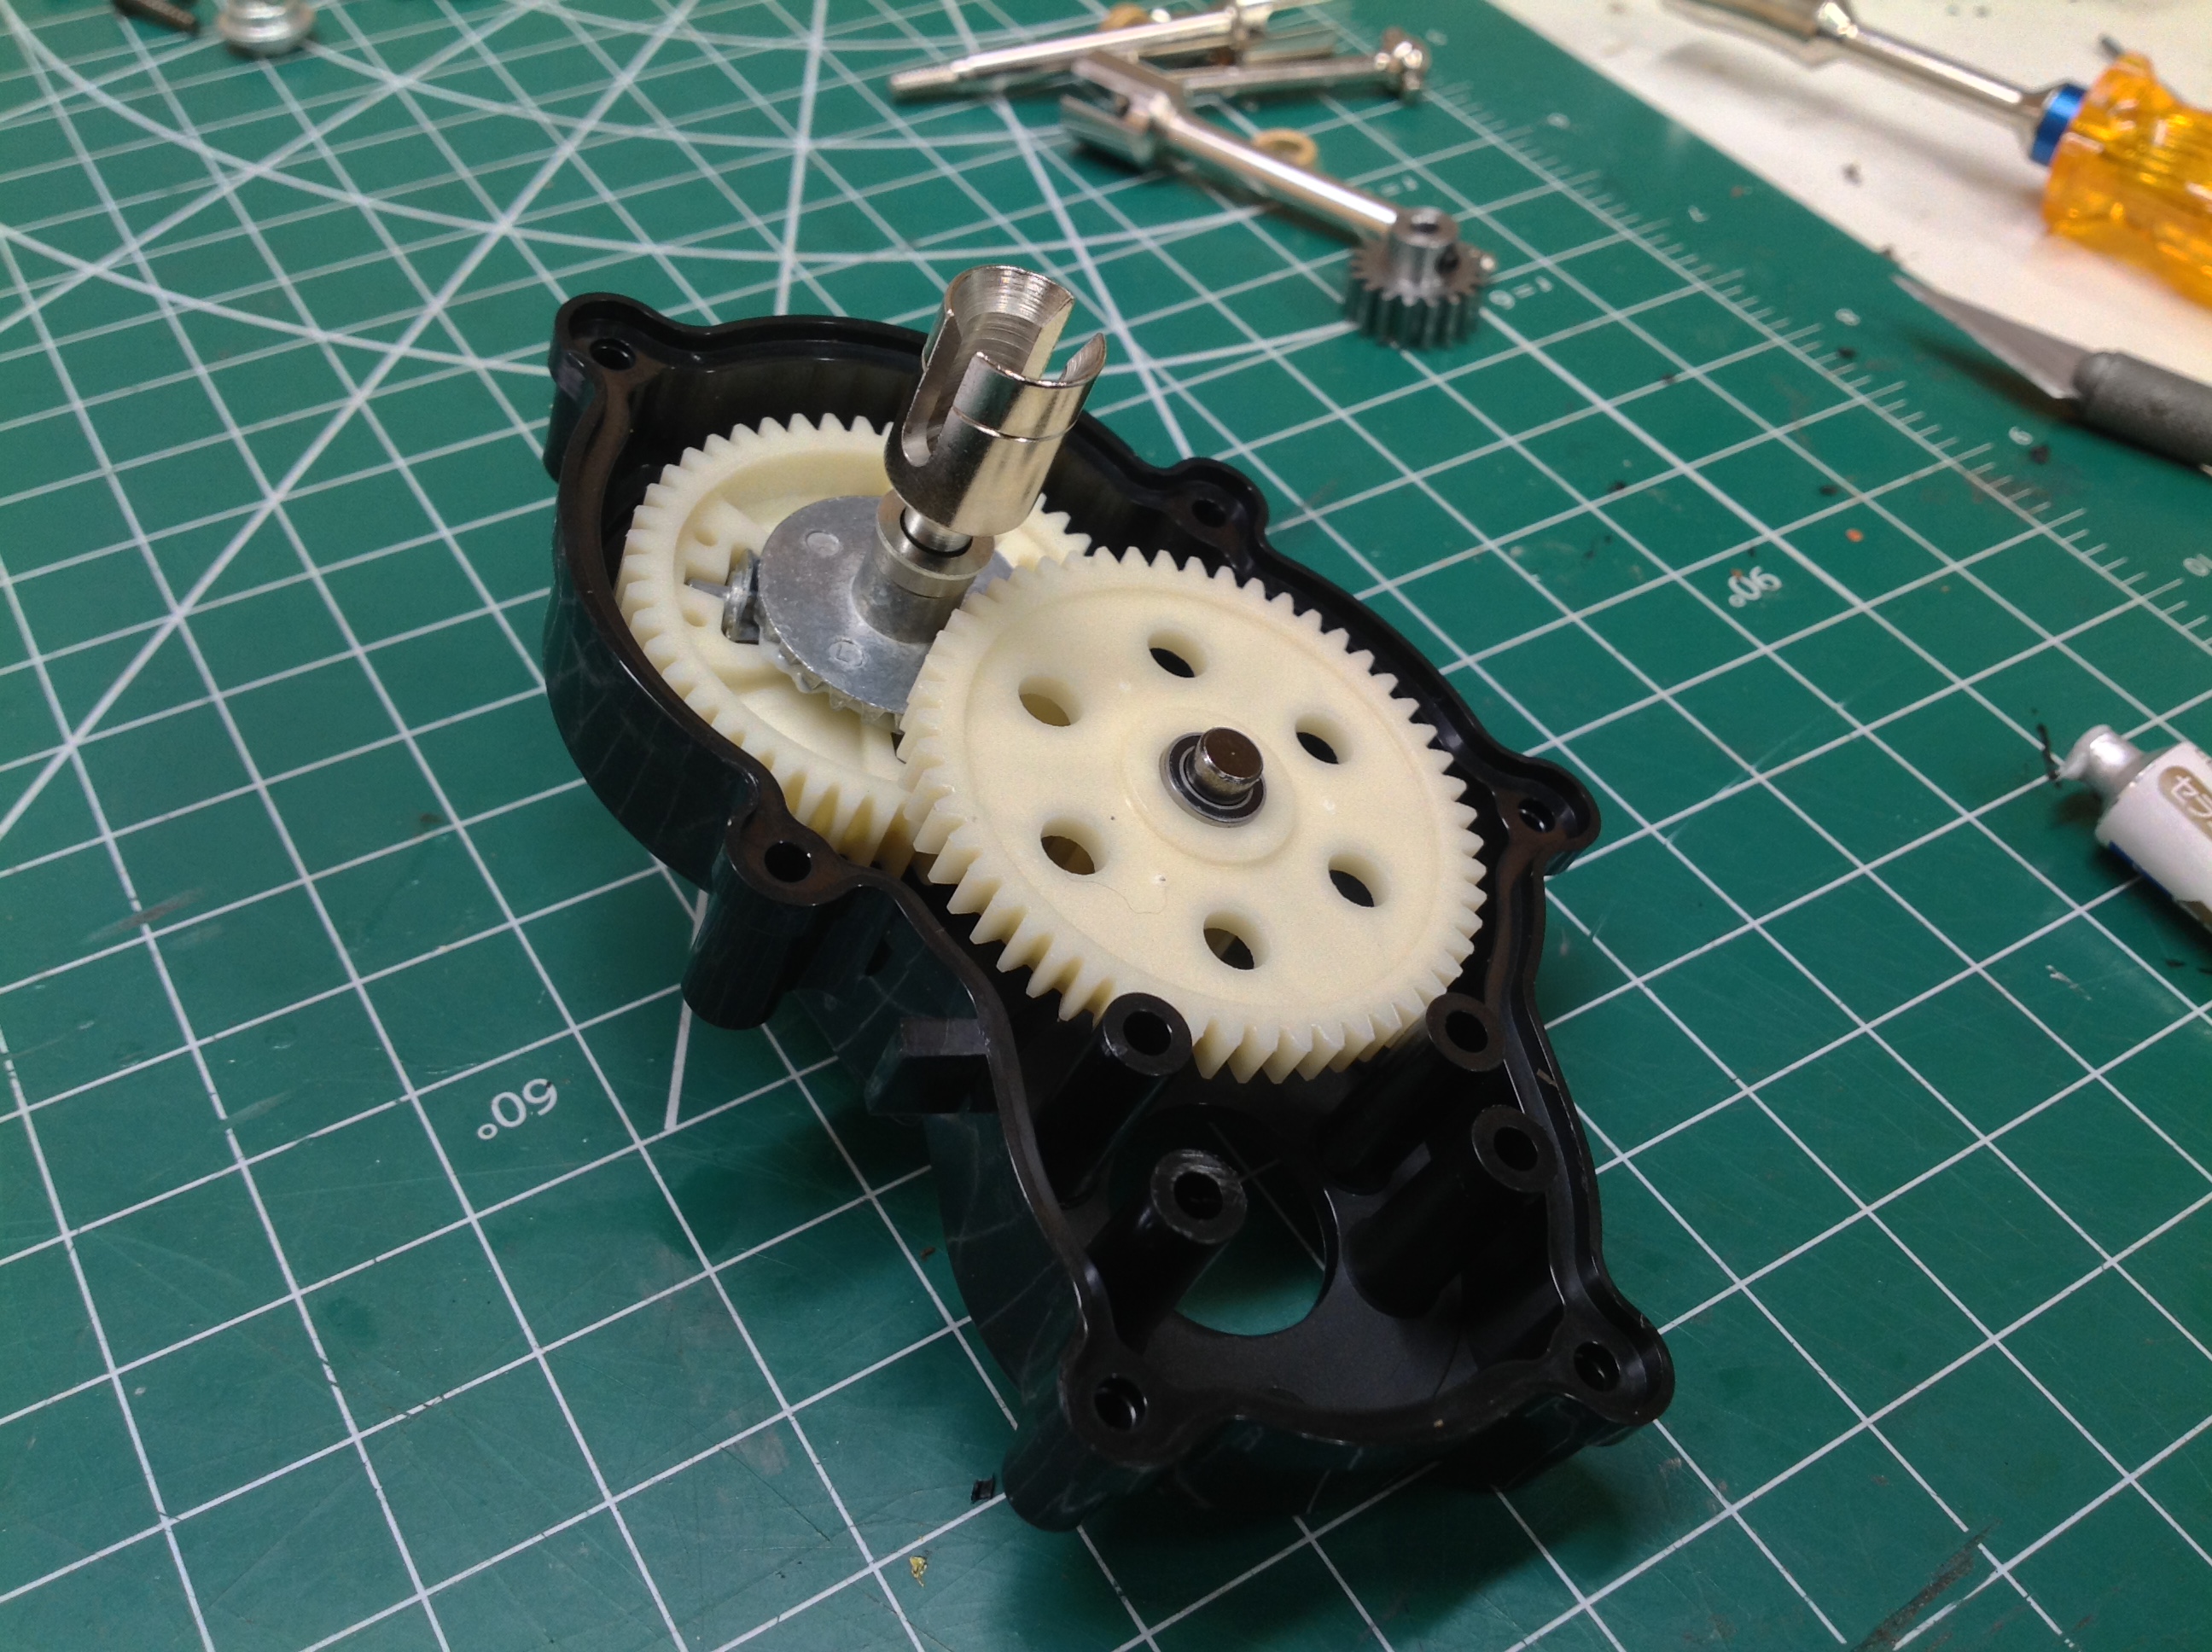
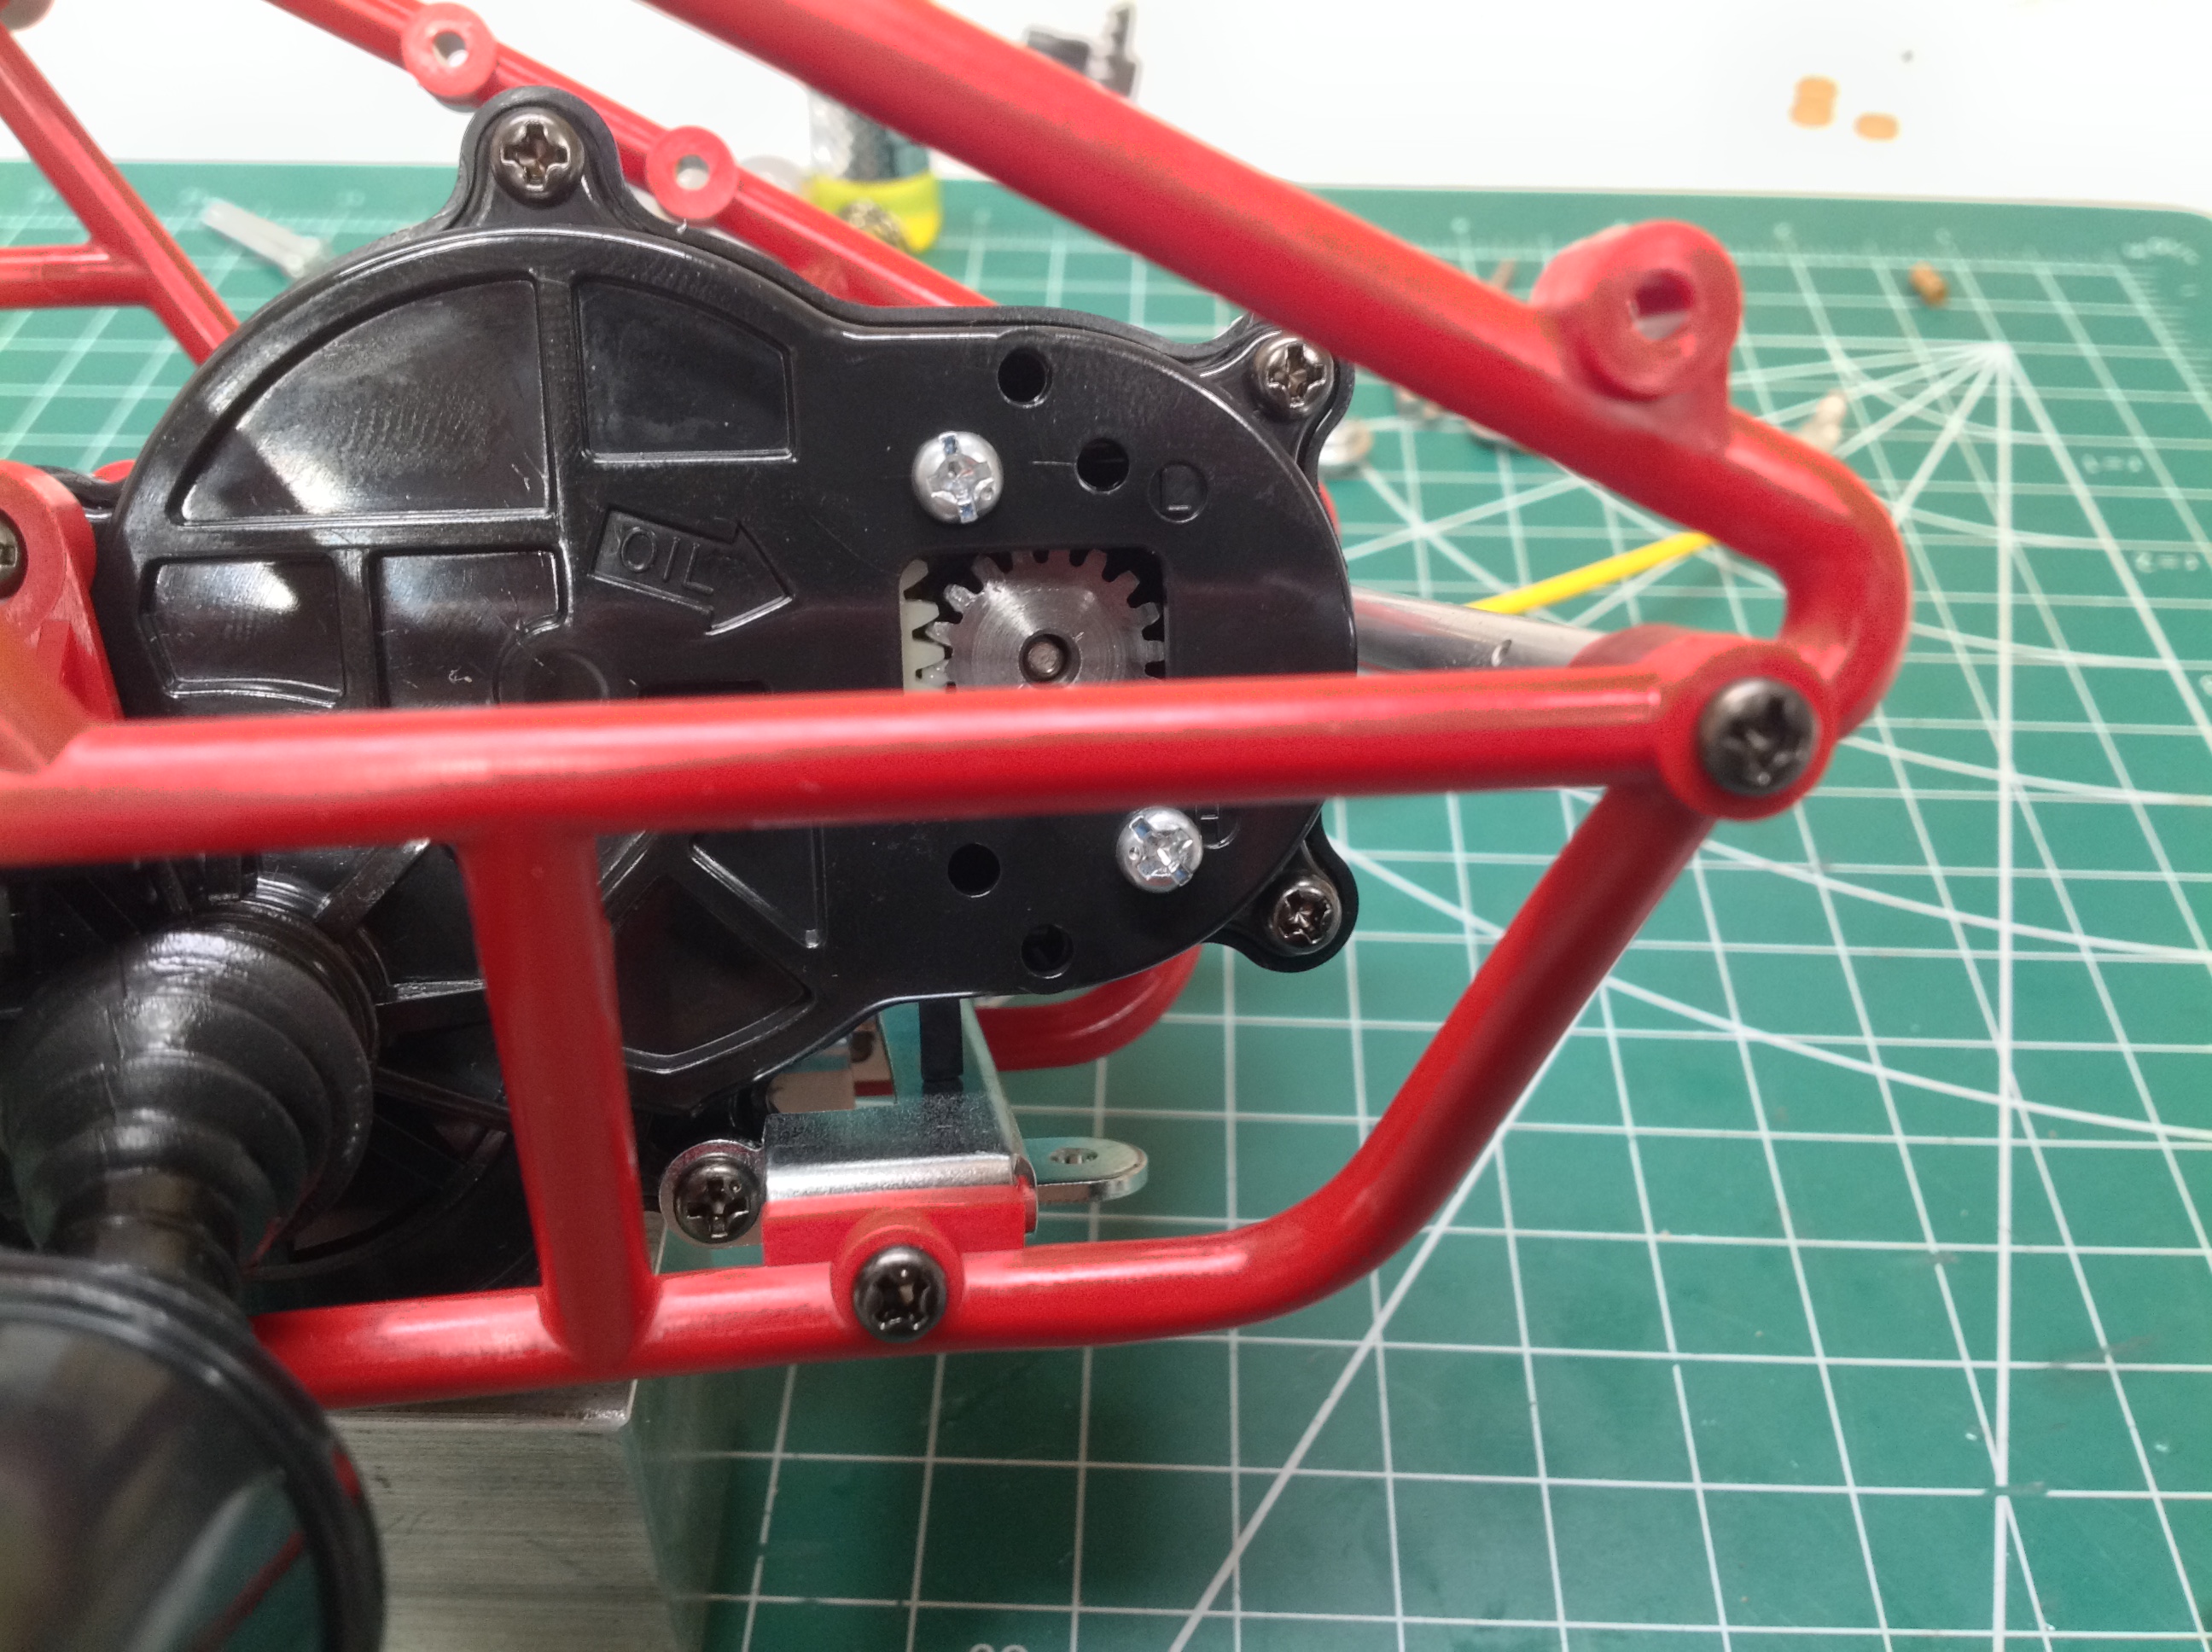
There is only one more gear in this simple transmission. It is
supported by tiny 5x8mm bearings so you wouldn't want to put much power
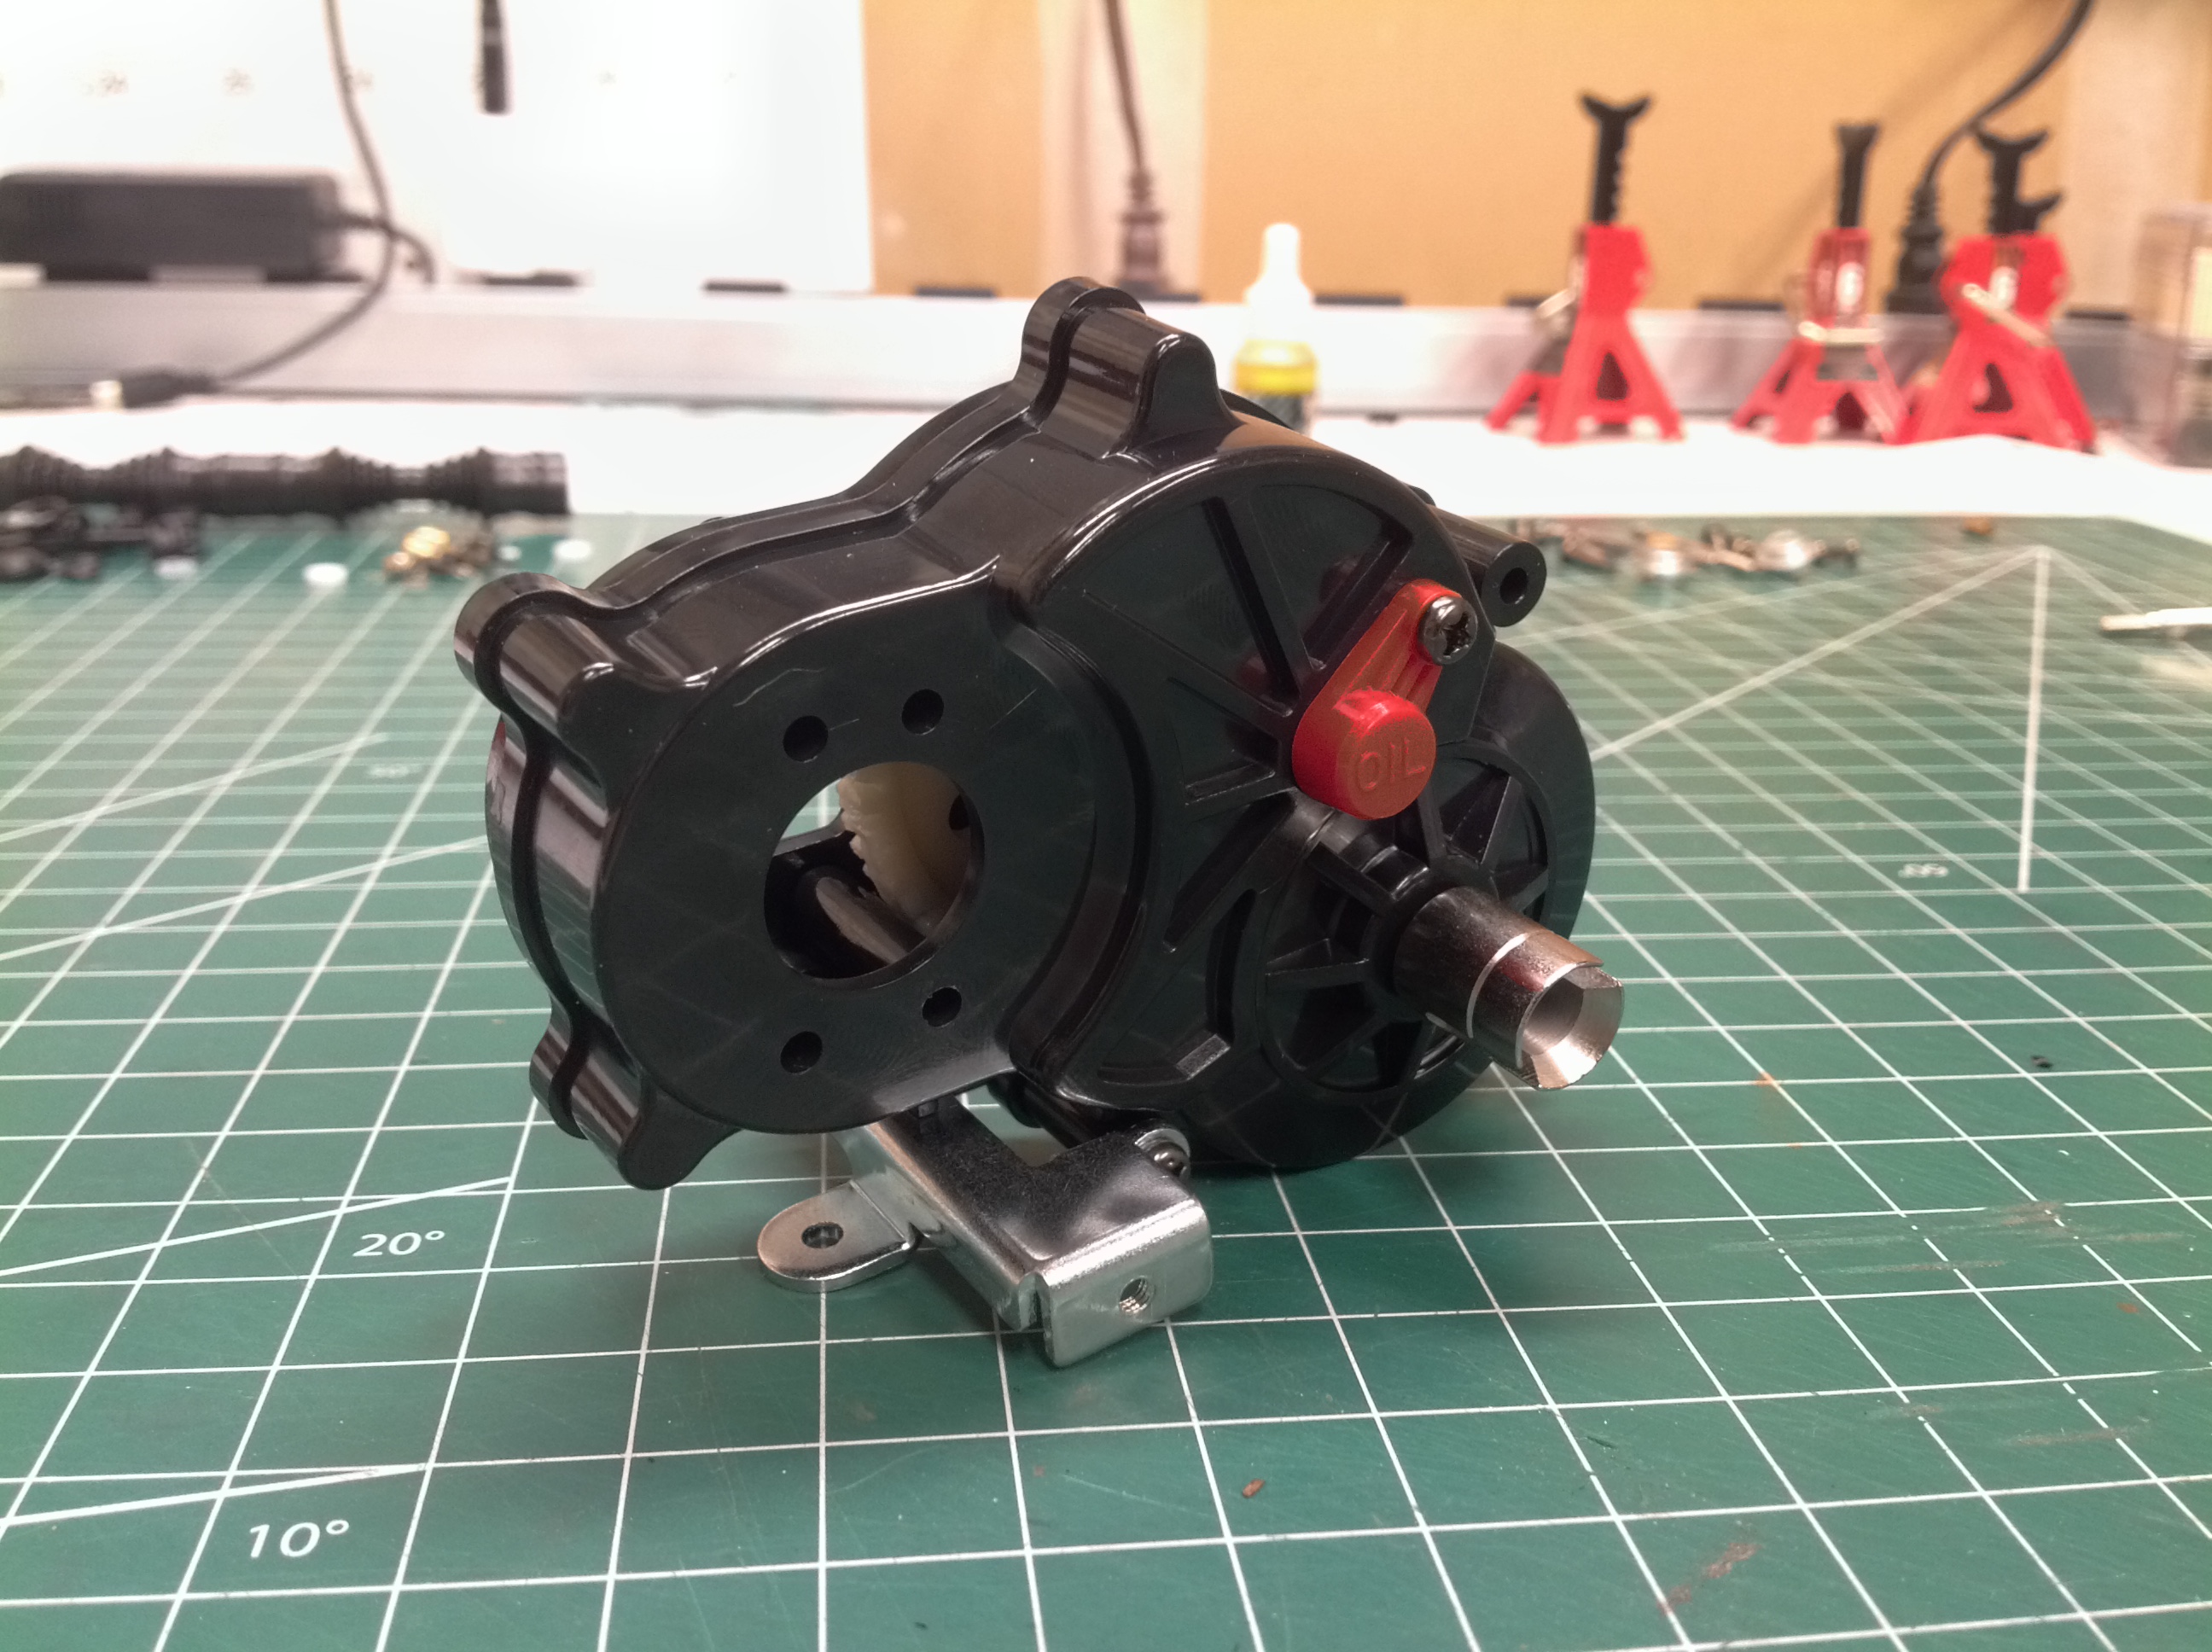
through this transmission. Once the other side of the housing is
screwed on, there is a sheet metal support bracket which spans them and a
little red cover which says "oil" on it. This is not really for
lubricating the transmission since it is not a sealed unit.
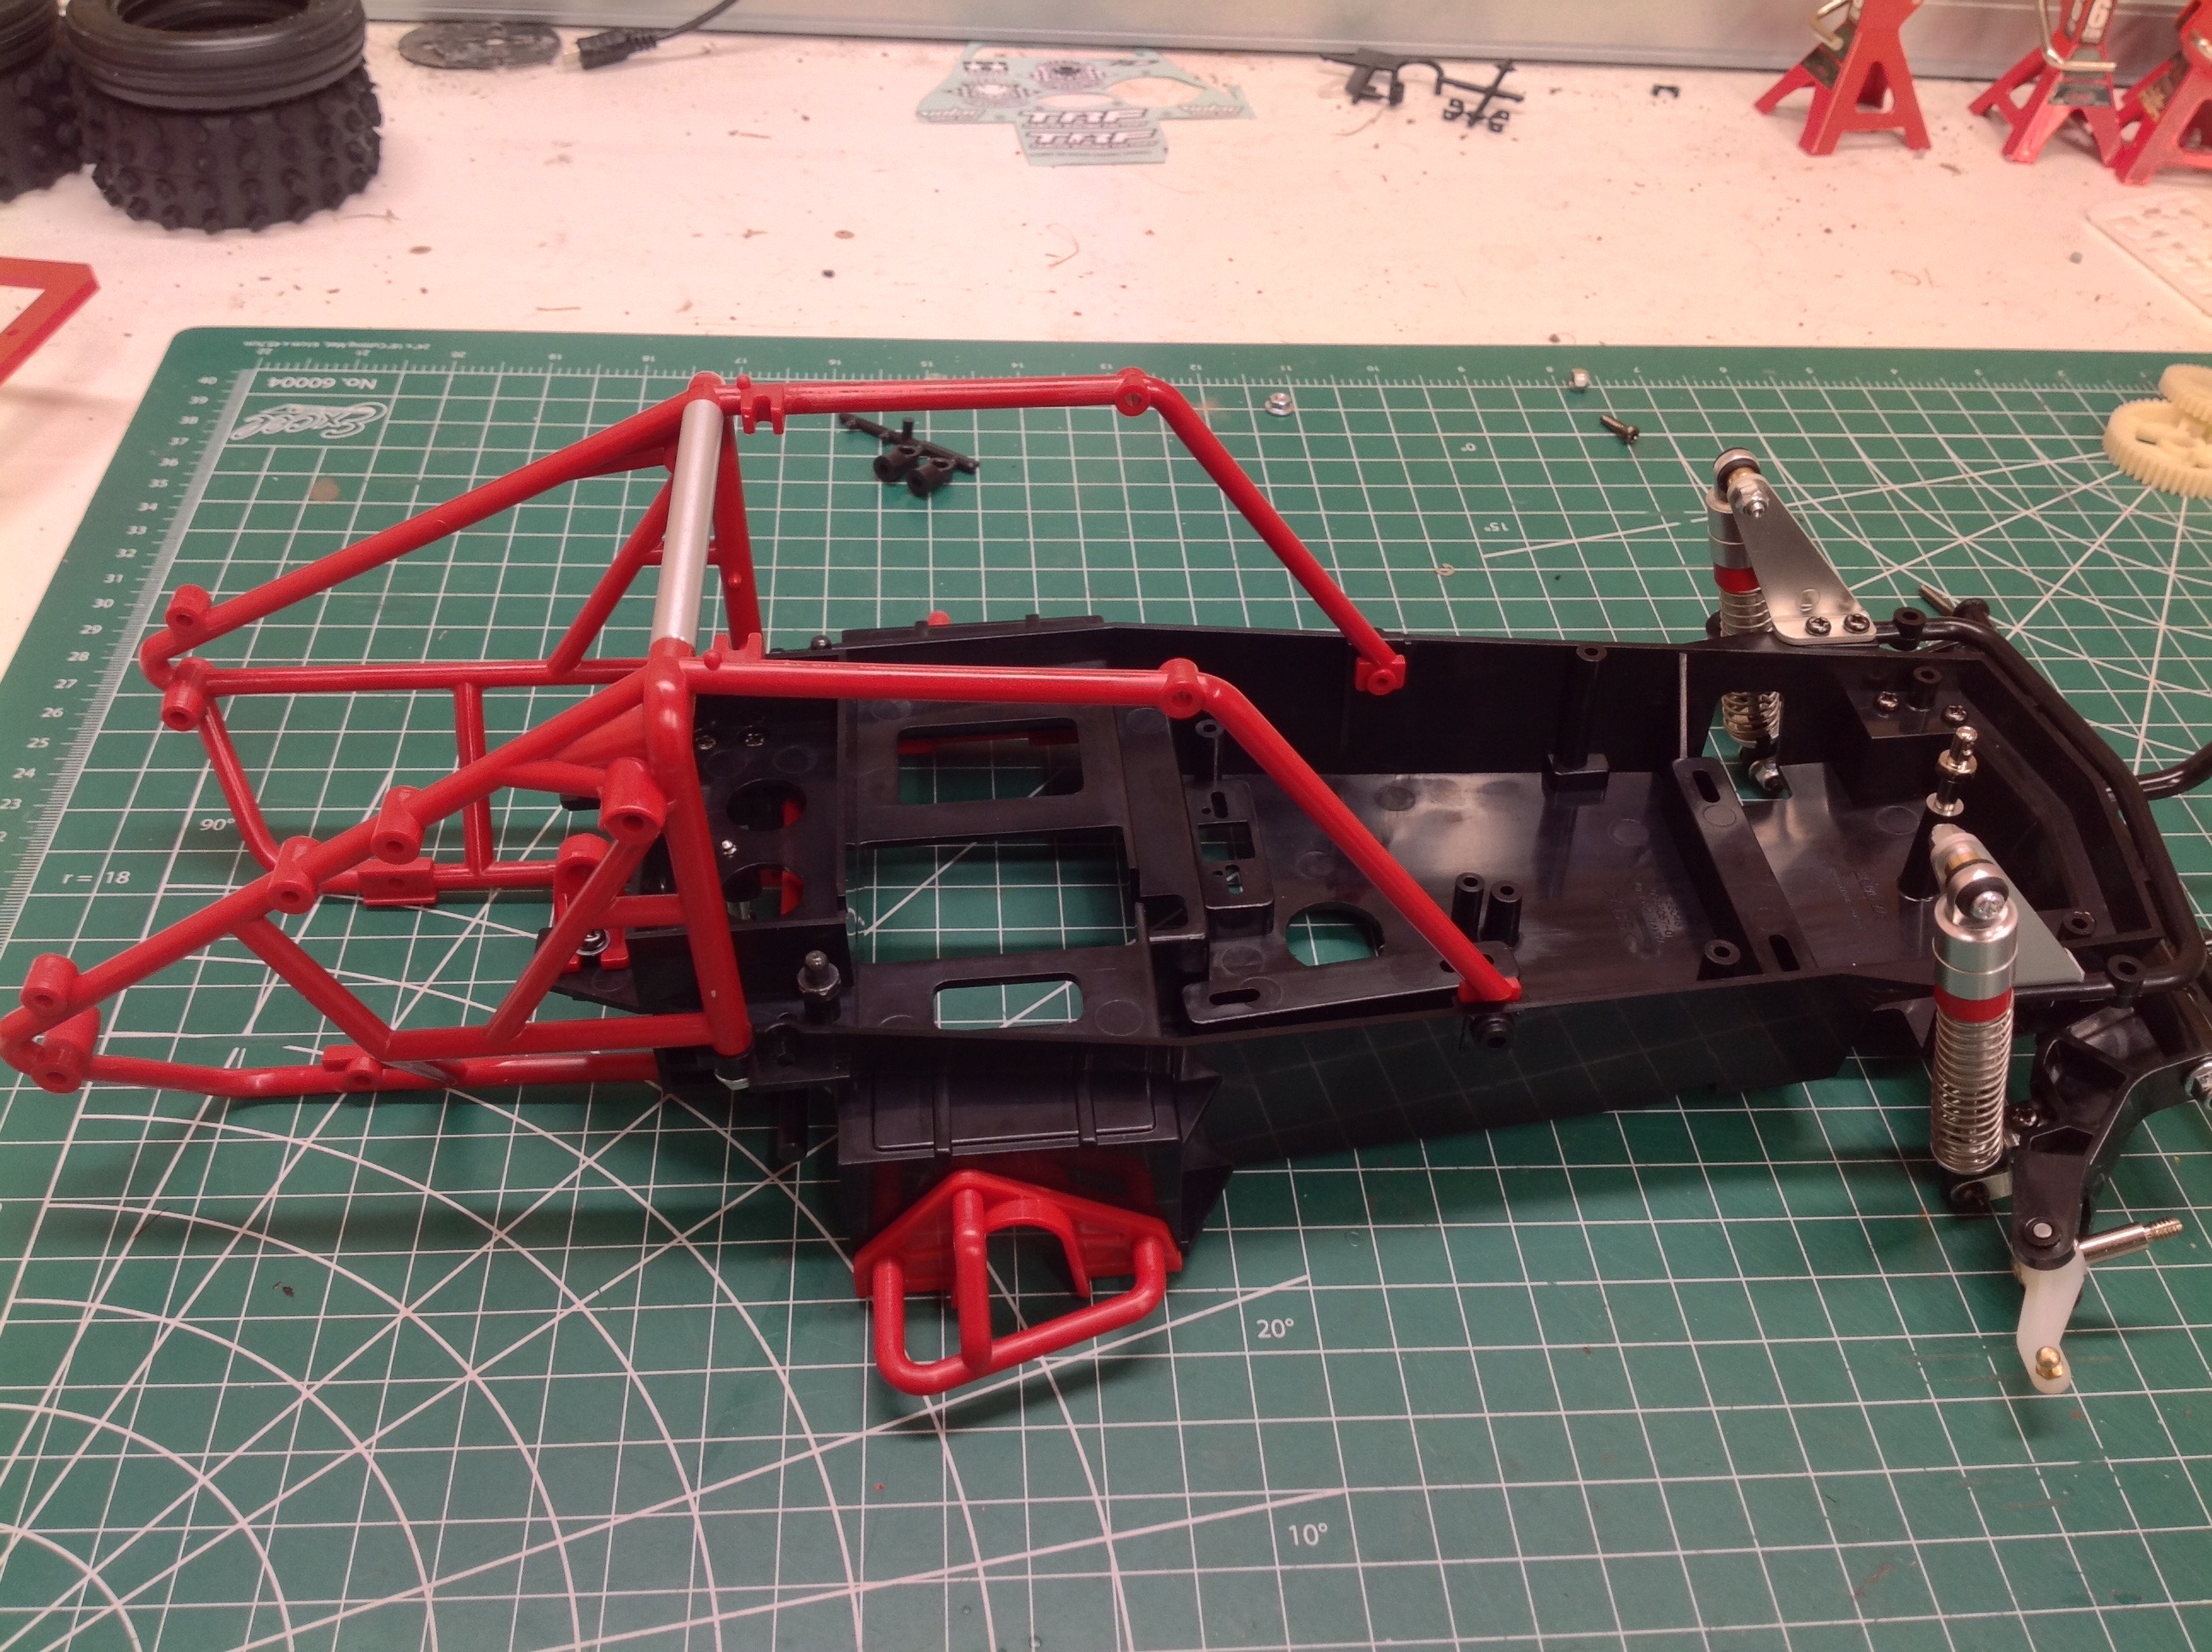
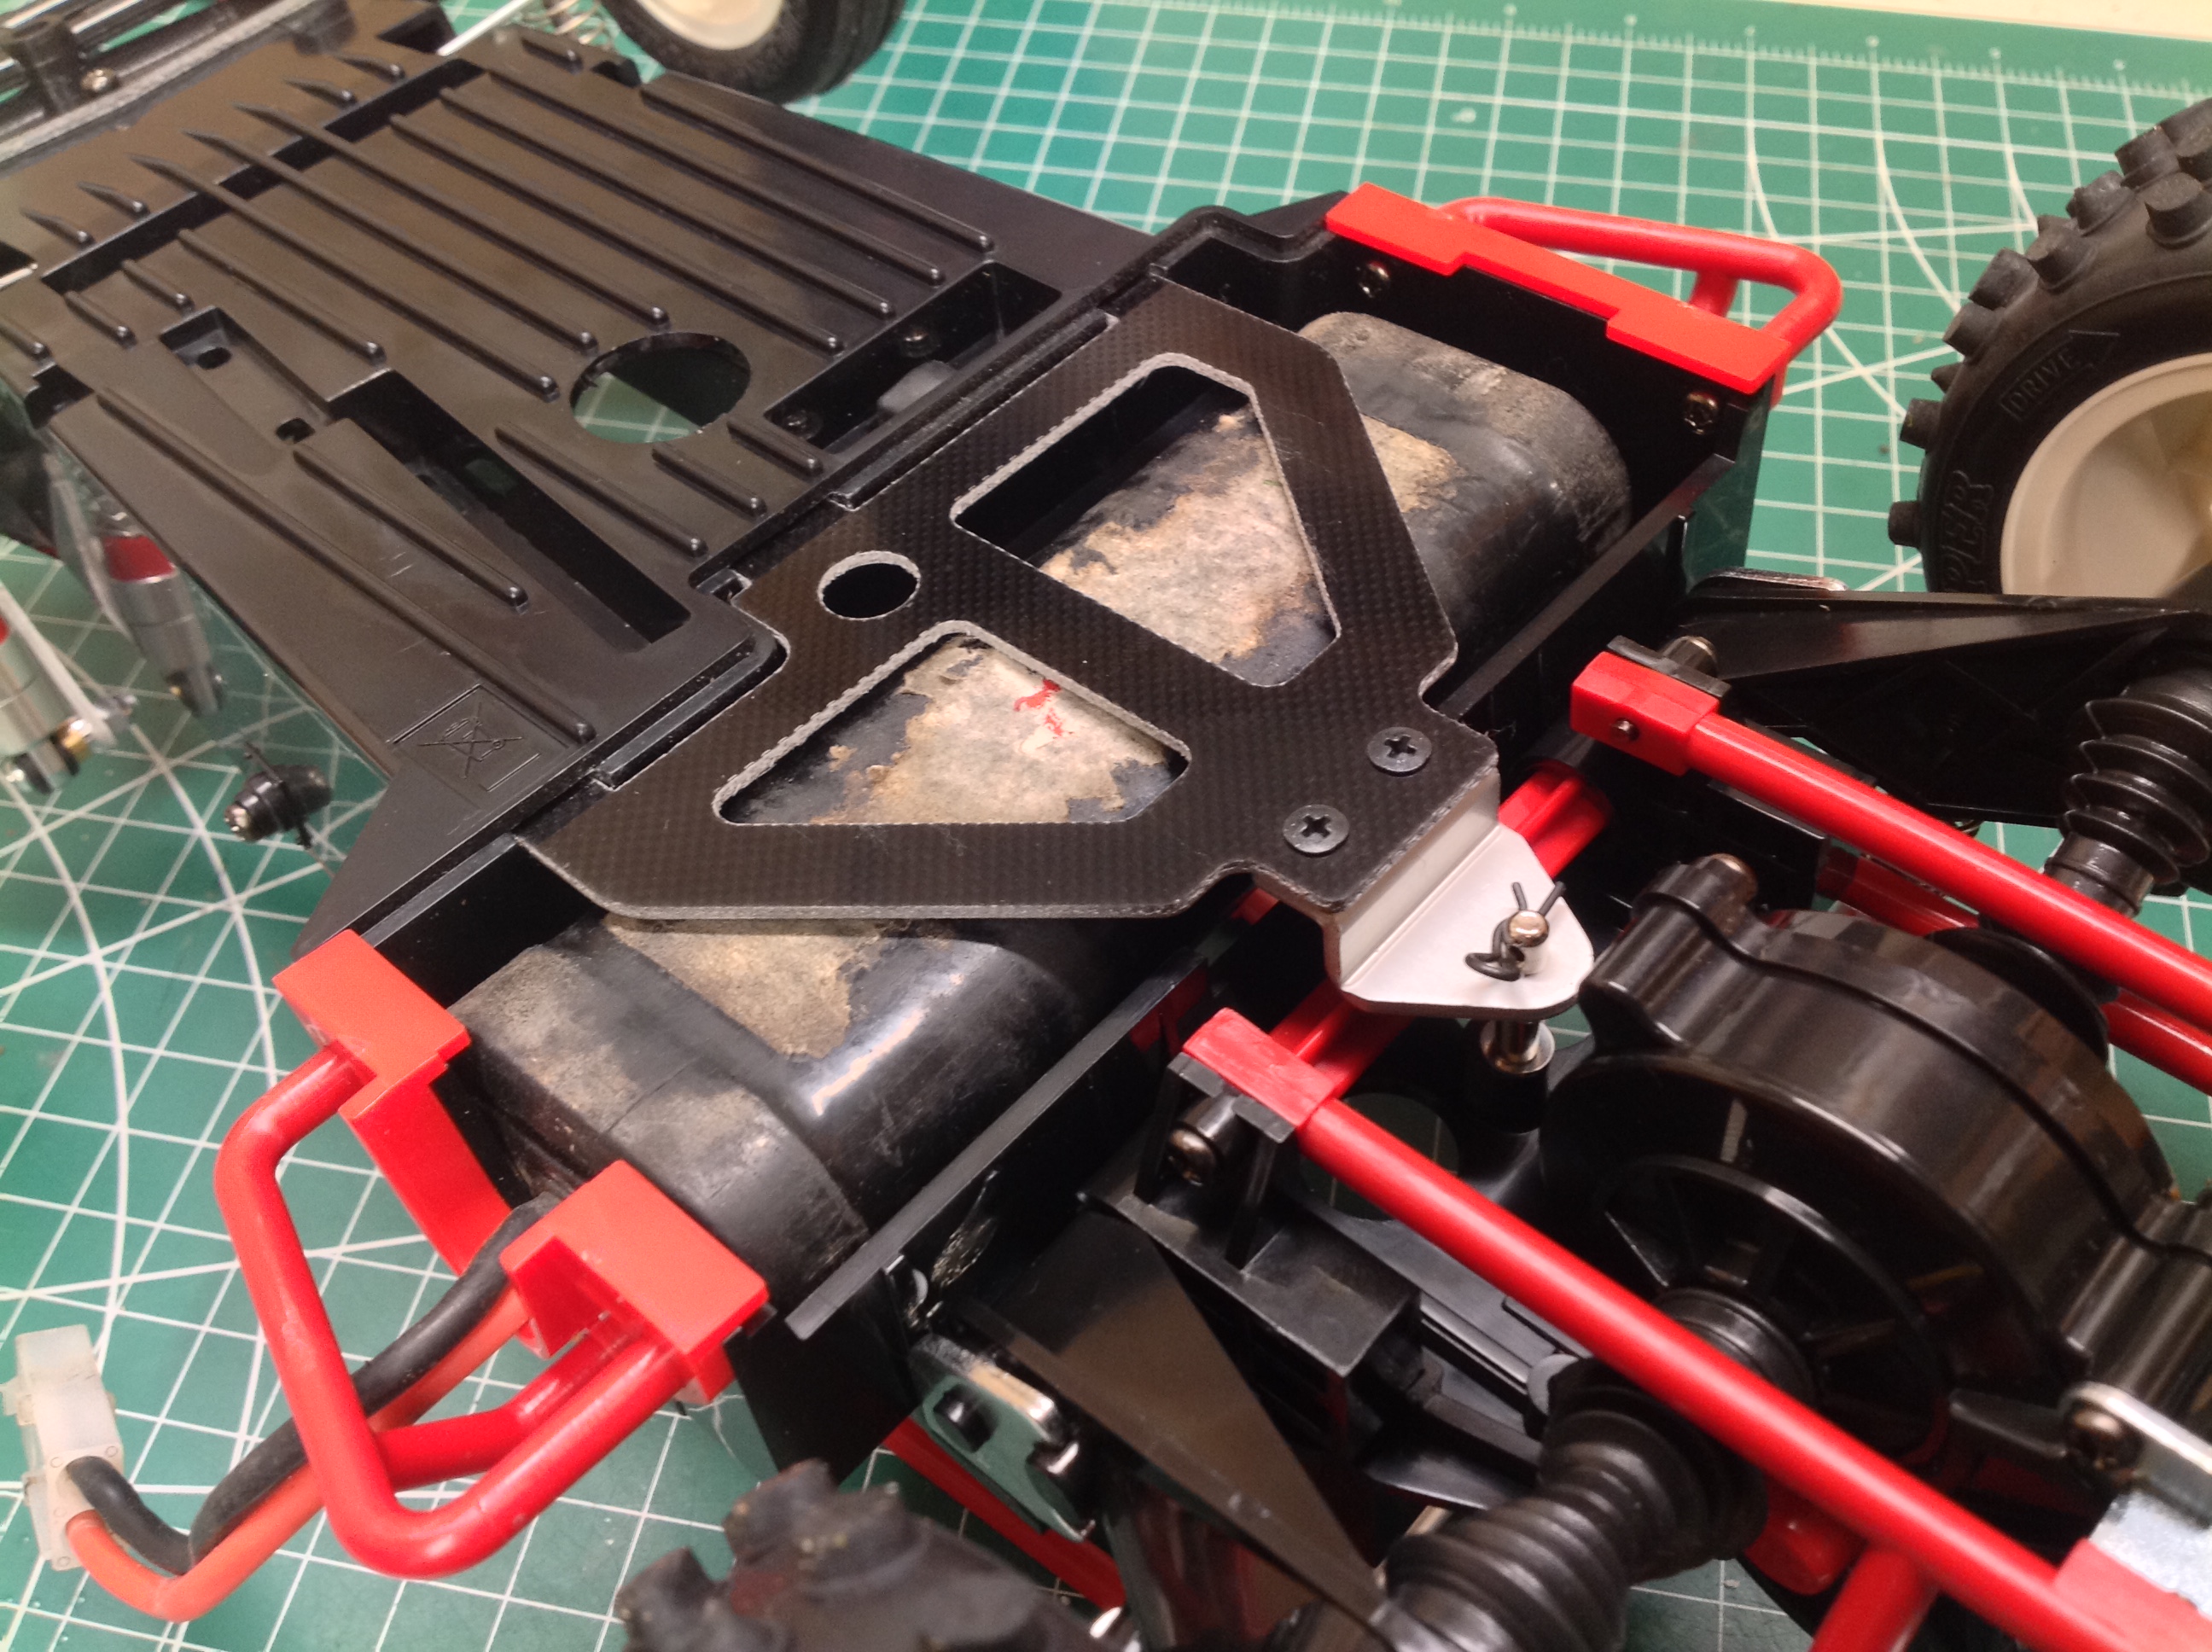
Here the gearbox has been attached to the chassis. The metal
support bracket attaches to the lower rear cage, and the front of the
gearbox attaches to the two vertical red brackets.
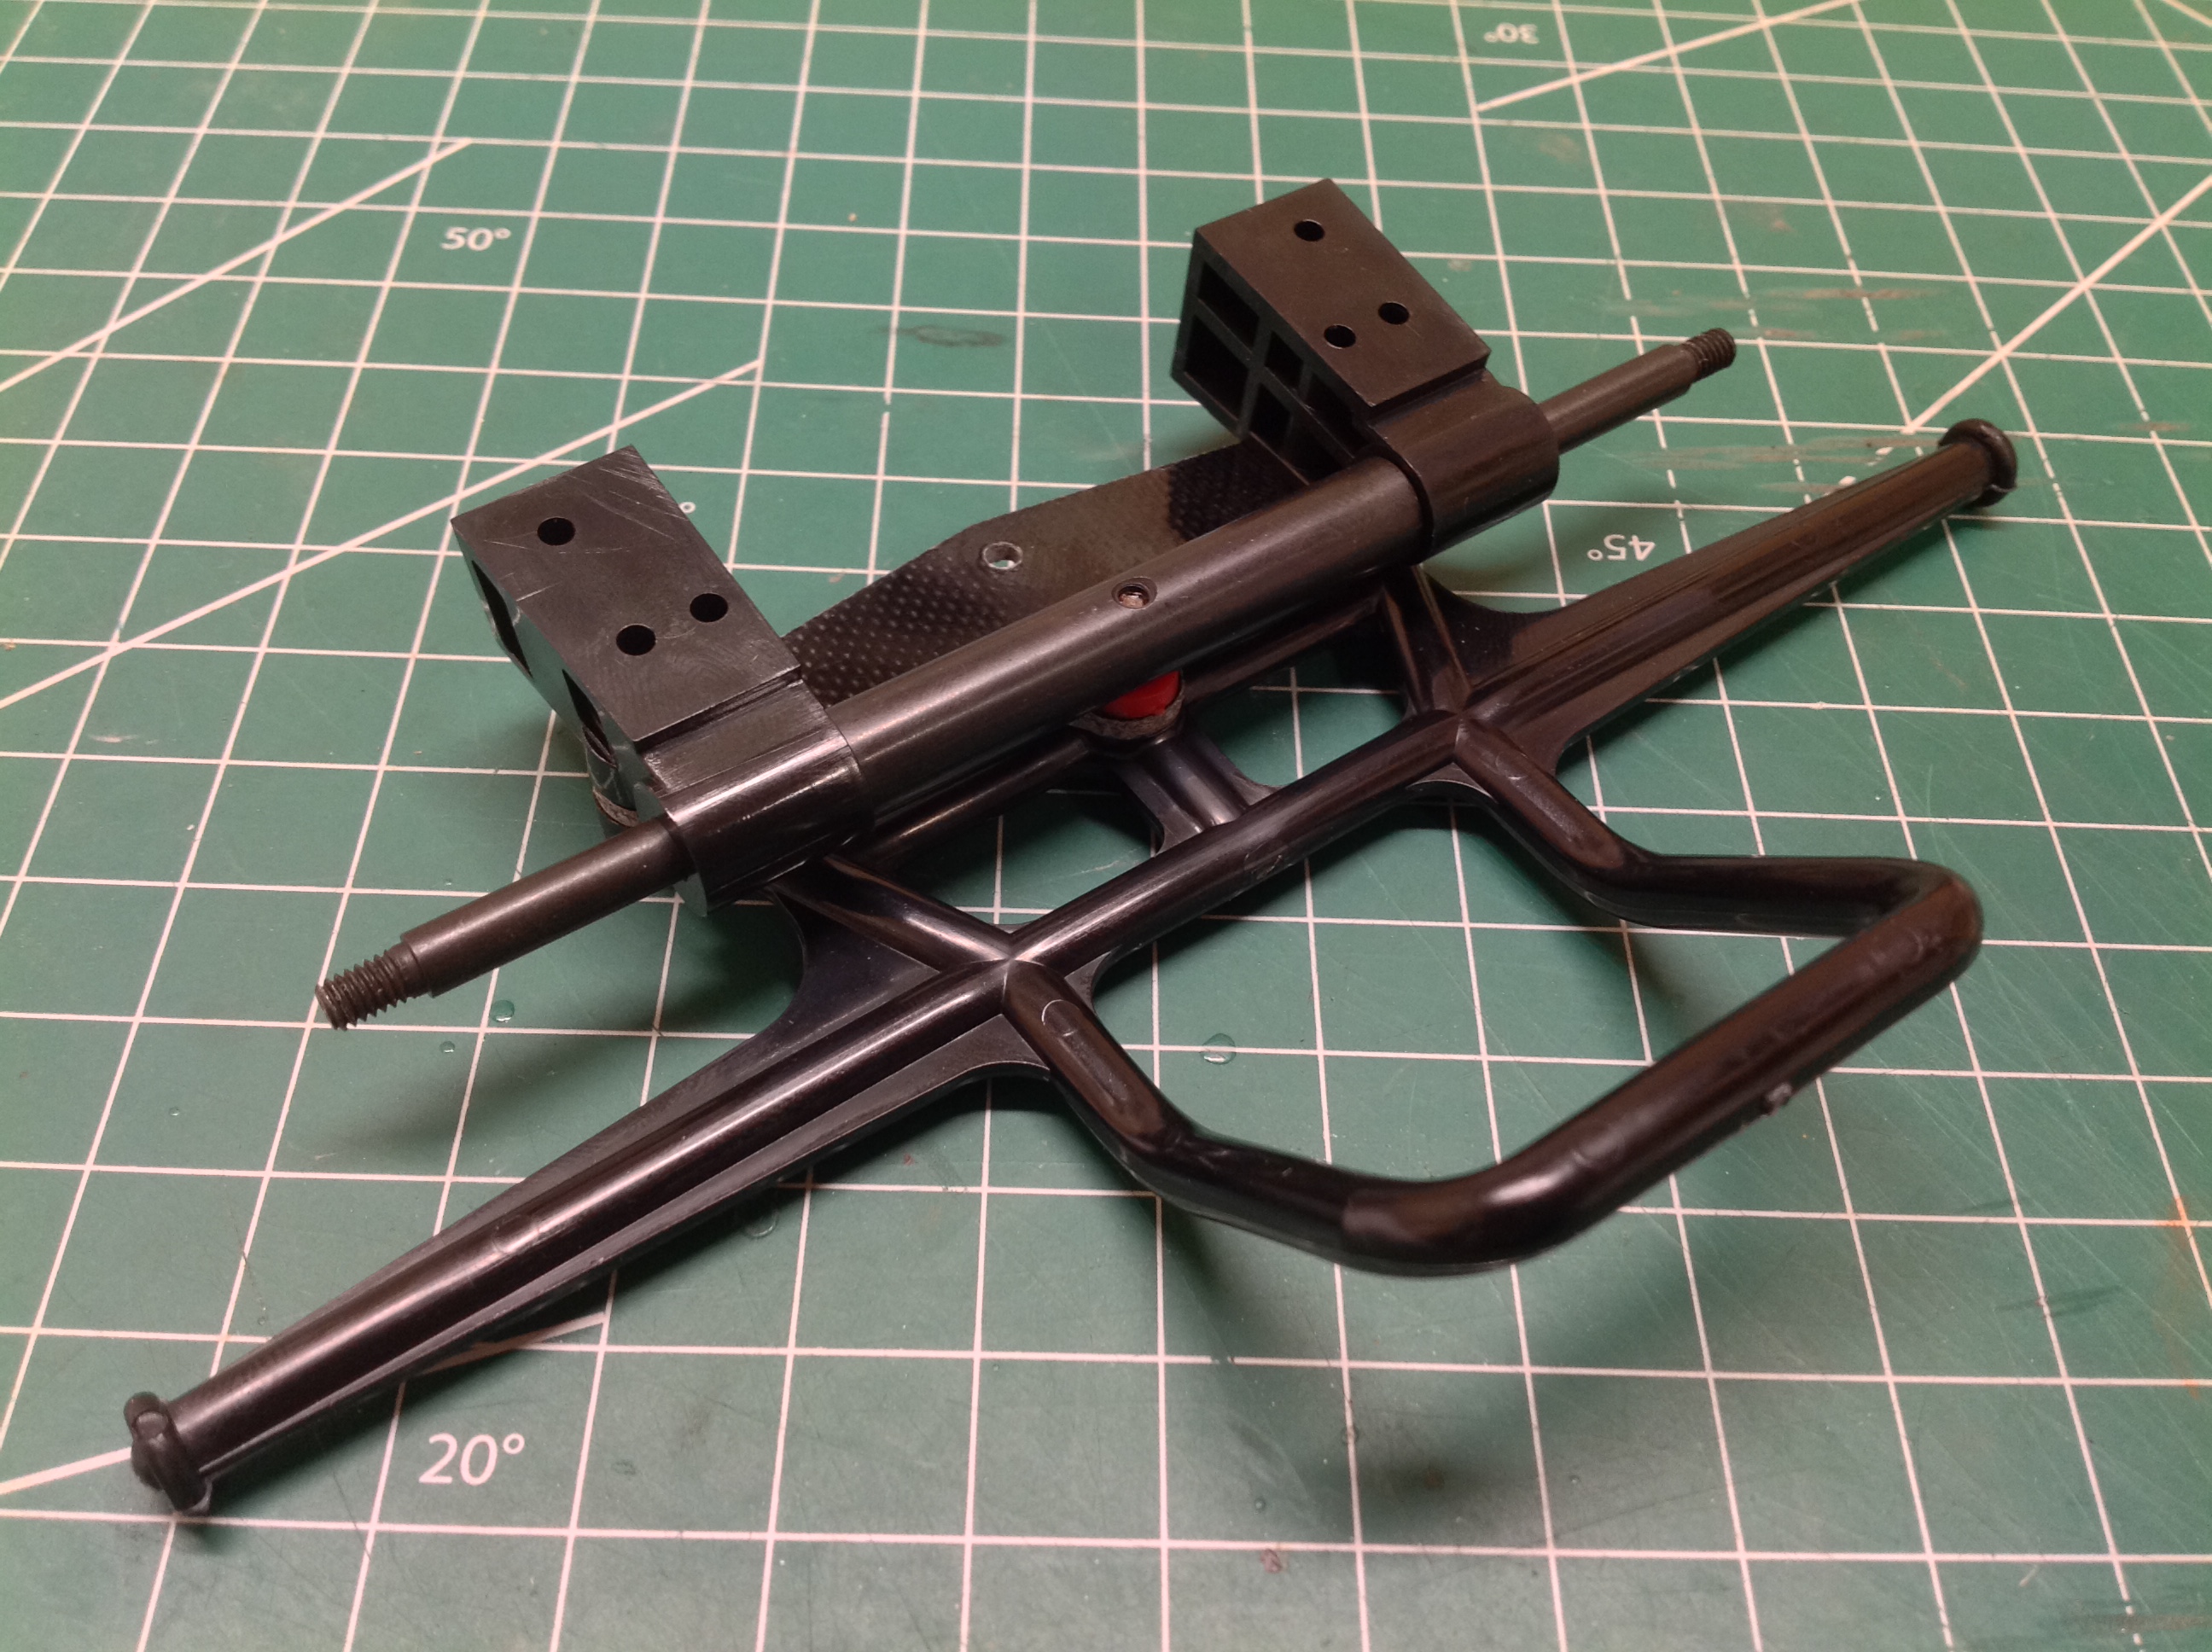
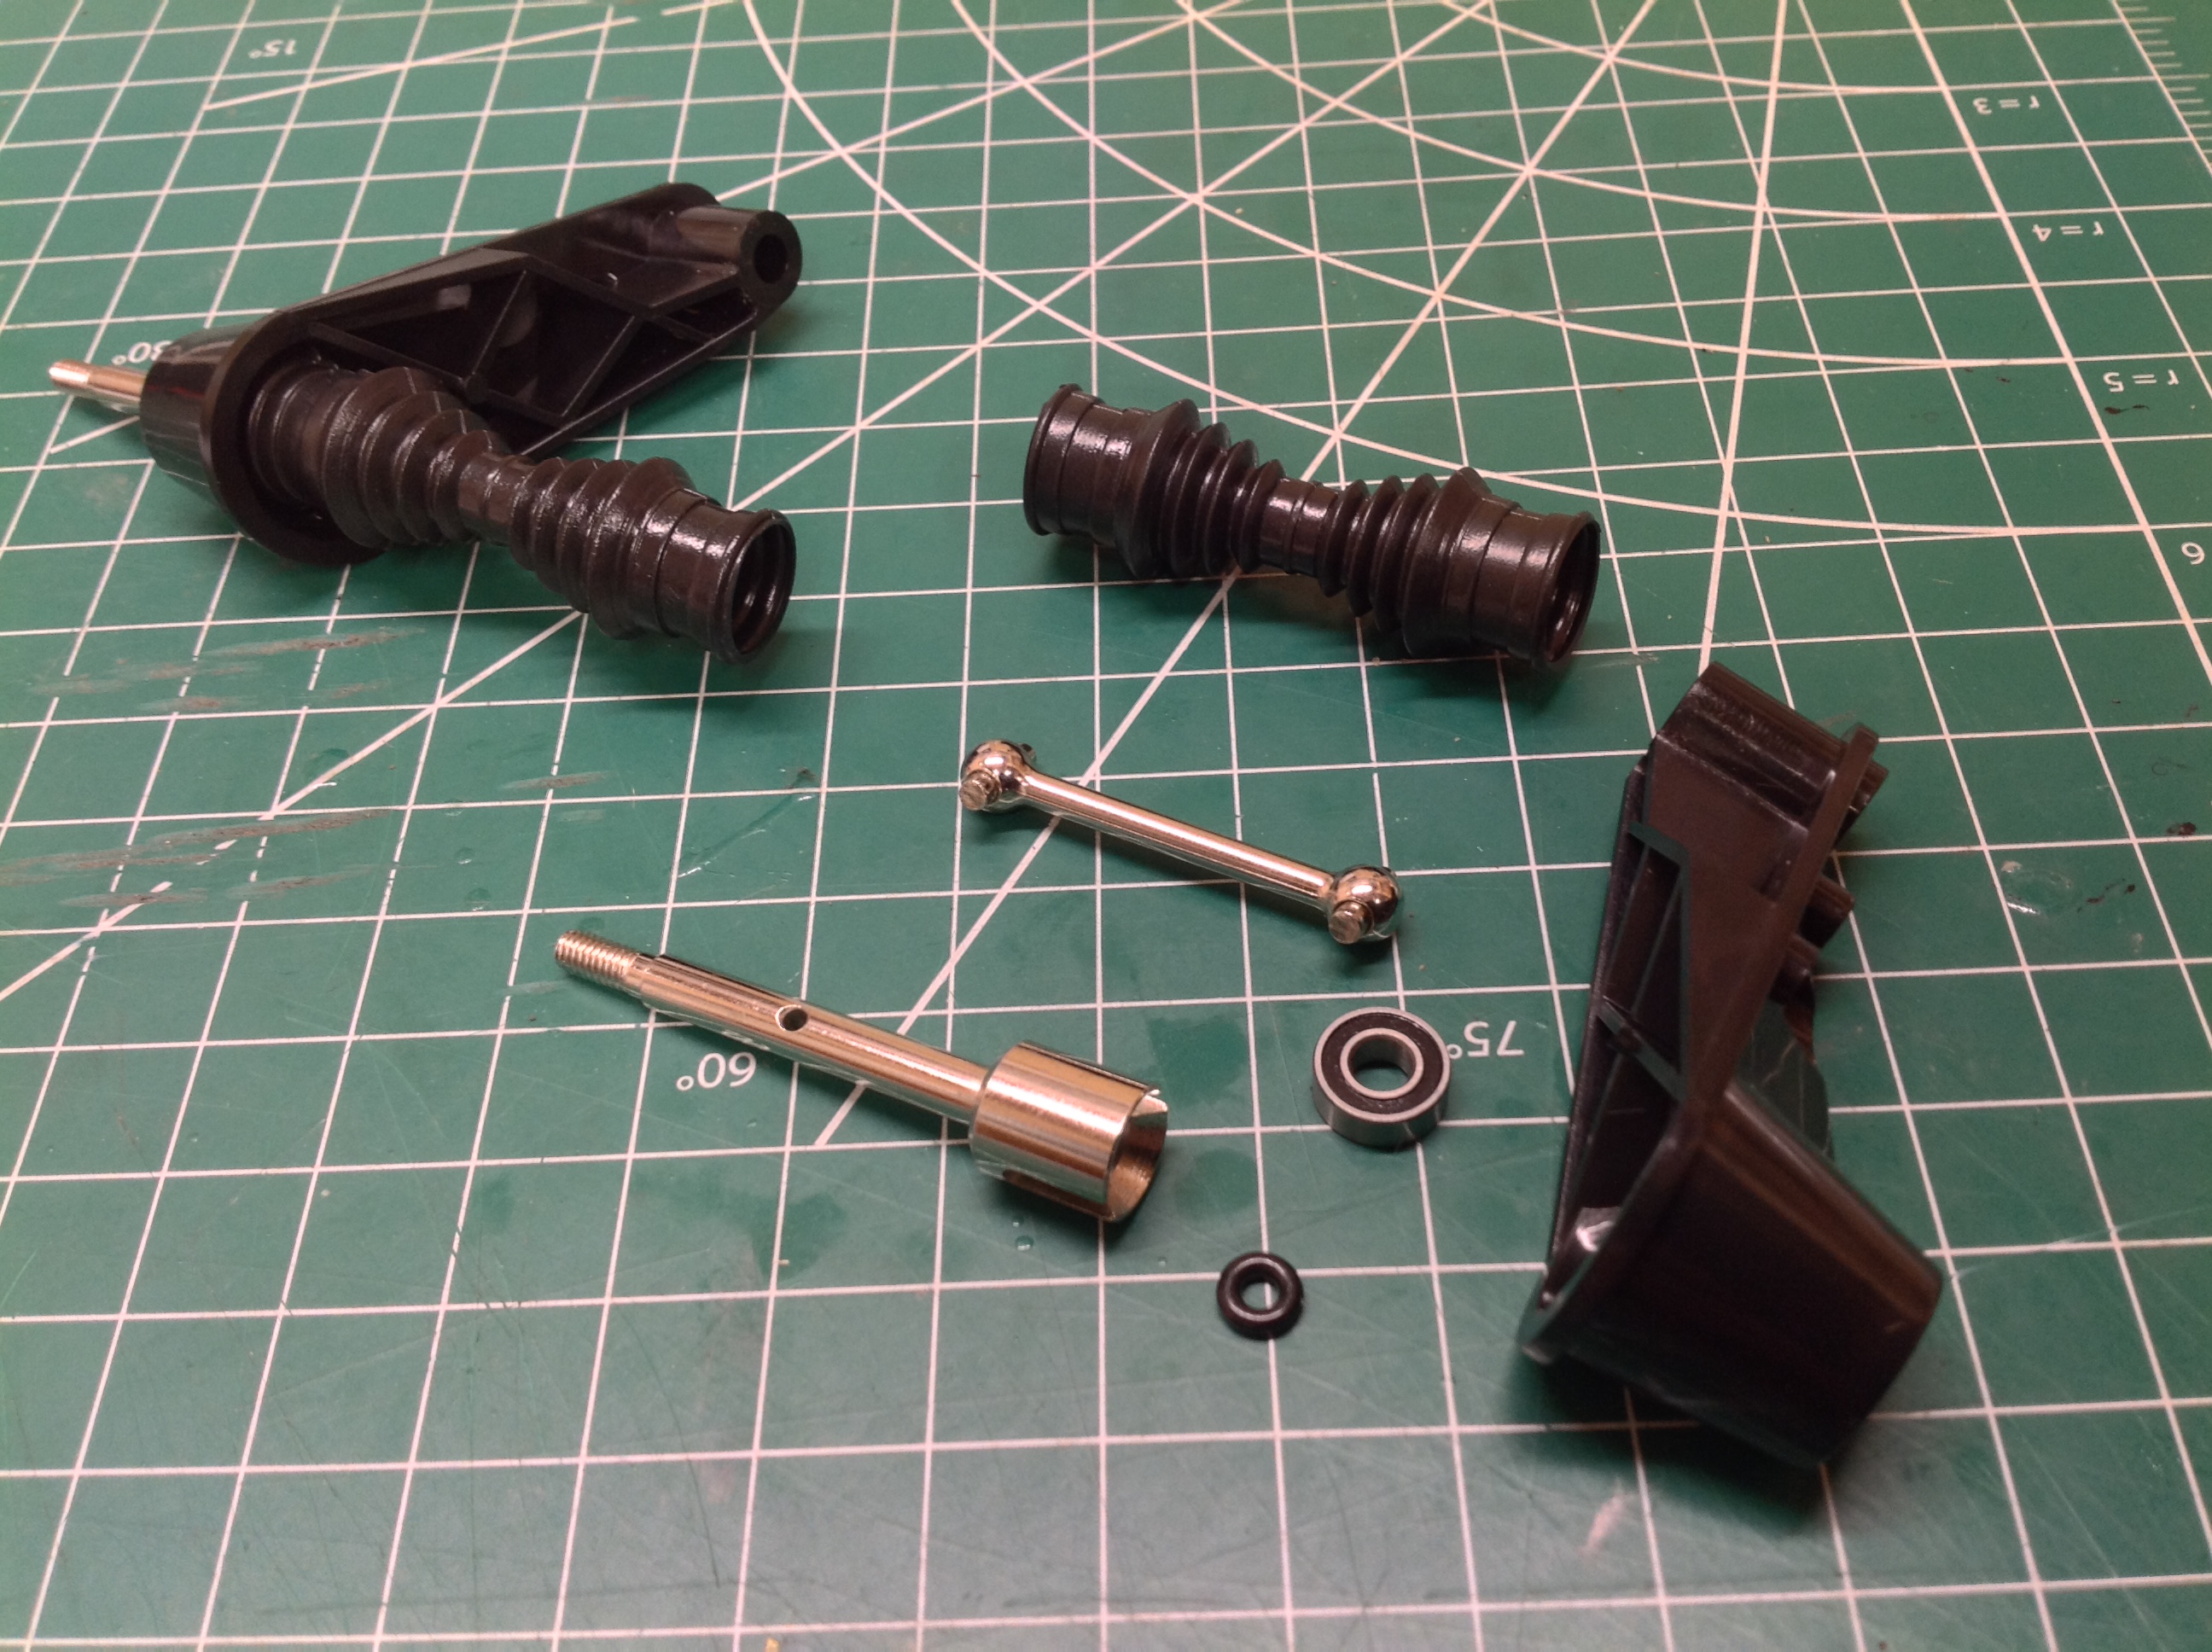
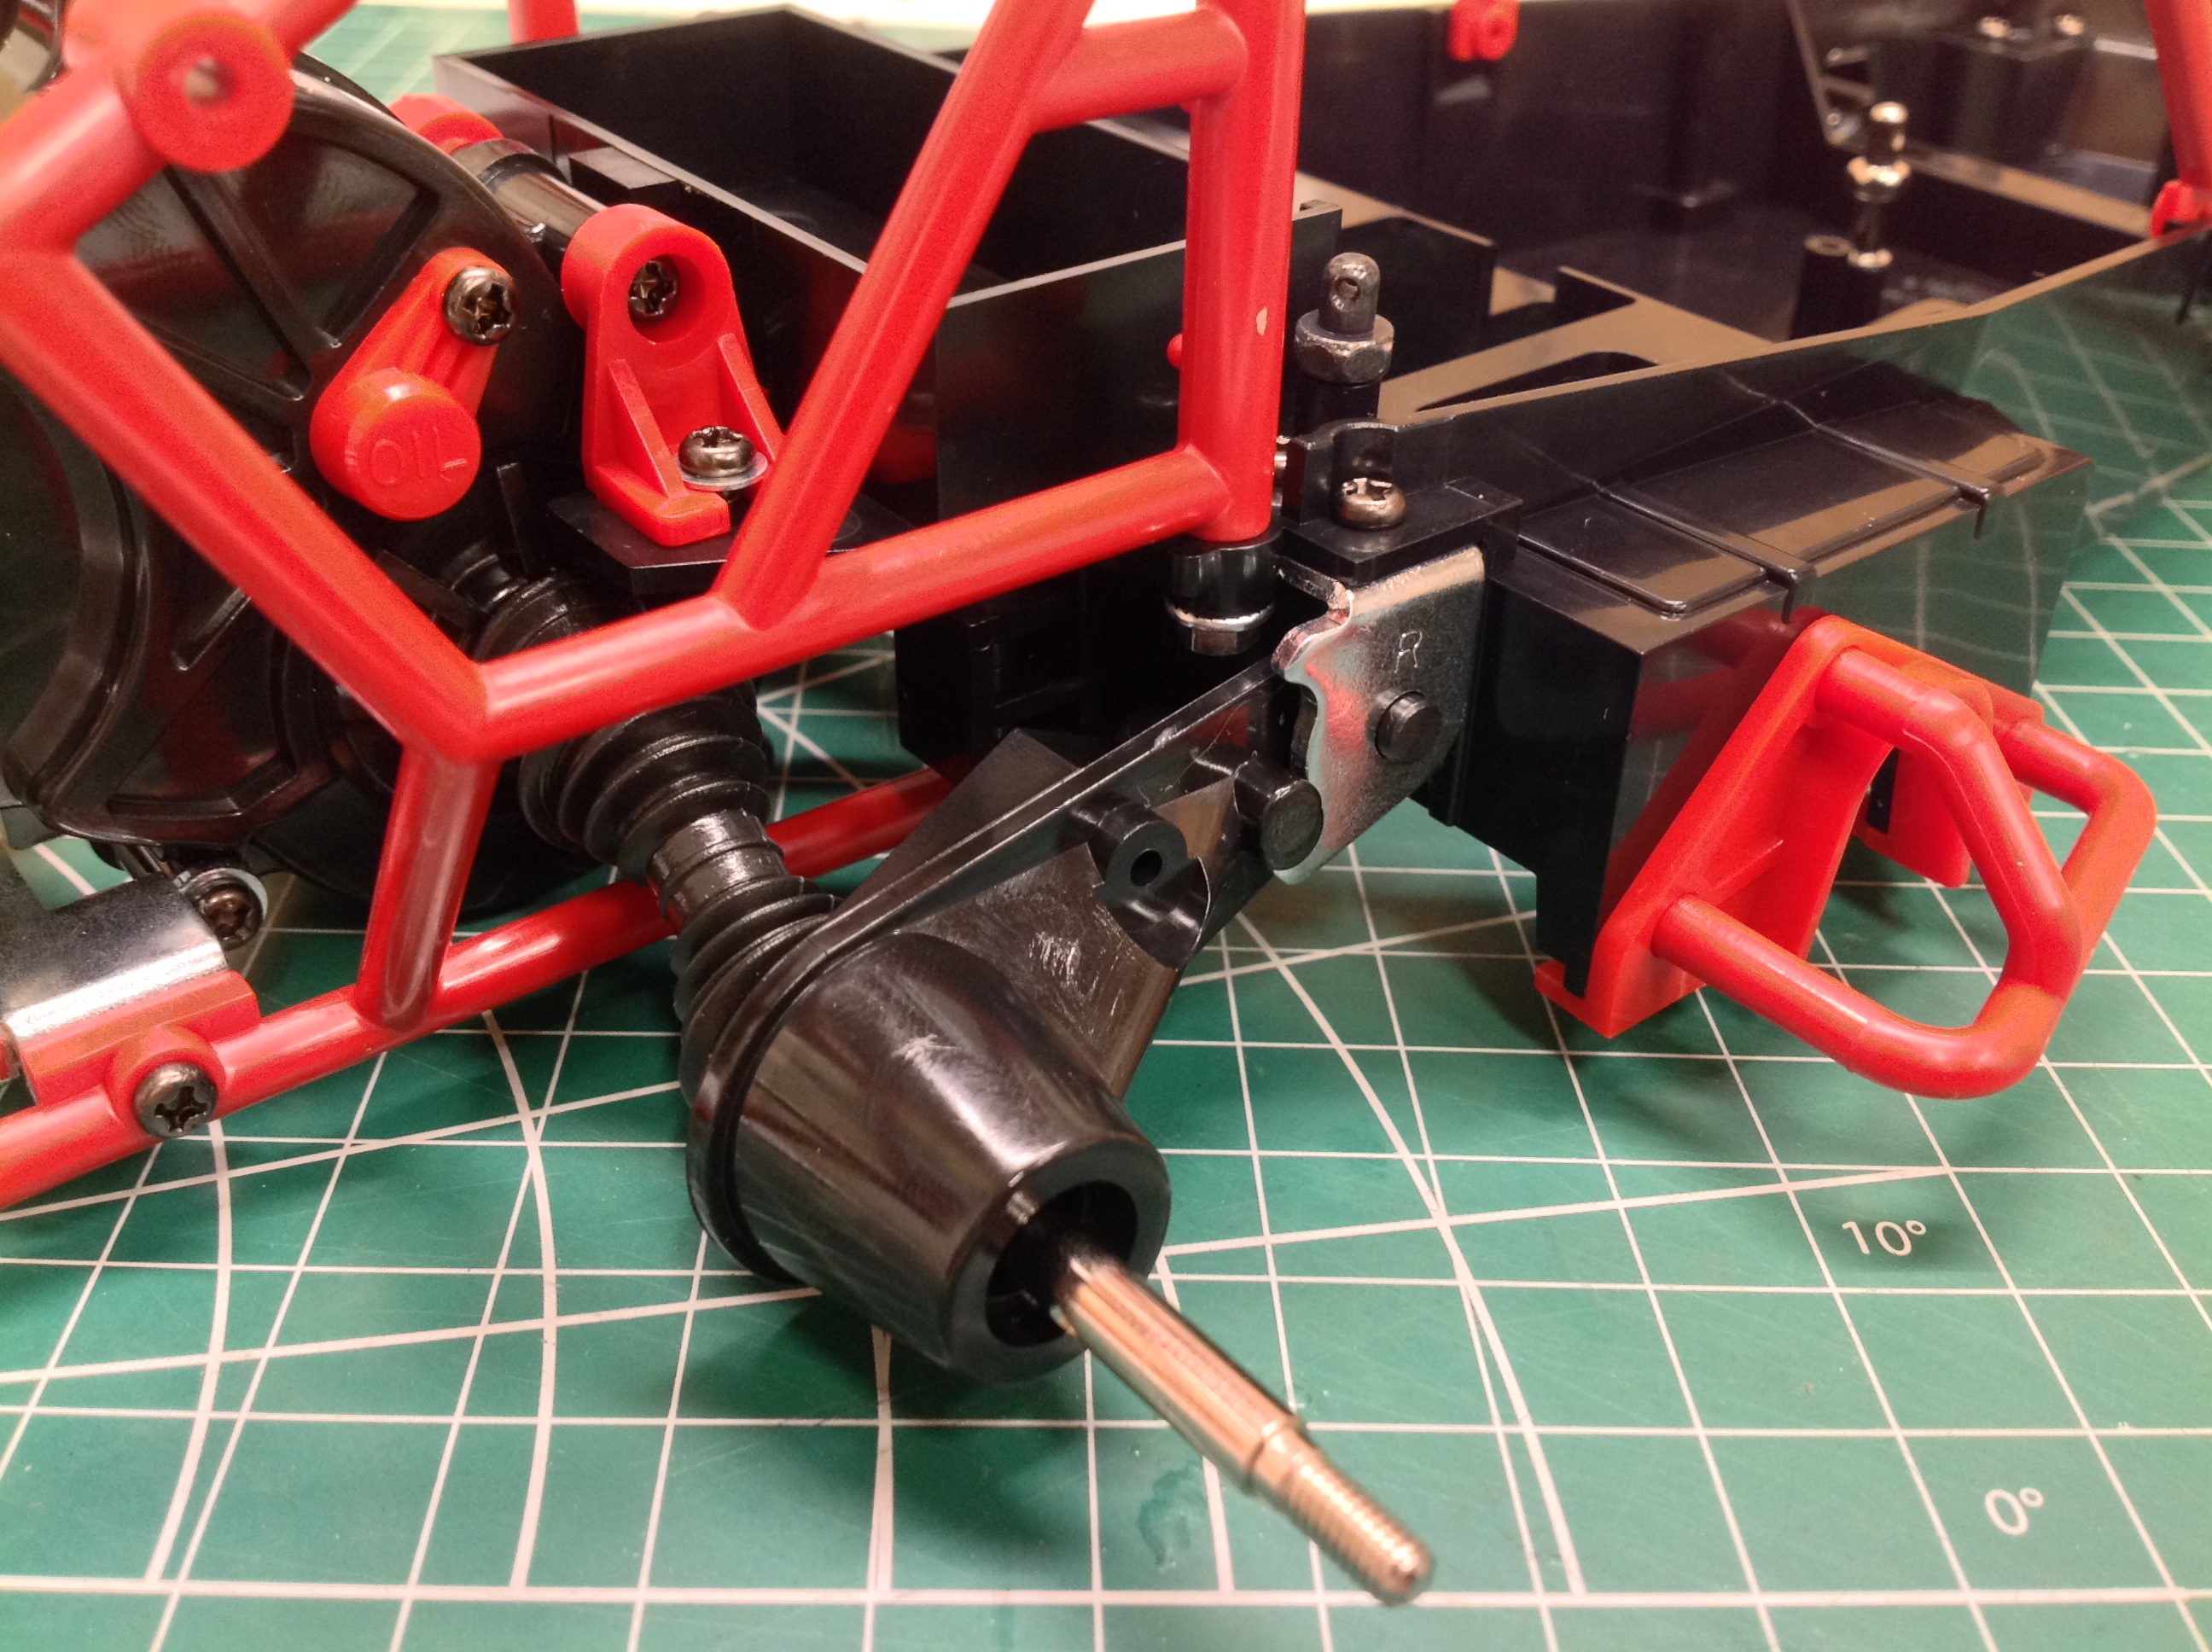
Now I'll install the axles. The original Wild One used an axle
with crowned hexes on the ends. The hex transmitted torque and the
crowning allowed angular misalignment with suspension travel. The
newer version uses simpler and stronger dogbones as shown. The
original rubber boots are maintained to hide and protect the axles
though. The trailing arms are retained with metal clamps as
shown. You can see the "R" stamped on the retainer on the right
hand side. Note how long the protruding stub shafts are.
These go deep into the wheels and use a very thick hub. The hub
does not use a 12mm hex. Instead it has holes which mate with
protrusions on the wheels.
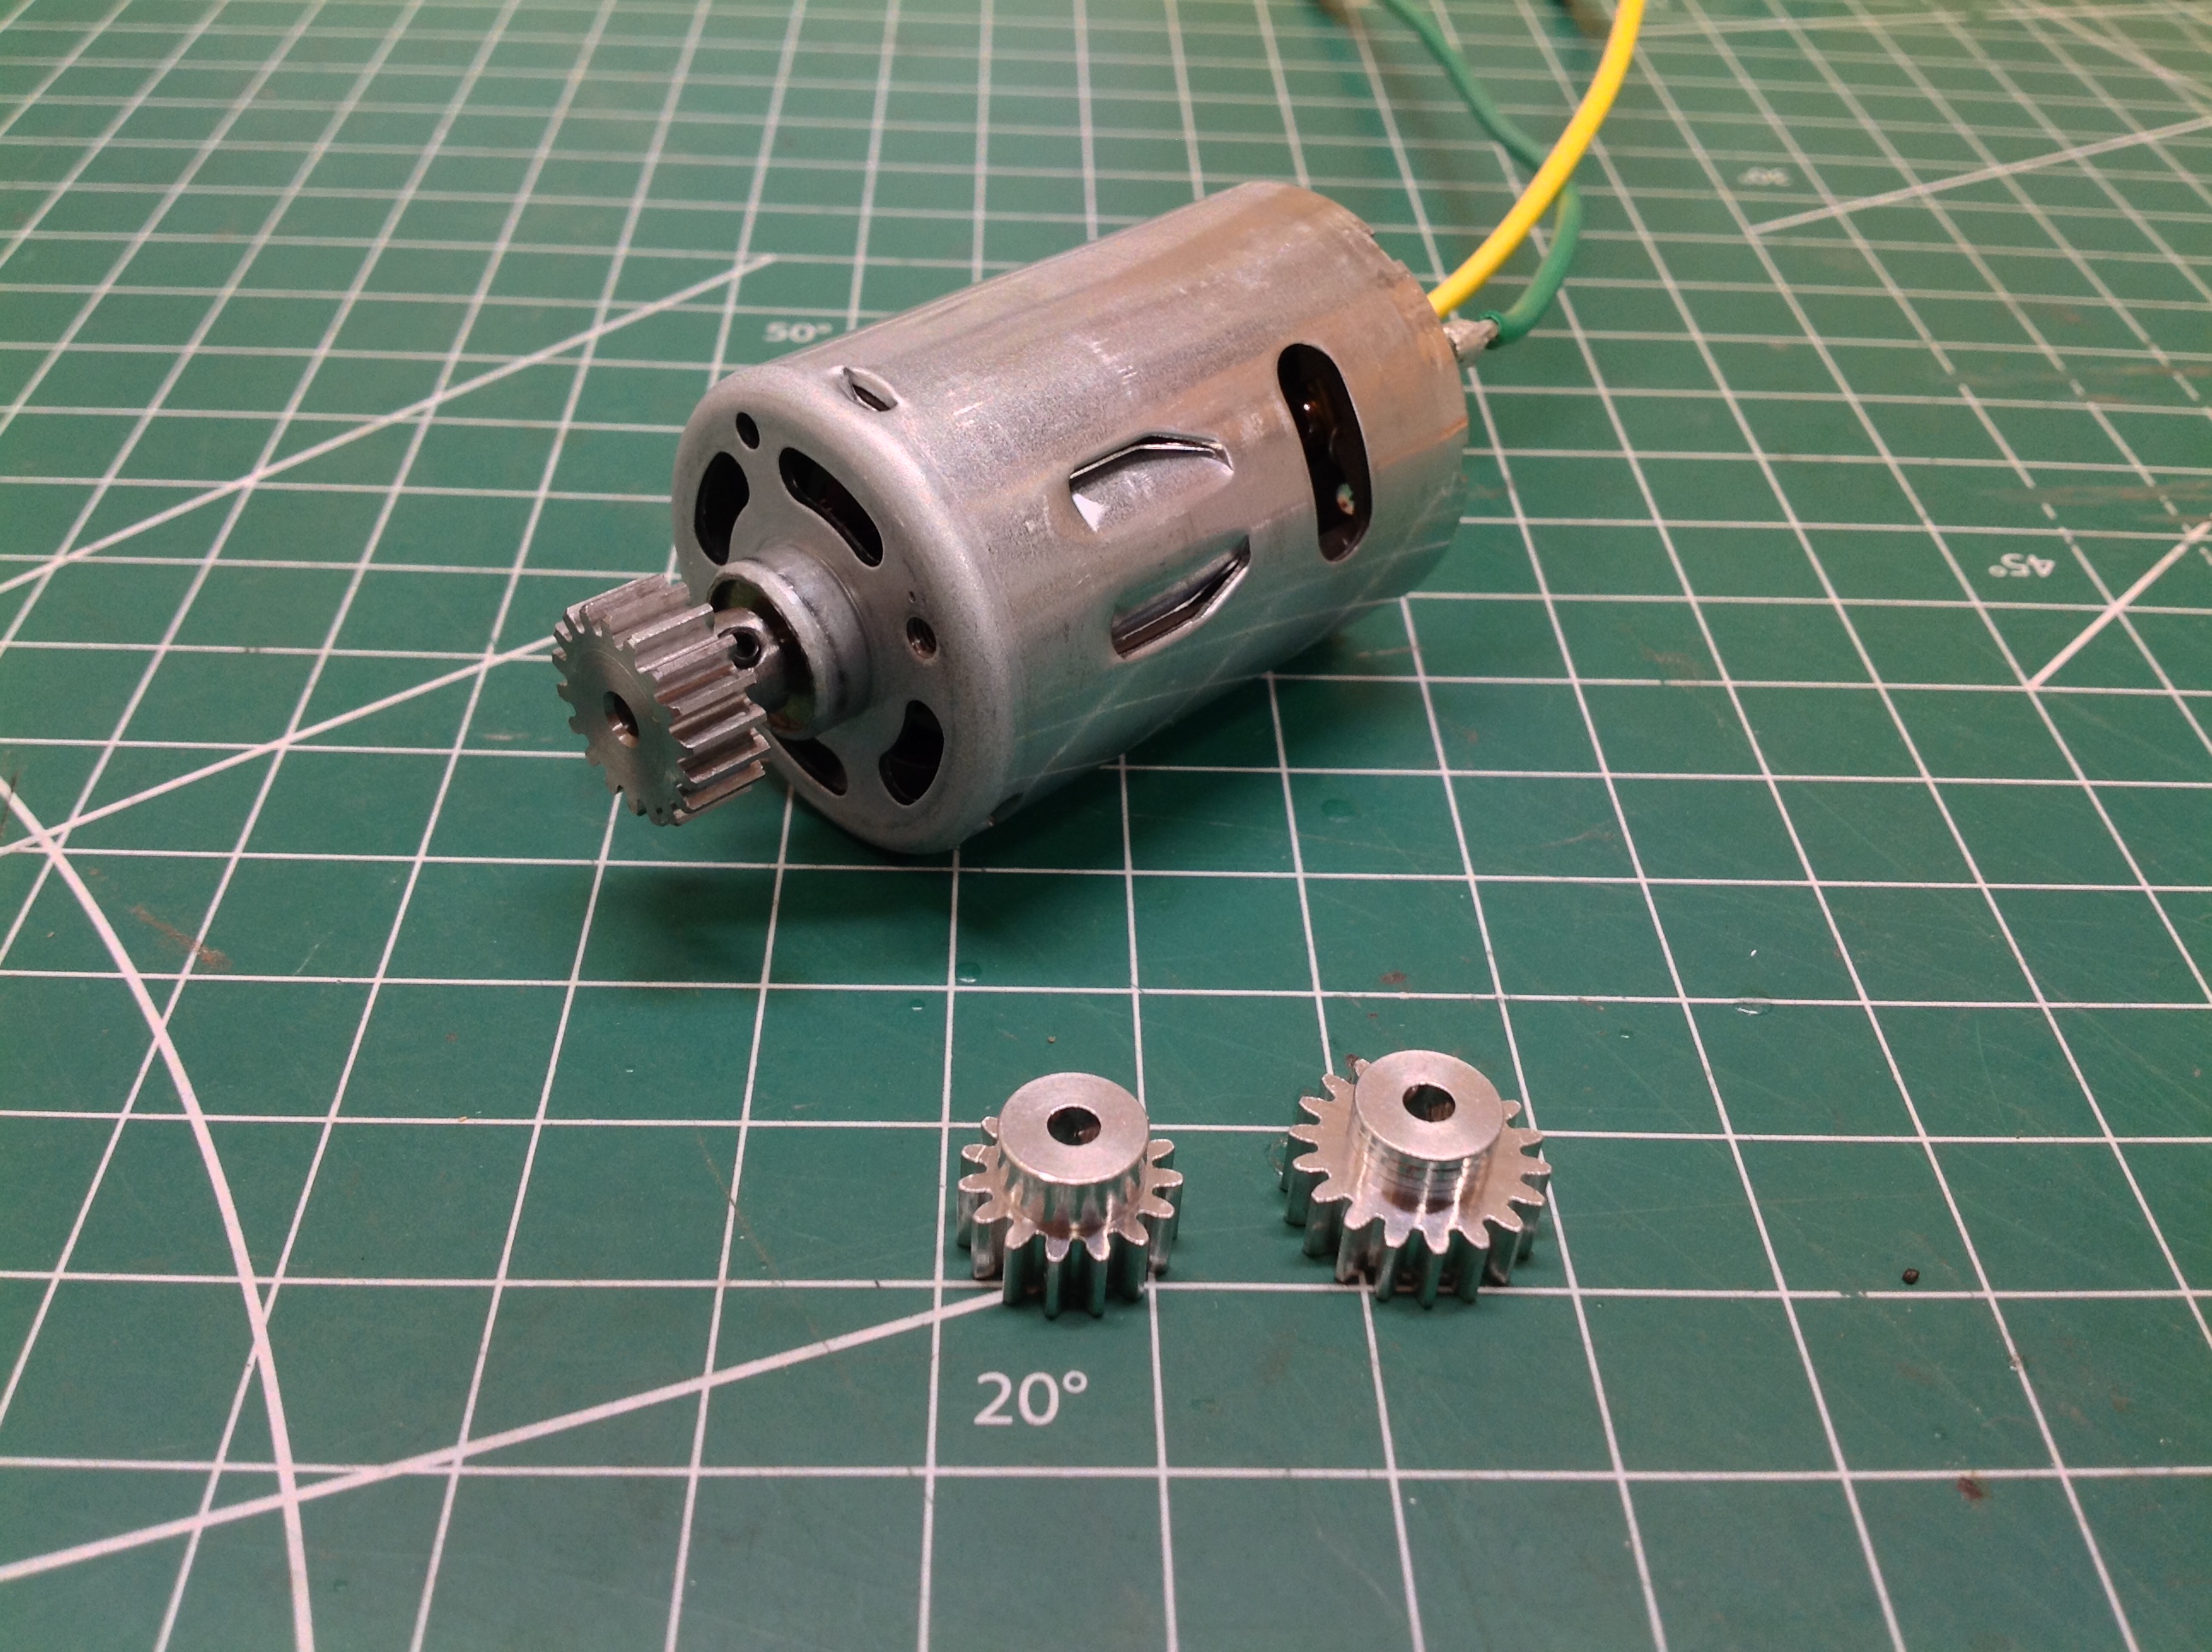
The kit comes with both a 15T and 18T aluminum pinion. I chose the
larger size for higher speed but replaced it with steel. You can
see the gear mesh through the access port on the right. The mesh
is not adjustable, instead there are two sets of holes, one for each
pinion size.
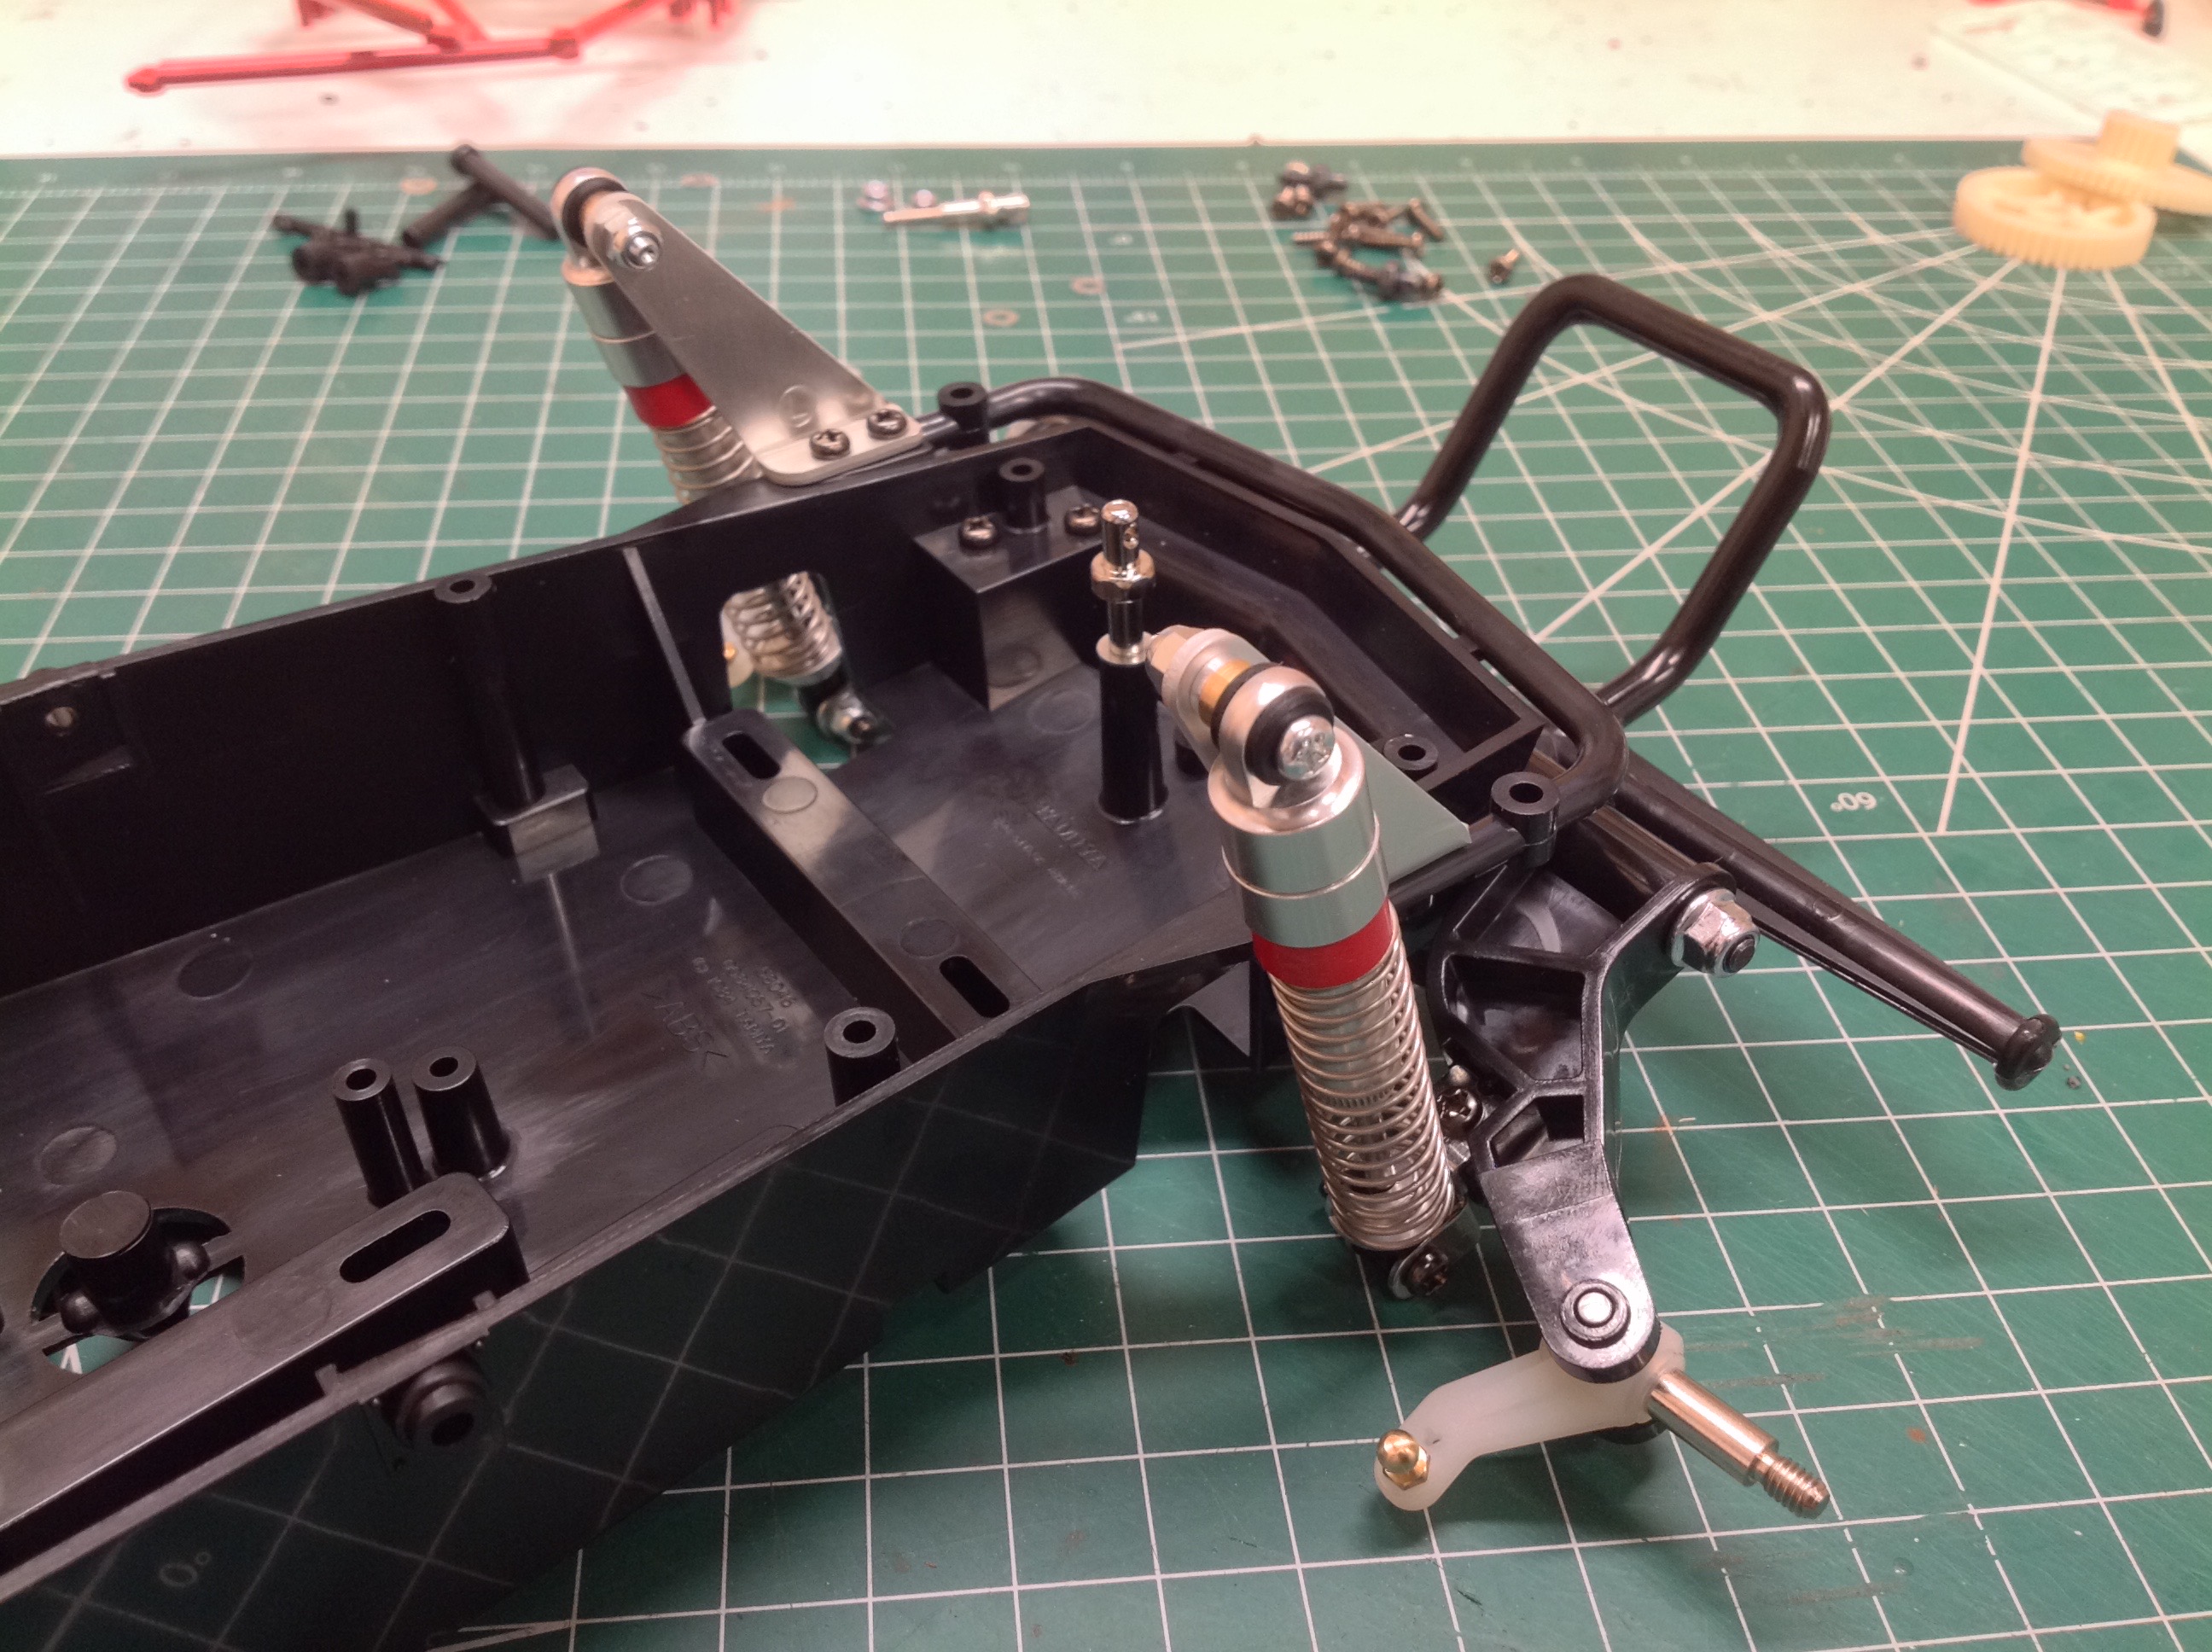
The assembly of the rear shocks is pretty much like the front although
they are shaped differently. Instead of the spring enclosing the
entire shock body, it only covers the rod and bottoms on the
cylinder. The rear shocks also use thicker yellow oil. They
attach to the rear trailing arms and cage as shown.
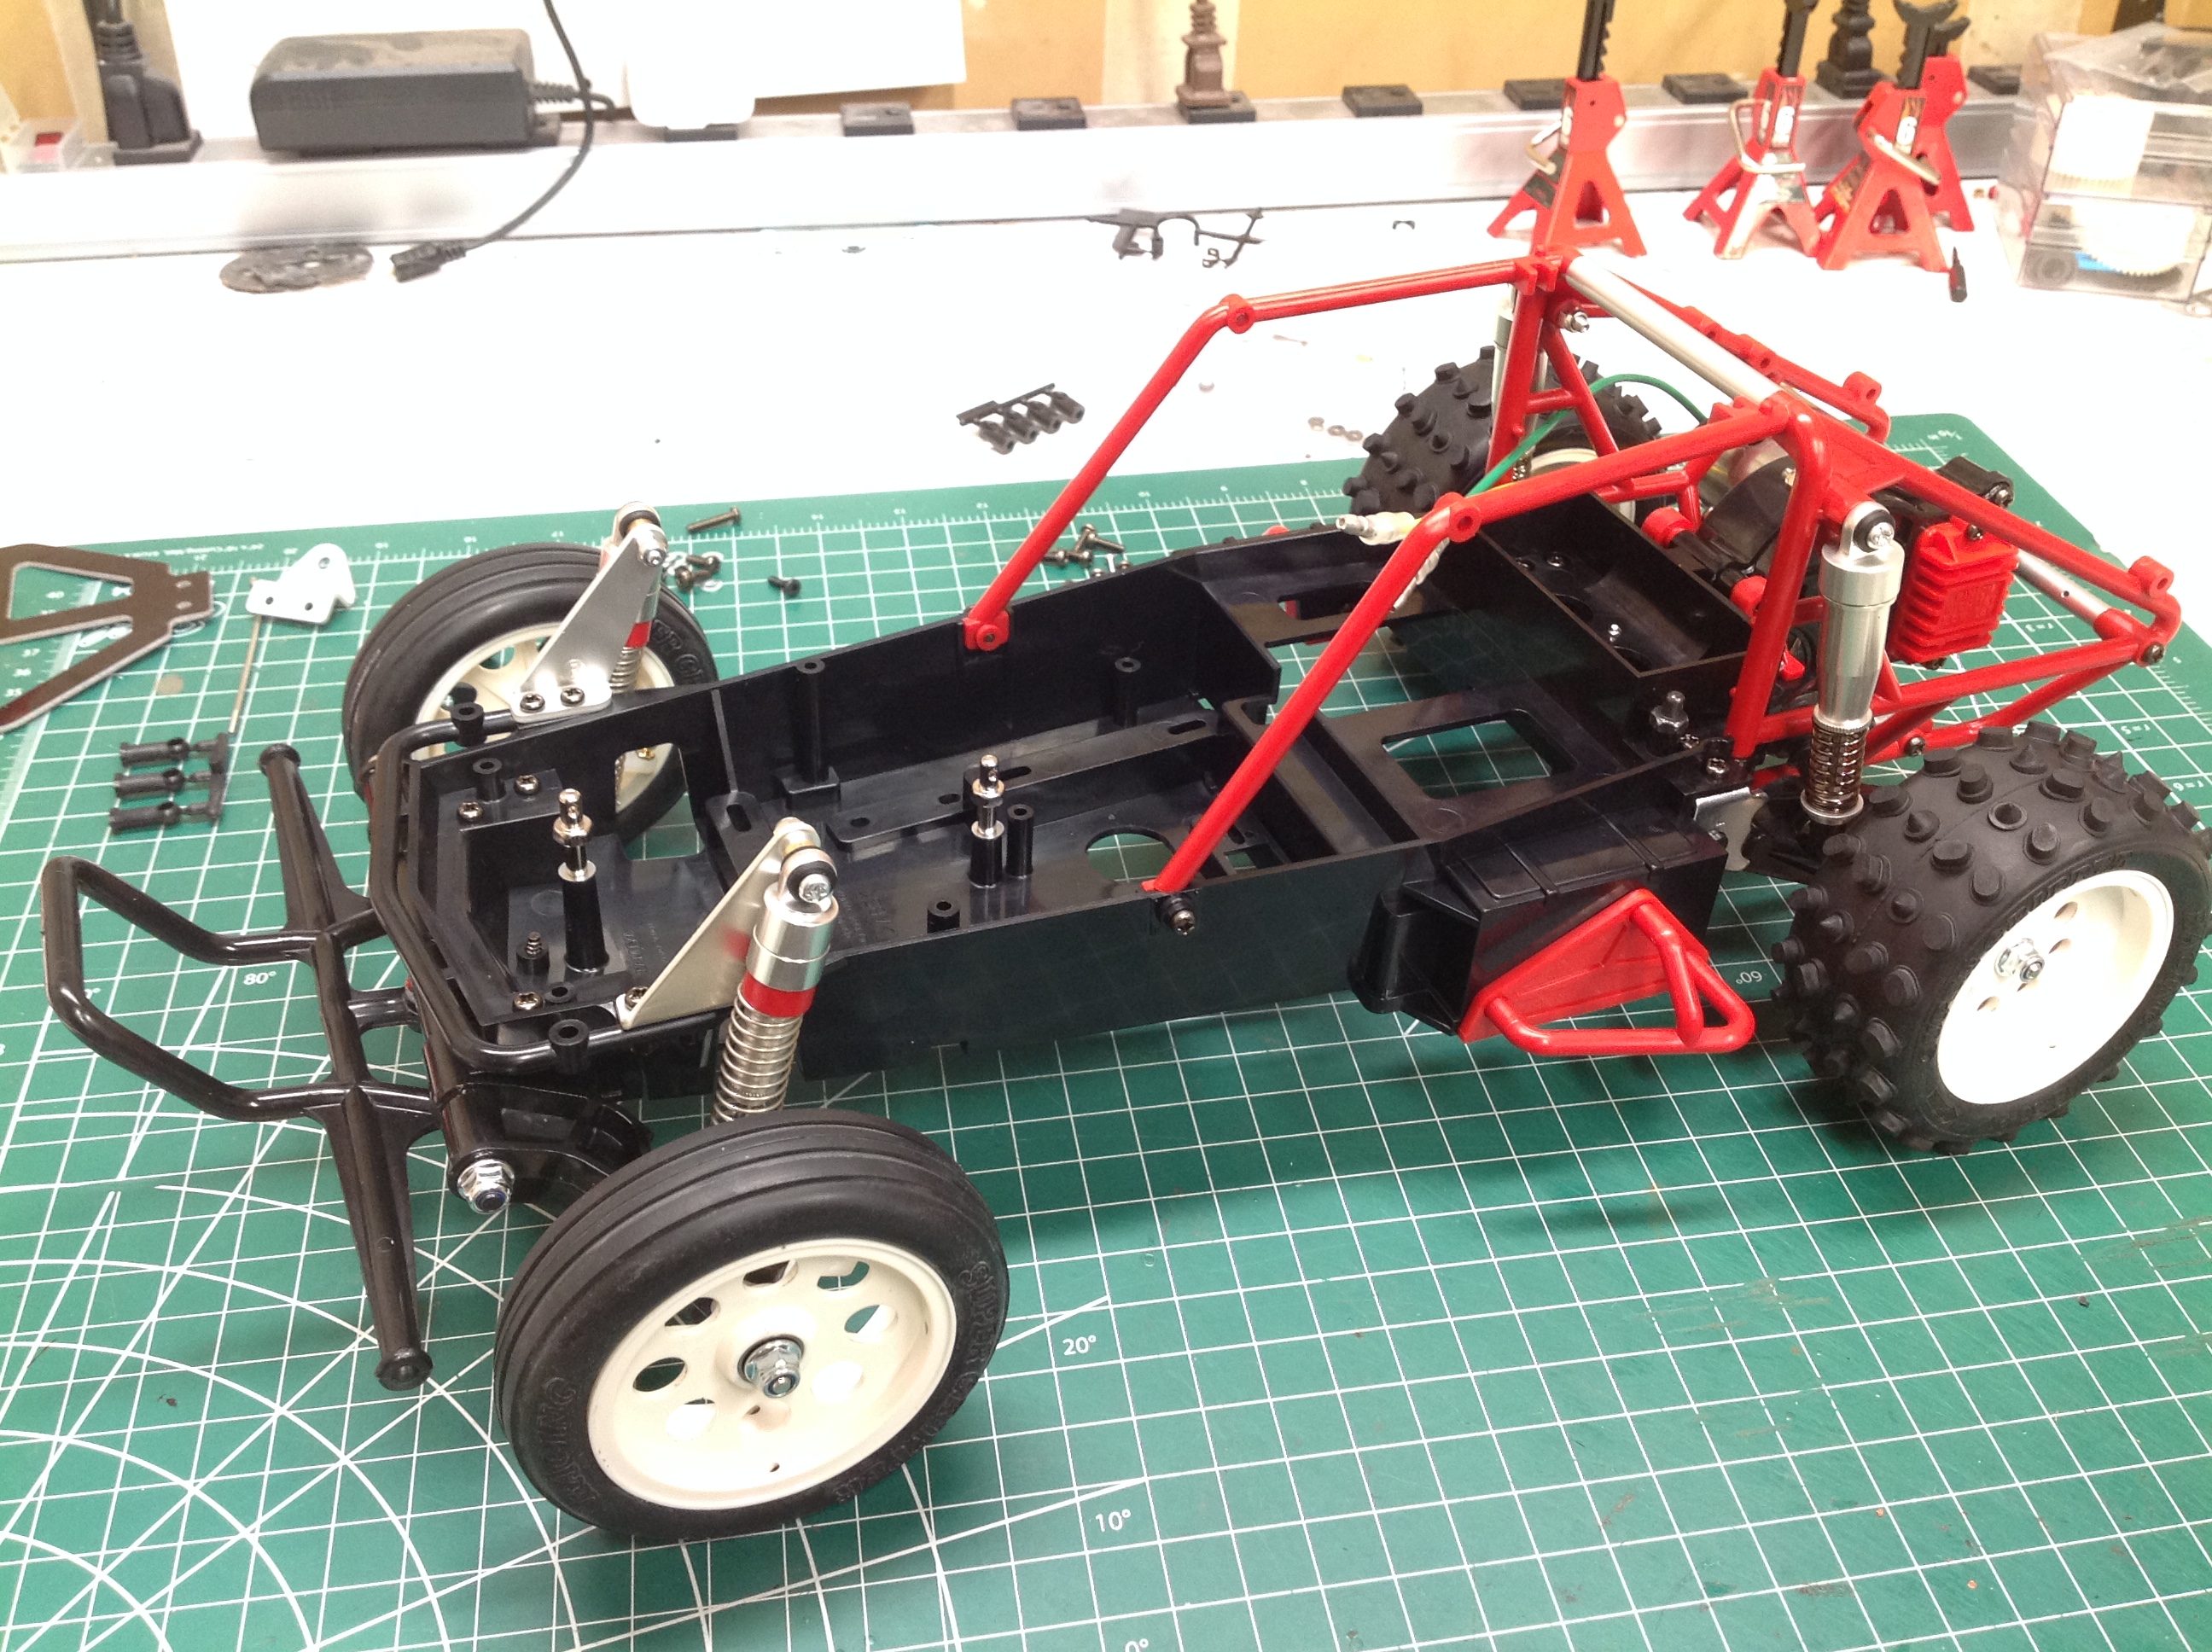
Now I can put the wheels and tires on and complete the rolling
chassis. There is room up front for two servos: one to control the
steering and one for an old mechanical speed controller. I only
needed the steering servo which left me with plenty of extra
space. The front wheels house bearings and rotate freely.
The rear wheels attach to deep hubs which are specific to this vehicle
type. The battery door is also unique and not shared with the Fast
Attach Vehicle. The FAV uses a solid plastic door but the Wild
One uses this skeletal FRP plate. The original car was designed to
use a hump pack, but the newer version uses a standard stick pack.
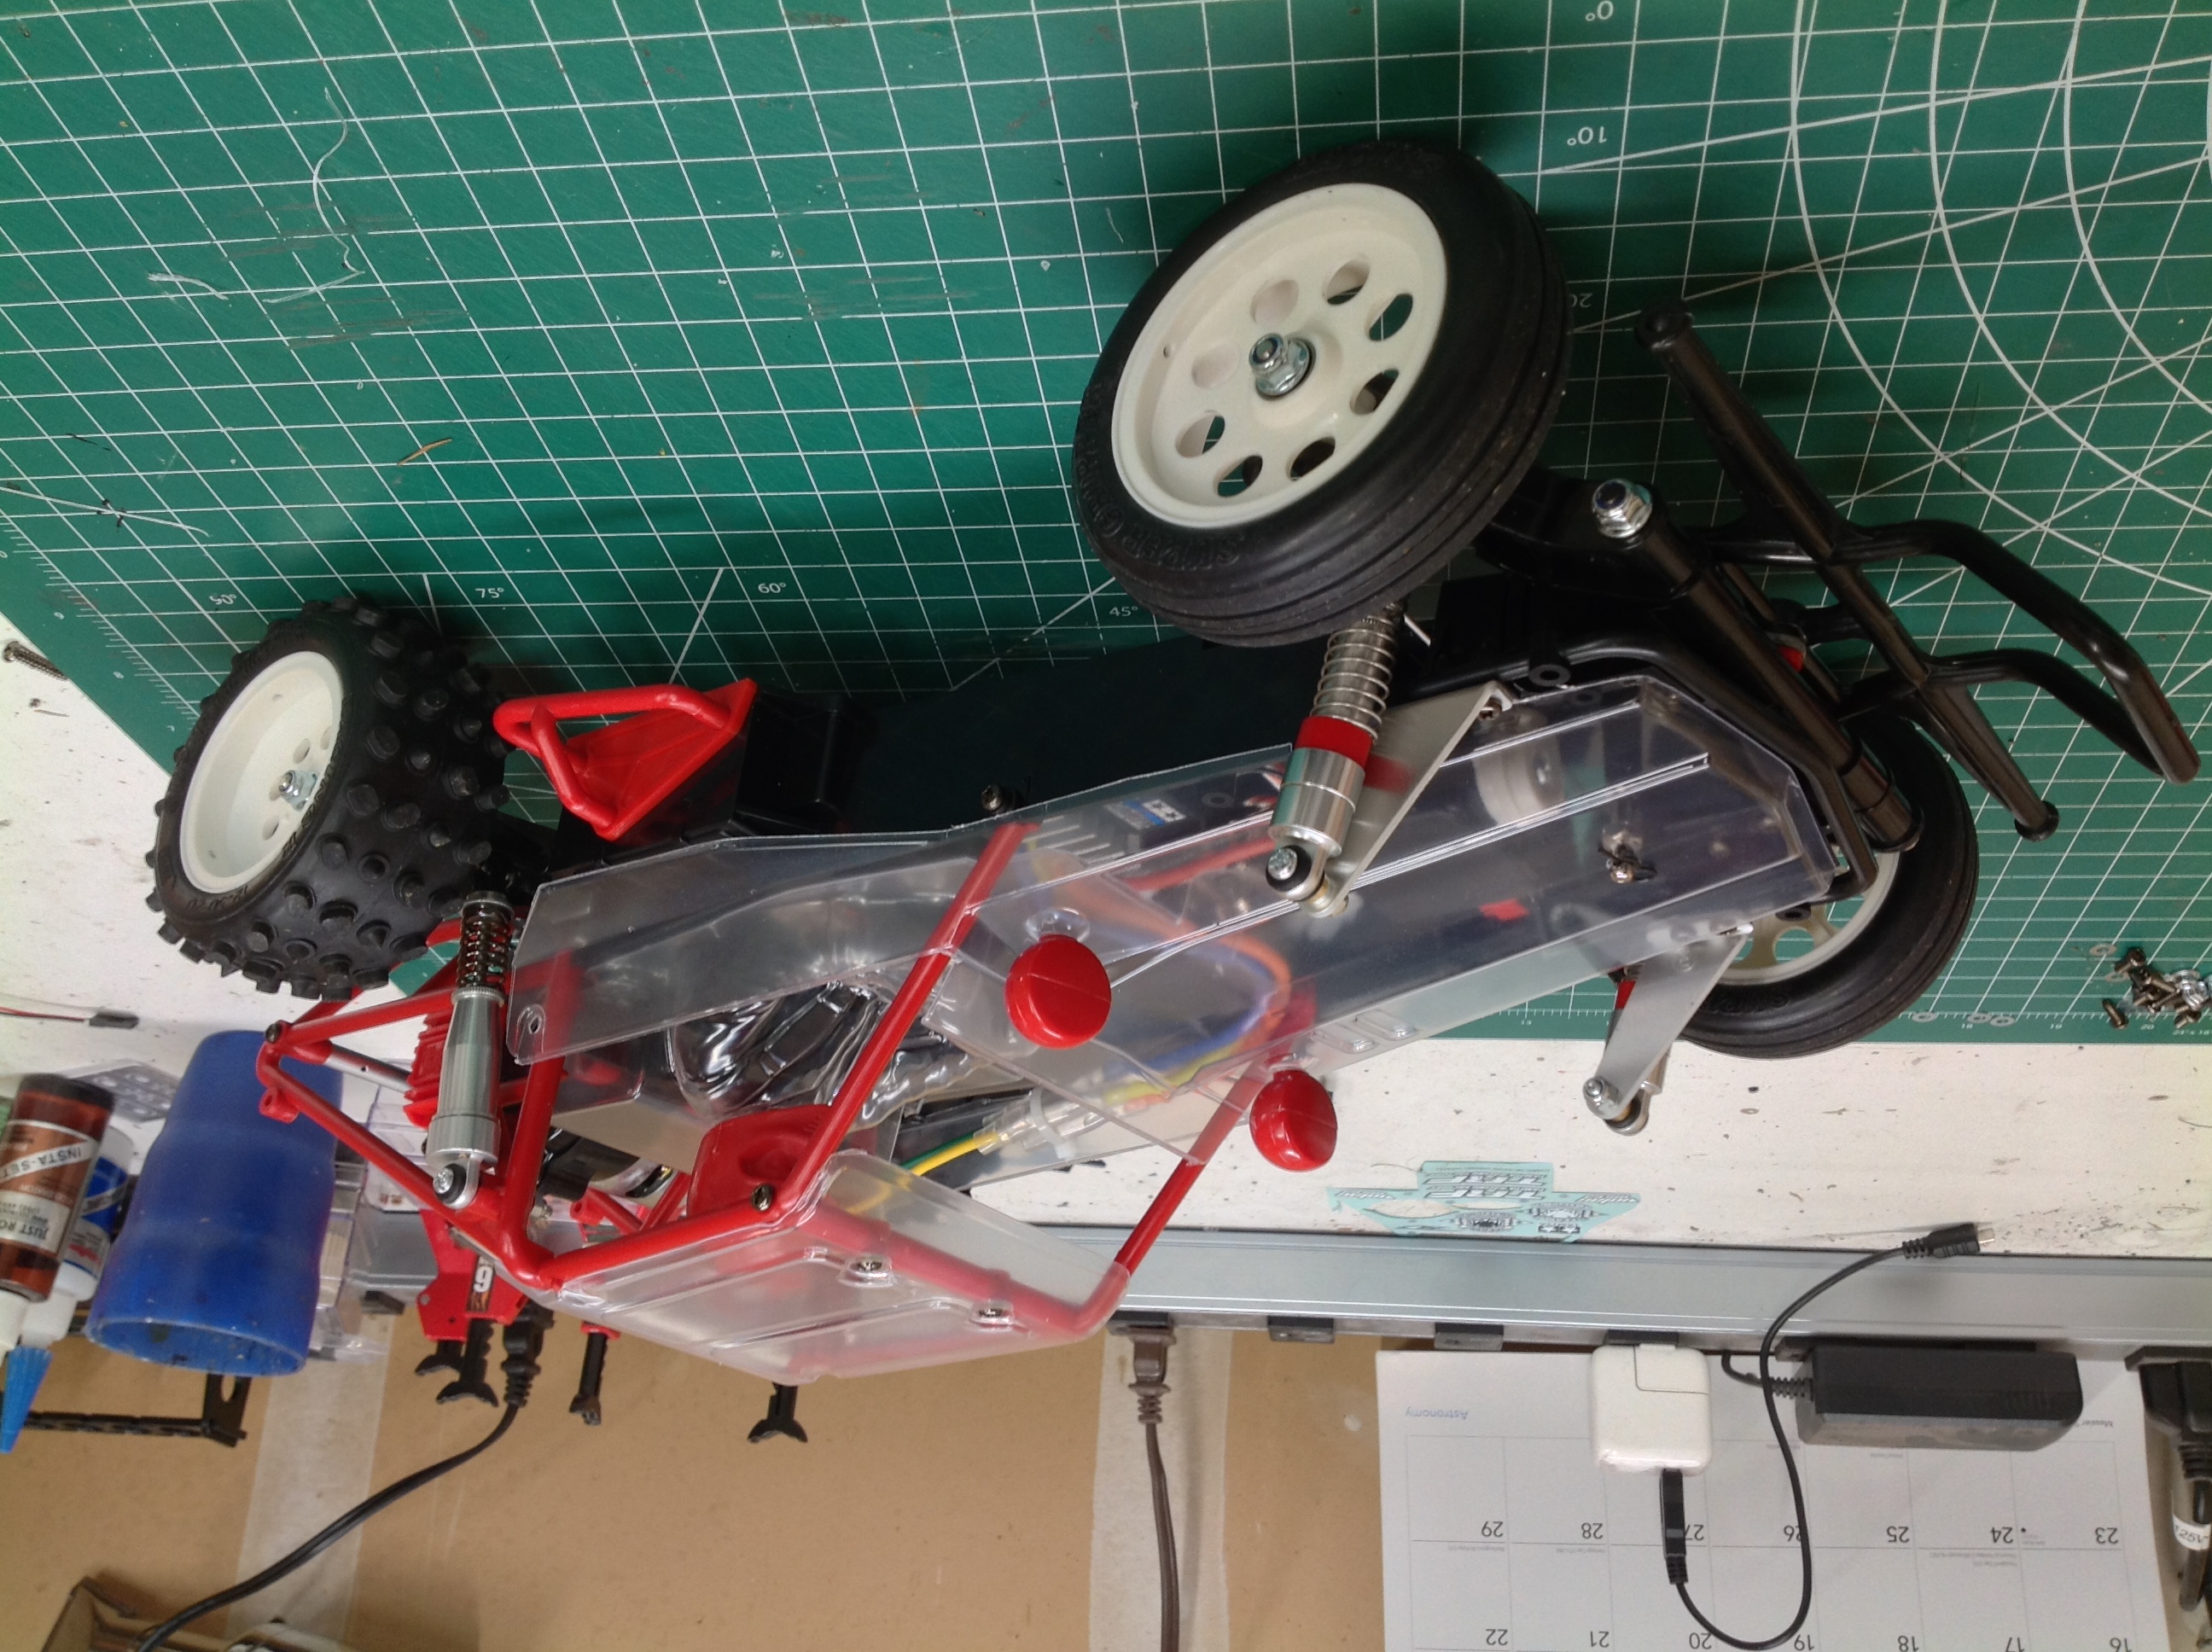
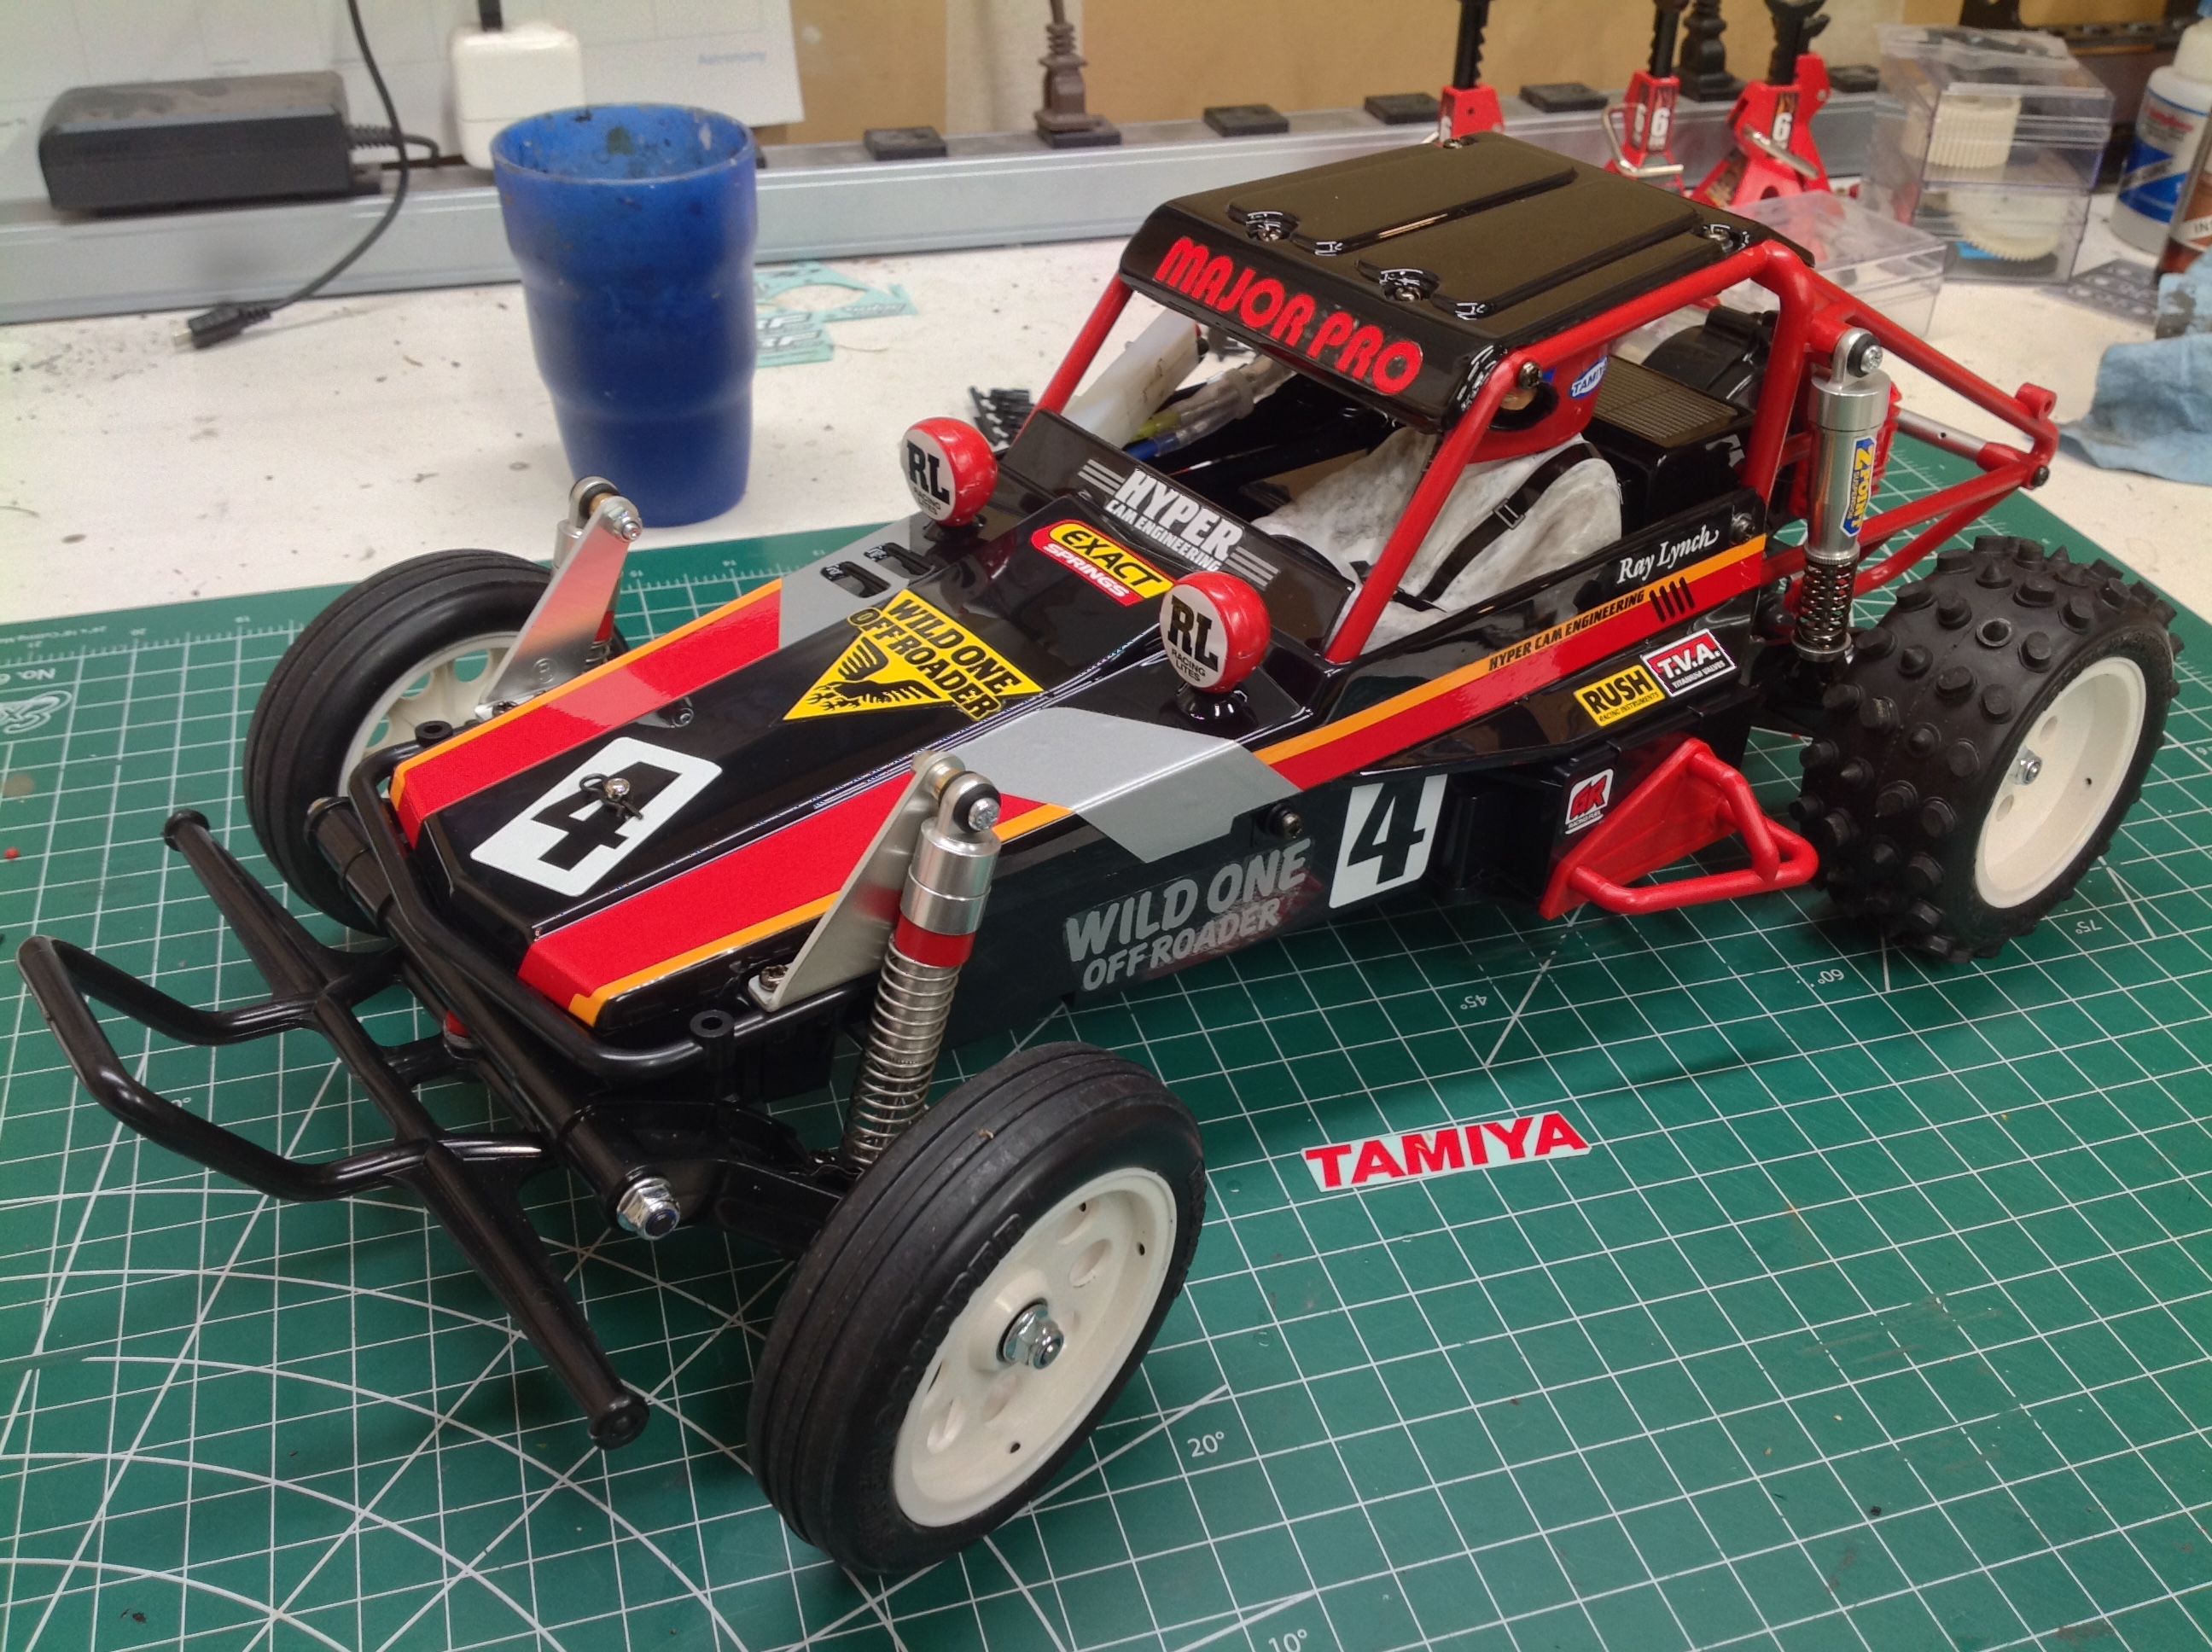
The polycarbonate body comes it three pieces: the main cover, the
driver, and the roof. The cover is mostly a lid for the front of
the tub but also wraps around the driver's station and locks to the
B-pillars. The roof screws to the cross bars. The driver is
really part of the body as well because he covers the middle of the
chassis and the battery compartment for the receiver pack. If you
are not using a receiver pack, this is just empty space. The body
is just painted standard black and then decorated with stickers.
Putting stickers on the rear aluminum dampers was not a great
idea. I don't expect them to stay there long.
©2020 Eric Albrecht