Tamiya Flakpanzer Gepard Project
Page 1: Unboxing
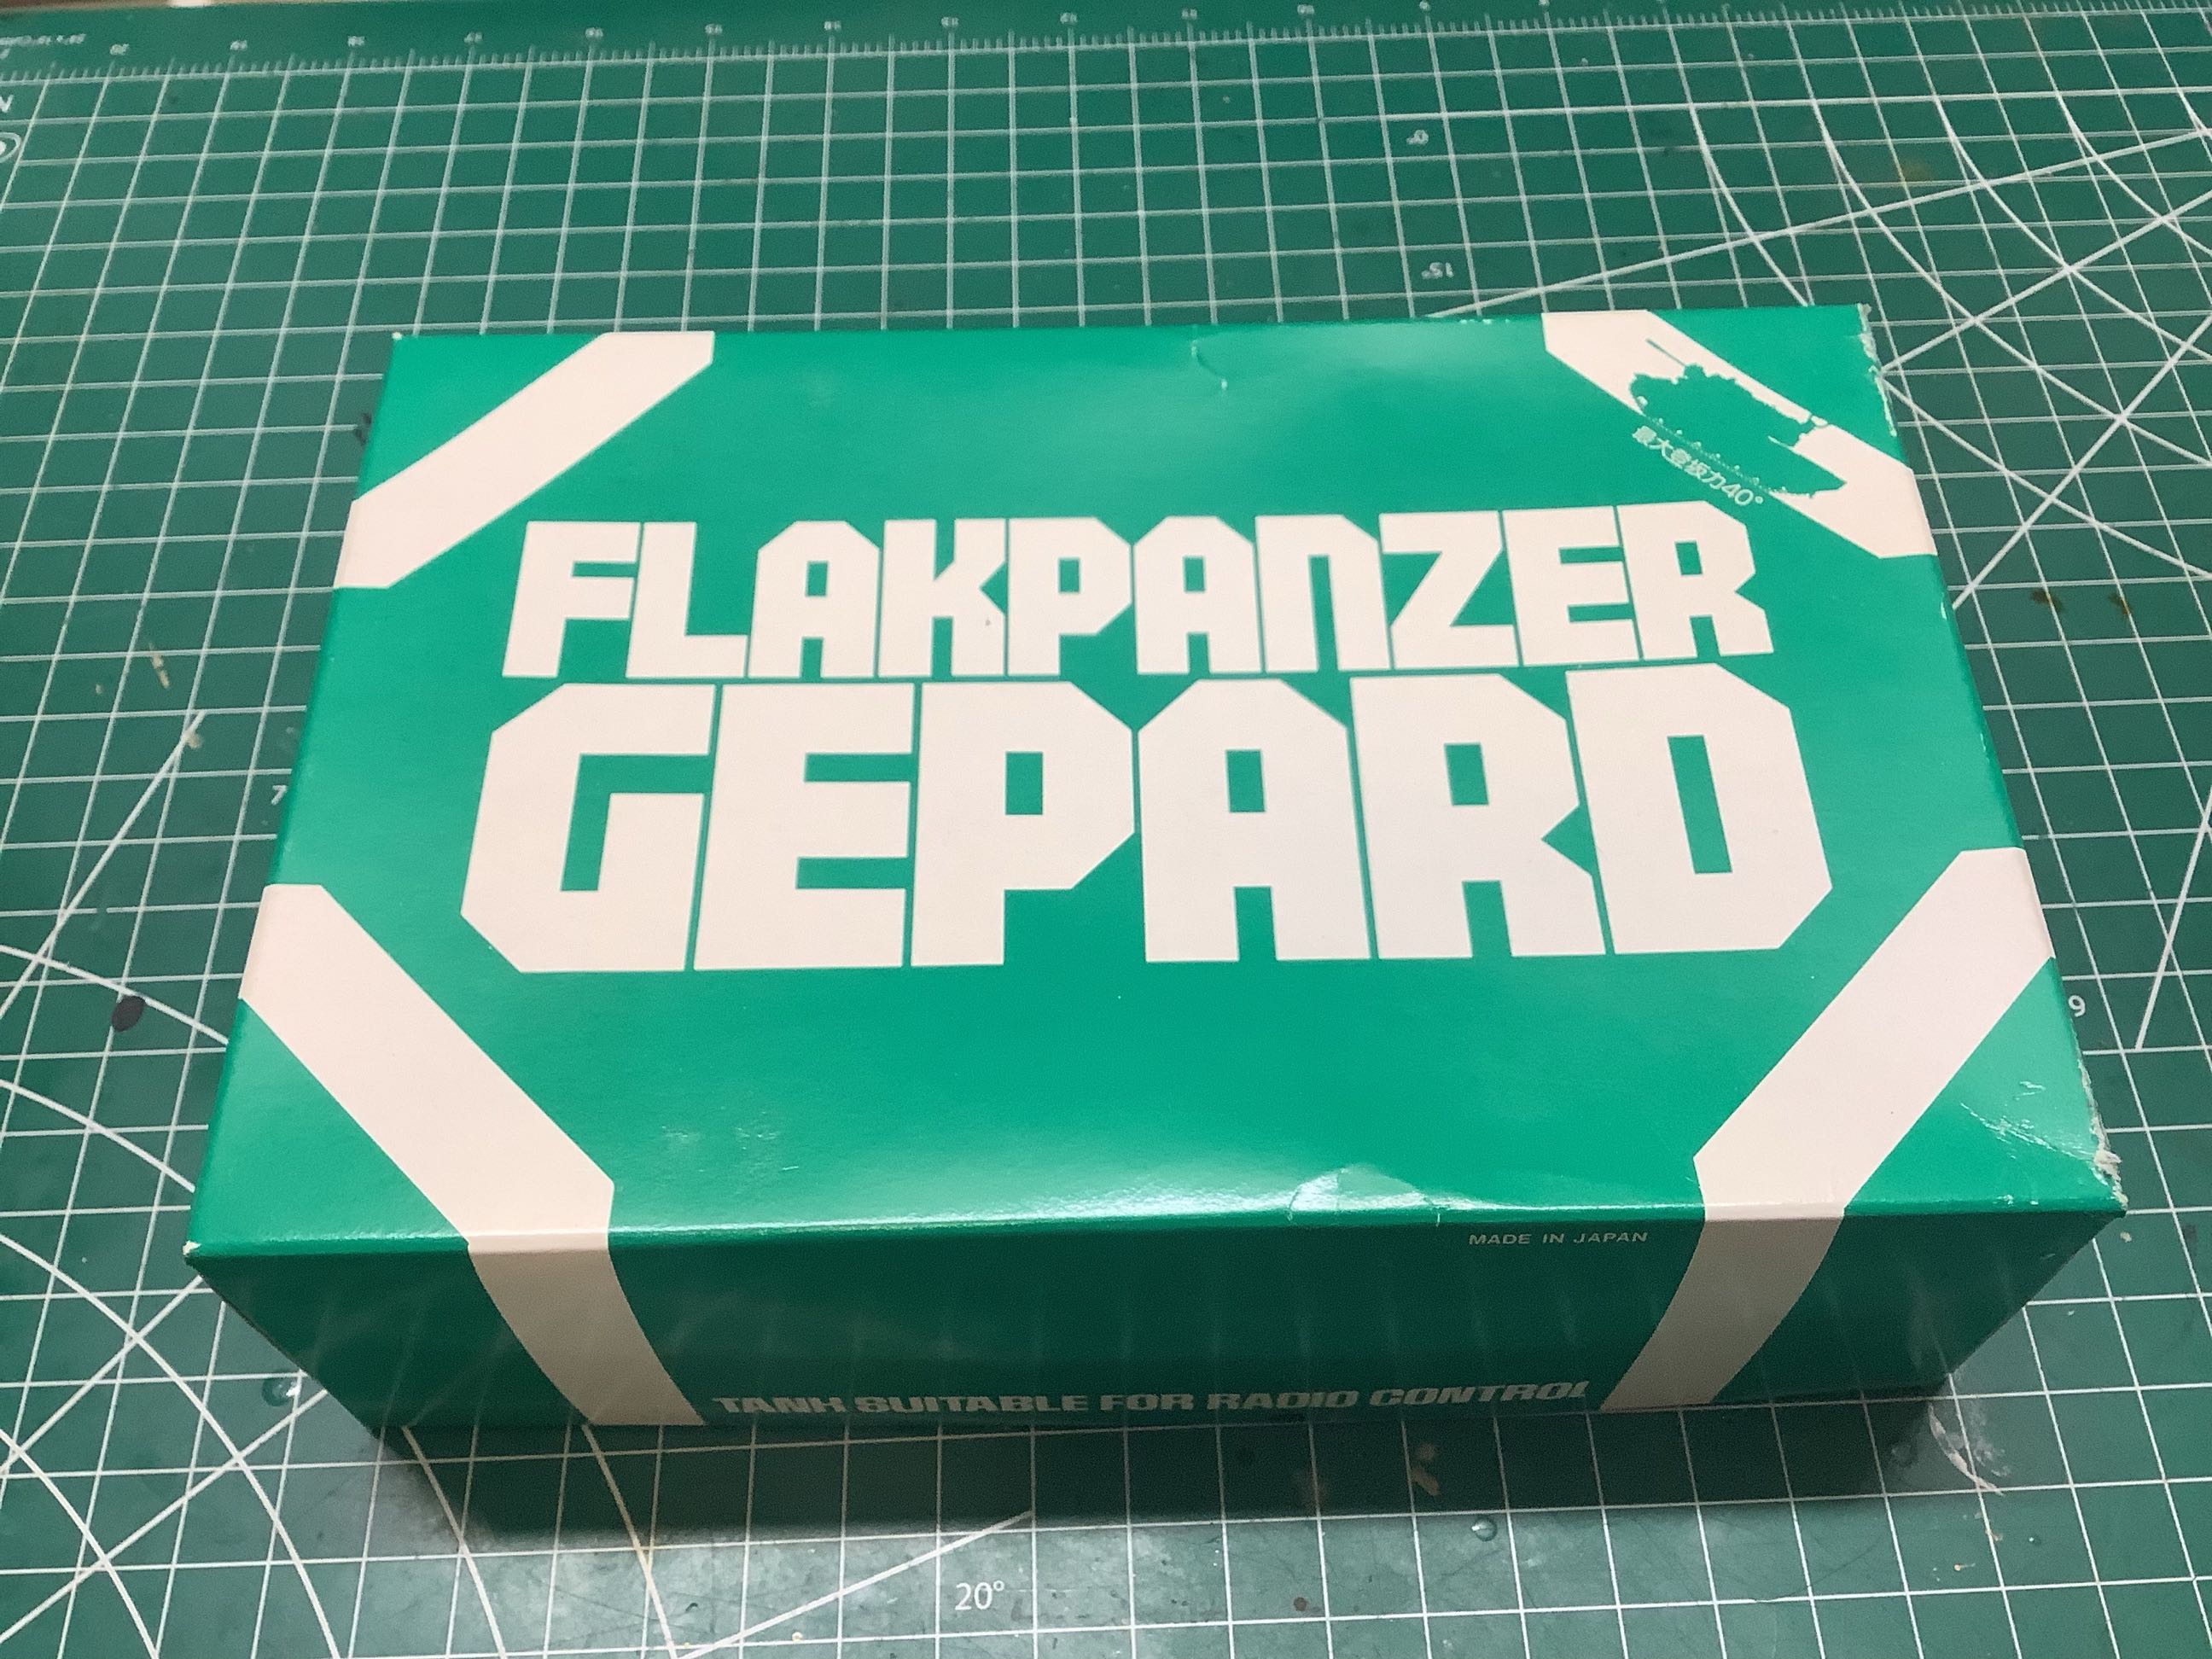
This was by far the oldest model I'd ever built new from the box, so I
was pretty nervous about even opening it. Even though the model
was released in 1978, my instructions are stamped 1983 indicating my
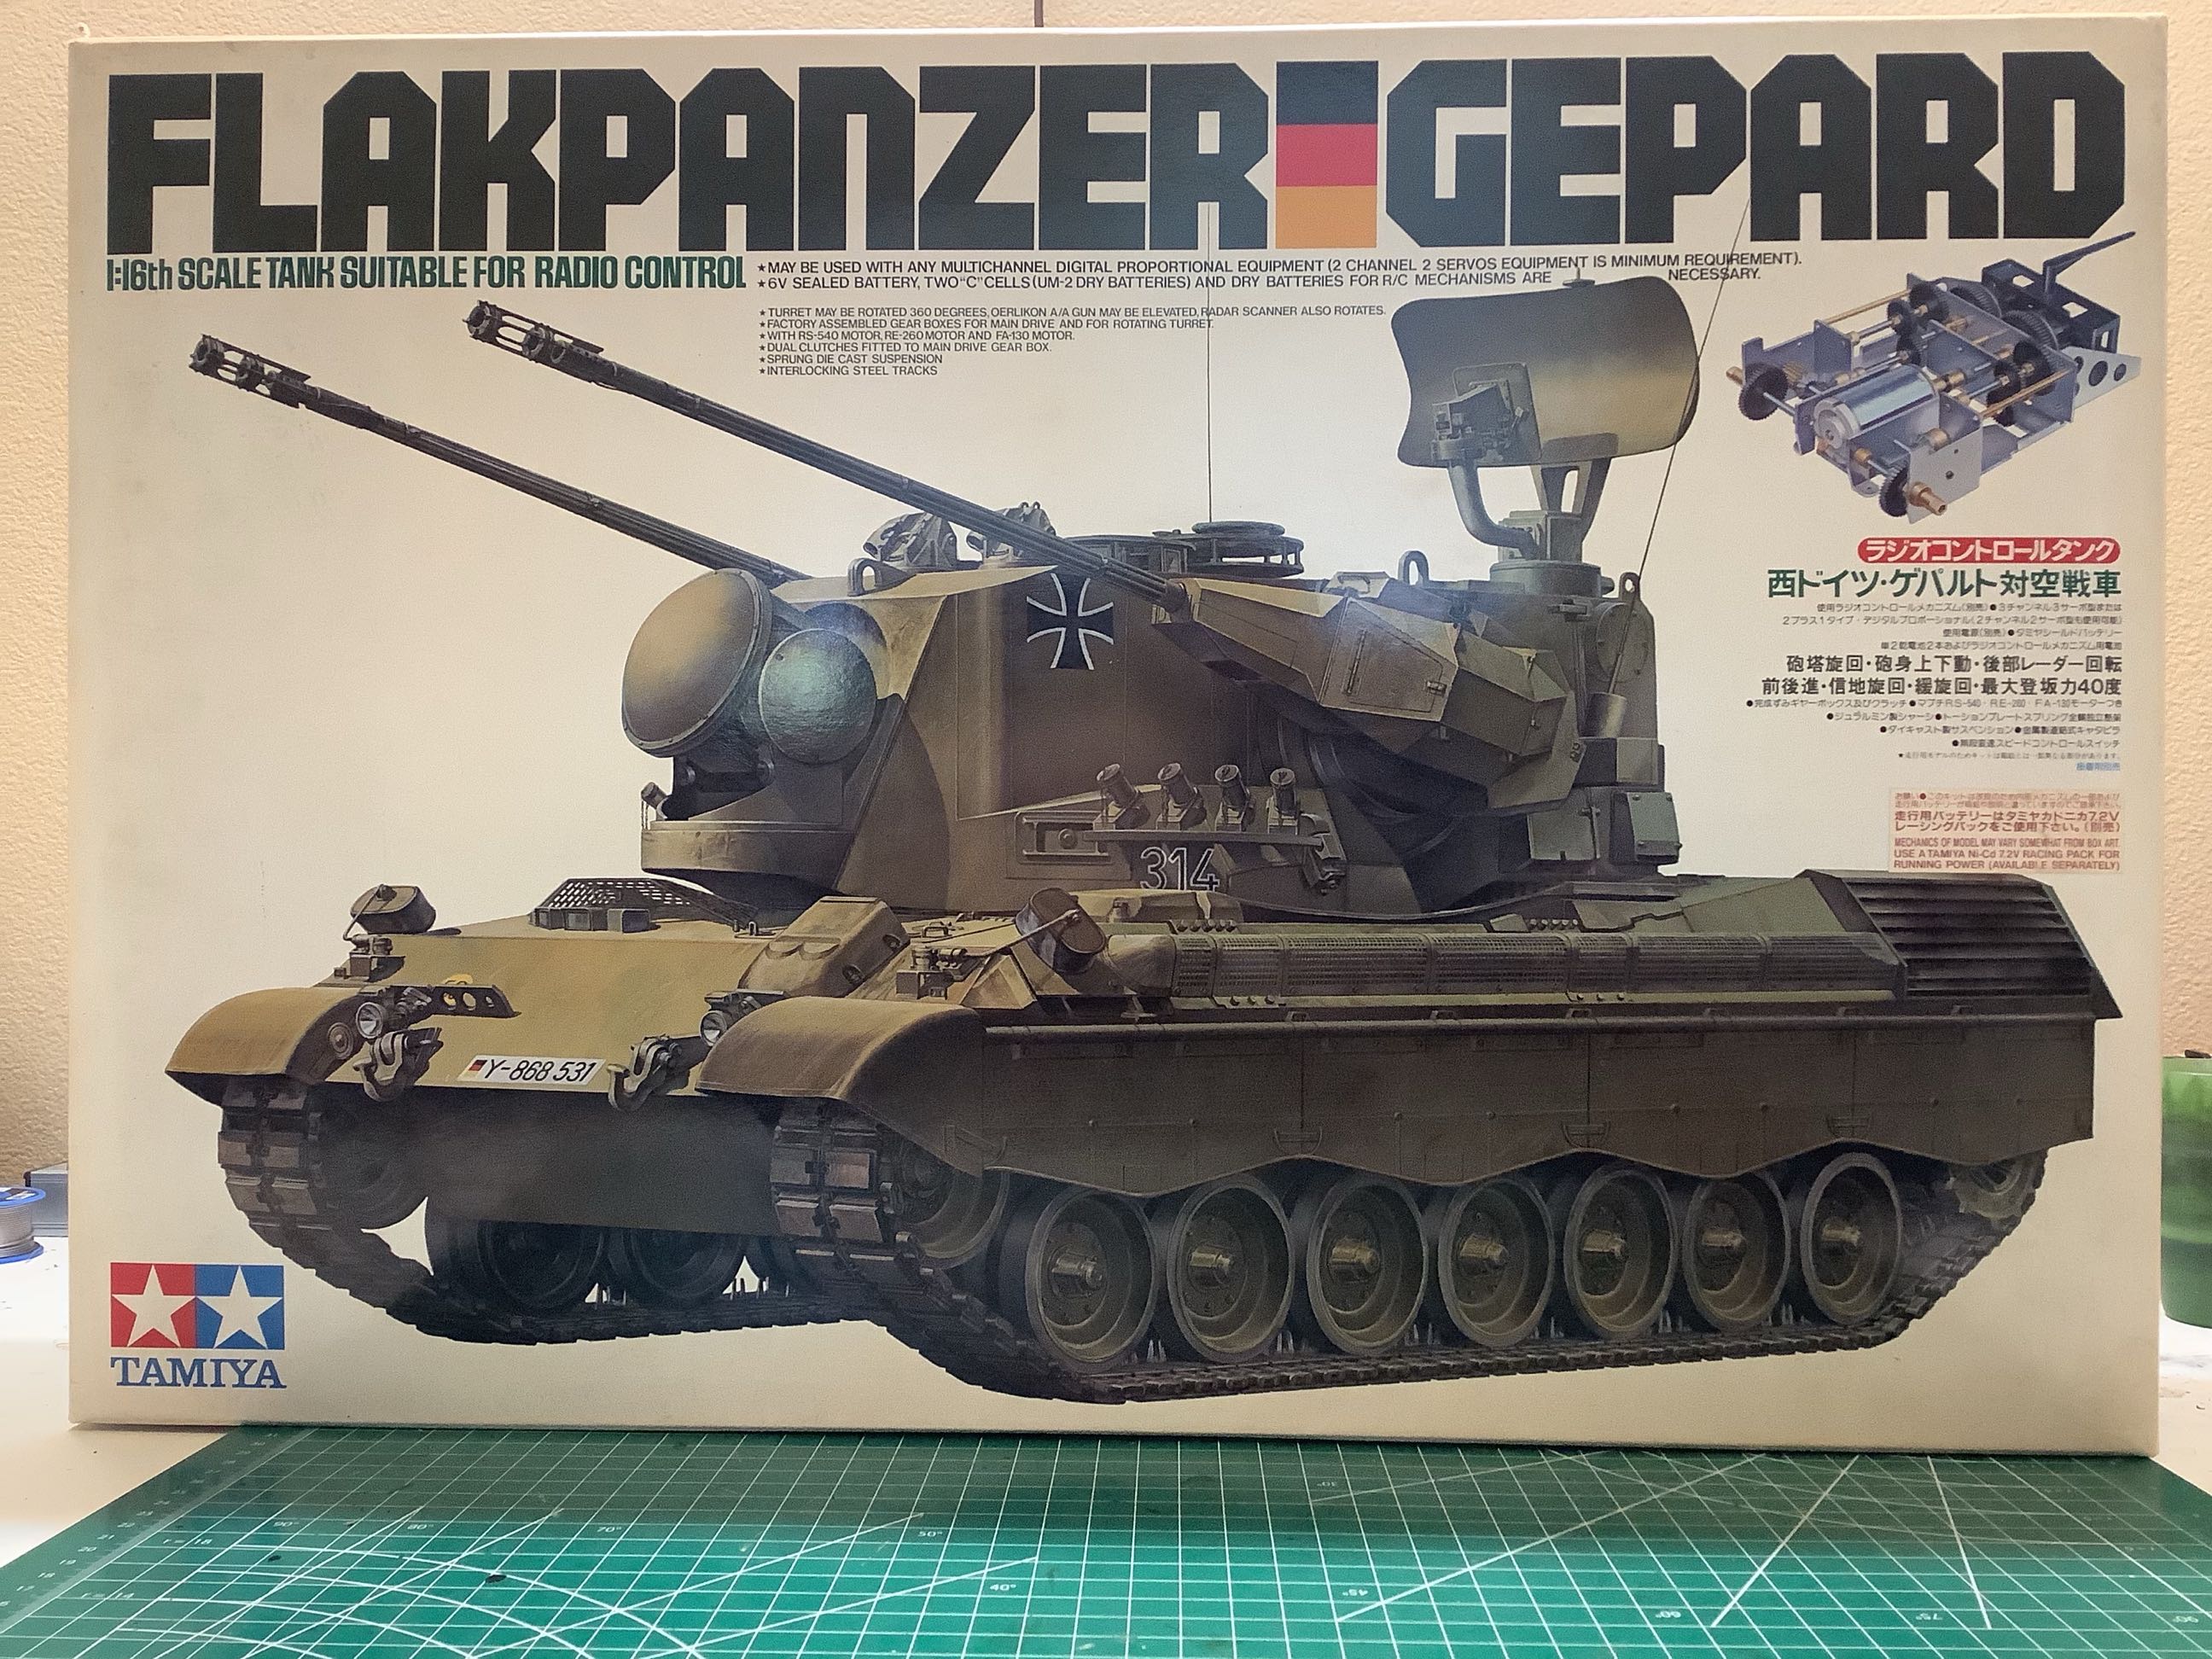
model came from a later batch. The front of the box contains a
lovely hand drawn image of the vehicle (I'm avoiding using the word
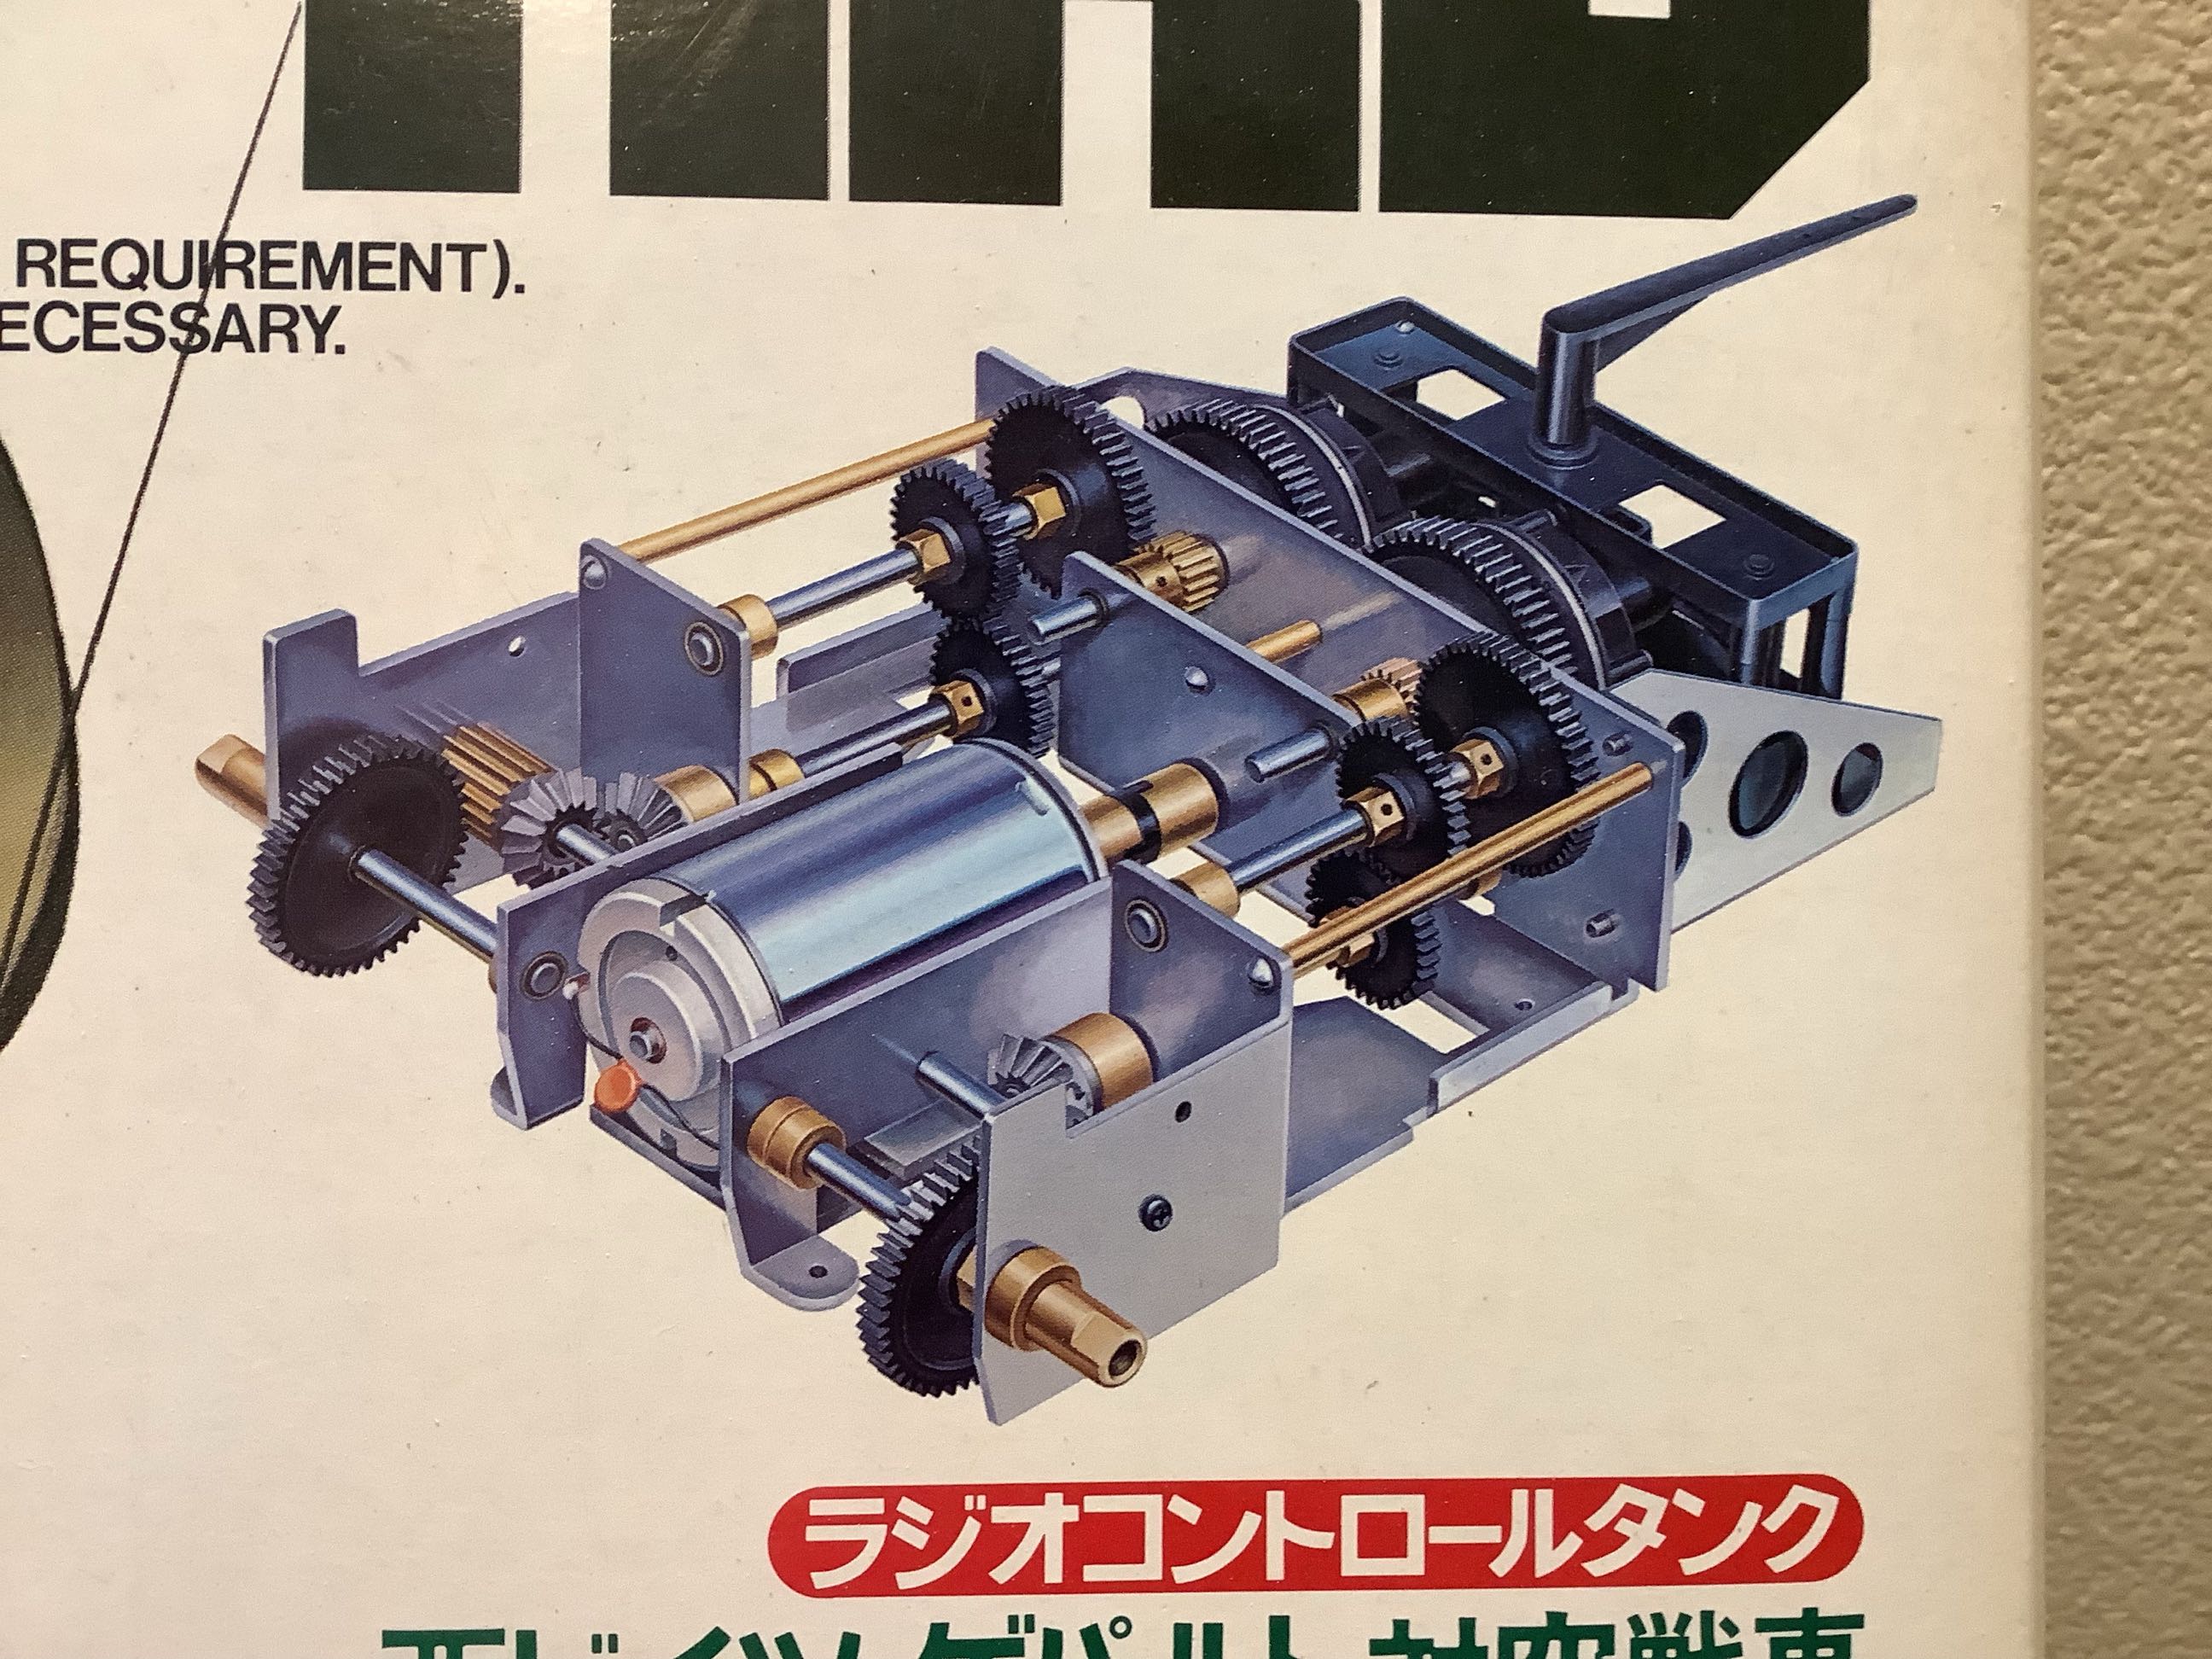
tank) and of the gearbox. The picture on the right is a close-up
of the gearbox image. I'll explain the inner workings of this a
bit later. Notice the single 540 motor
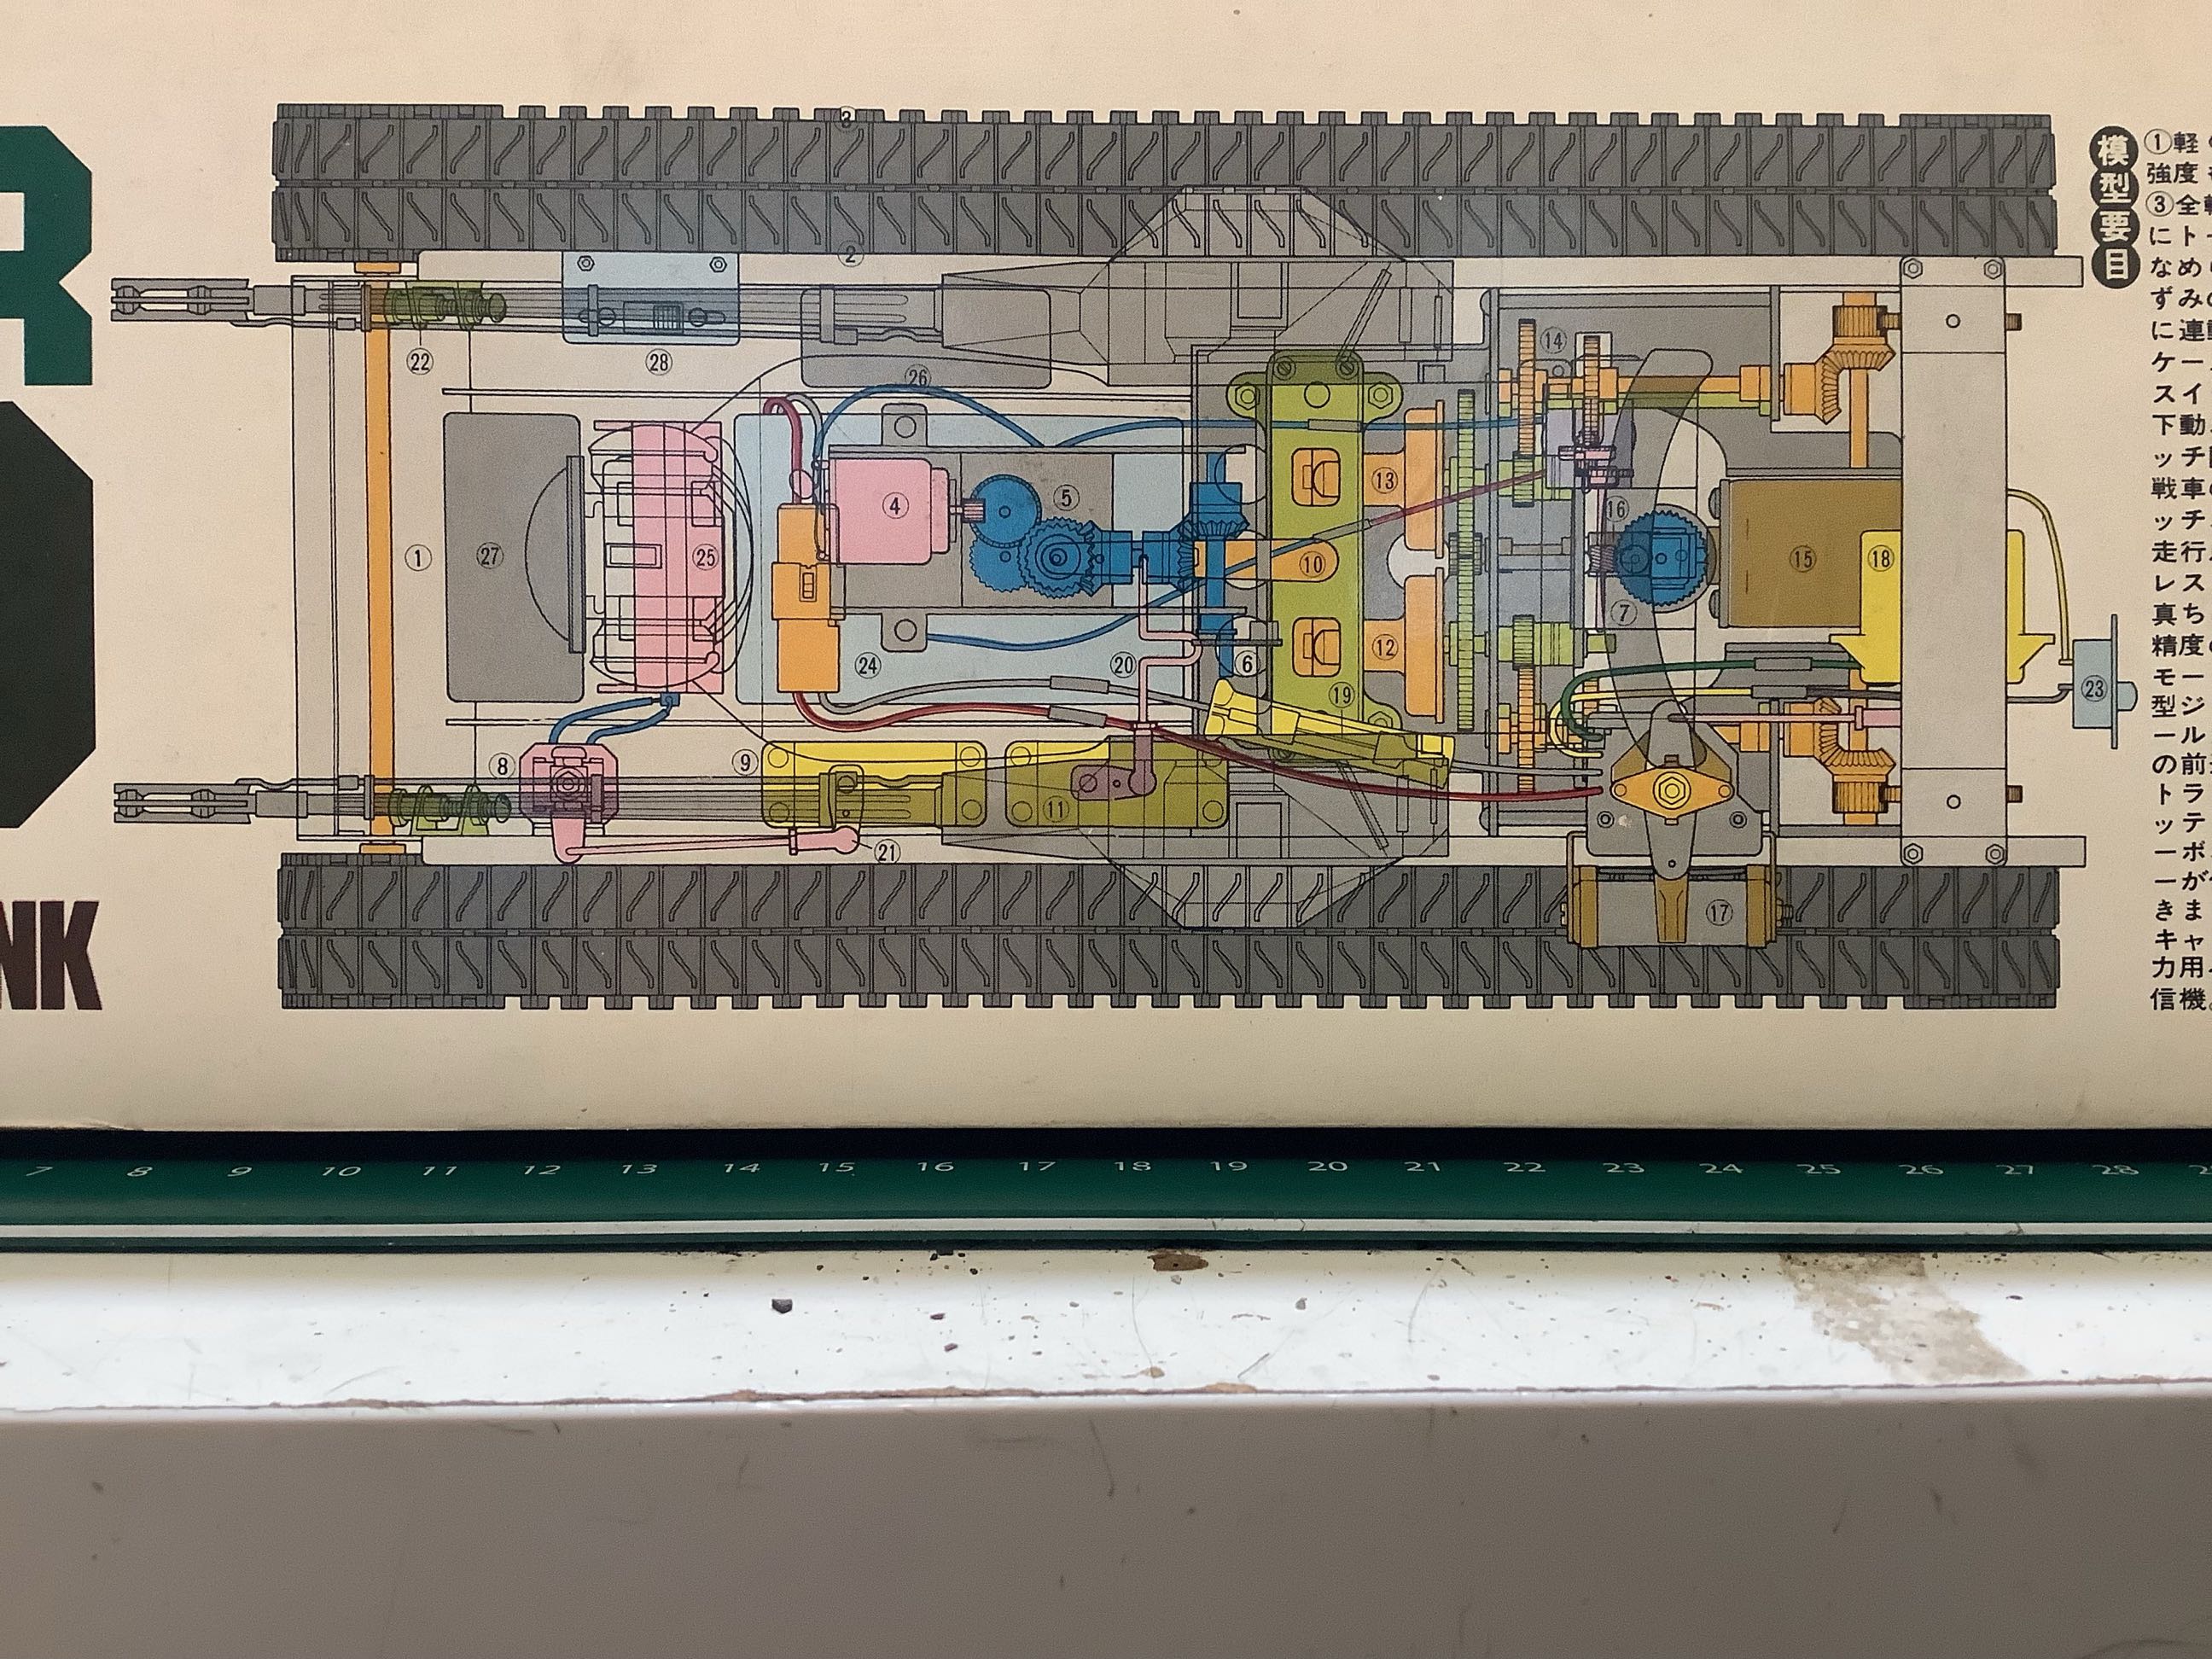
The picture on the left shows the plan view with representations of the
interior components. Note that this image shows the original
variable
MSC and 6V lead acid battery, neither of which are actually used in my
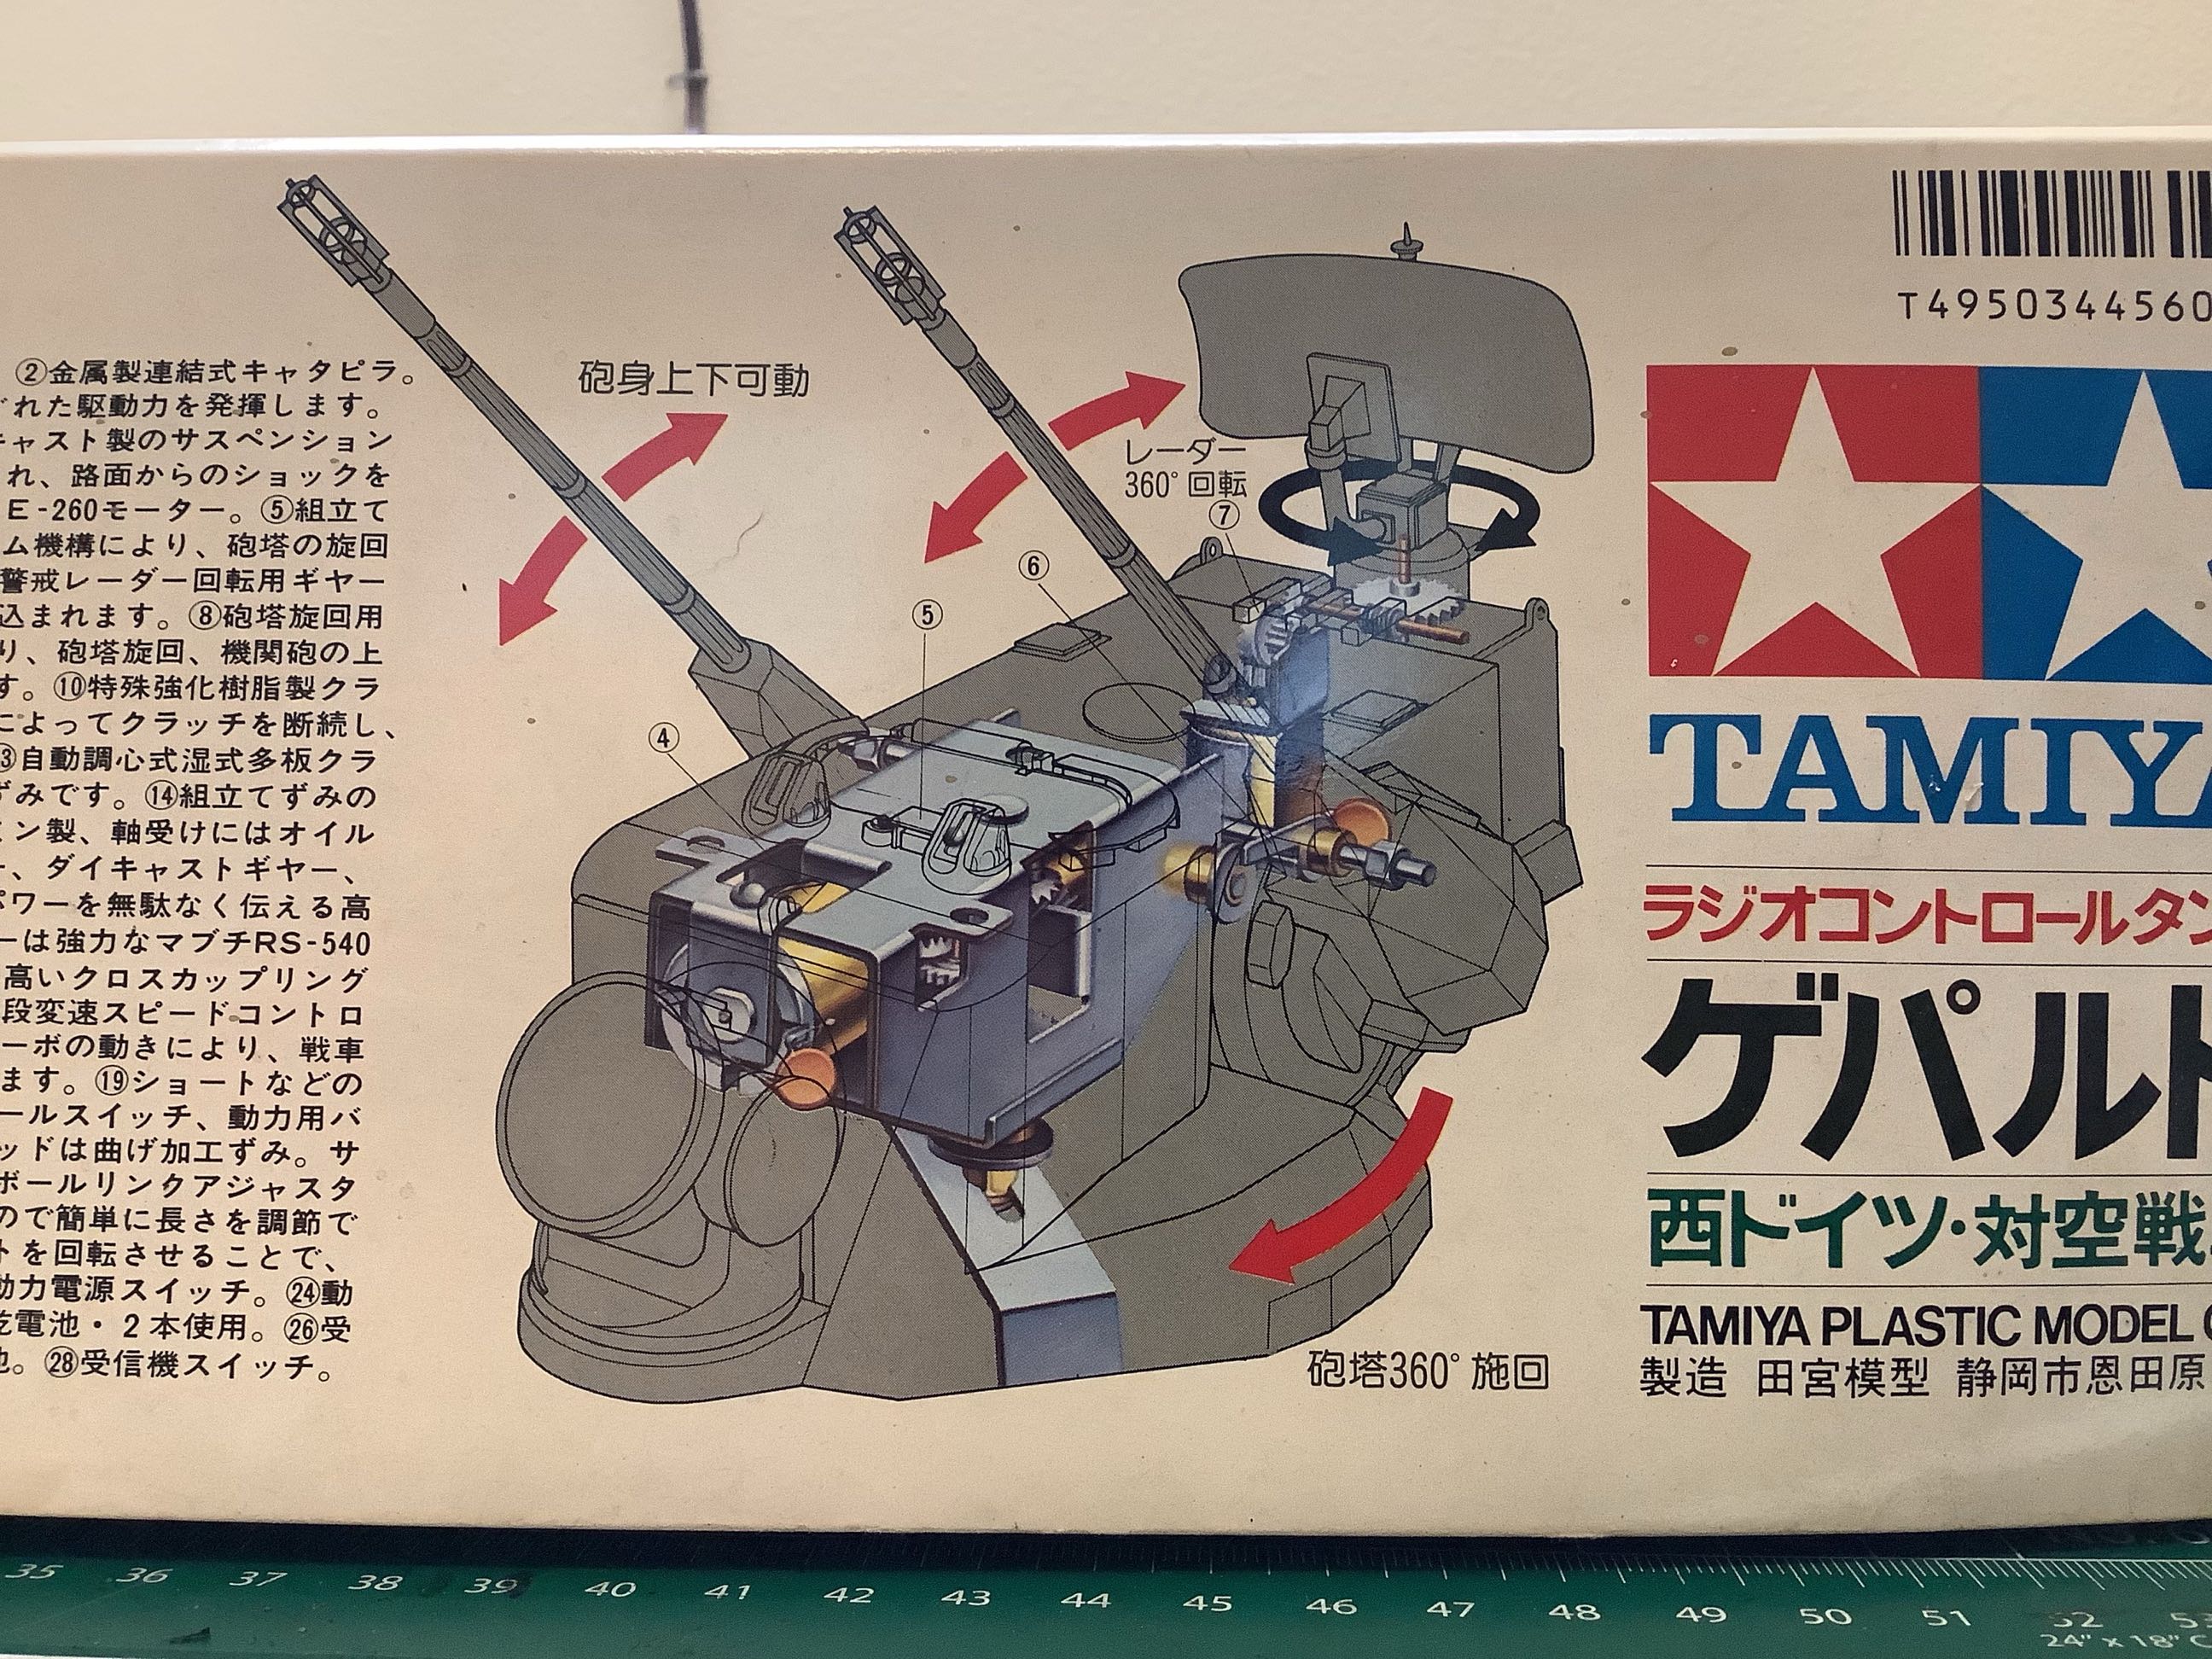
version of the model. On the right you can see an isometric
cutaway of the turret. There is one motor to control the turret
traverse and gun elevation (they are slaved together), and another for
the search radar.
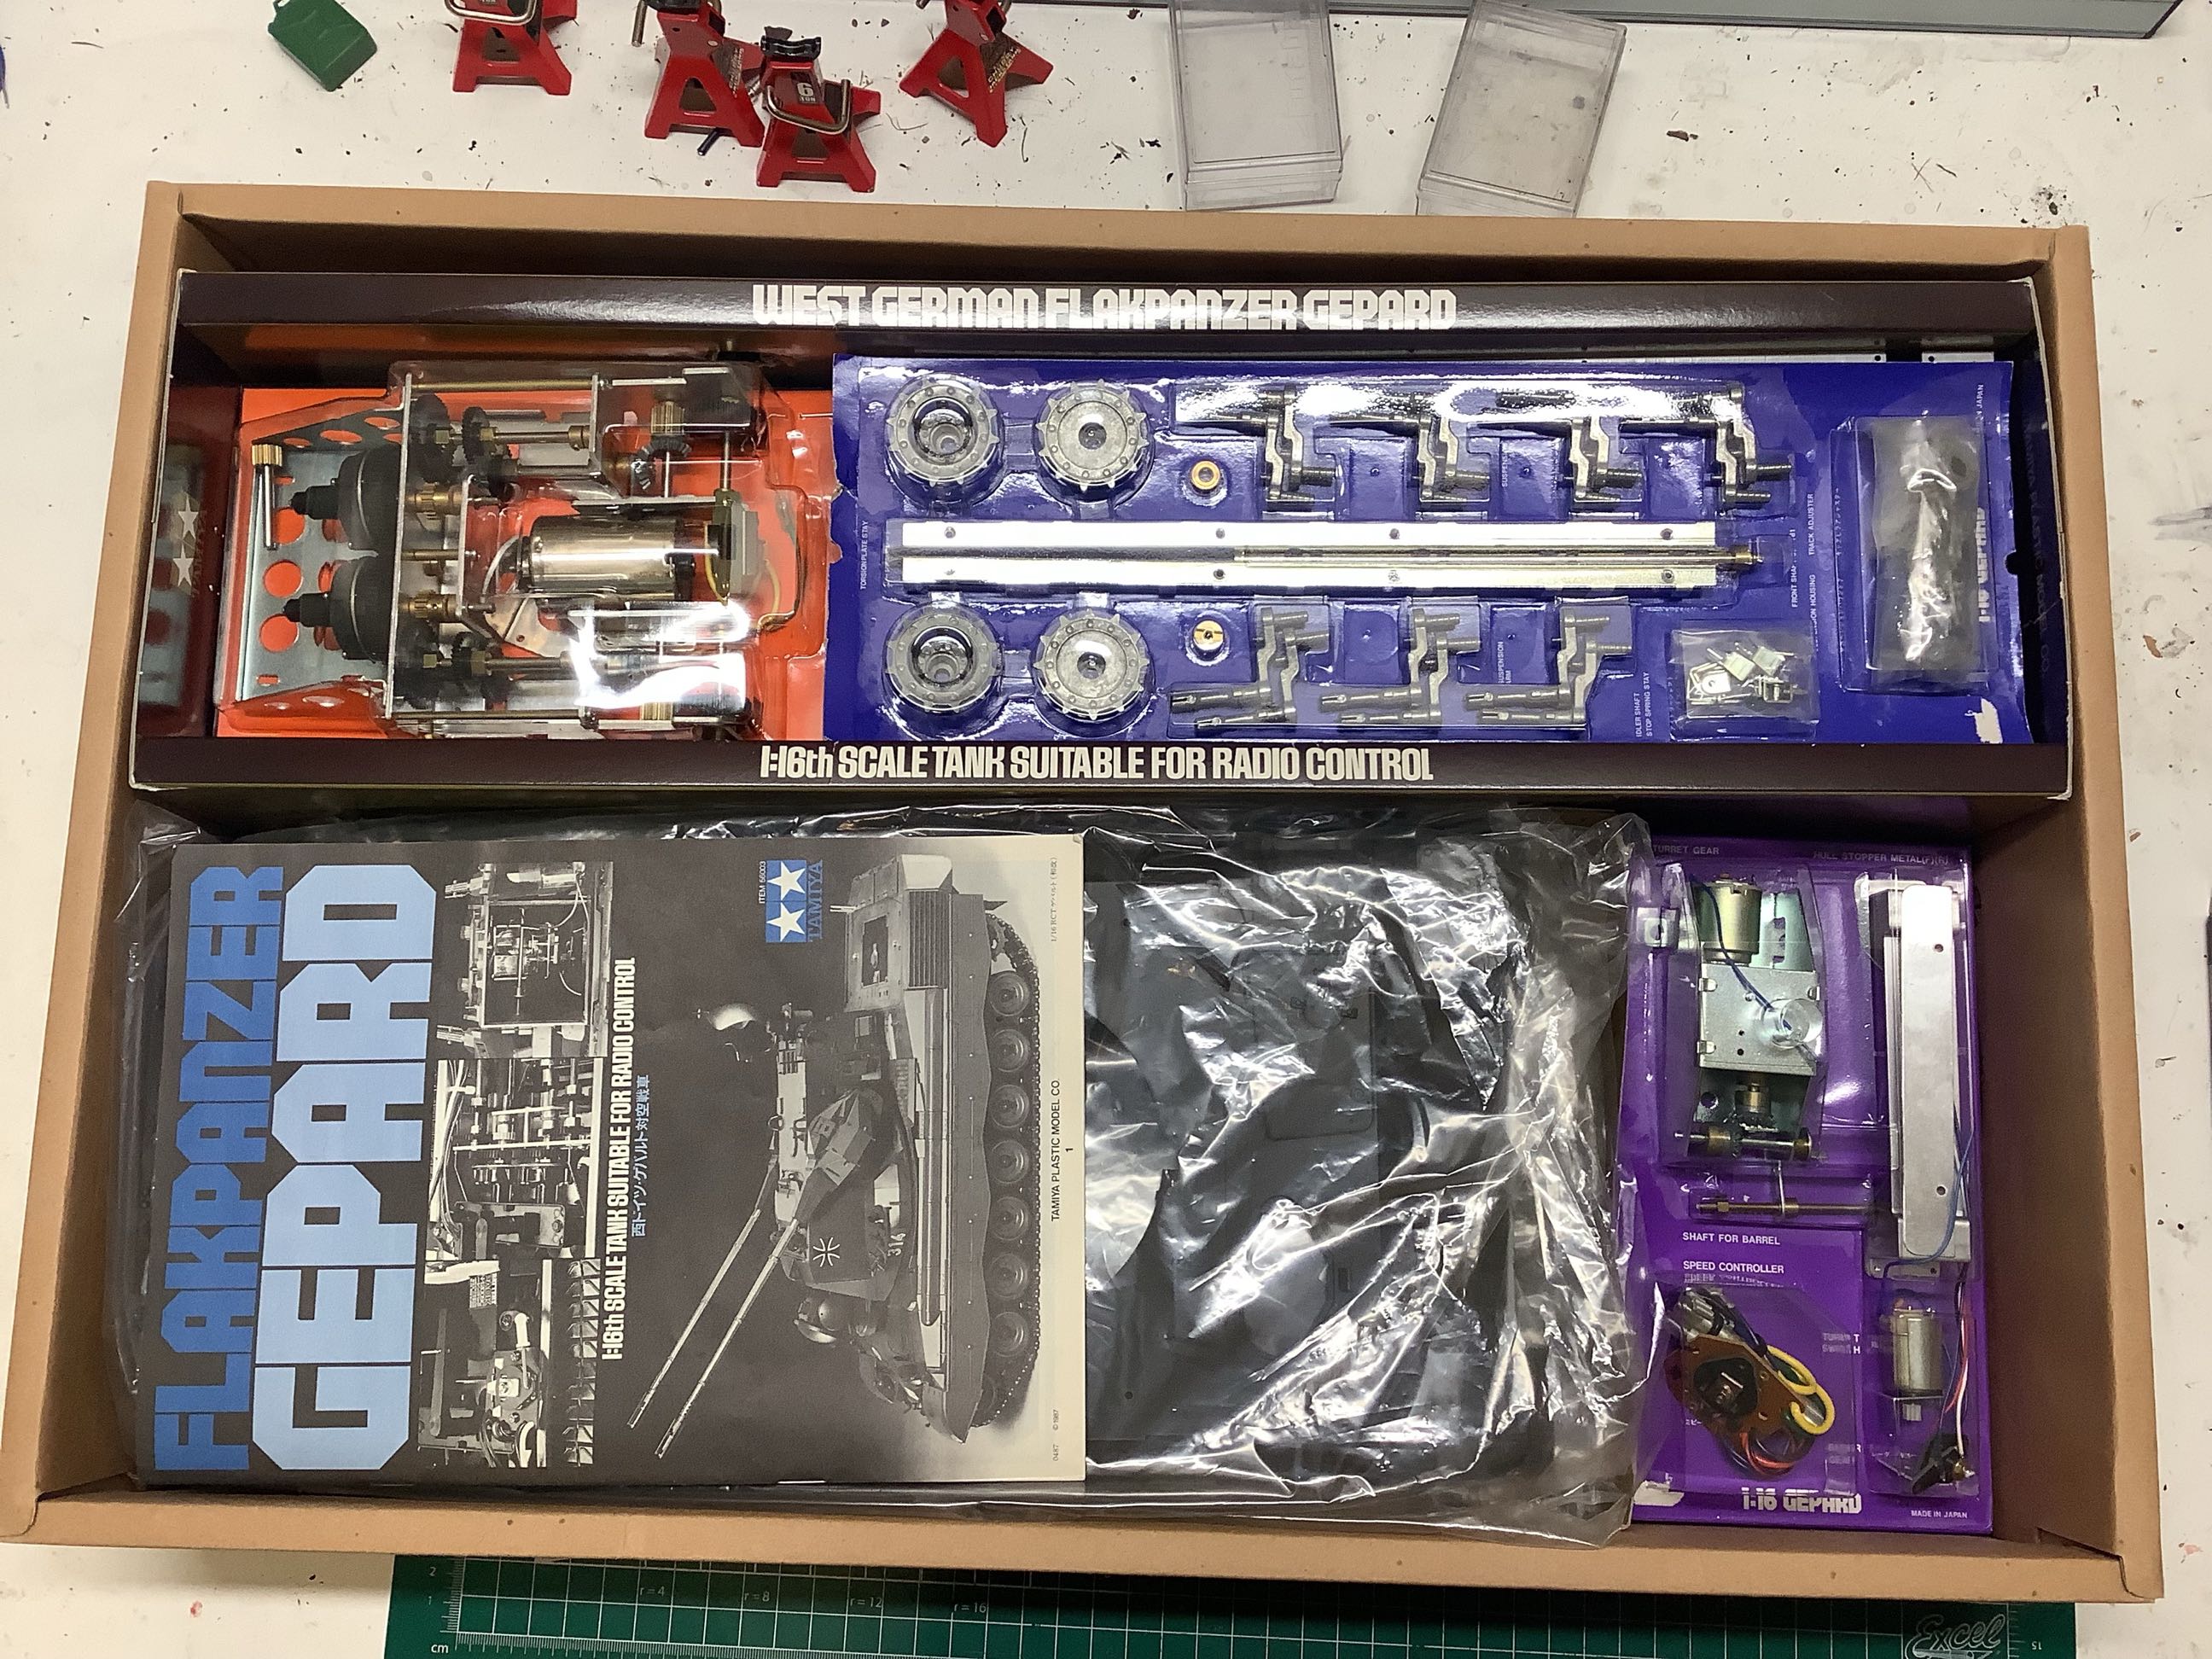
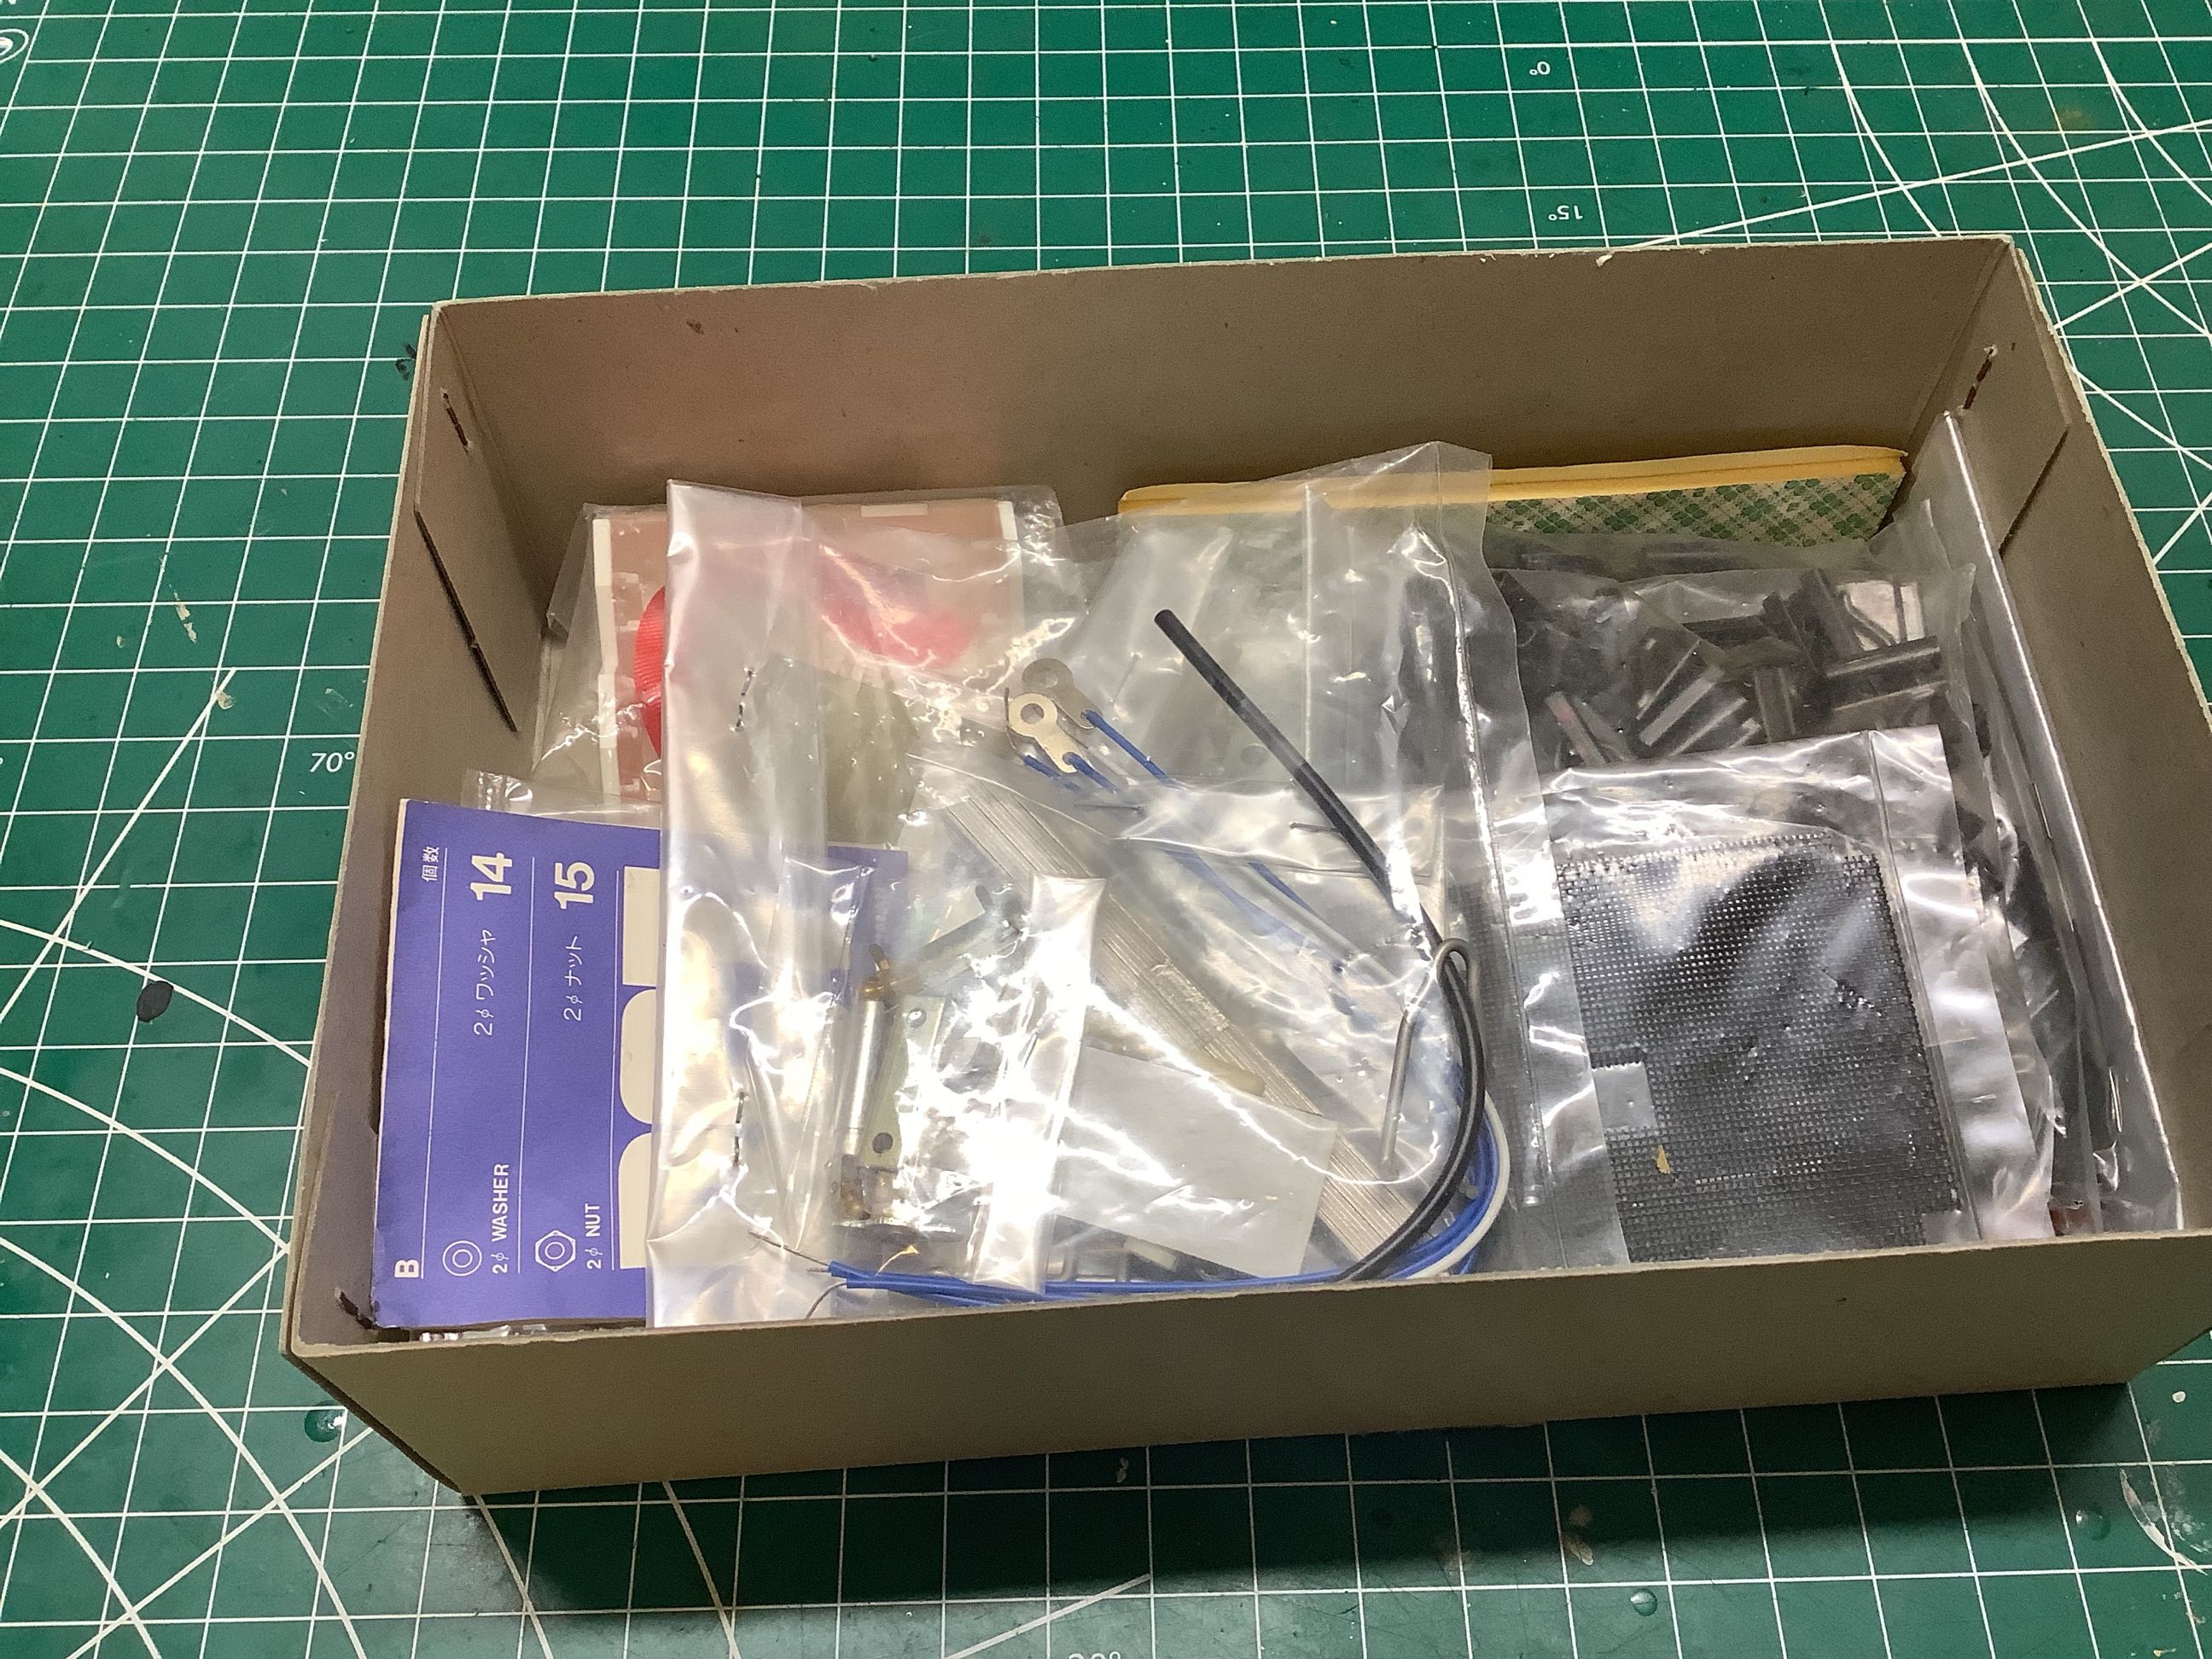
Here are some views of the inside of the box. On the left you can
see the blister packs containing the important components such as the
gearbox and metal suspension parts. The manual you see here is
only printed in Japanese, so I had use a PDF version in English to
clarify. The long slim box is shown in detail on the right and
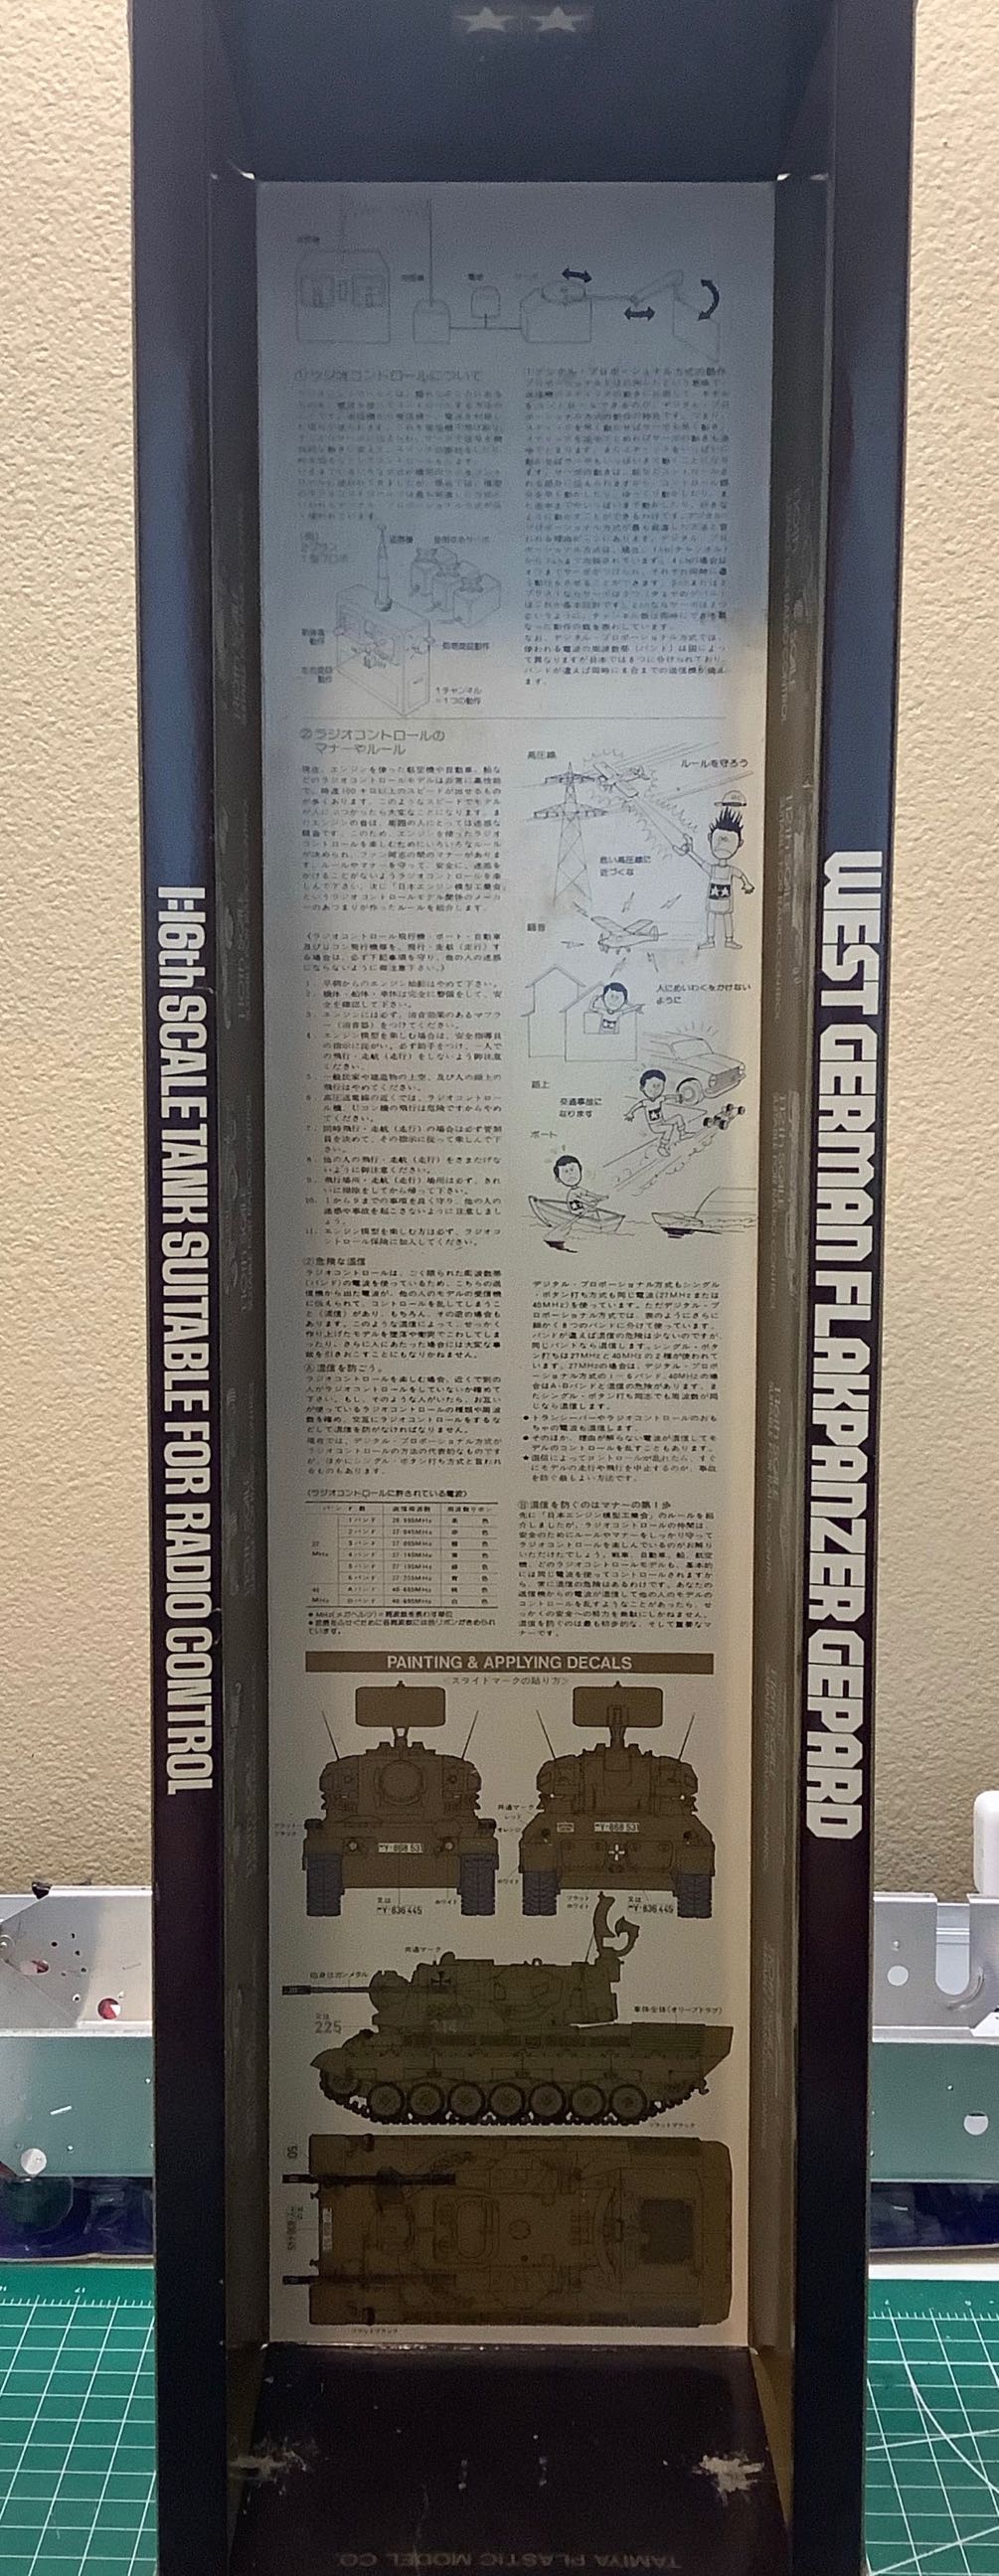
contains lots of information about the vehicle.
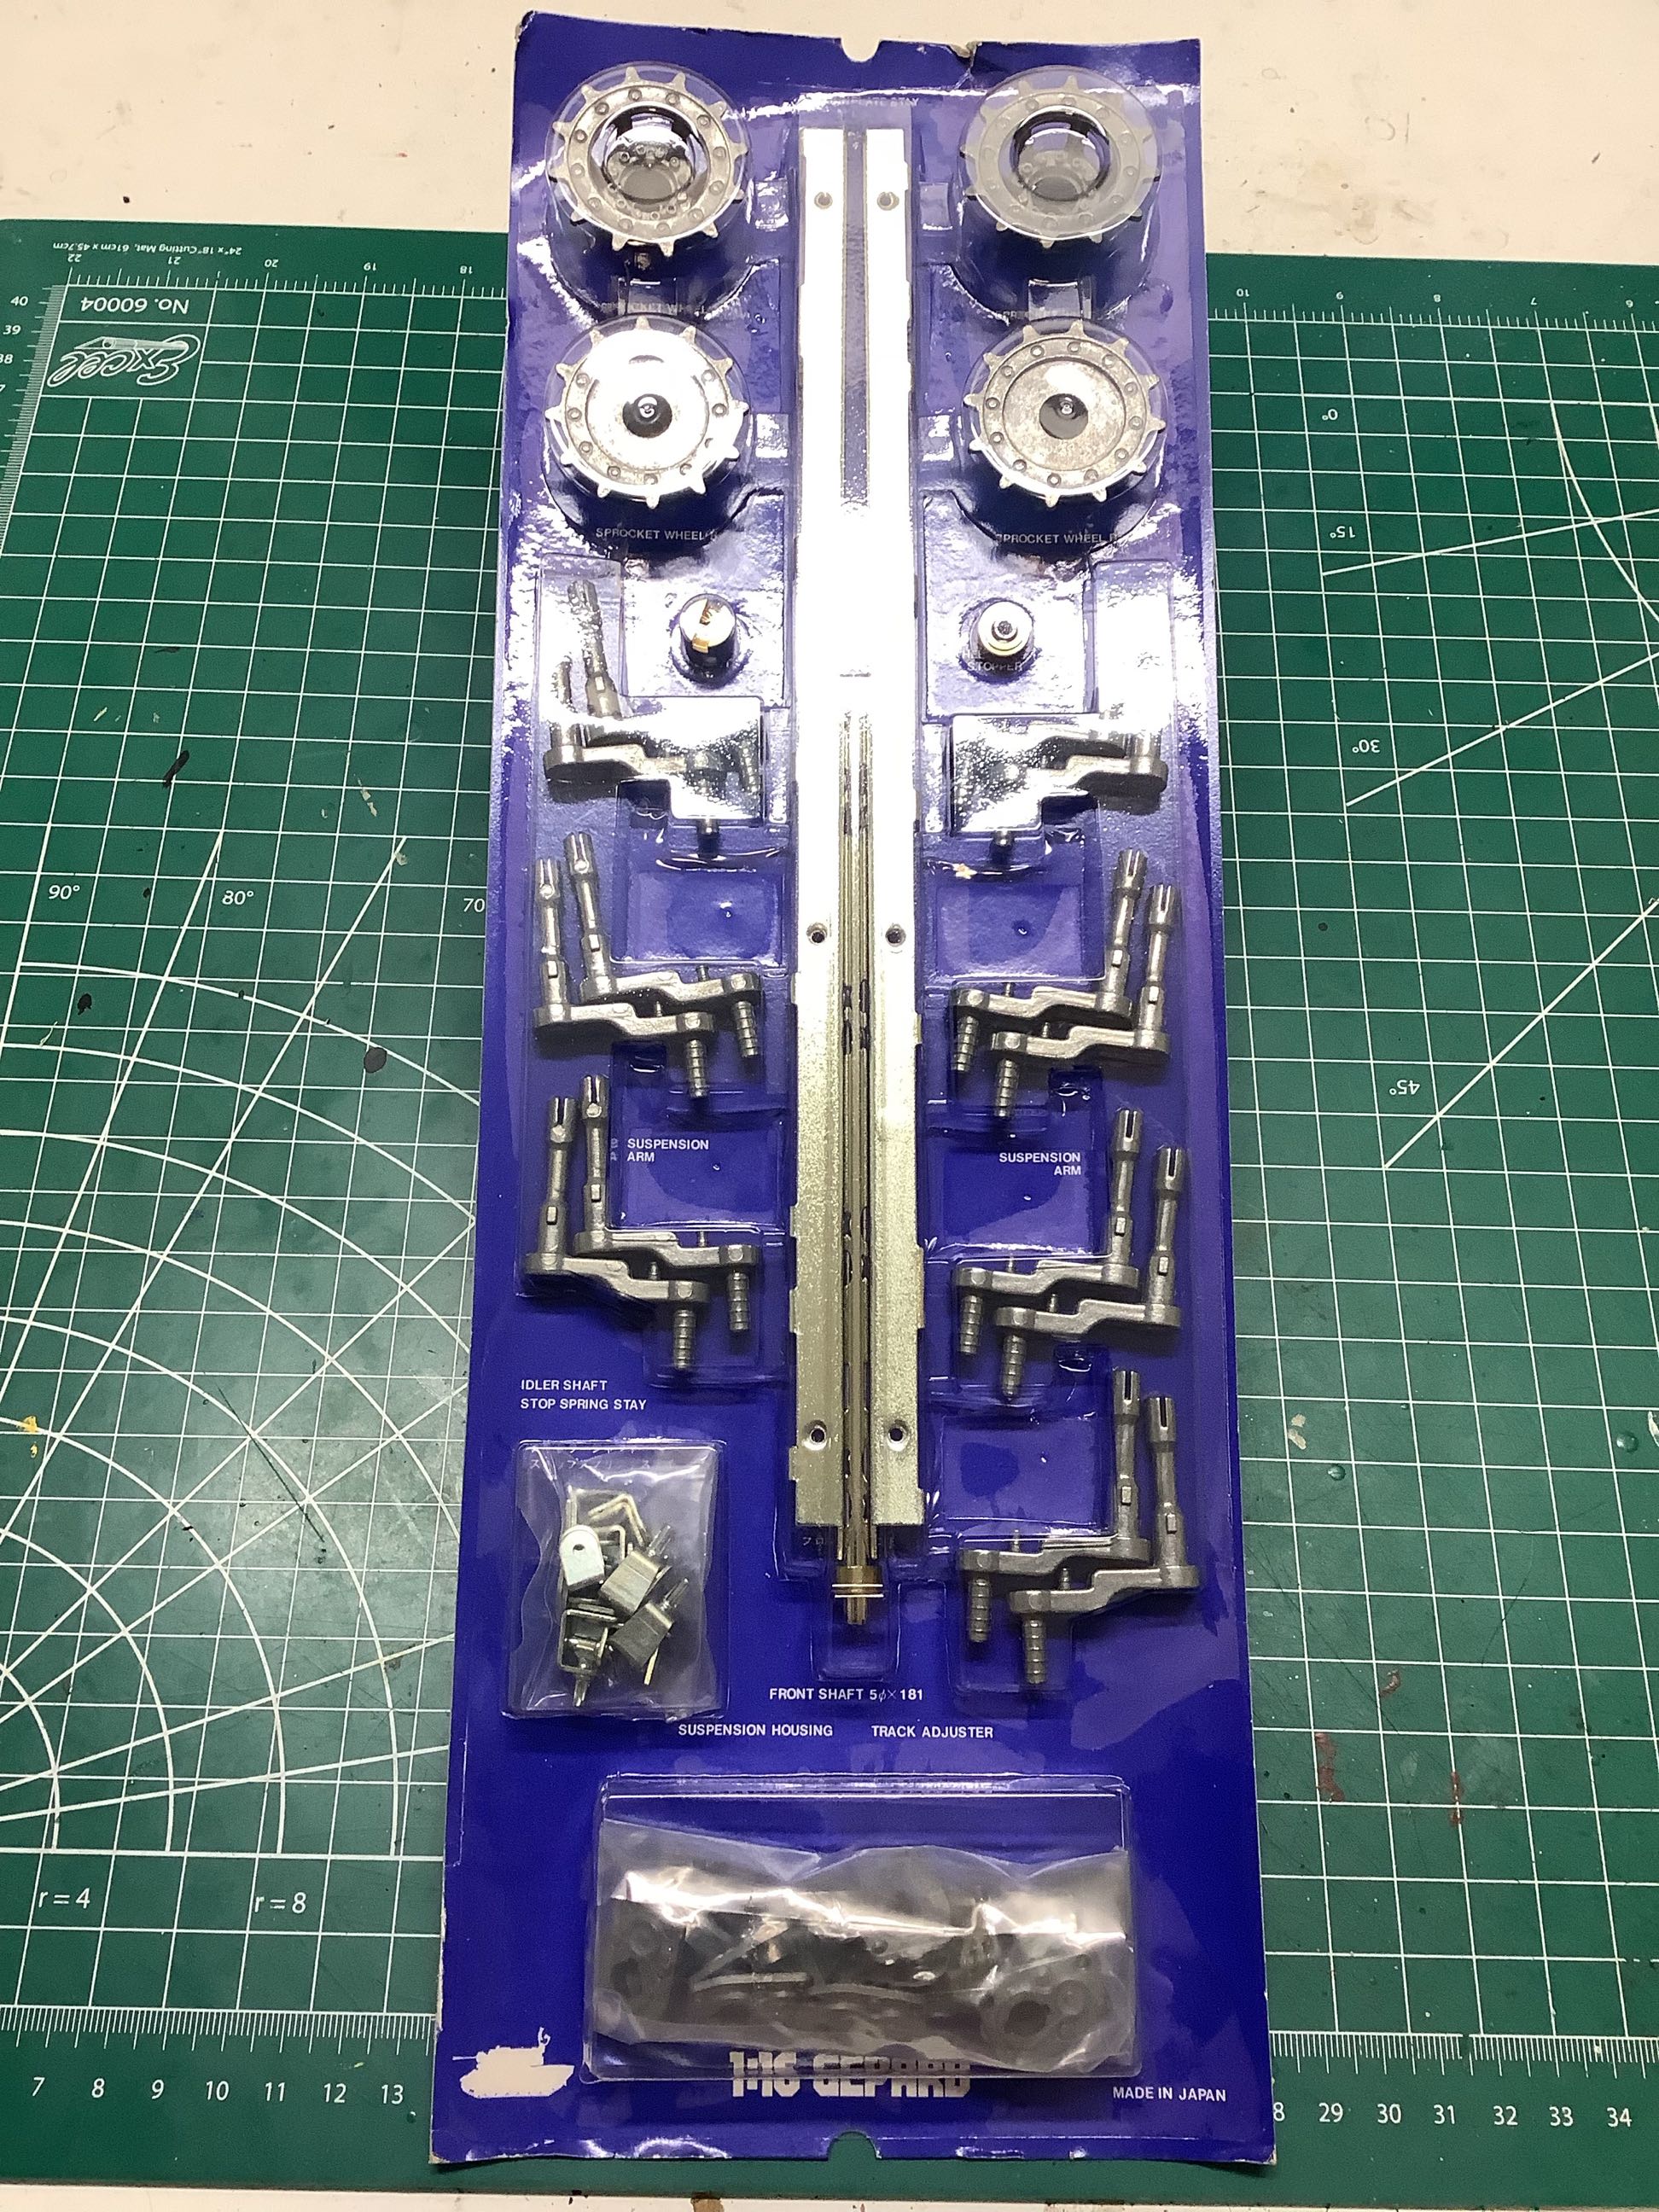
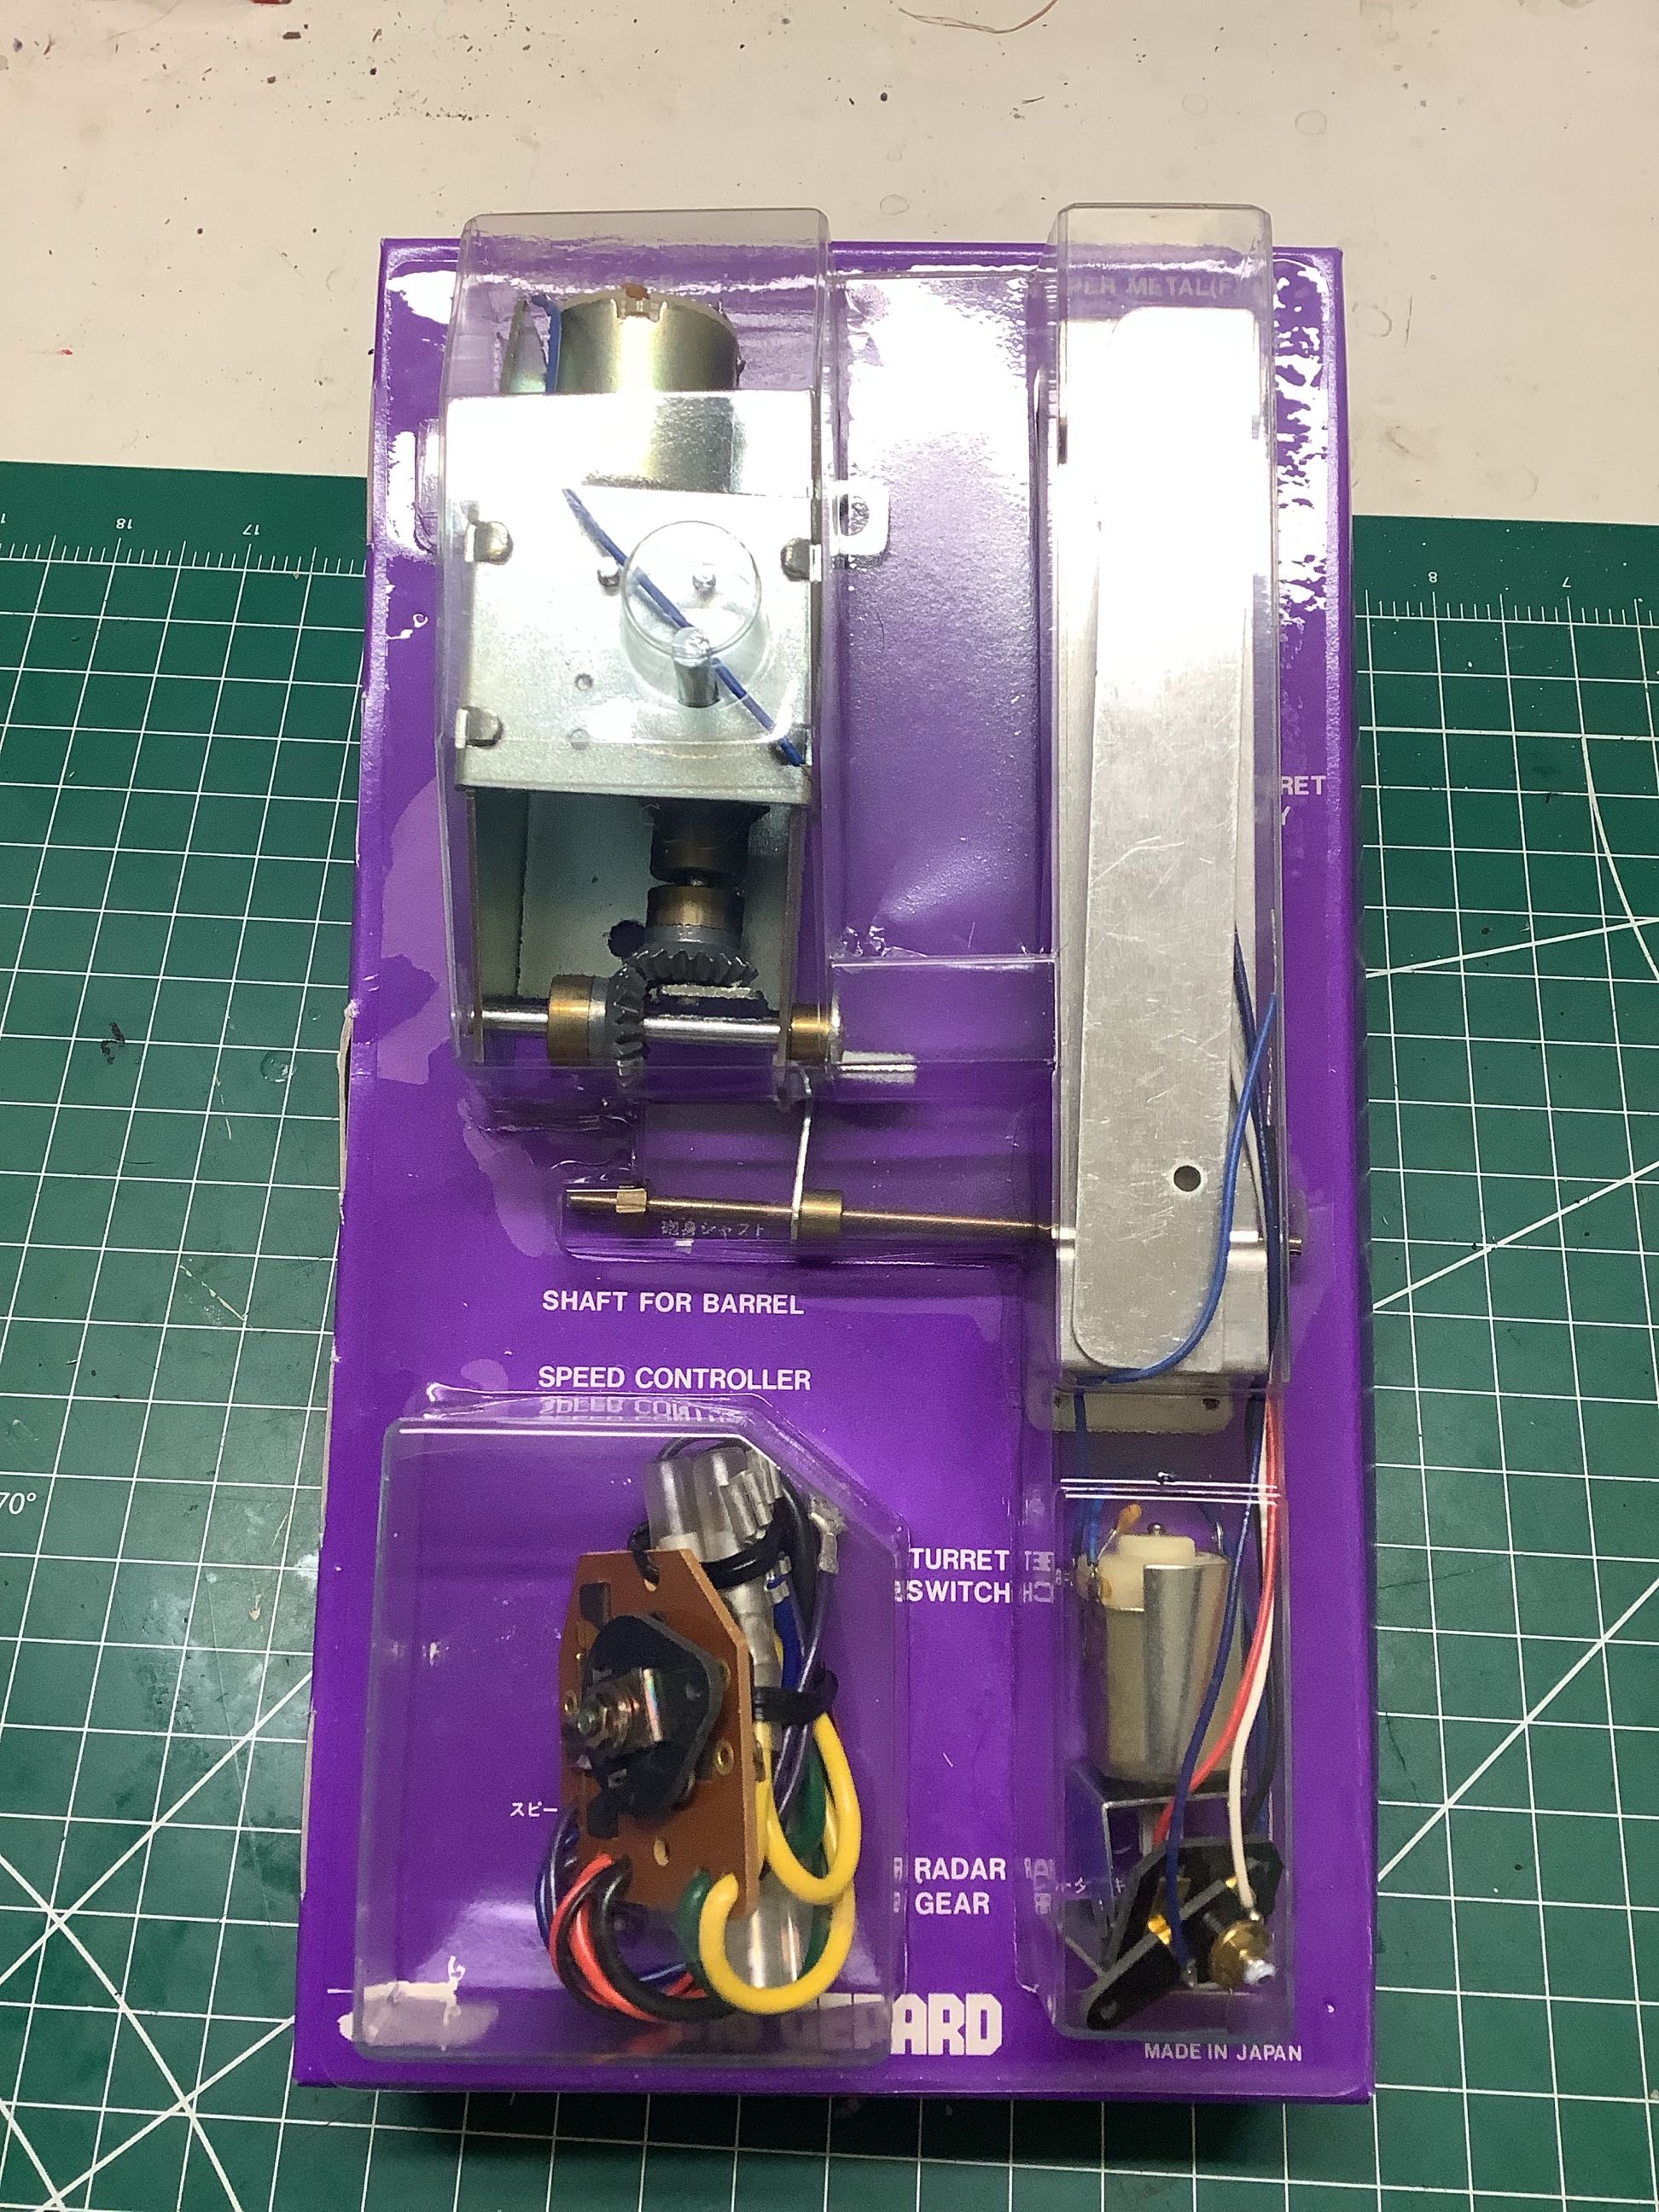
Let's take a closer look at those blister packs. On the left are
the suspension arms, sprockets, brackets, and chassis stiffeners, all in
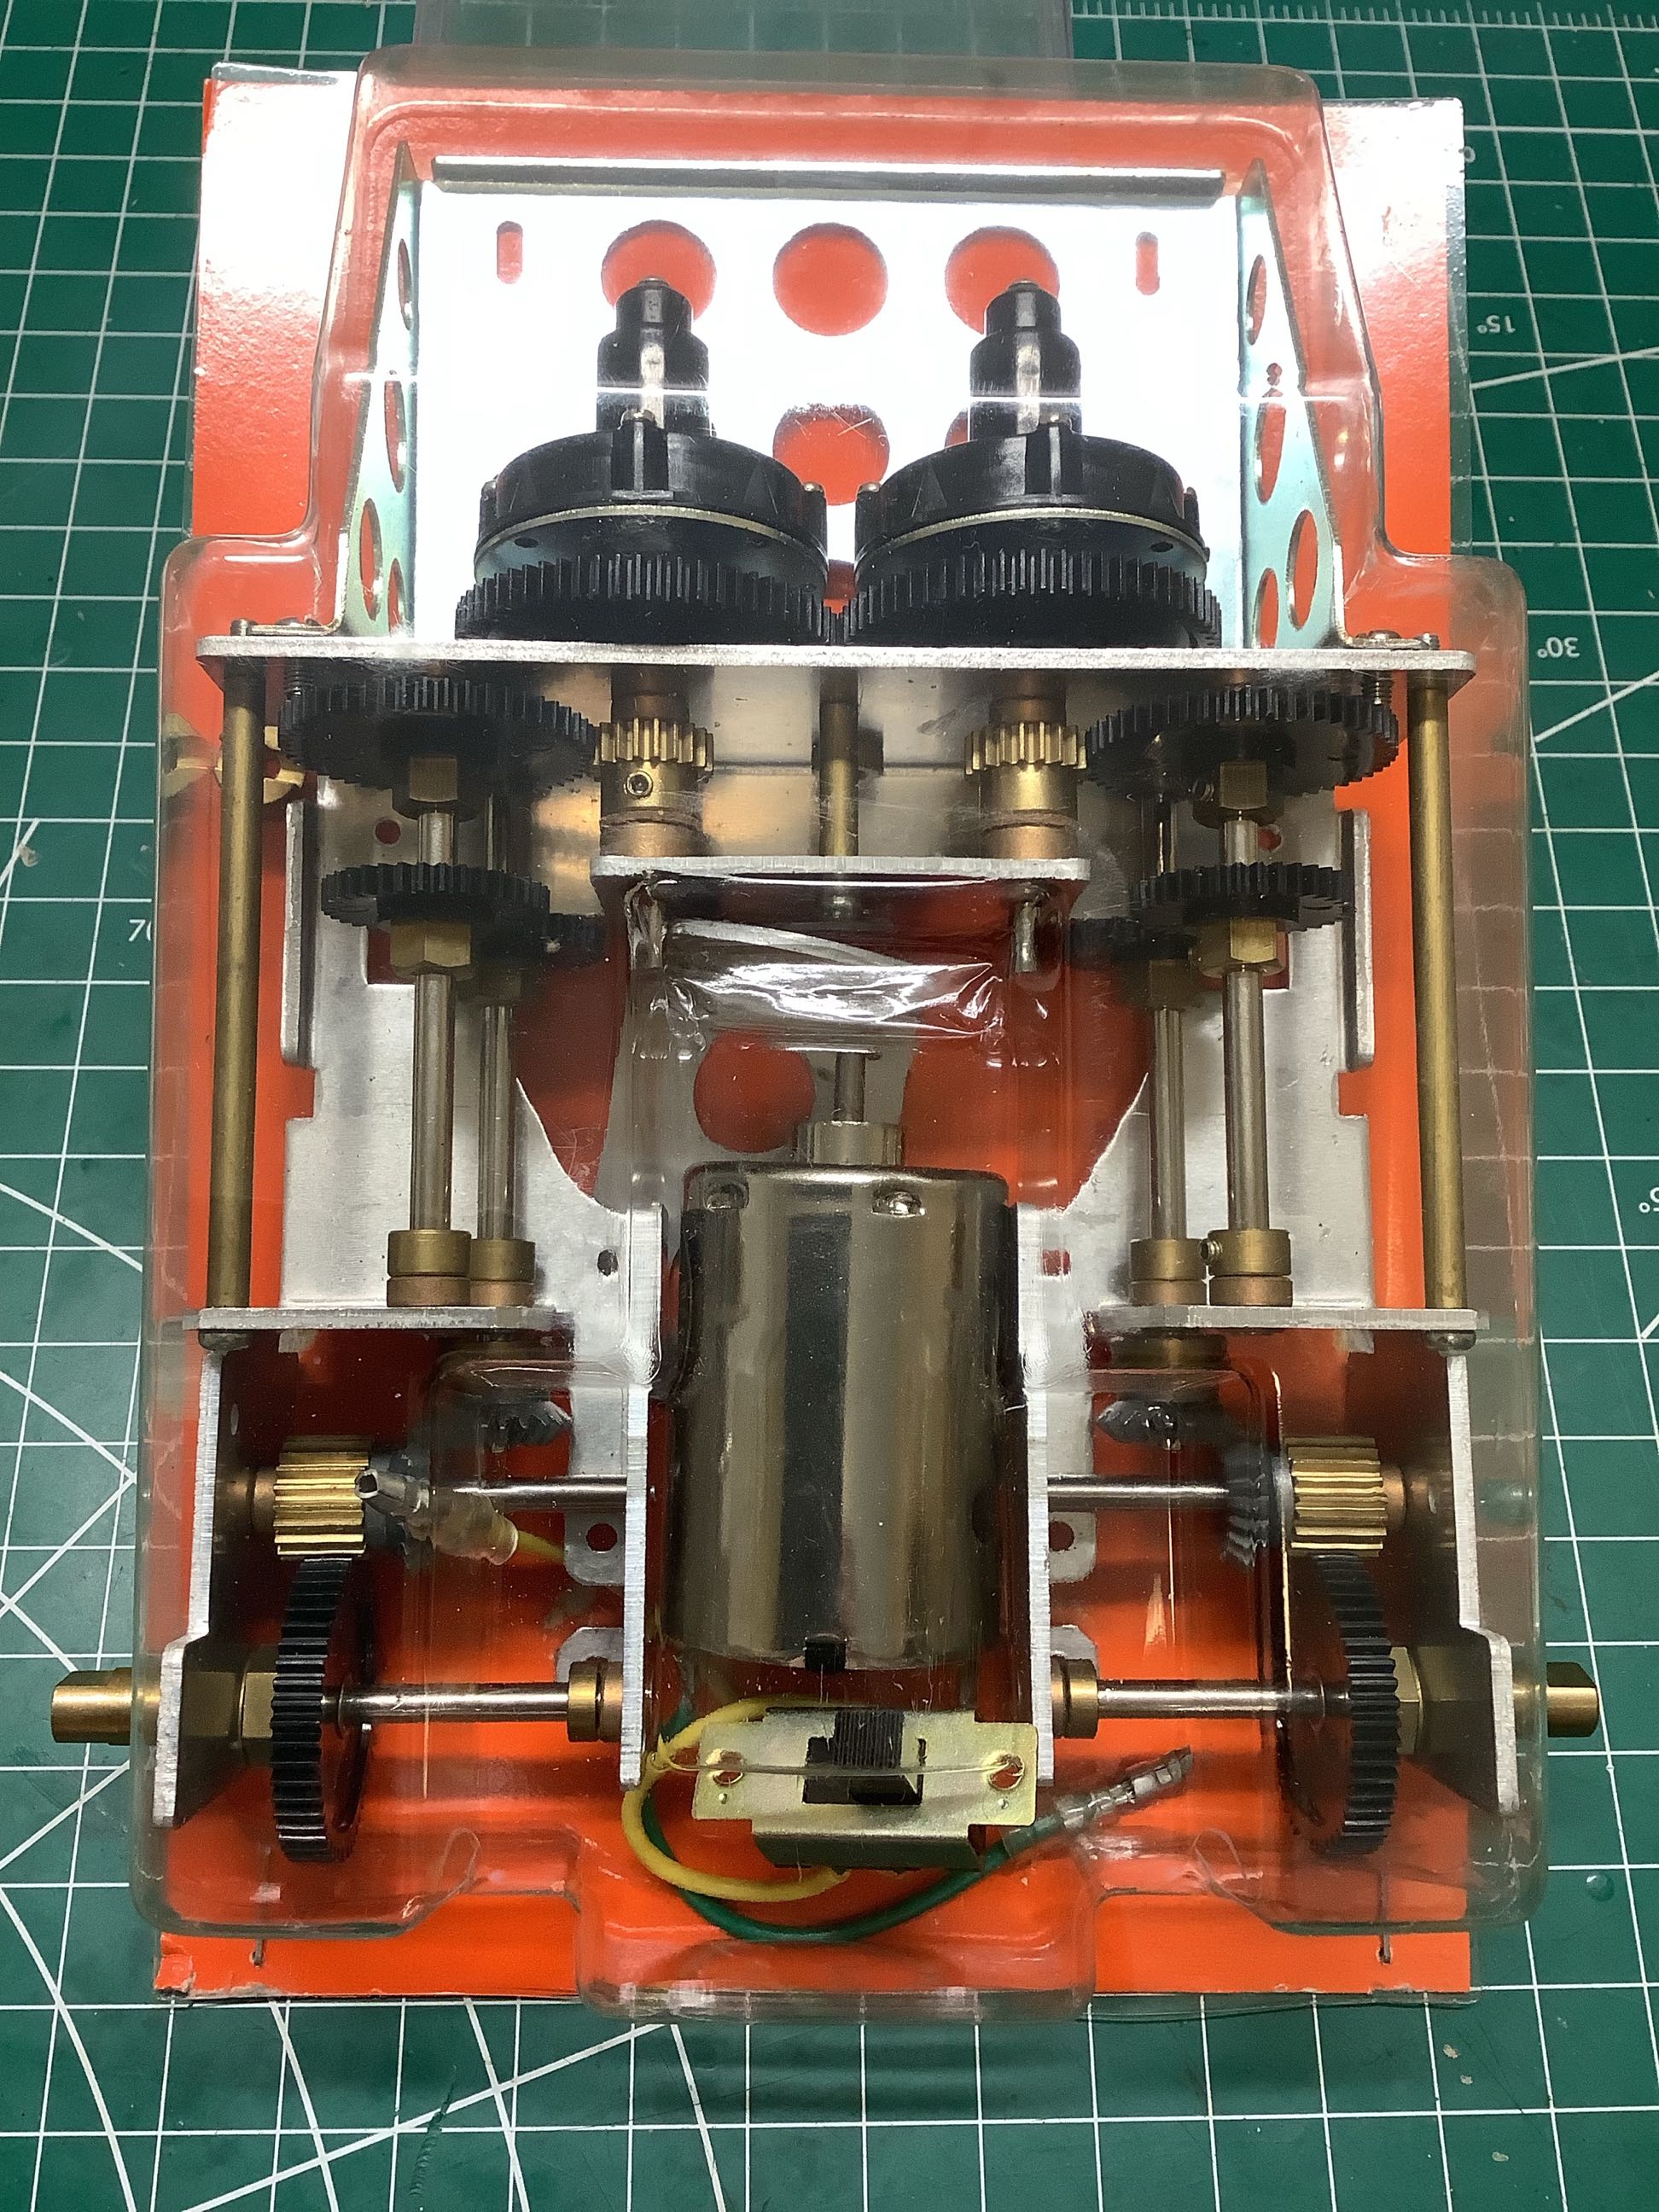
metal. In the middle is the gearbox. Note that the gearbox
is pre-assembled. In fact, the manual contains no instructions on
how to service it. I'll be taking it apart anyway. On the right is
the gearbox for the turret traverse, the radar motor, and the
MSC. Note that this is a 3-position MSC and not the continuous
unit shown on the box.
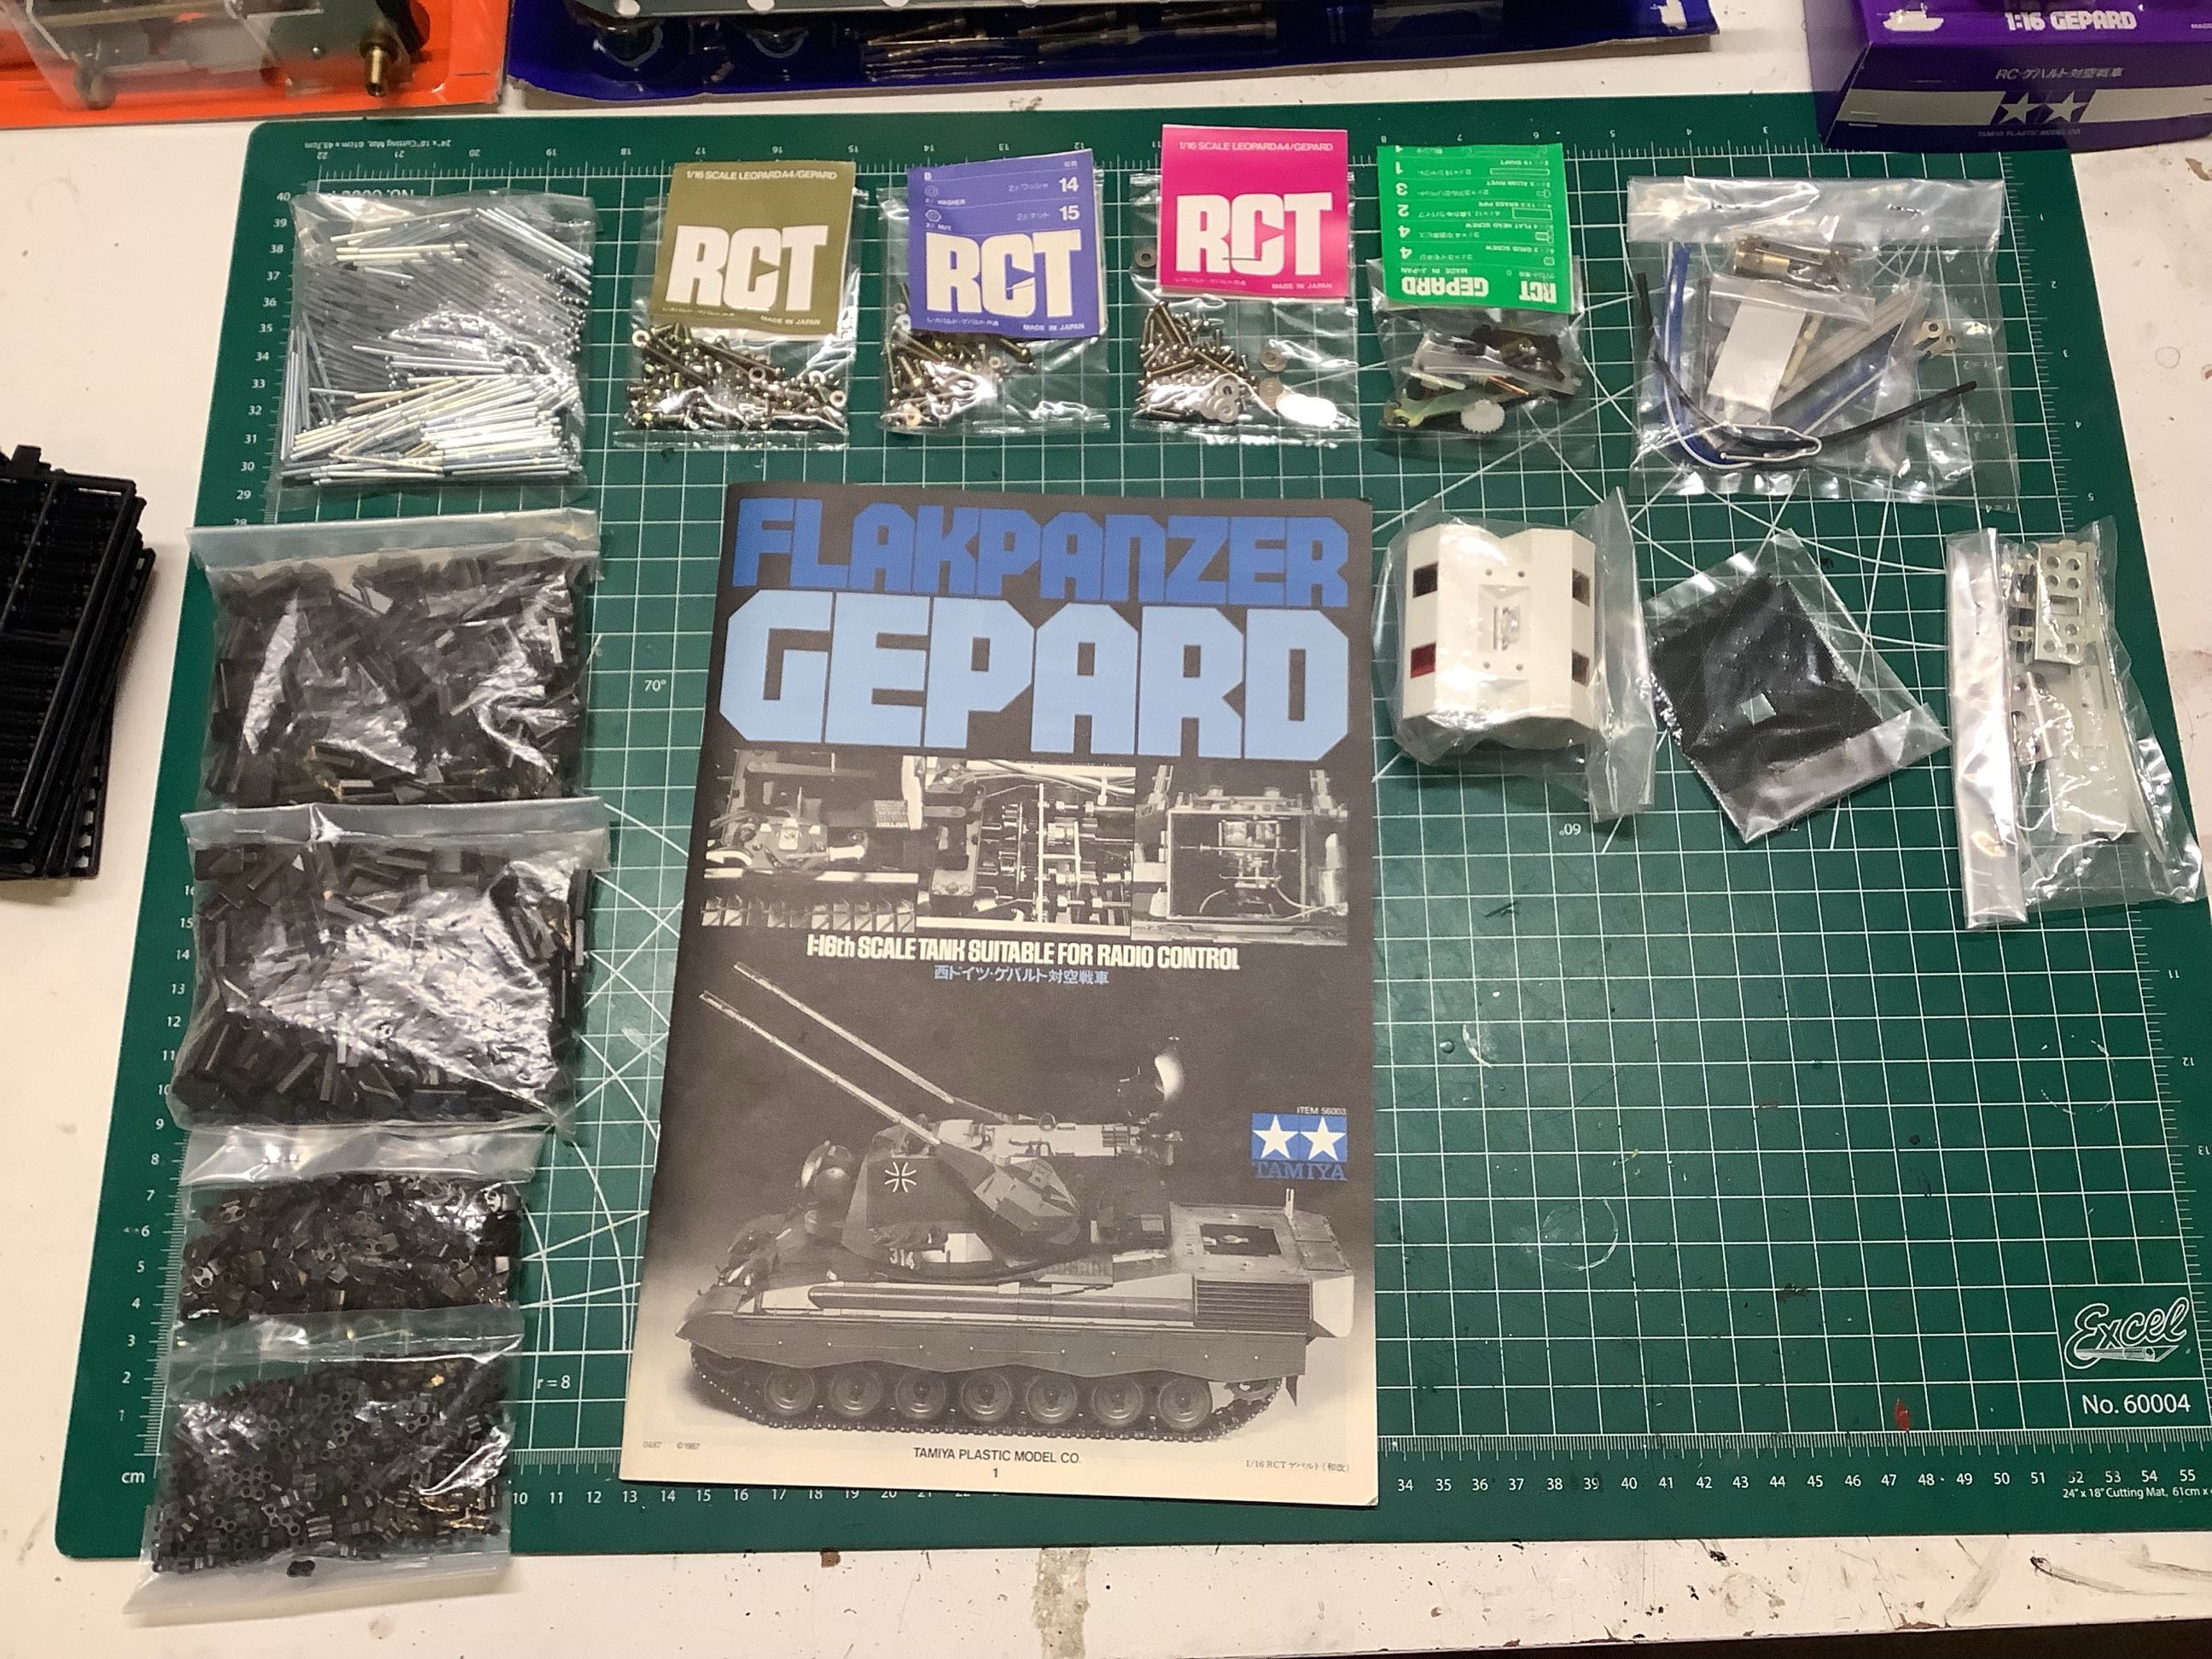
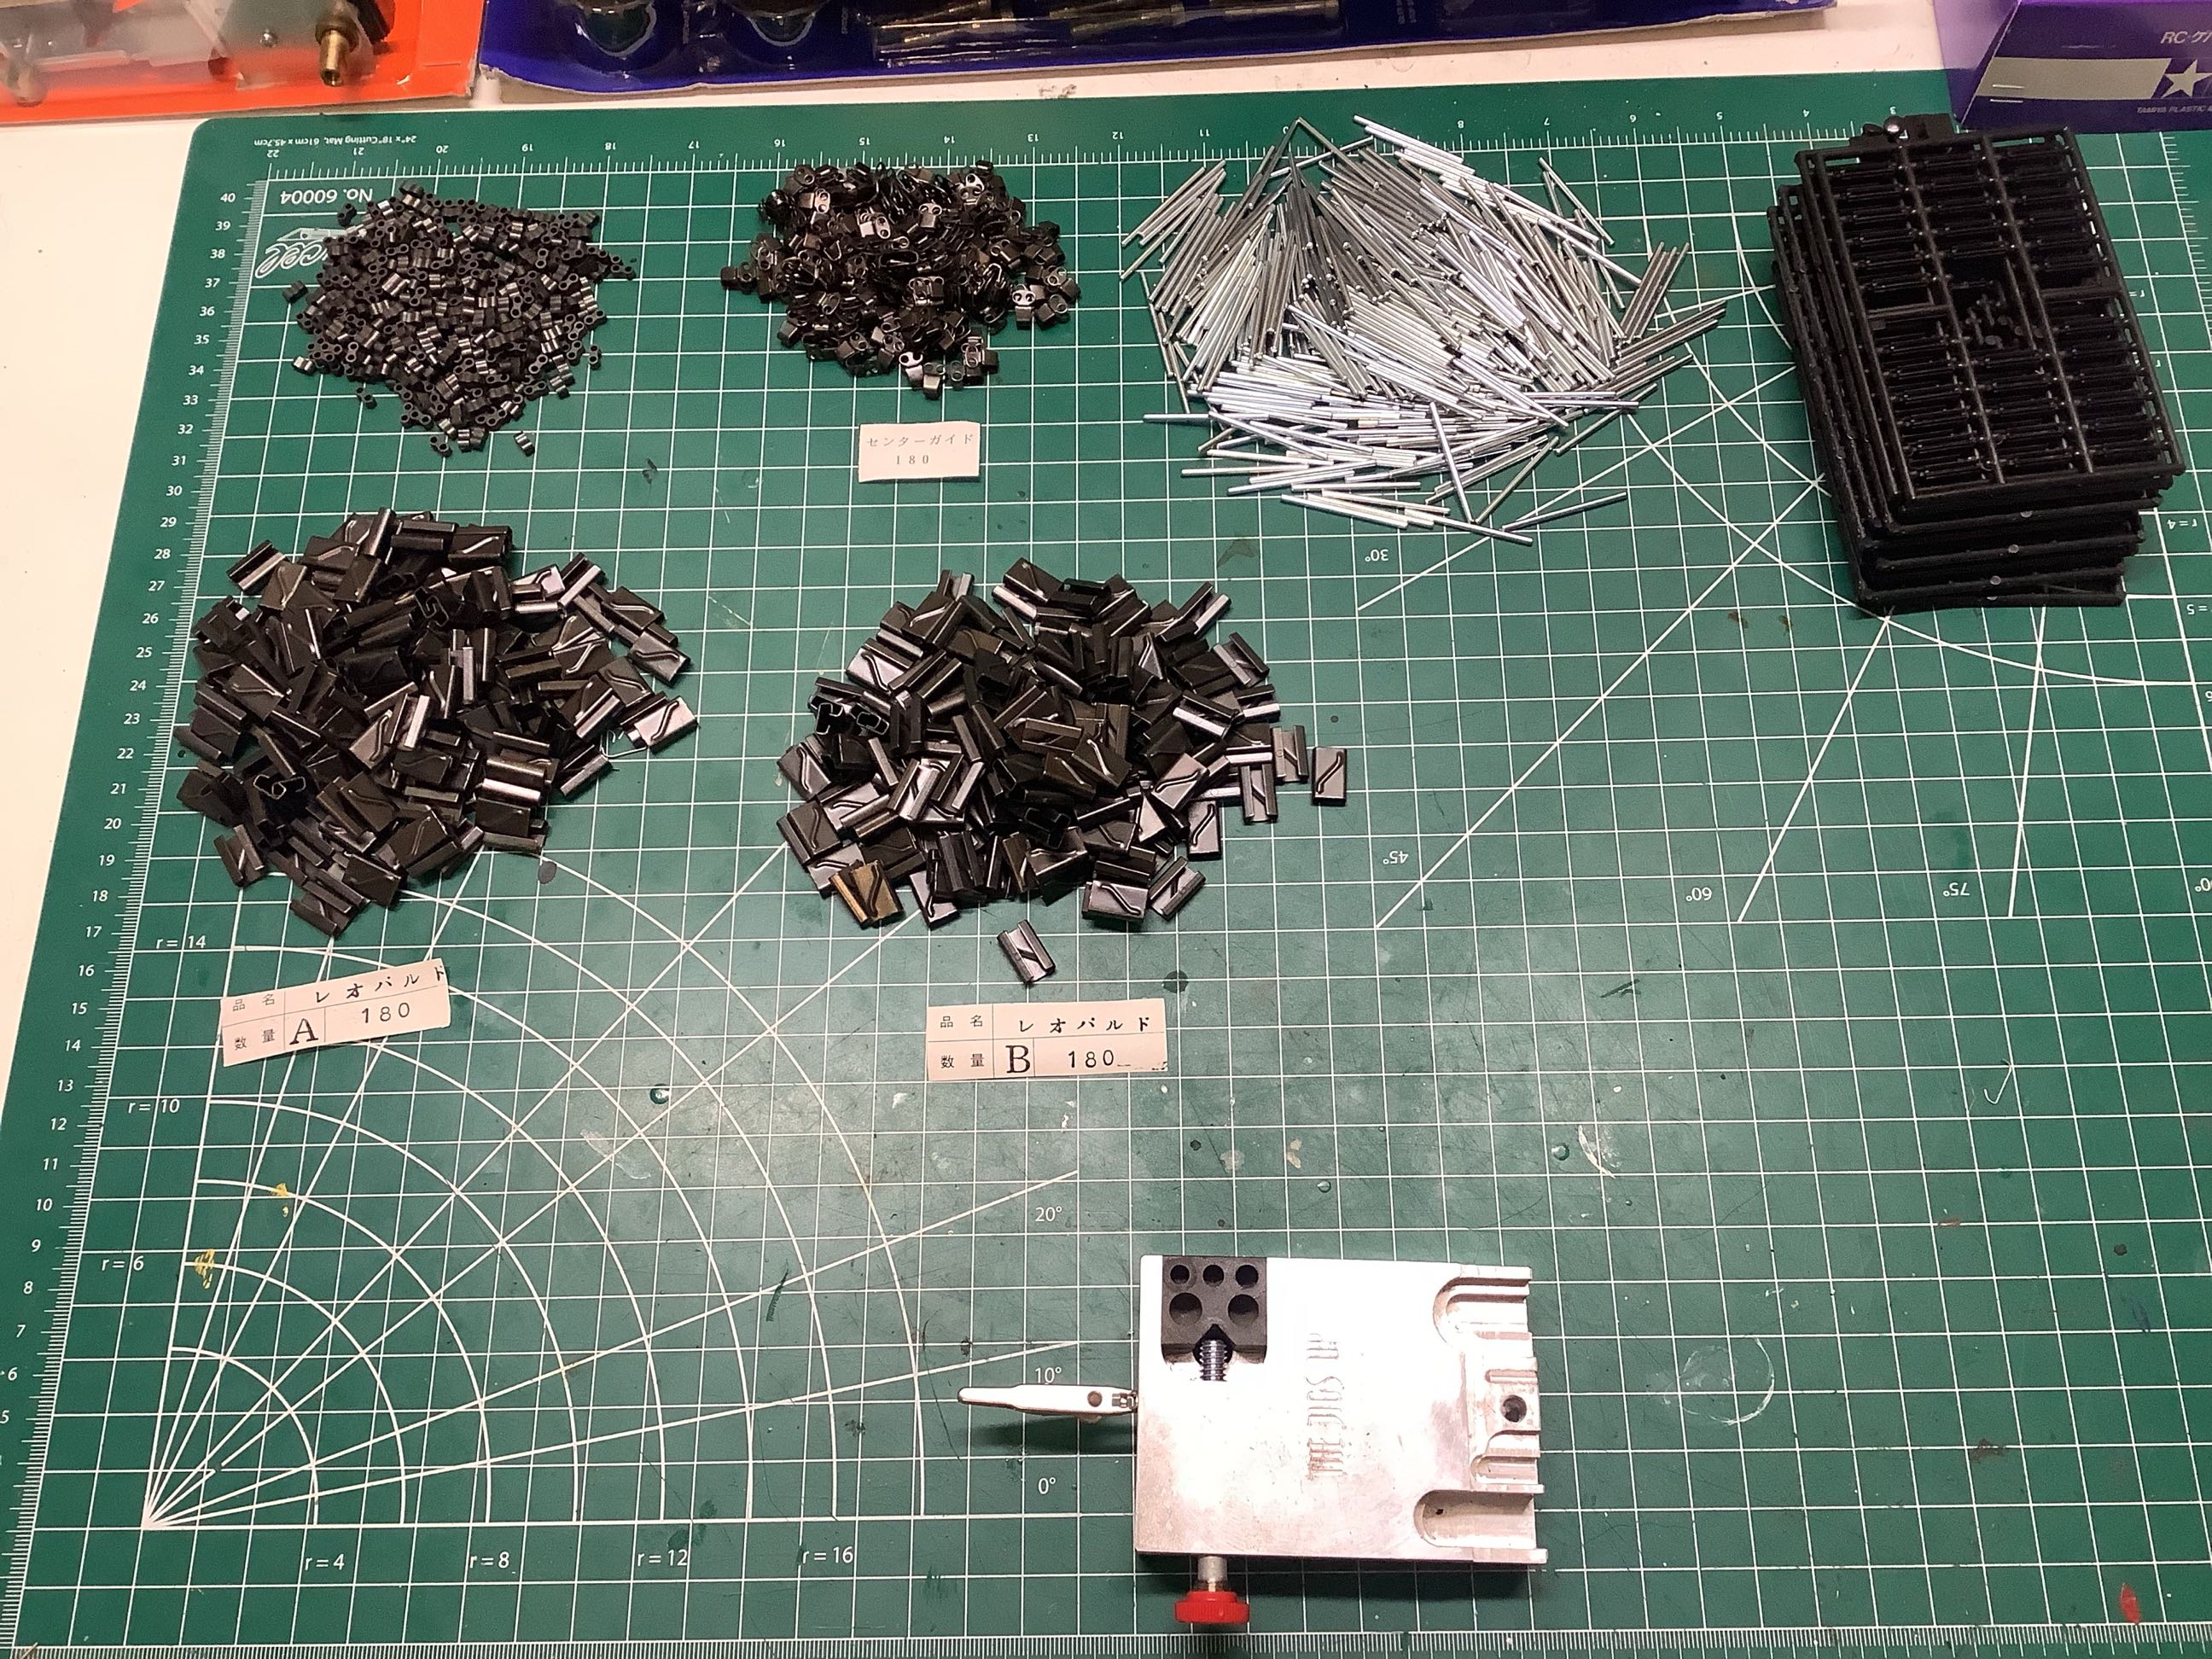
This box contains the hardware and other small parts including the many bits for the metal tracks. Many. Bits.
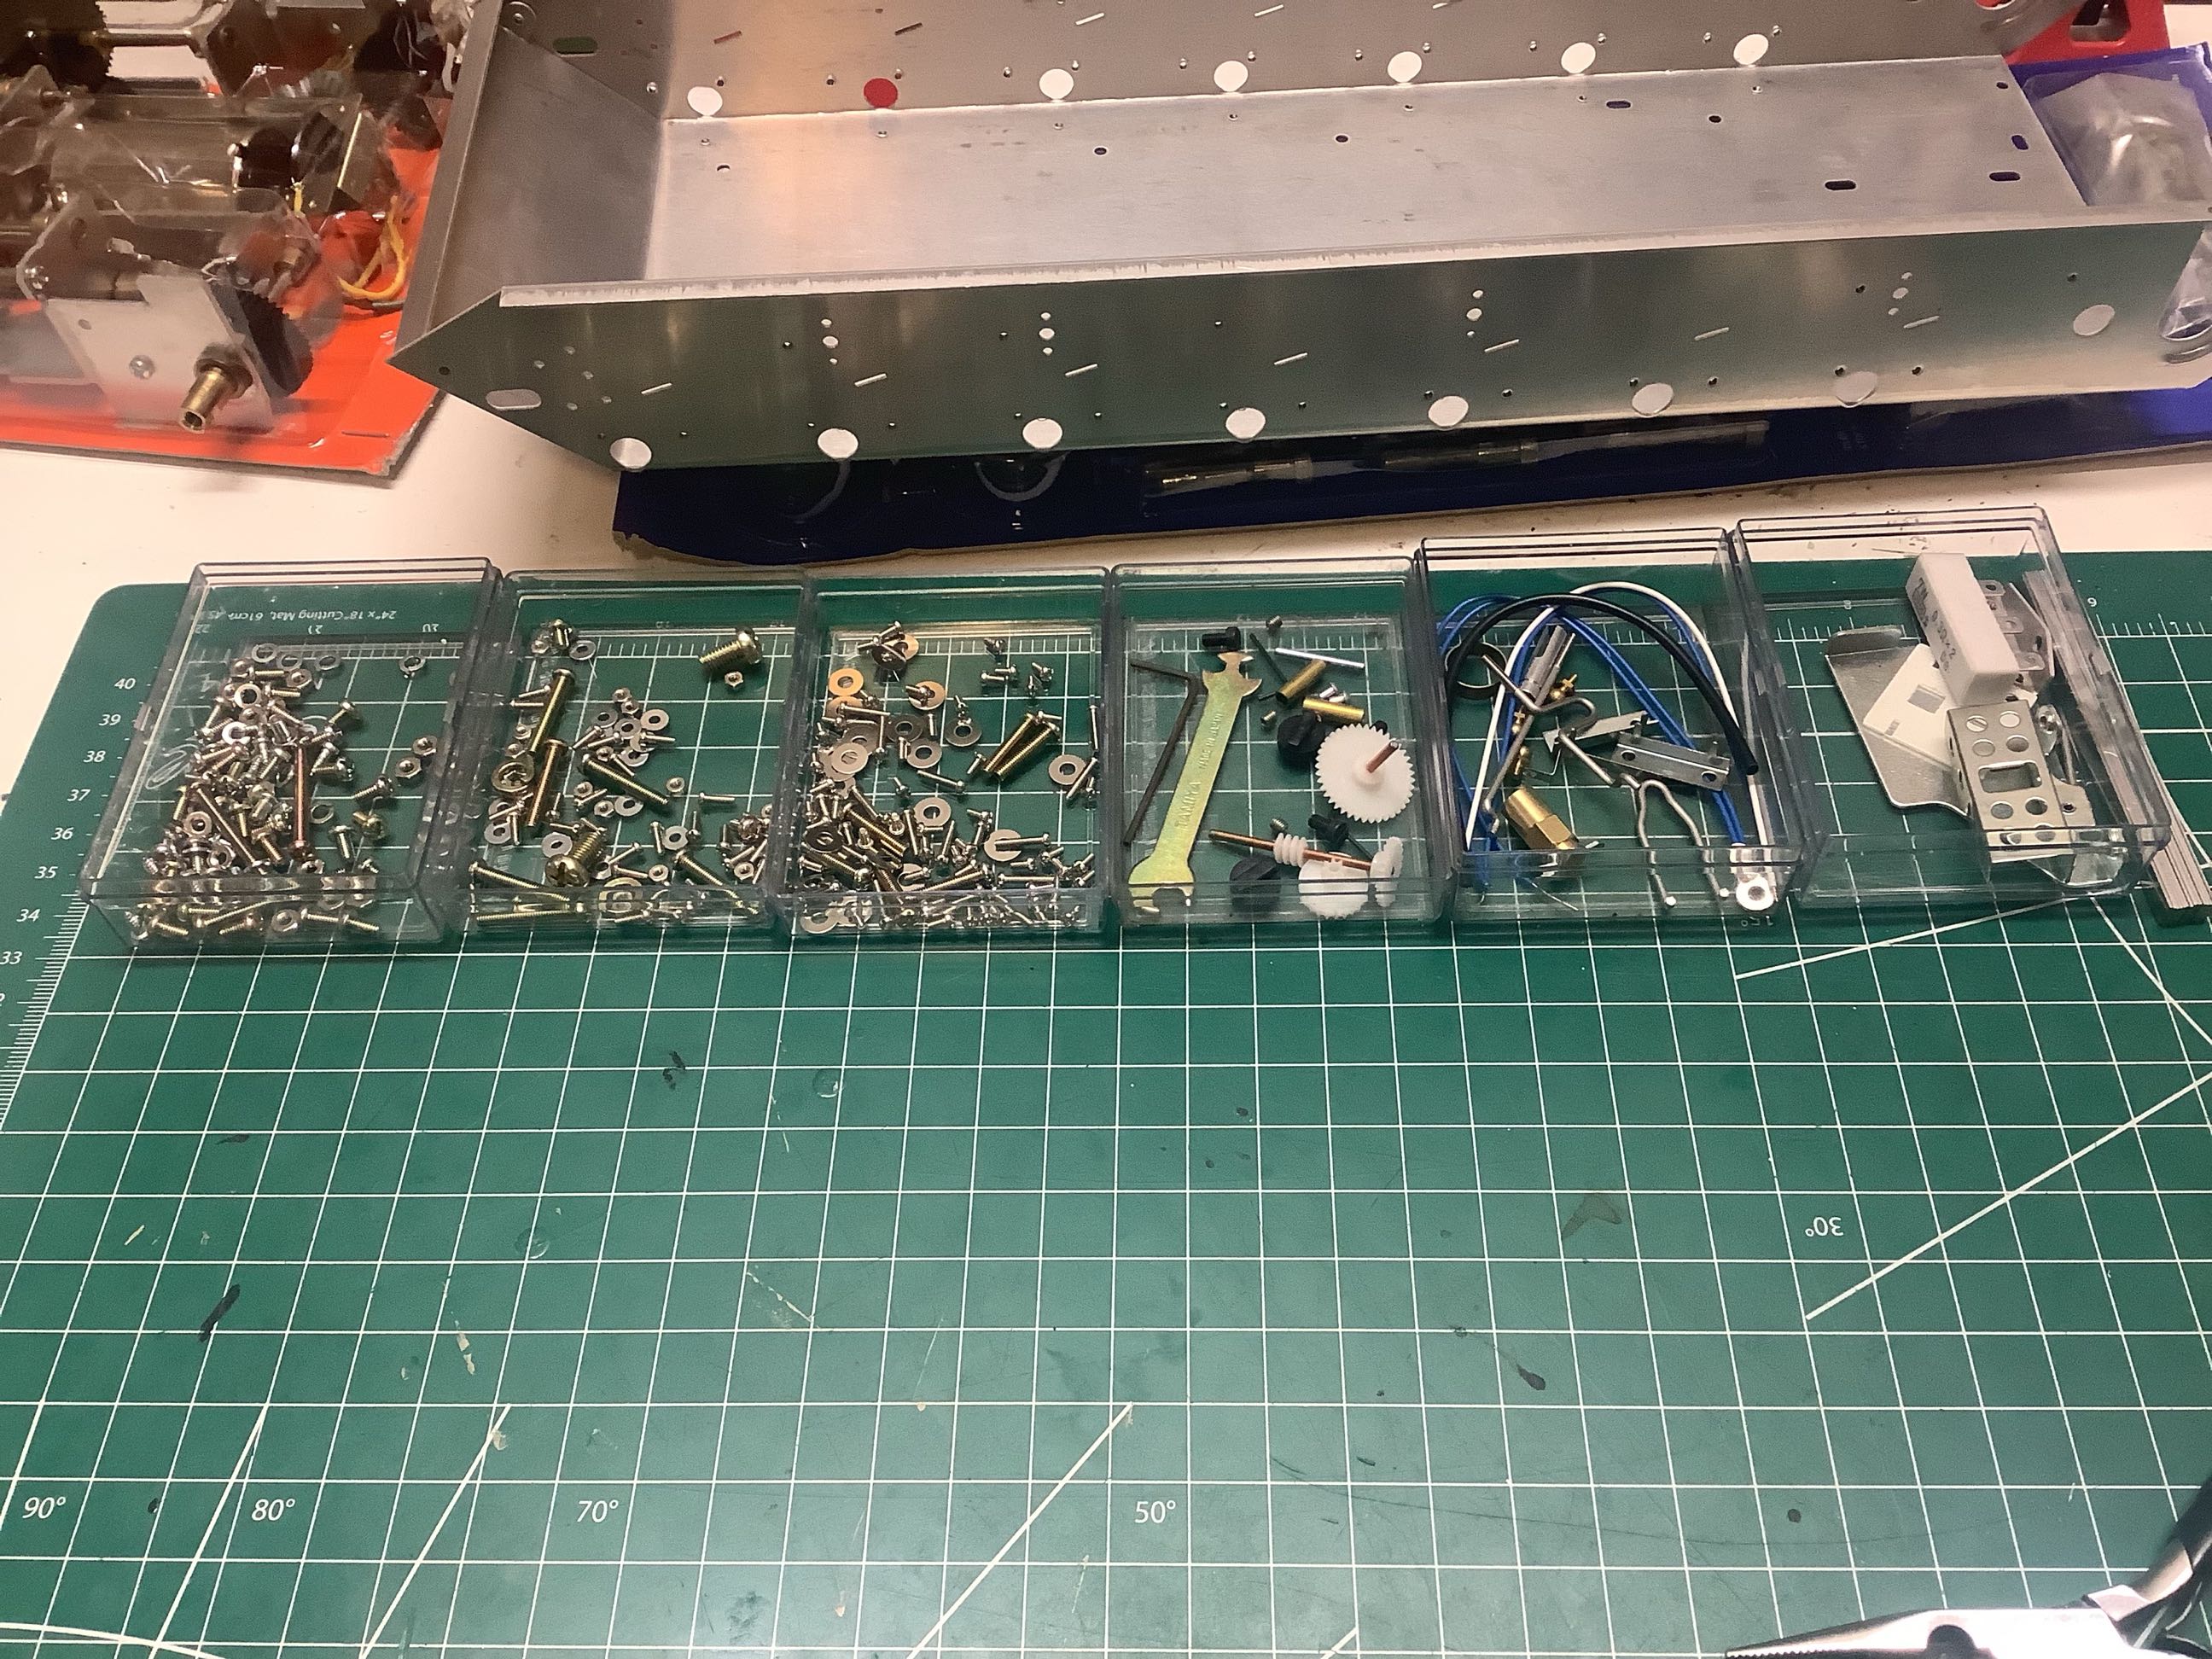
Here are the hardware bags and other bits from the small inner
box. Although they are individually labeled, all need to be opened
at once because the hardware is not sorted sequentially. The
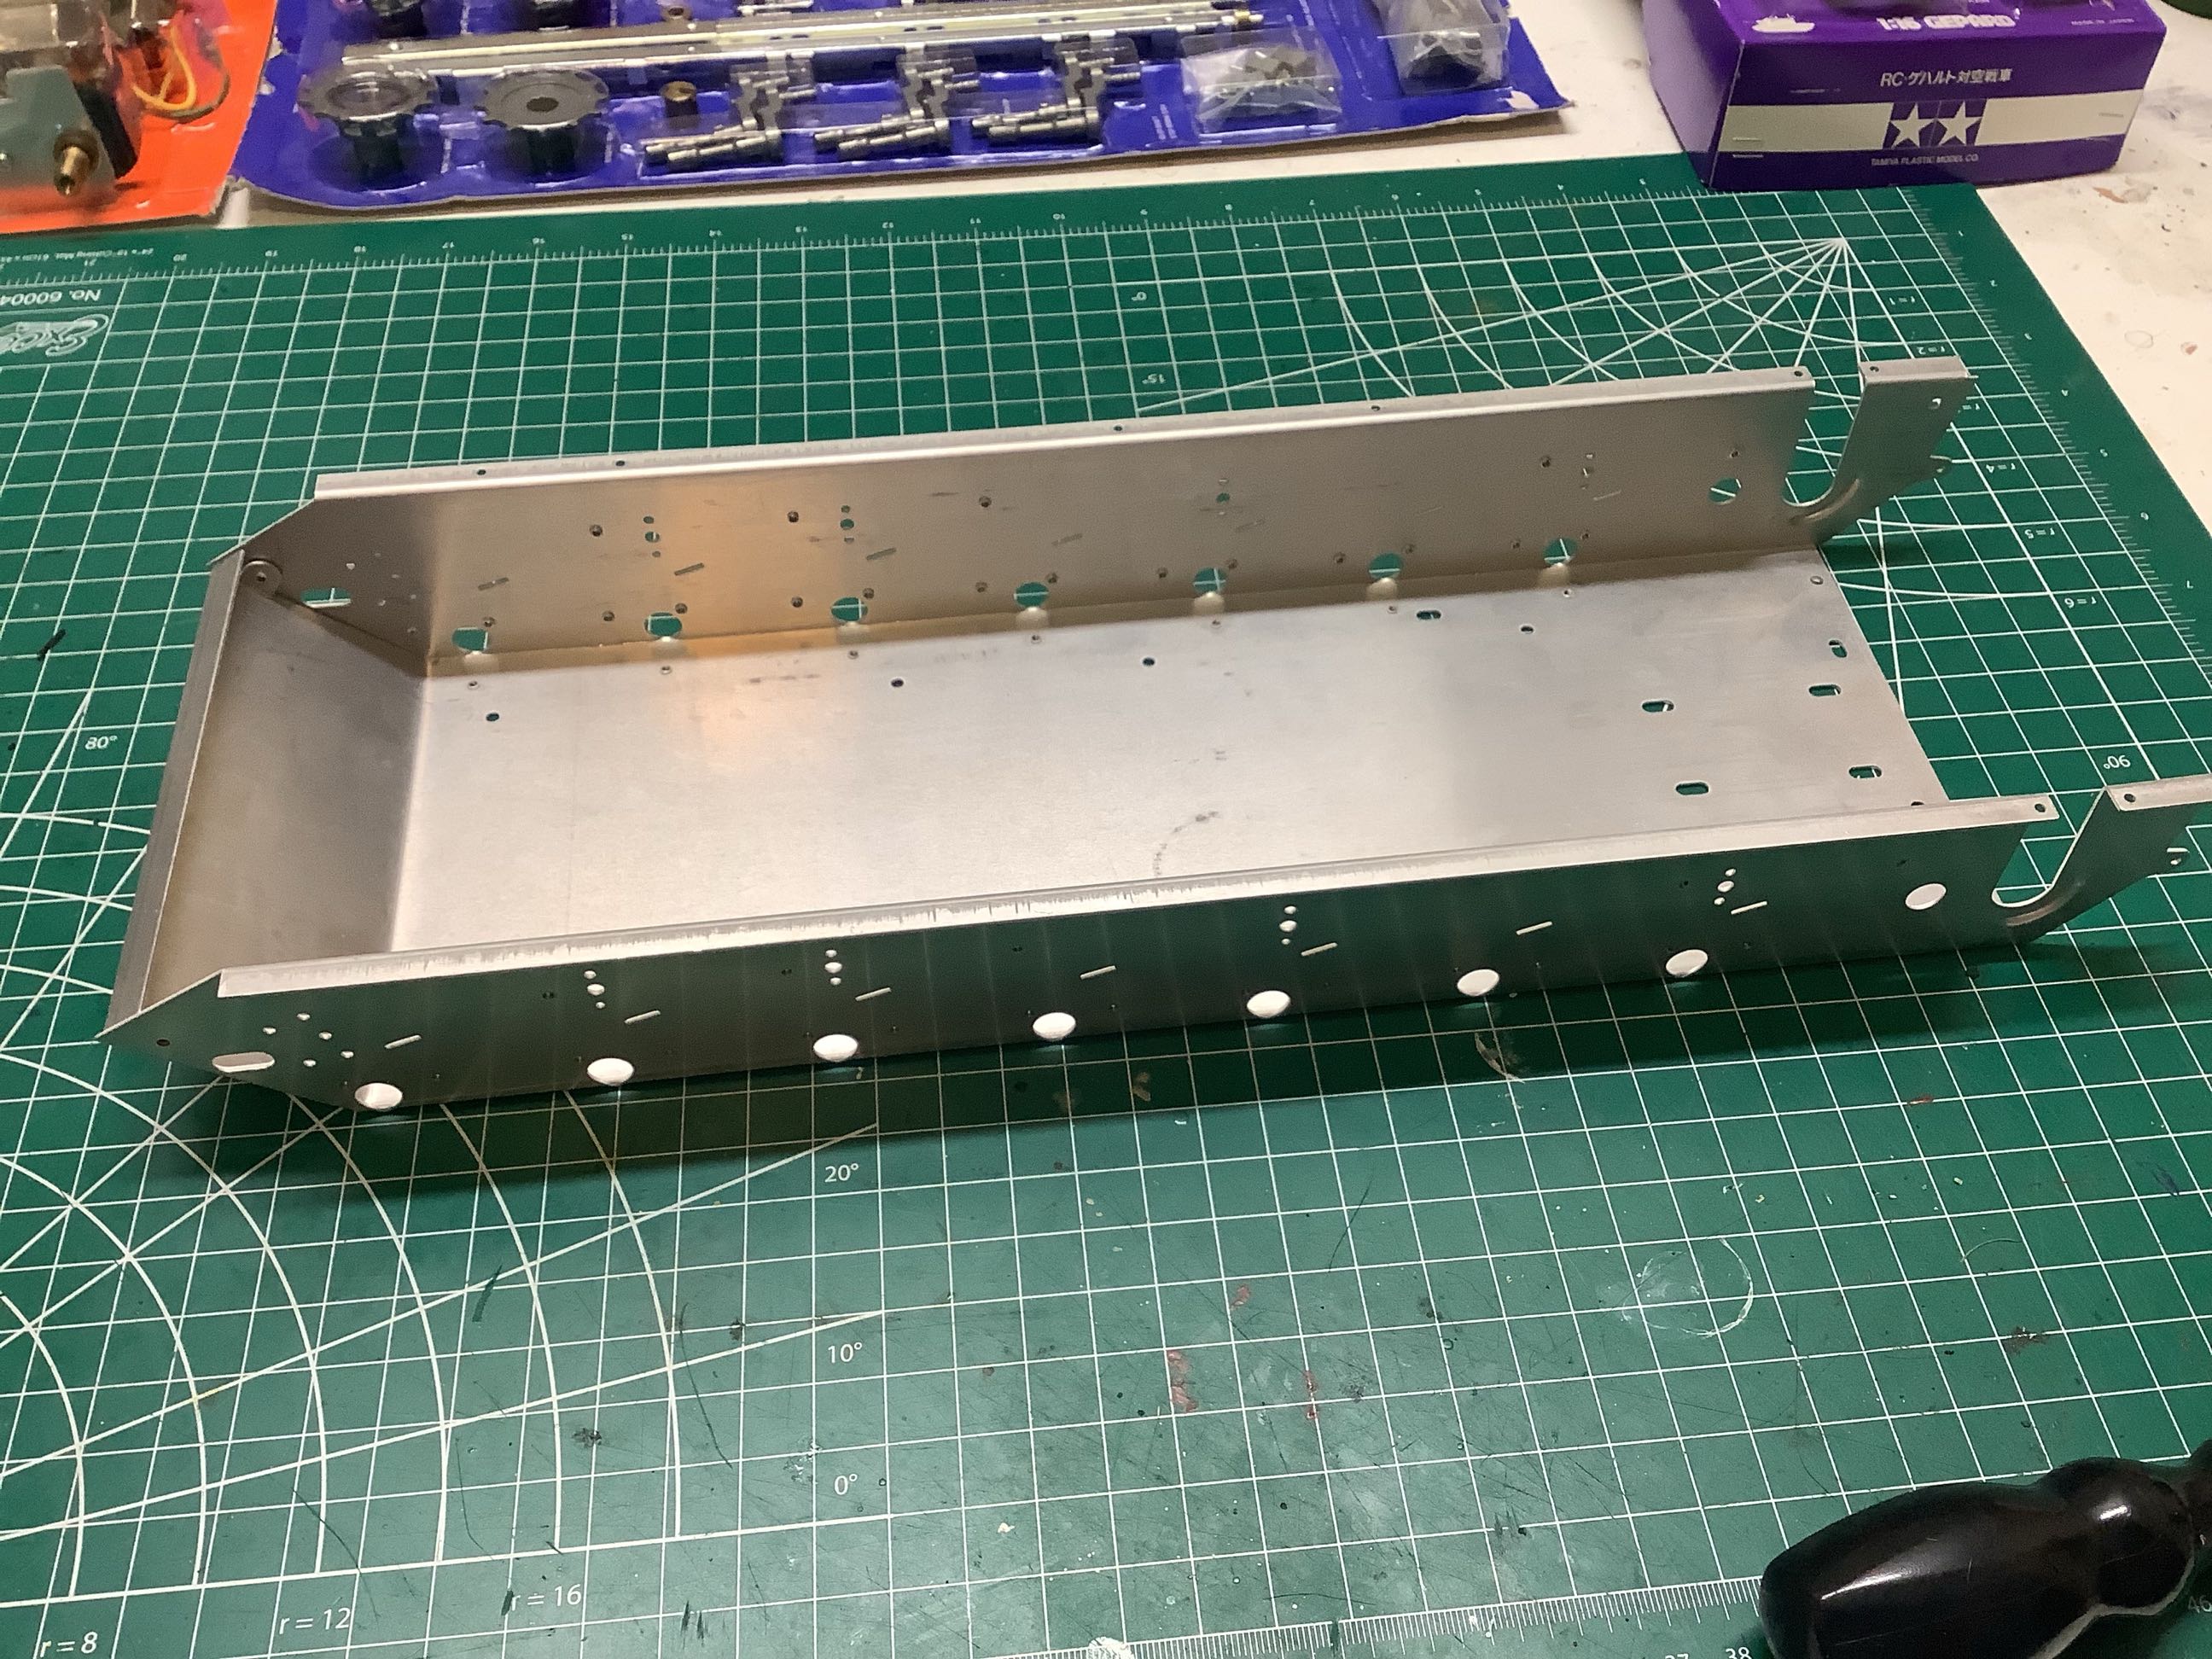
formed sheet metal chassis is shown on the right. Tamiya calls
this "duralumin", which is an ancient trade name for specific aluminum
alloys containing copper. It is most likely equivalent to 2036
aluminum sheet.
These photos show some closer views of the hardware. On the left
I've sorted the hundreds of parts used to build the tracks. On the
right I've opened all the hardware bags and placed them in plastic
servo cases to keep track of everything.
©2021 Eric Albrecht