

This is a pretty standard Traxxas box, packed efficiently with little space to spare. The art on the box reflects both of the available liveries. I got the green and blue one. The Slash Ultimate costs $120 more than the regular brushless Slash 4x4. Let's review the upgrades as we rebuild the model and see if the value is really there. We'll also see if this version really deserves the moniker "Ultimate".
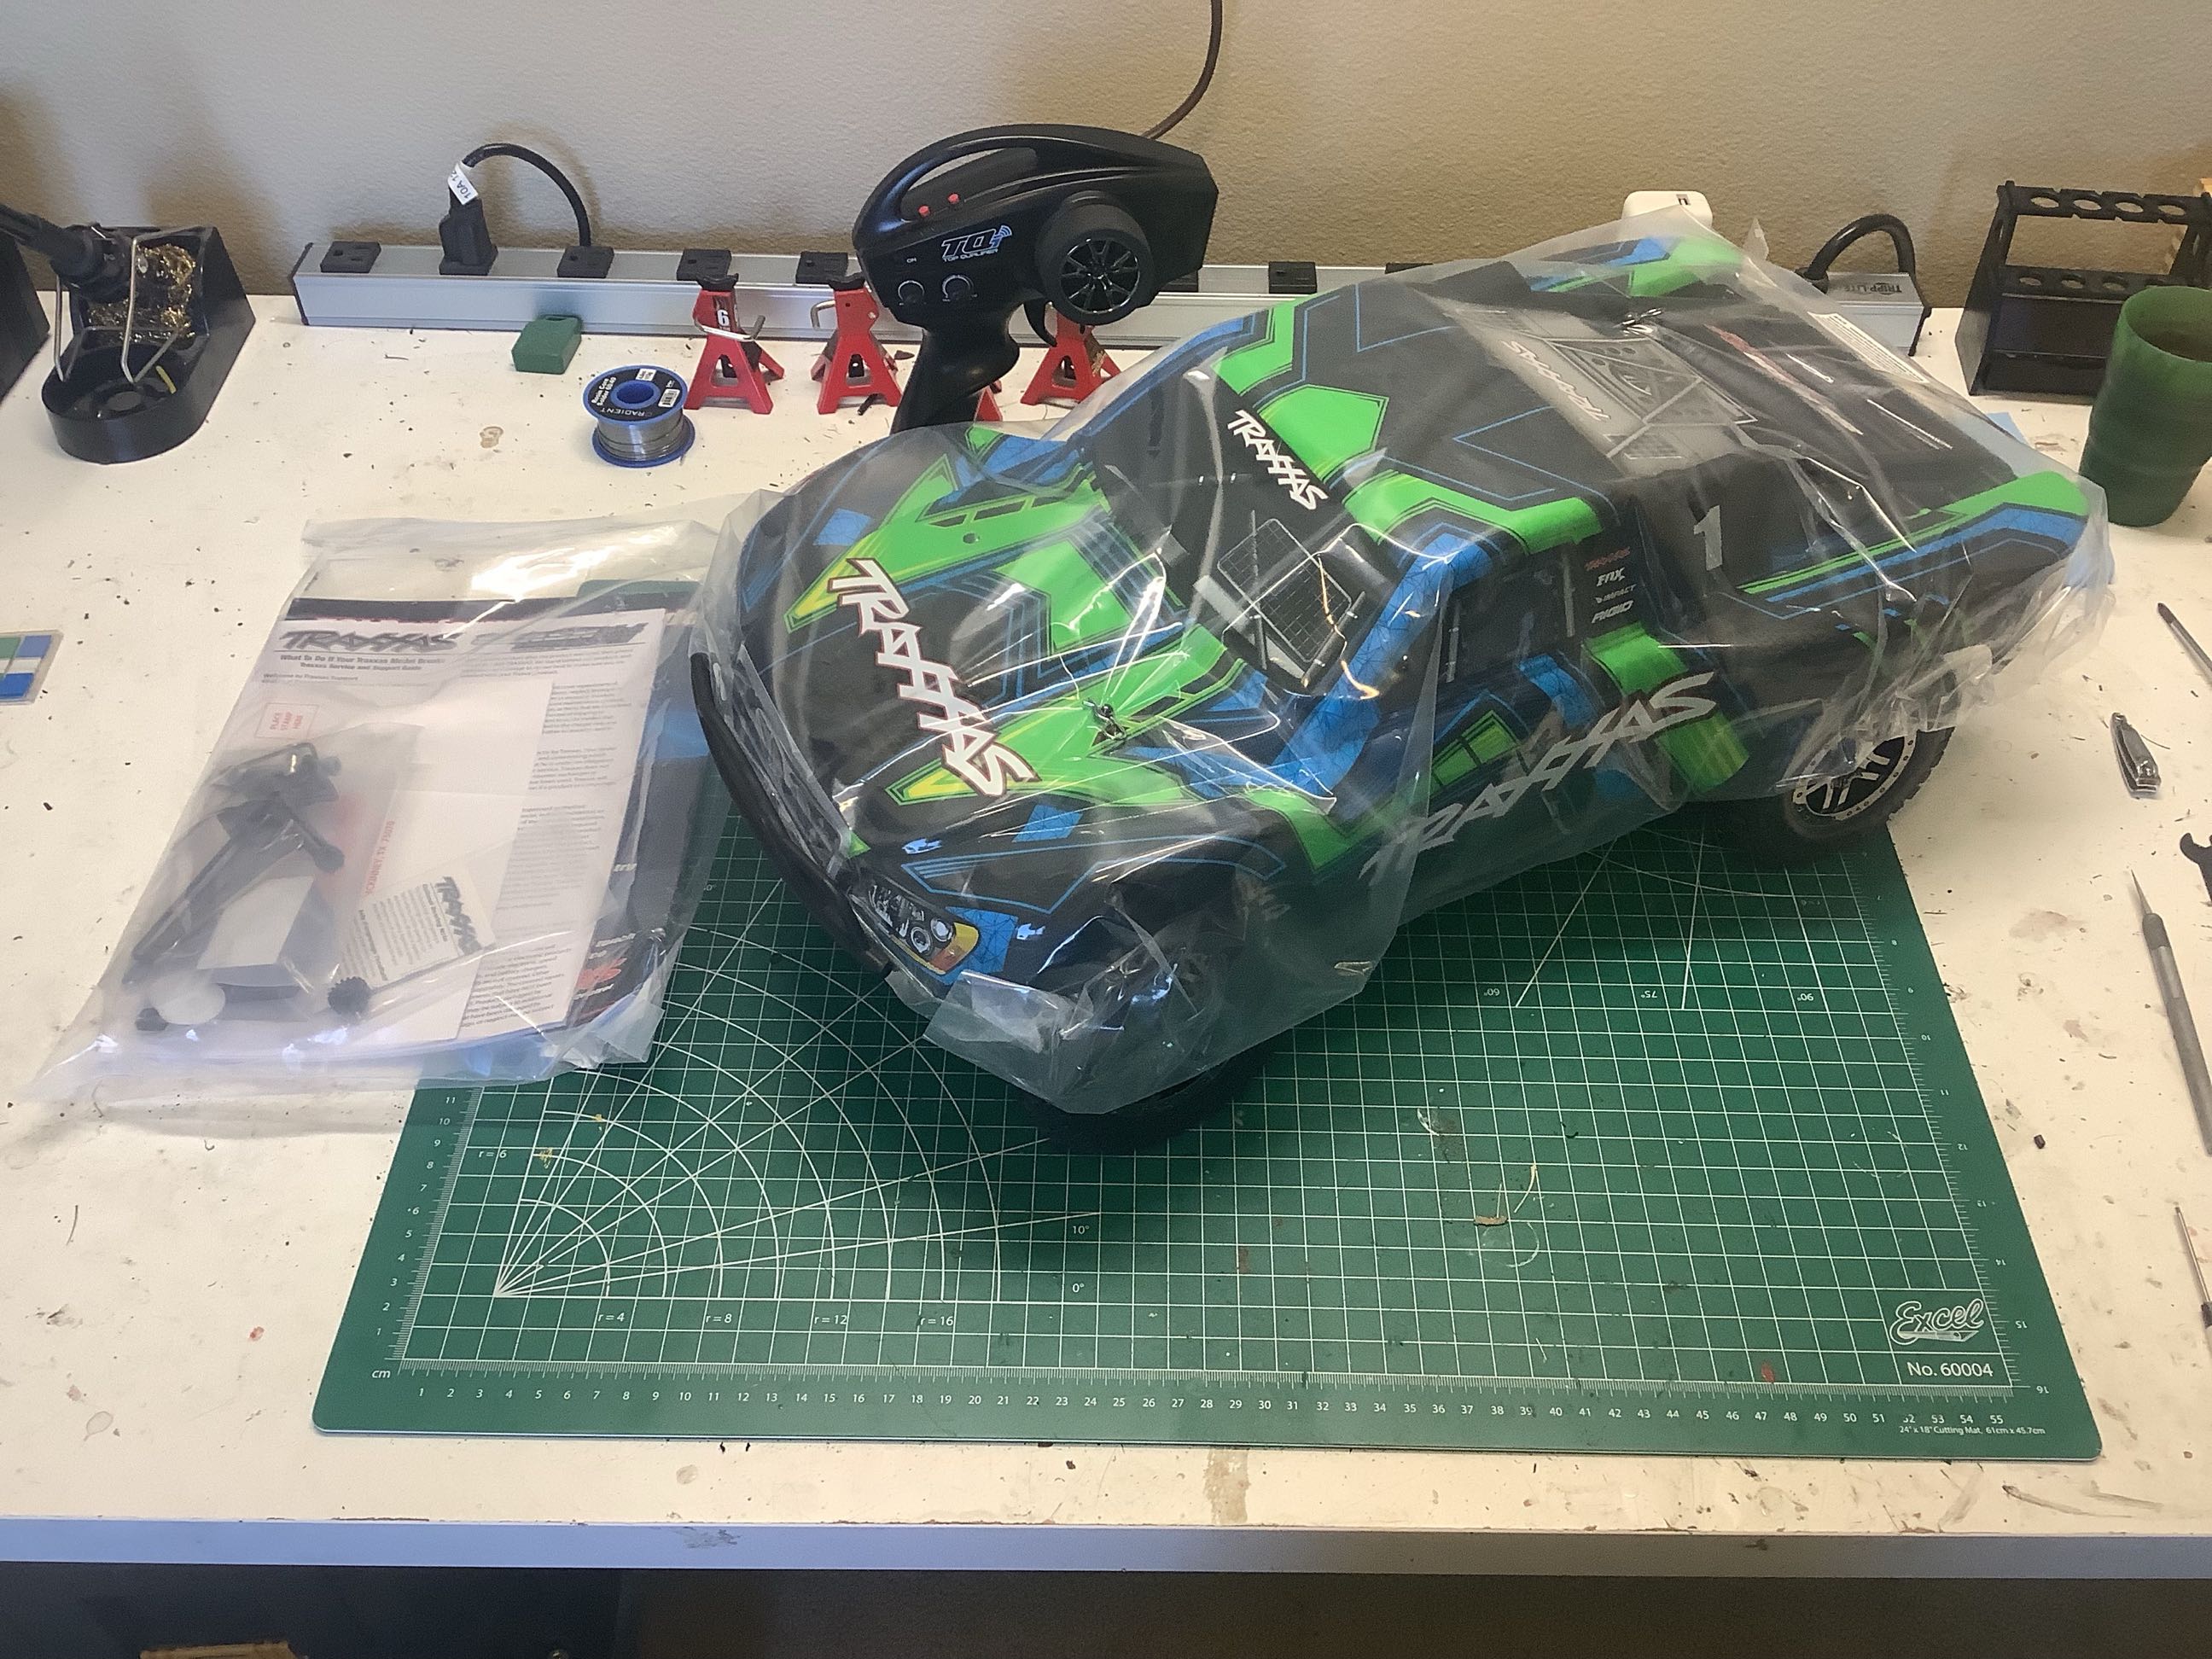
Here's what comes out of the box. The body is wrapped in plastic to avoid scratching, but is still pinned to the chassis. The body uses a different paint scheme than the standard model, but is not really more deluxe in any noticeable way. There is a transmitter and a bag which contains a simplified manual, a parts list, and a few simple tools. The full manual must be downloaded and is only available electronically. The picture of the chassis on the right shows the usual nanny warnings that need to be removed. The TQi transmitter actually includes the optional Bluetooth module. I think this is the only Traxxas model that comes with that module in the box. It provides for real time telemetry as well as programming of the transmitter and firmware upgrades of both the radio and receiver.
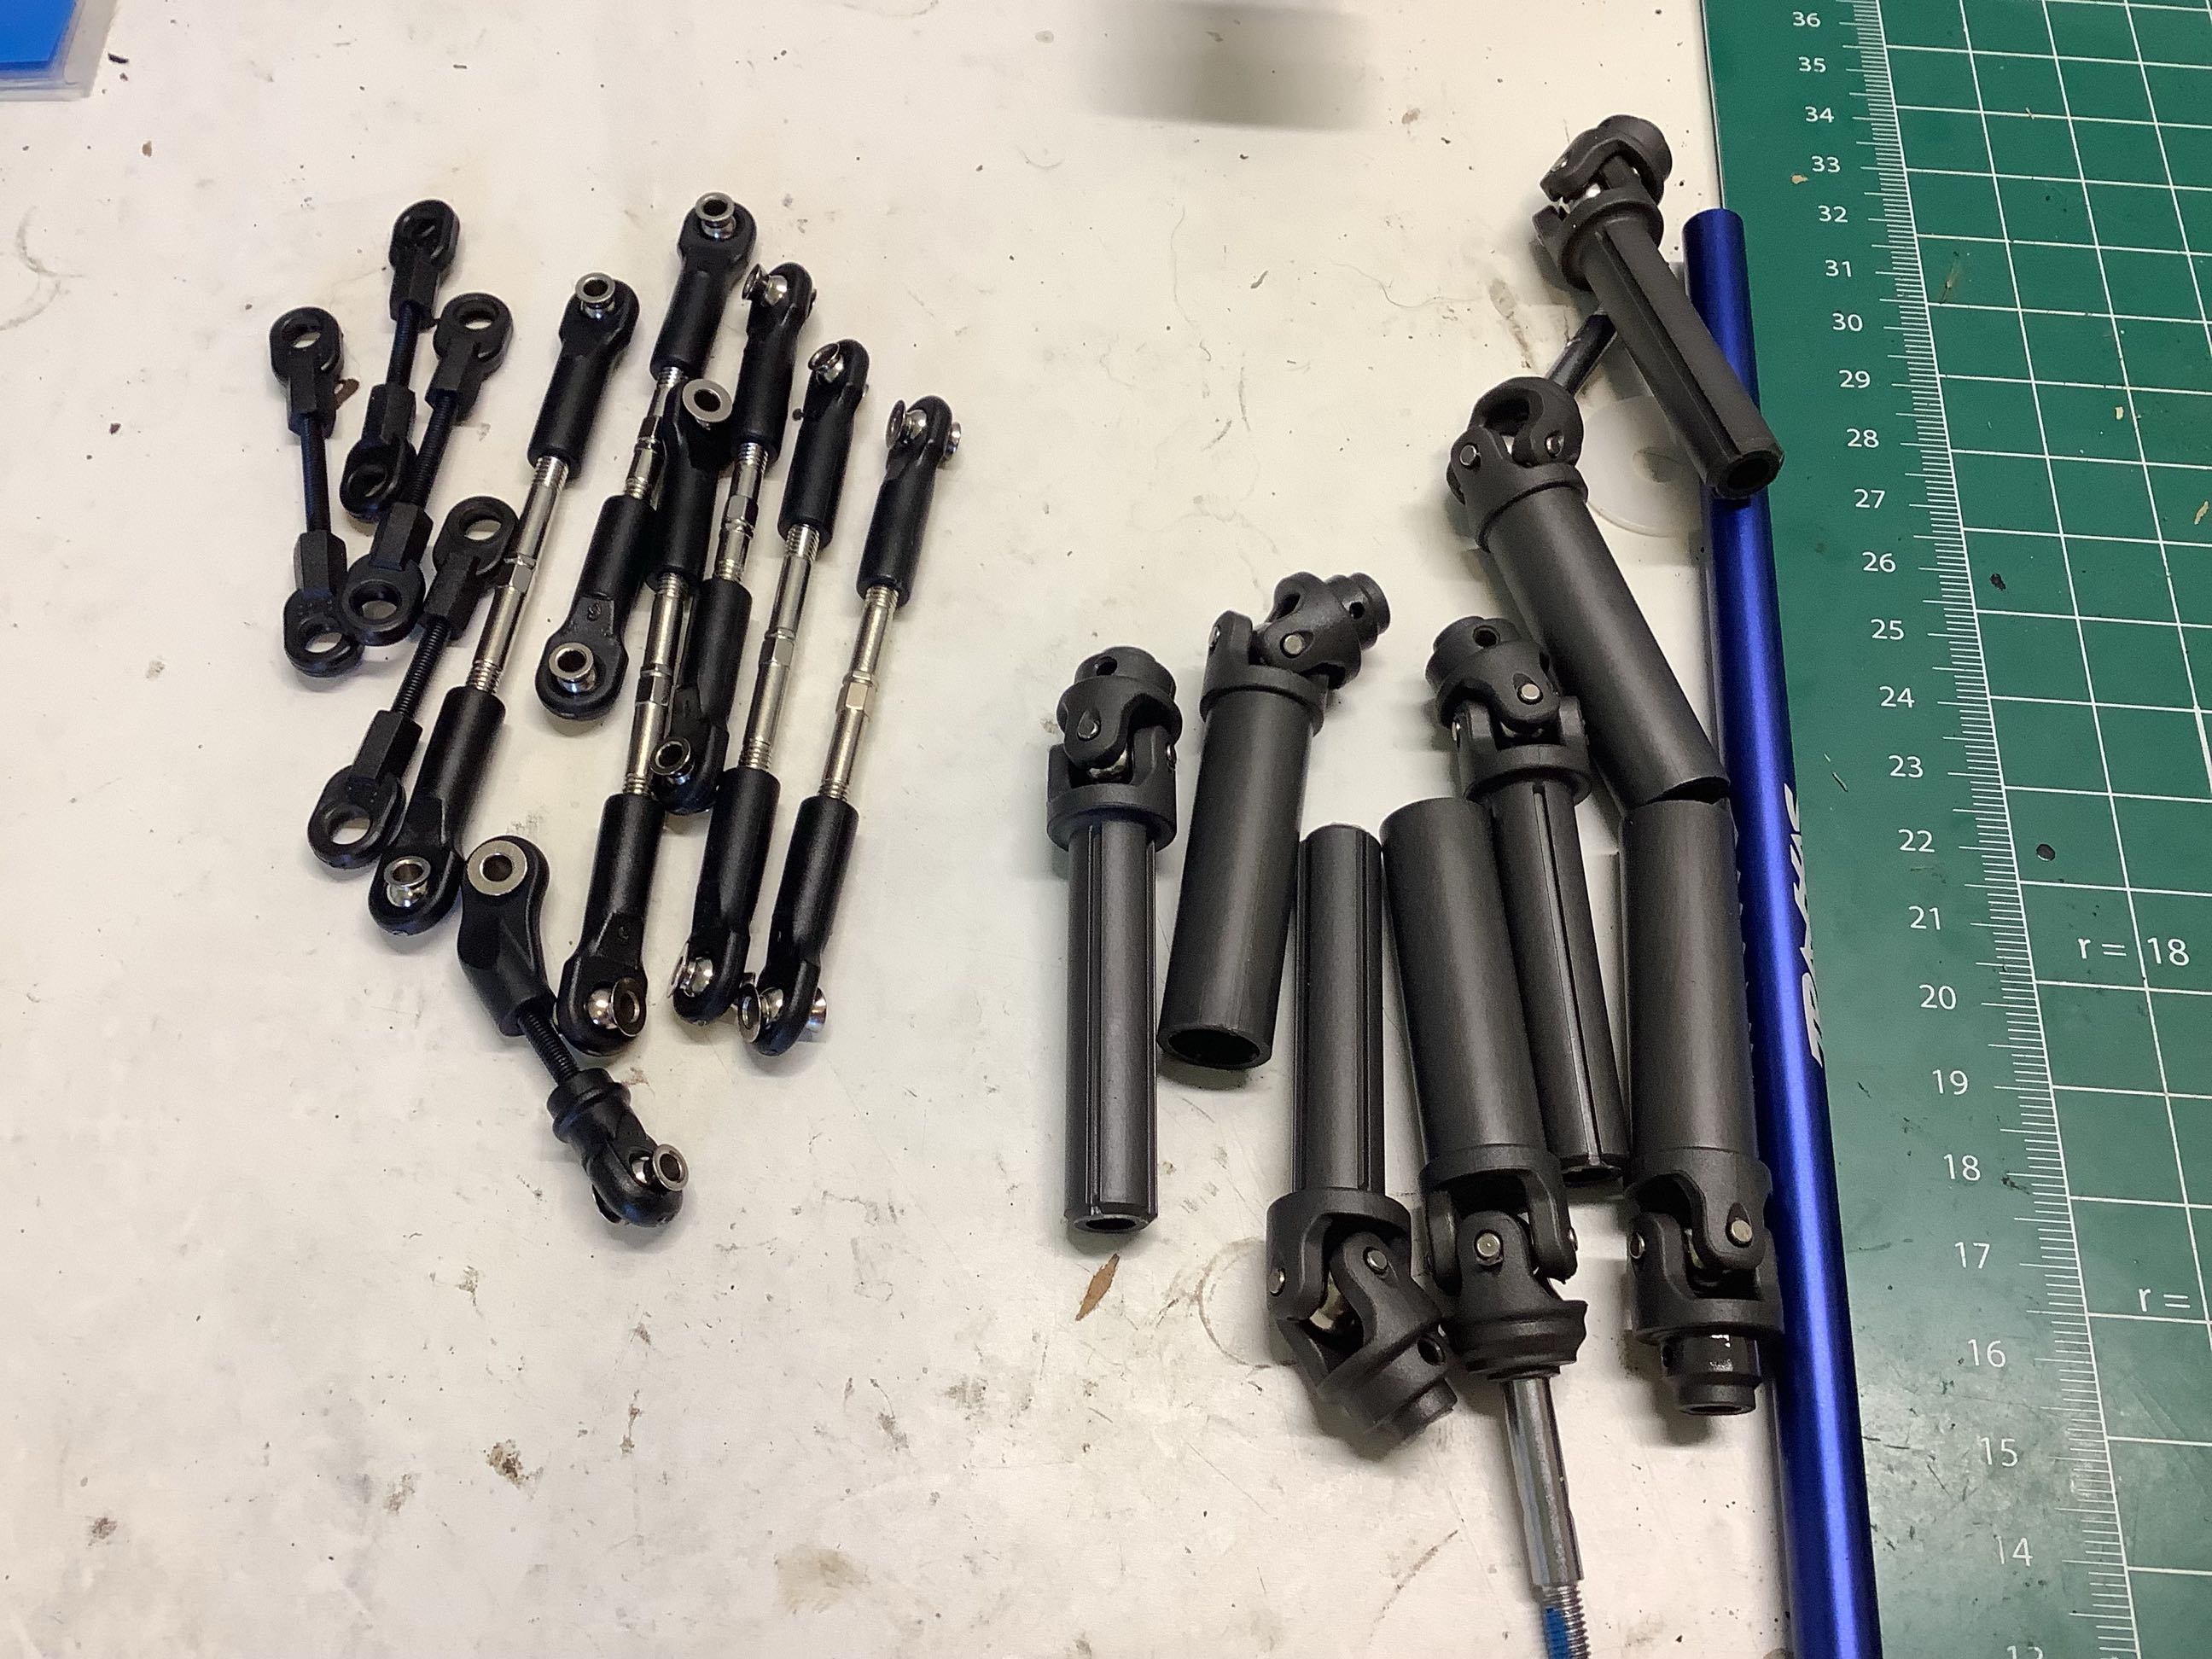
Time to tear down this entire brand new model and rebuild it from scratch. On the left you can see the links and drive shafts. I'm not going to take the links apart. The steel 4mm turnbuckle links are an upgrade from the brushed Slash, but standard on the brushless version. The drive shafts are sliding universal style which is an improvement over drive cups and dog bones, but there are no CVDs installed. A full set of those will cost another $160, so I guess this Ultimate version still has a ways to go. These are a slightly reinforced version of the drive shafts on the standard Slash versions worth a whopping extra $2 (per corner). That long extruded aluminum center drive shaft is common with the brushless Slash. On the right you can see the electronics package including the Velineon brushless system and the digital steering servo. The brushless system is common to the regular brushless Slash, but the high speed servo is a $14 upgrade.
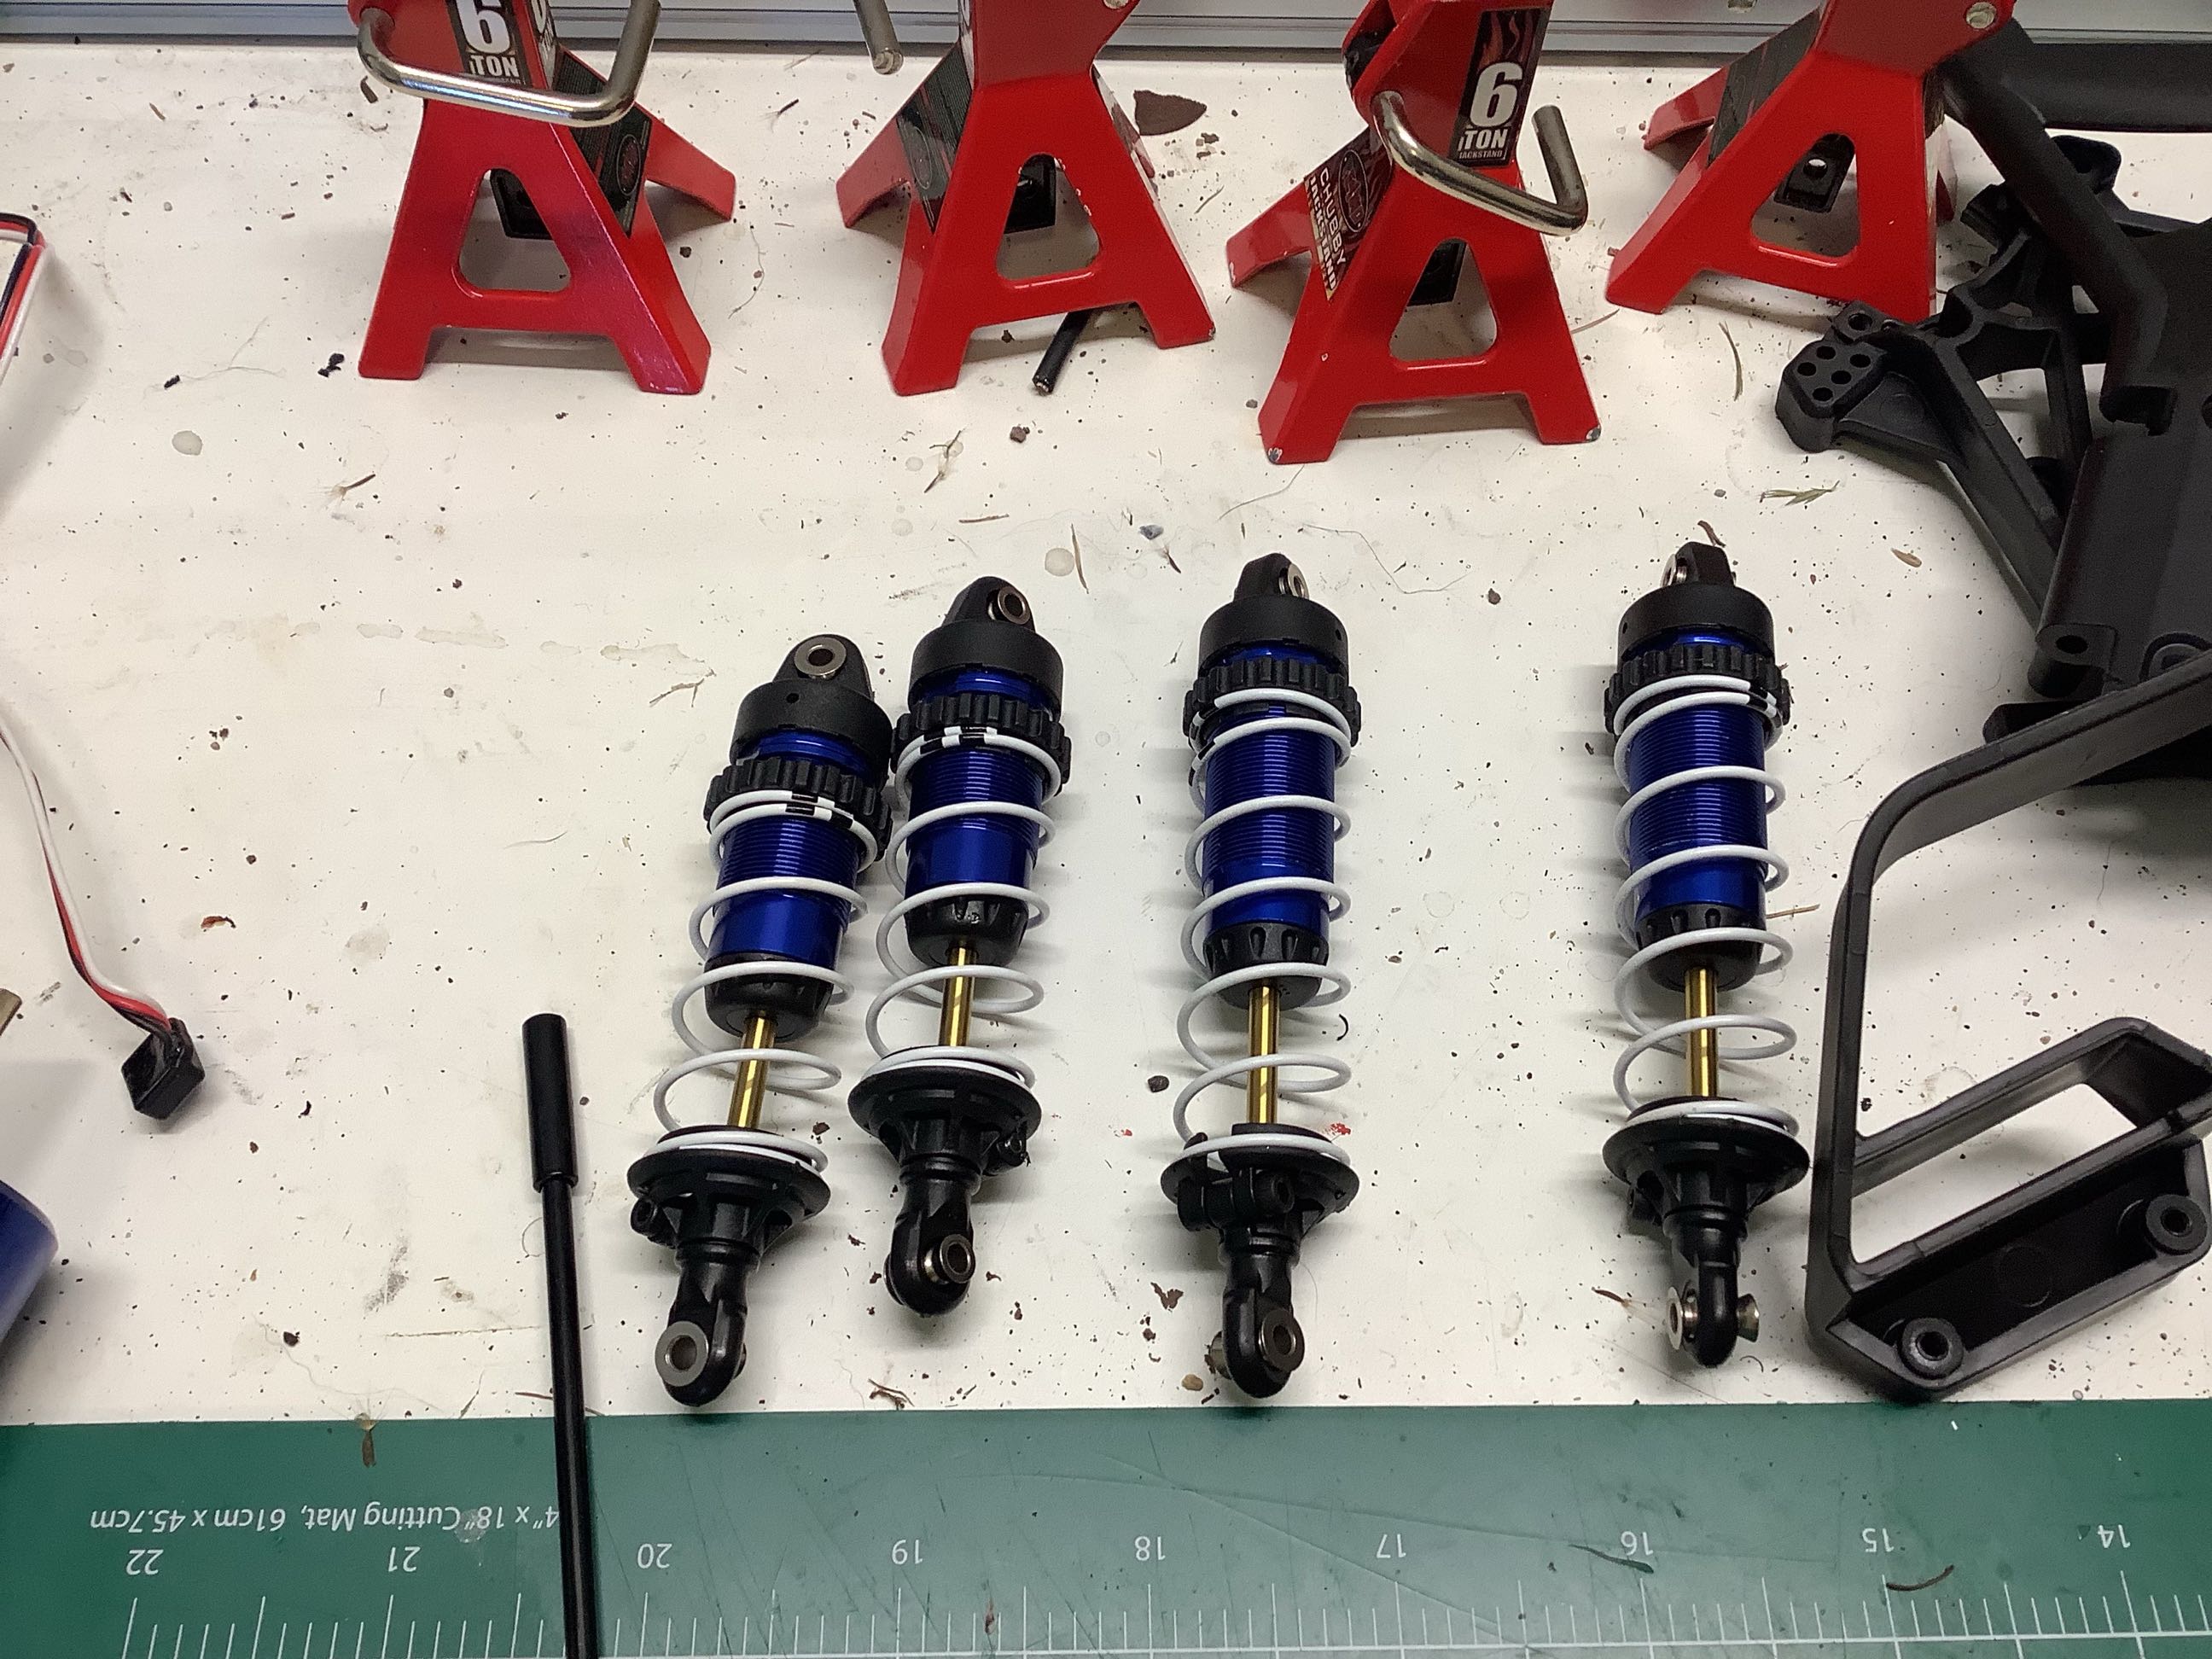
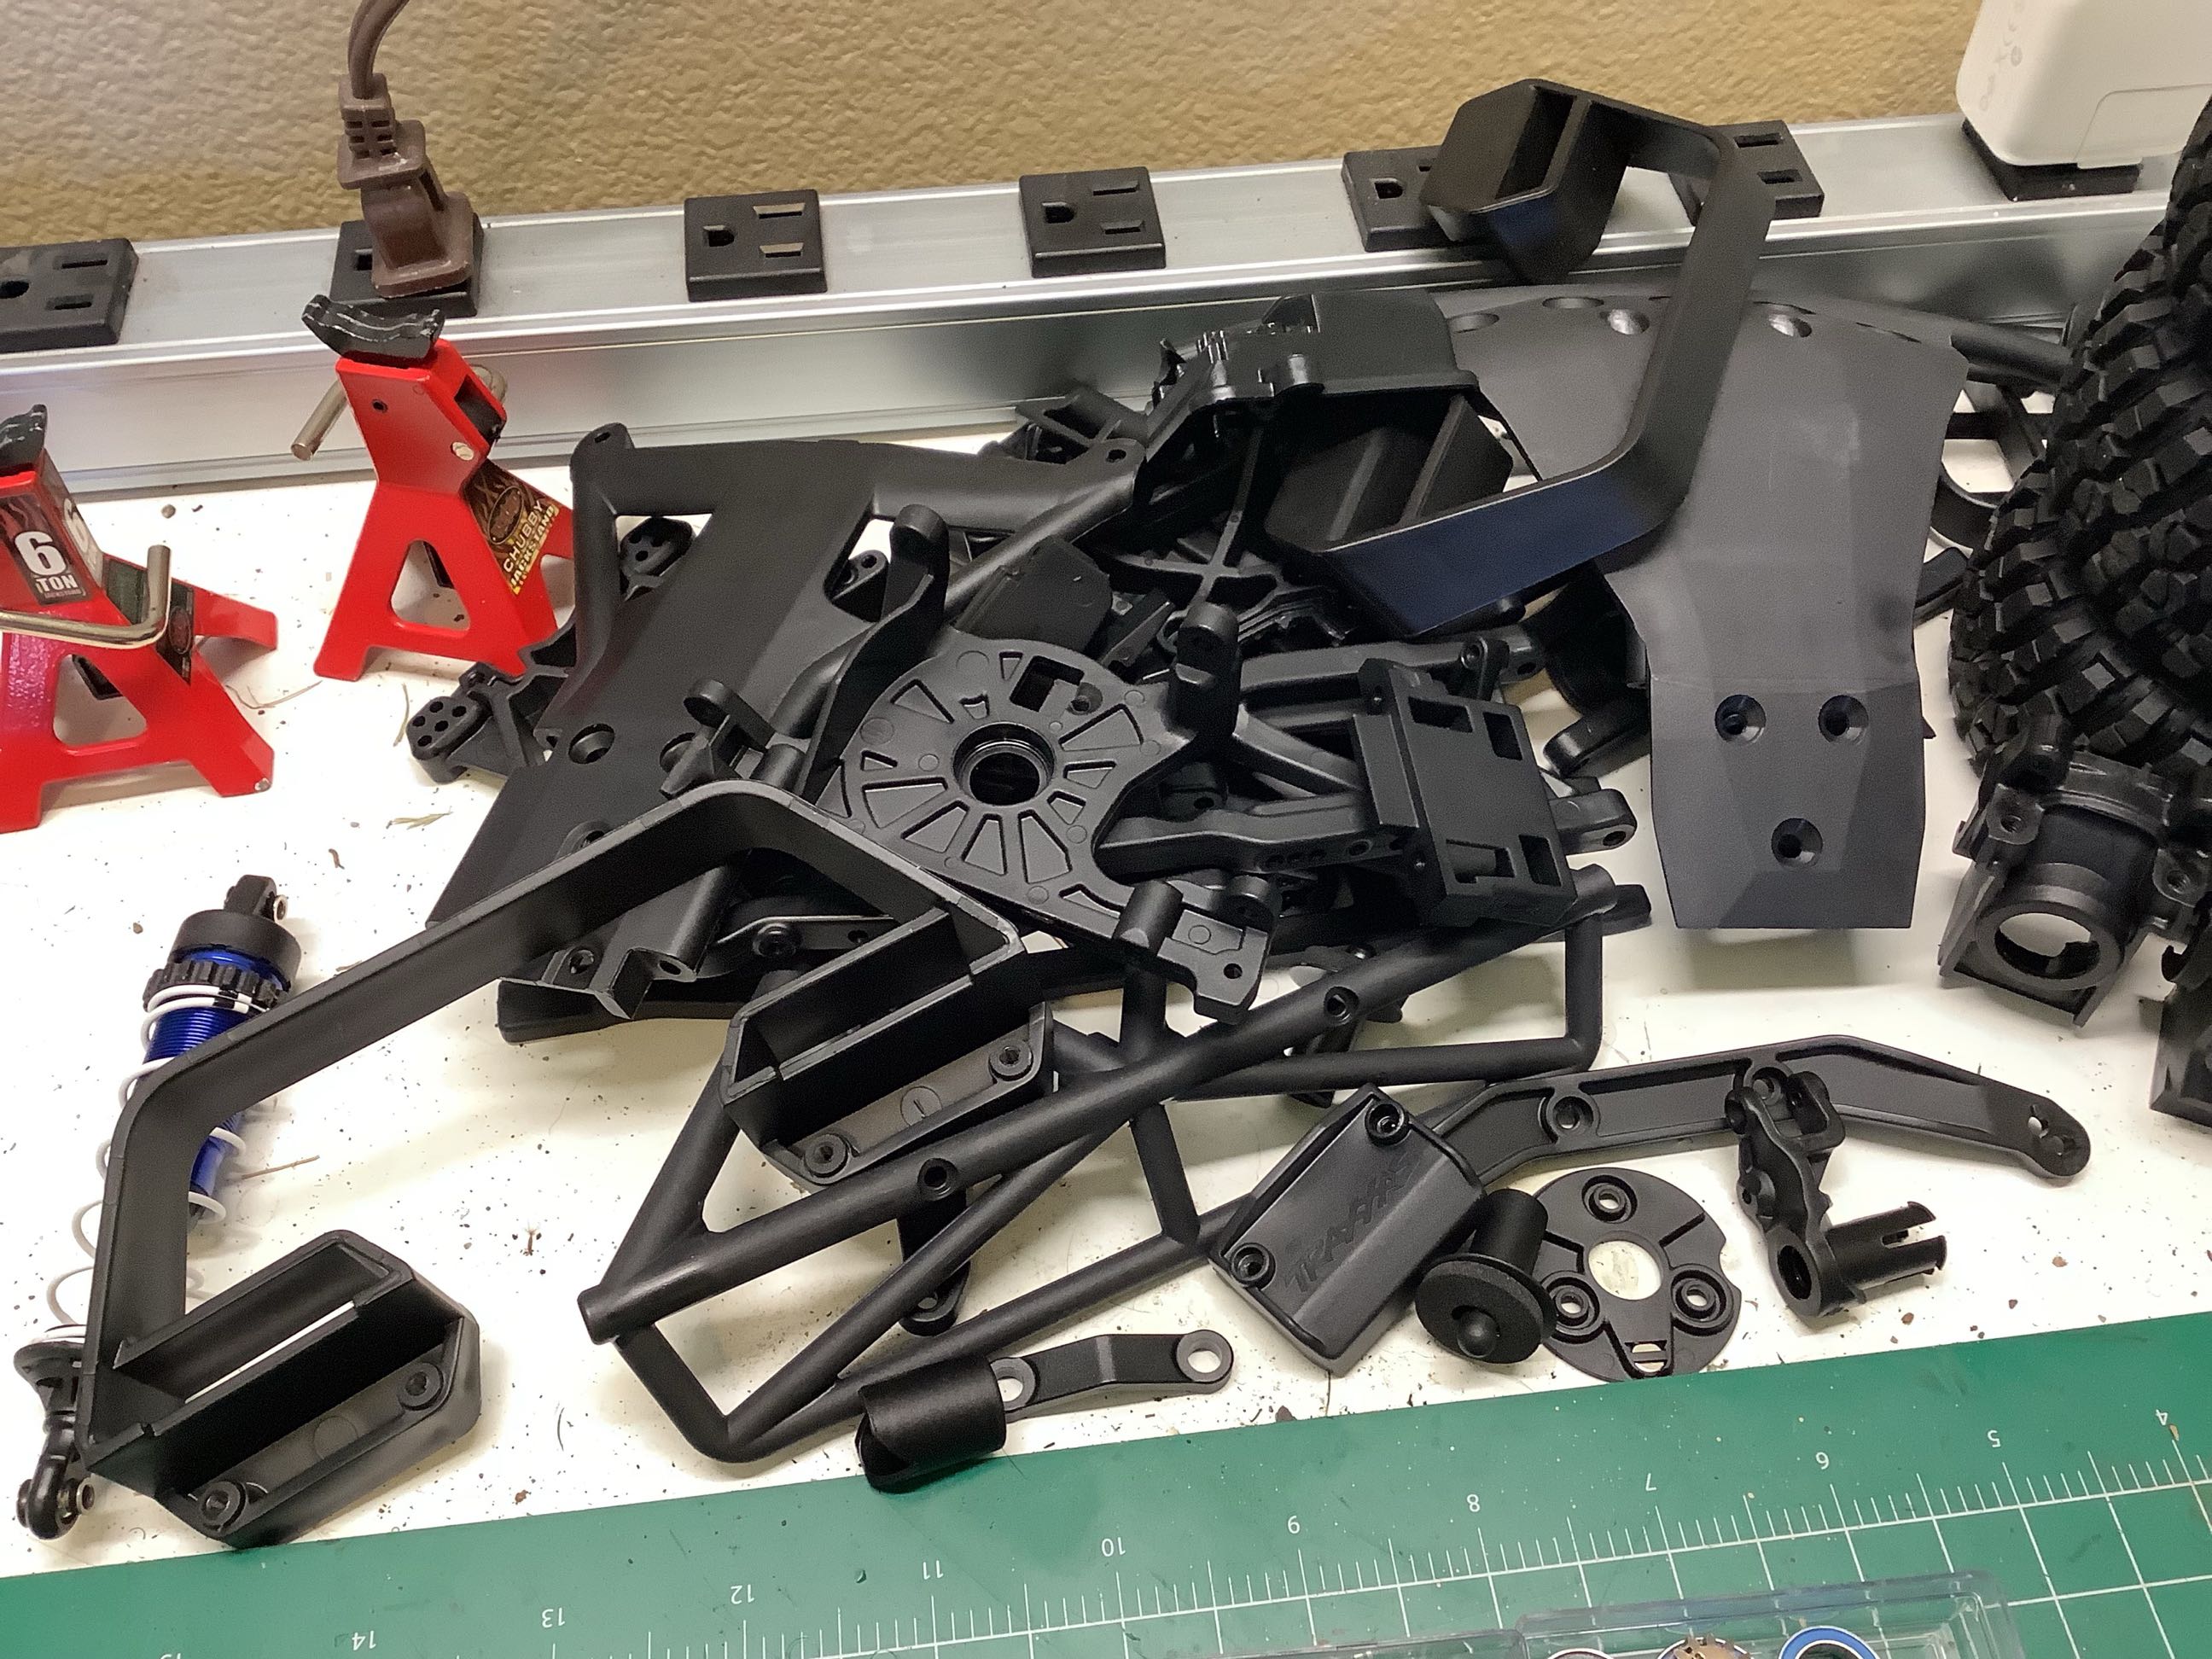
Here are the lovely aluminum GTR shocks which I'm also going to leave assembled. I don't want to have to refill and bleed them. These beautiful shocks add about $50 of value compared to the standard plastic "Ultra" shocks. Note that the rear shocks are longer than those for the front. On the right you can see the pile of loose plastic parts ready to be re-installed. These seems to be really high quality plastics which is normal for Traxxas.
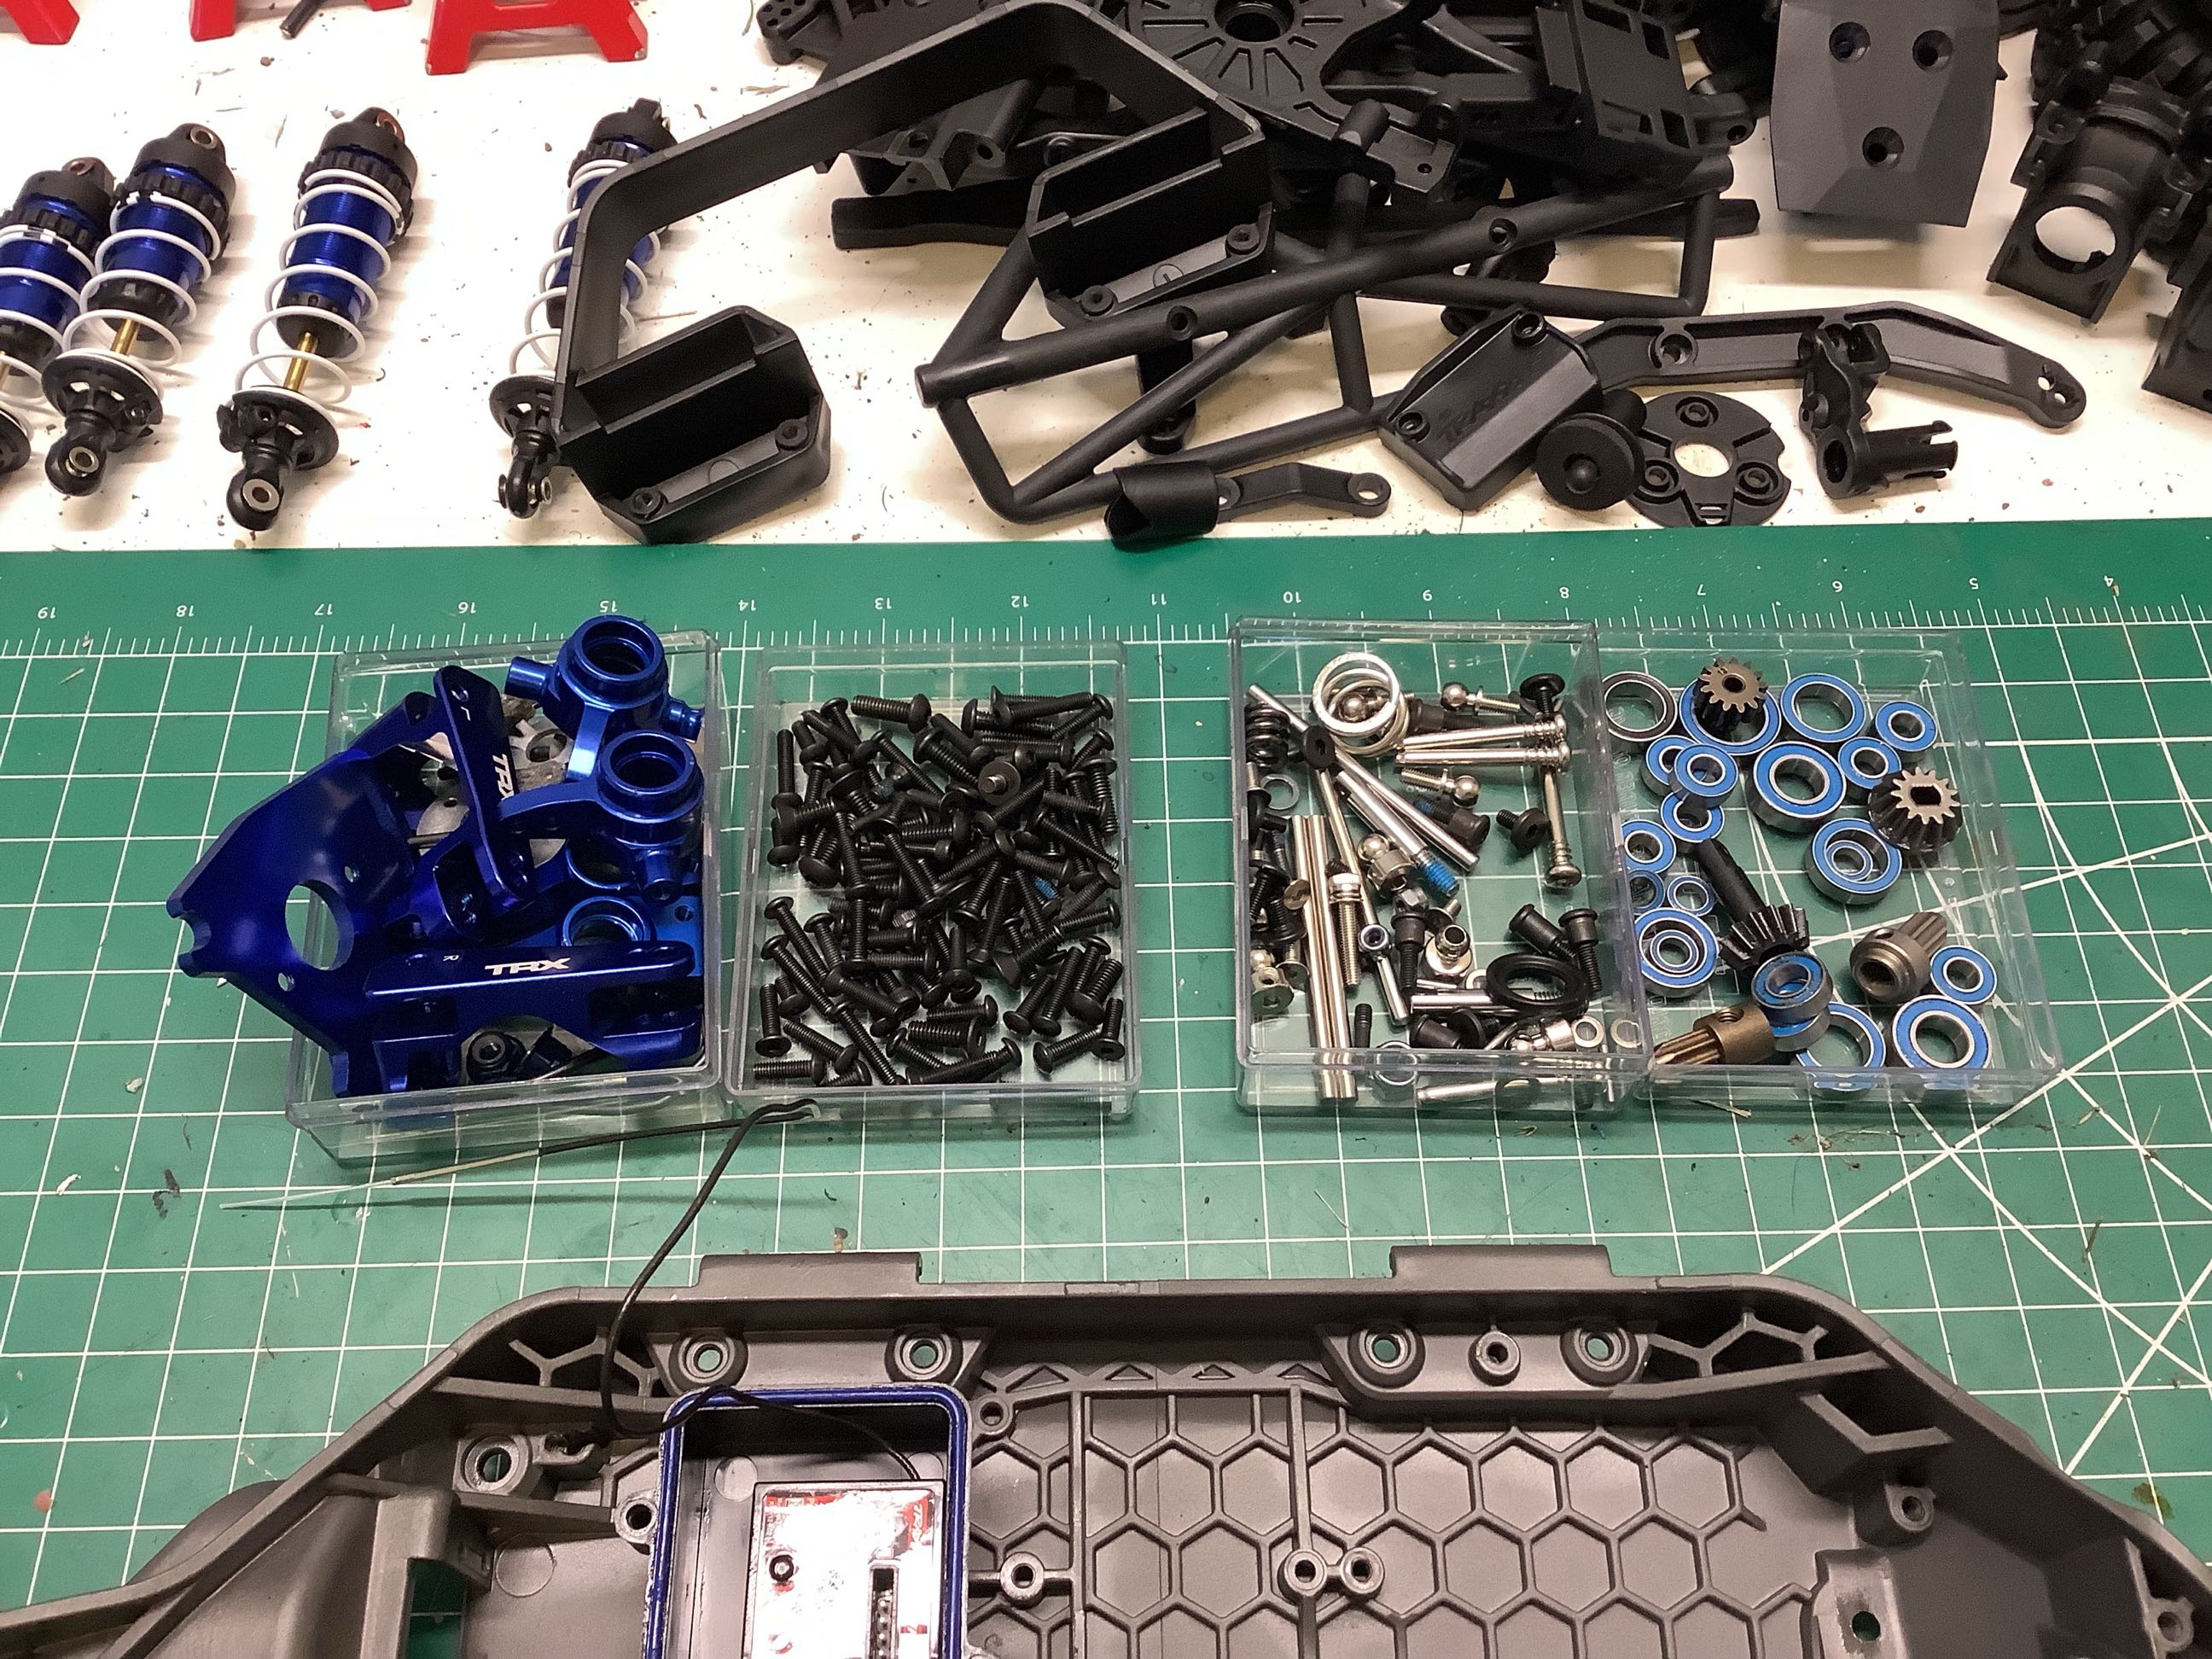
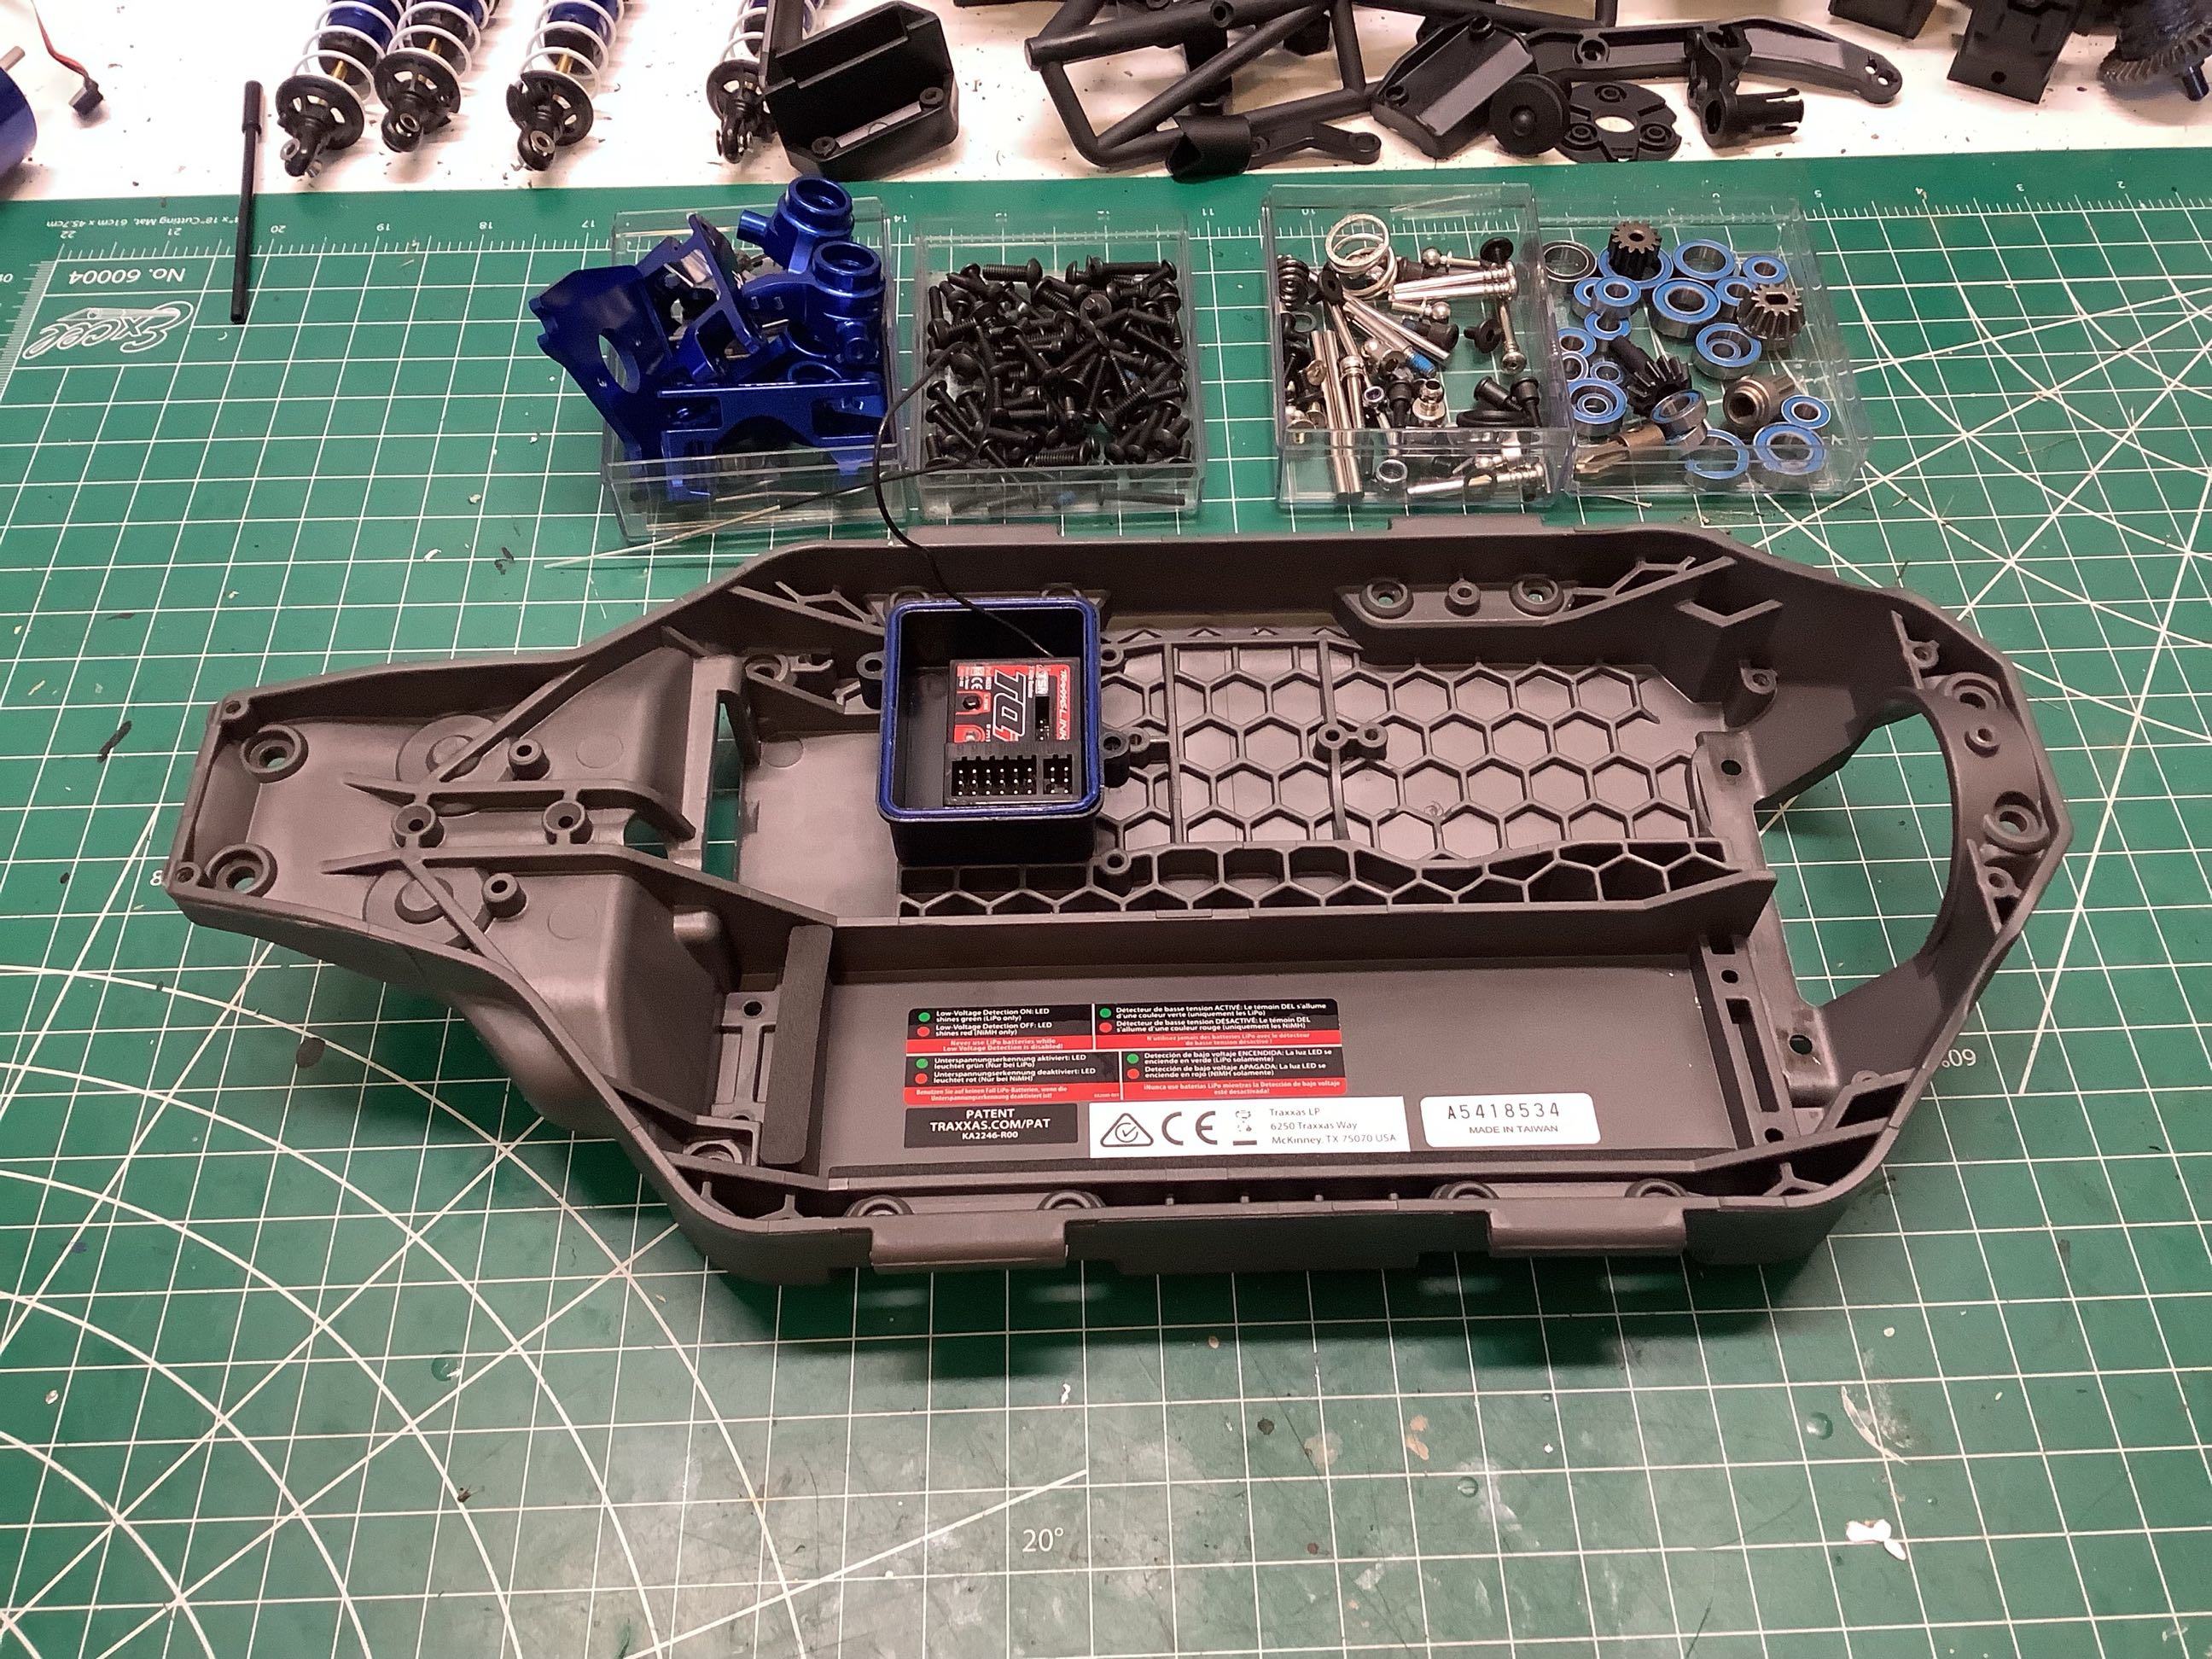
The picture on the left shows a pile of hardware, metal parts, gears, and bearings. All those blue parts in the far left bin are aluminum upgrades. We'll go through them in detail as they come up in the build. The picture on the right shows the LCG (Low Center of Gravity) chassis which only comes on the Ultimate Slash. It is optional on the others. This chassis doesn't cost any more, it is just different. While it certainly improves handling by reducing body roll, it also greatly reduces ground clearance which is terrible in grass. I'd only recommend this for driving on dirt and gravel. I didn't remove the radio box because the receiver is taped down. This is a 5 channel TQi receiver with TSM (Traxxas Stability Management) and telemetry. The brushed version comes with a much simpler 3-channel TQ receiver, but this is common to the brushless version. The Ultimate actually comes with the telemetry sensors though. More to come.
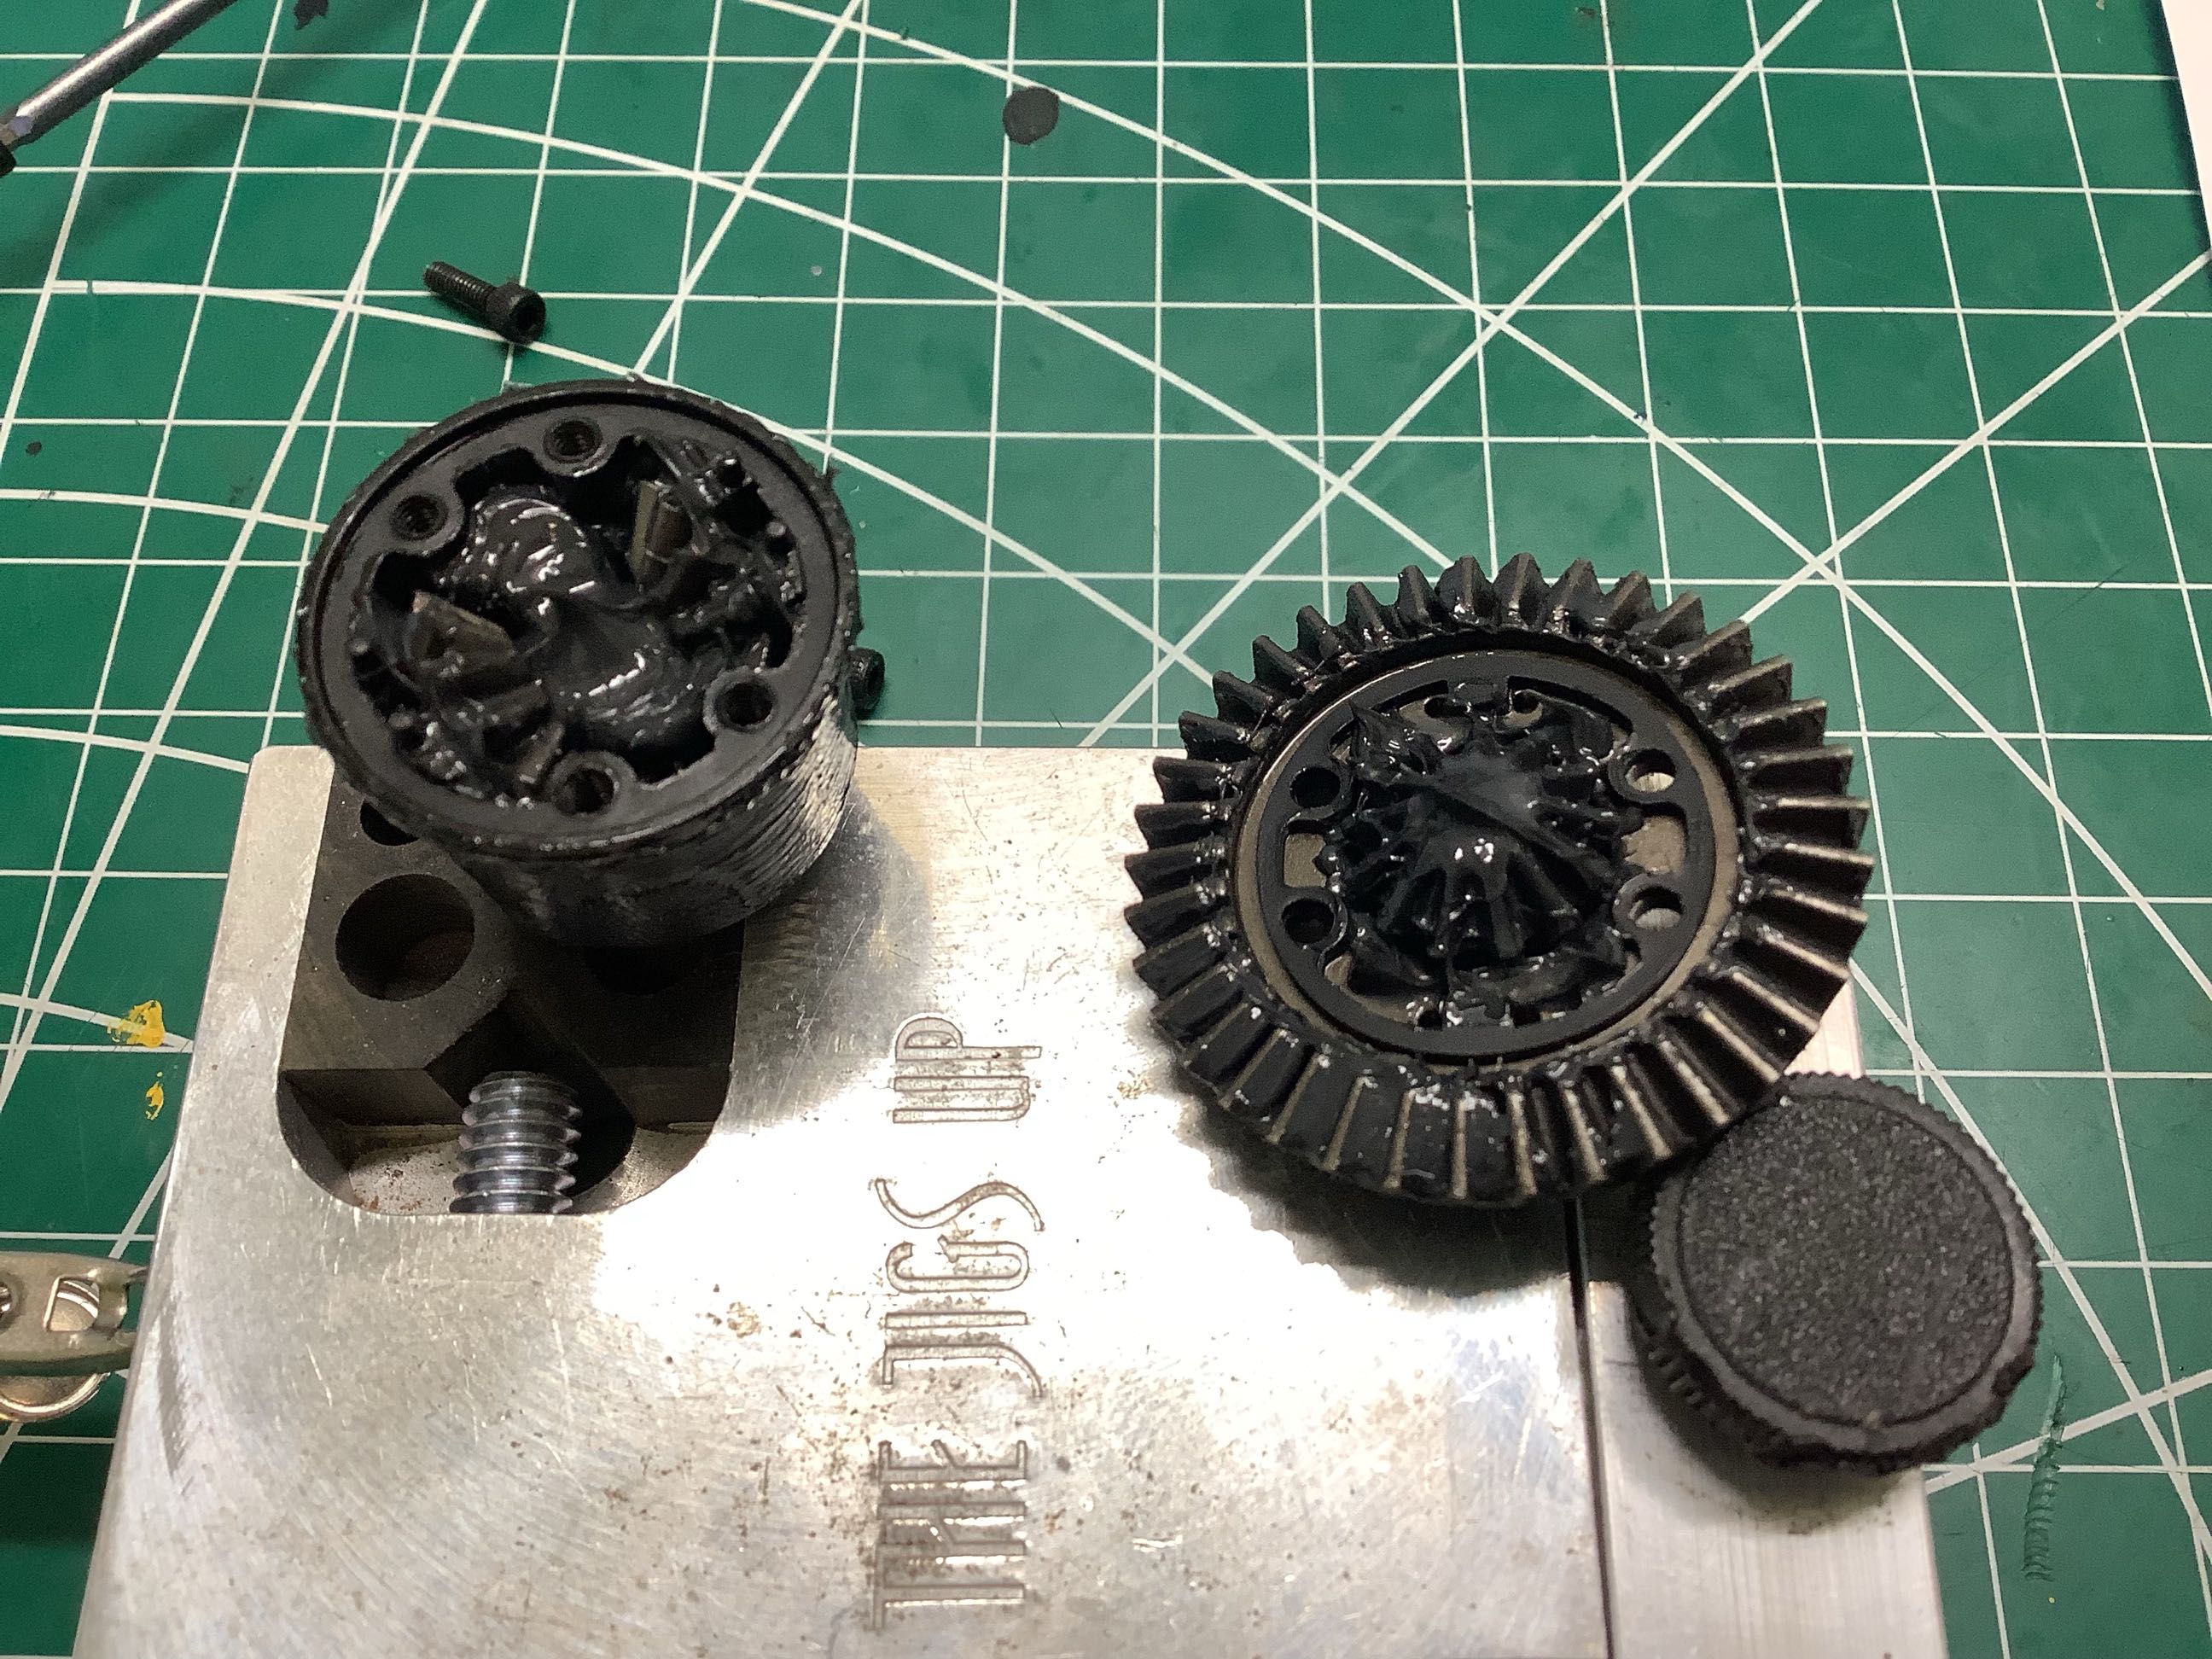
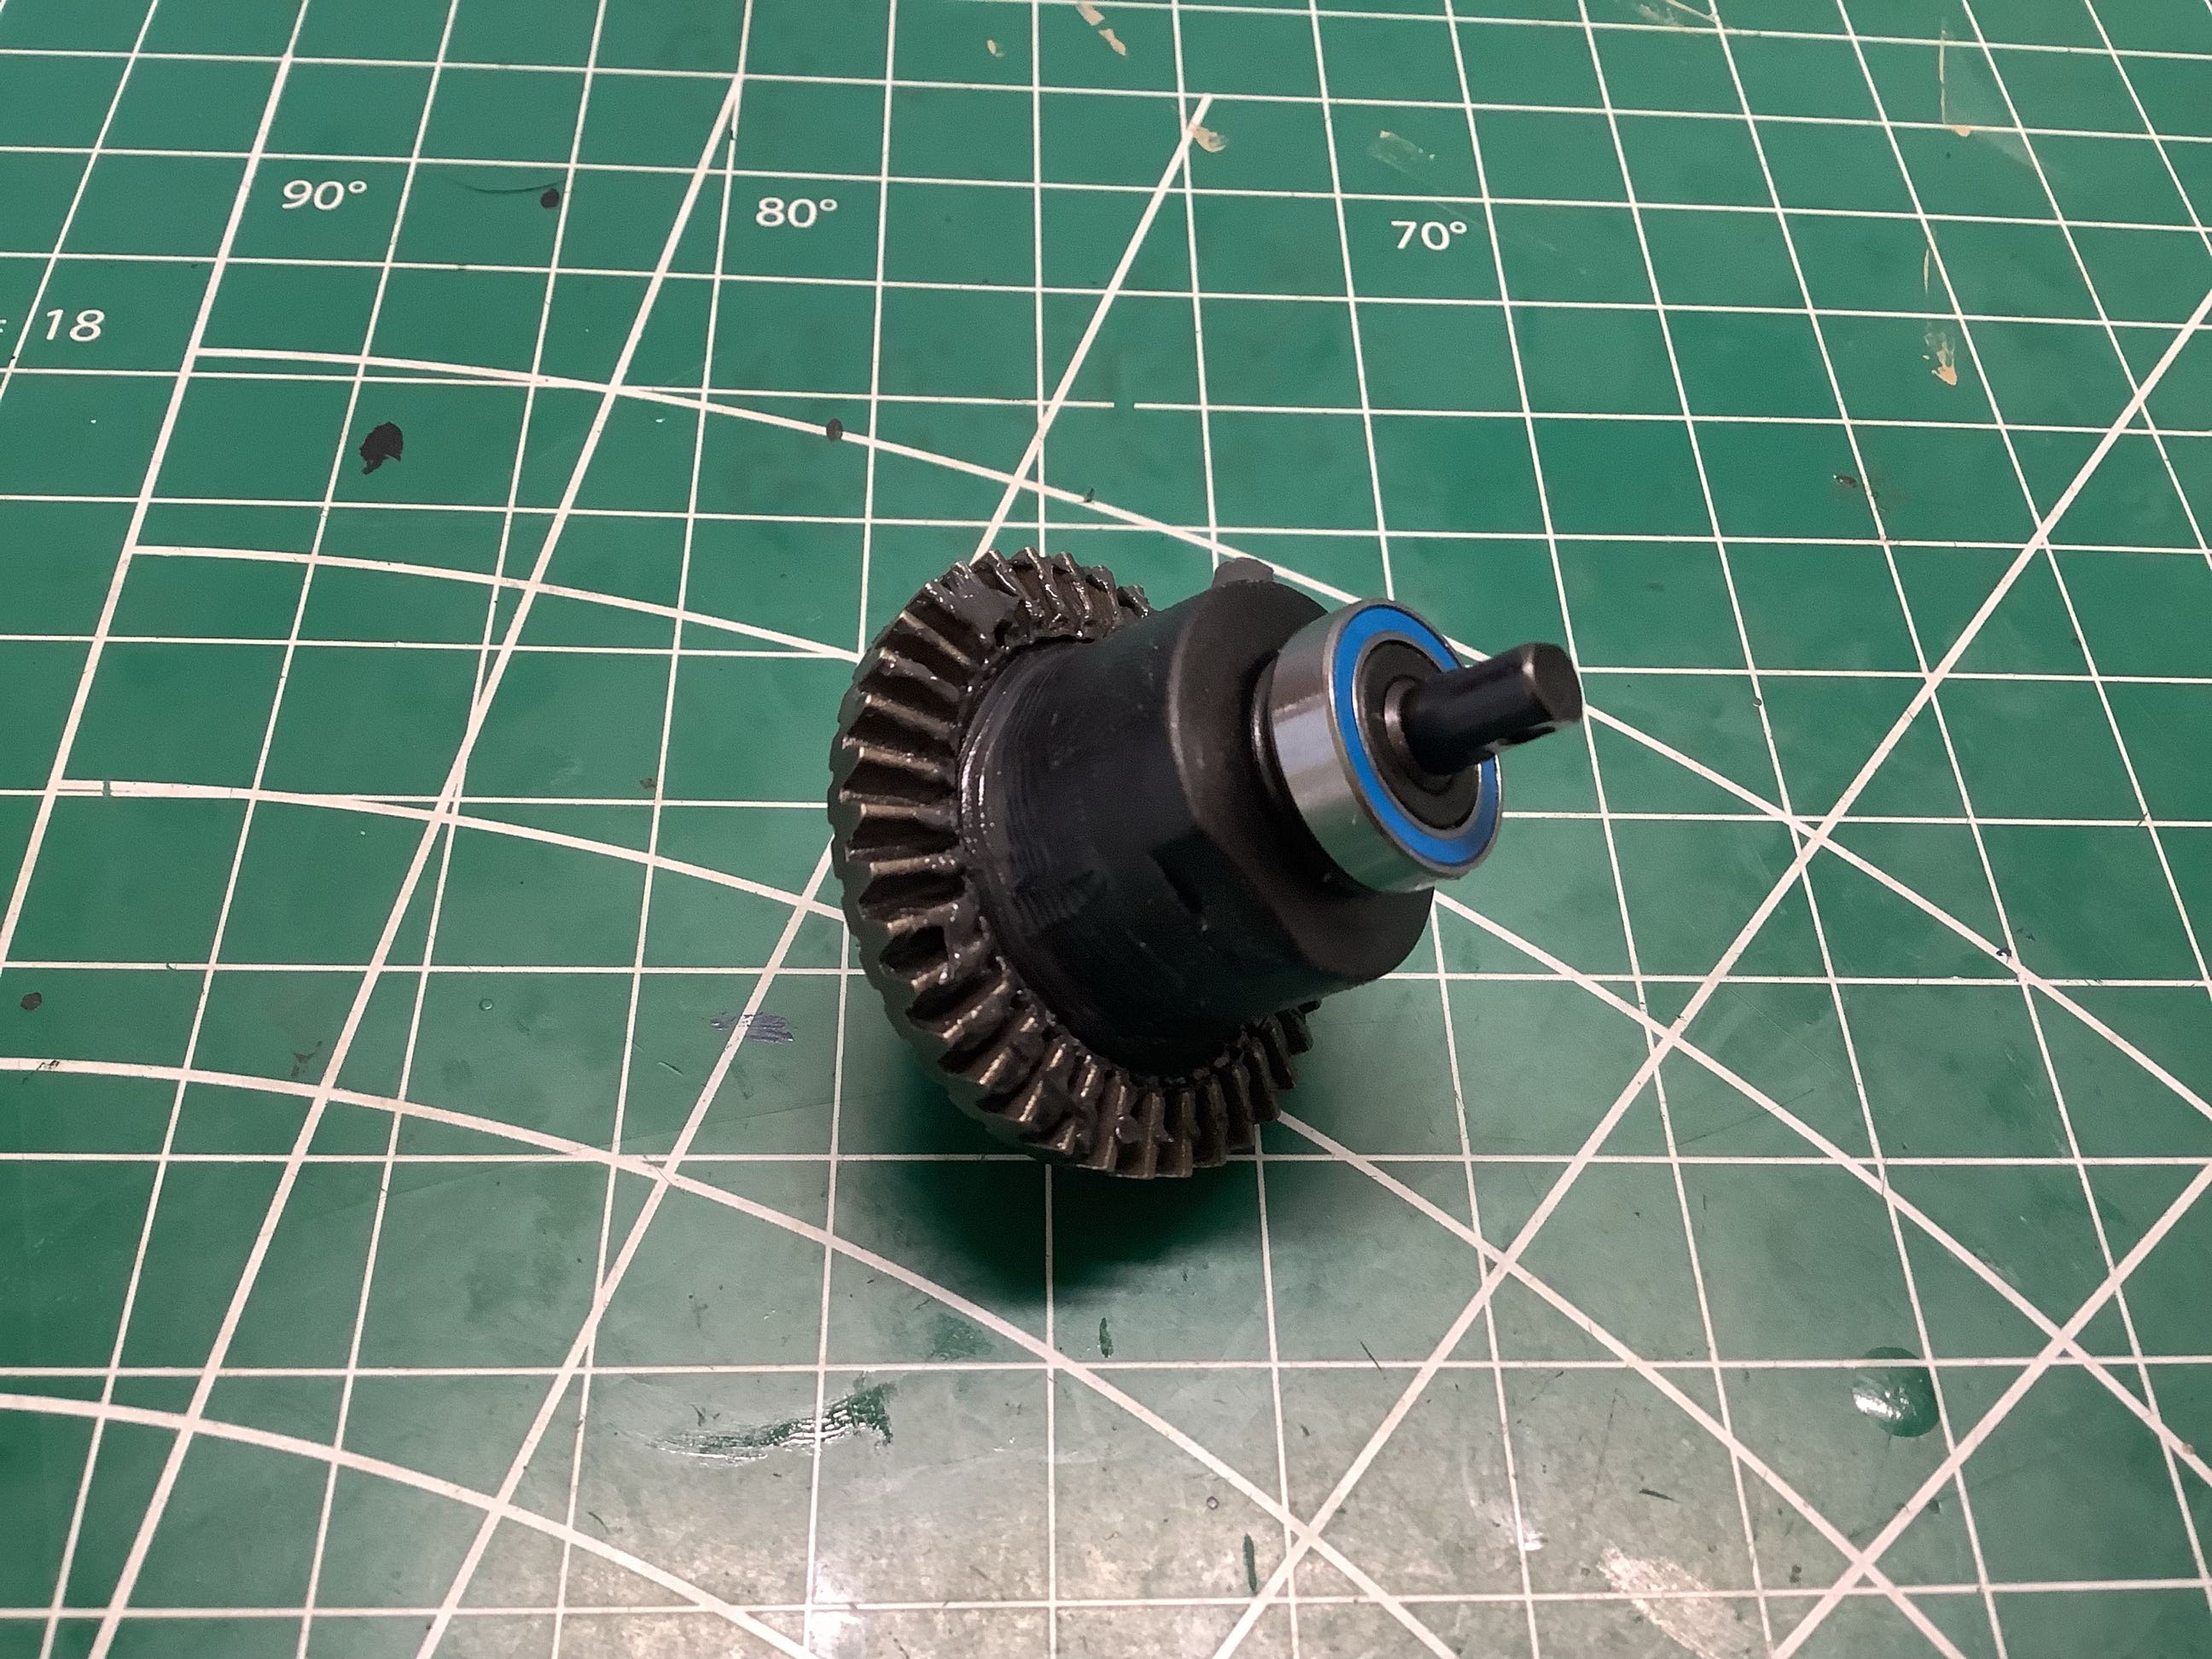
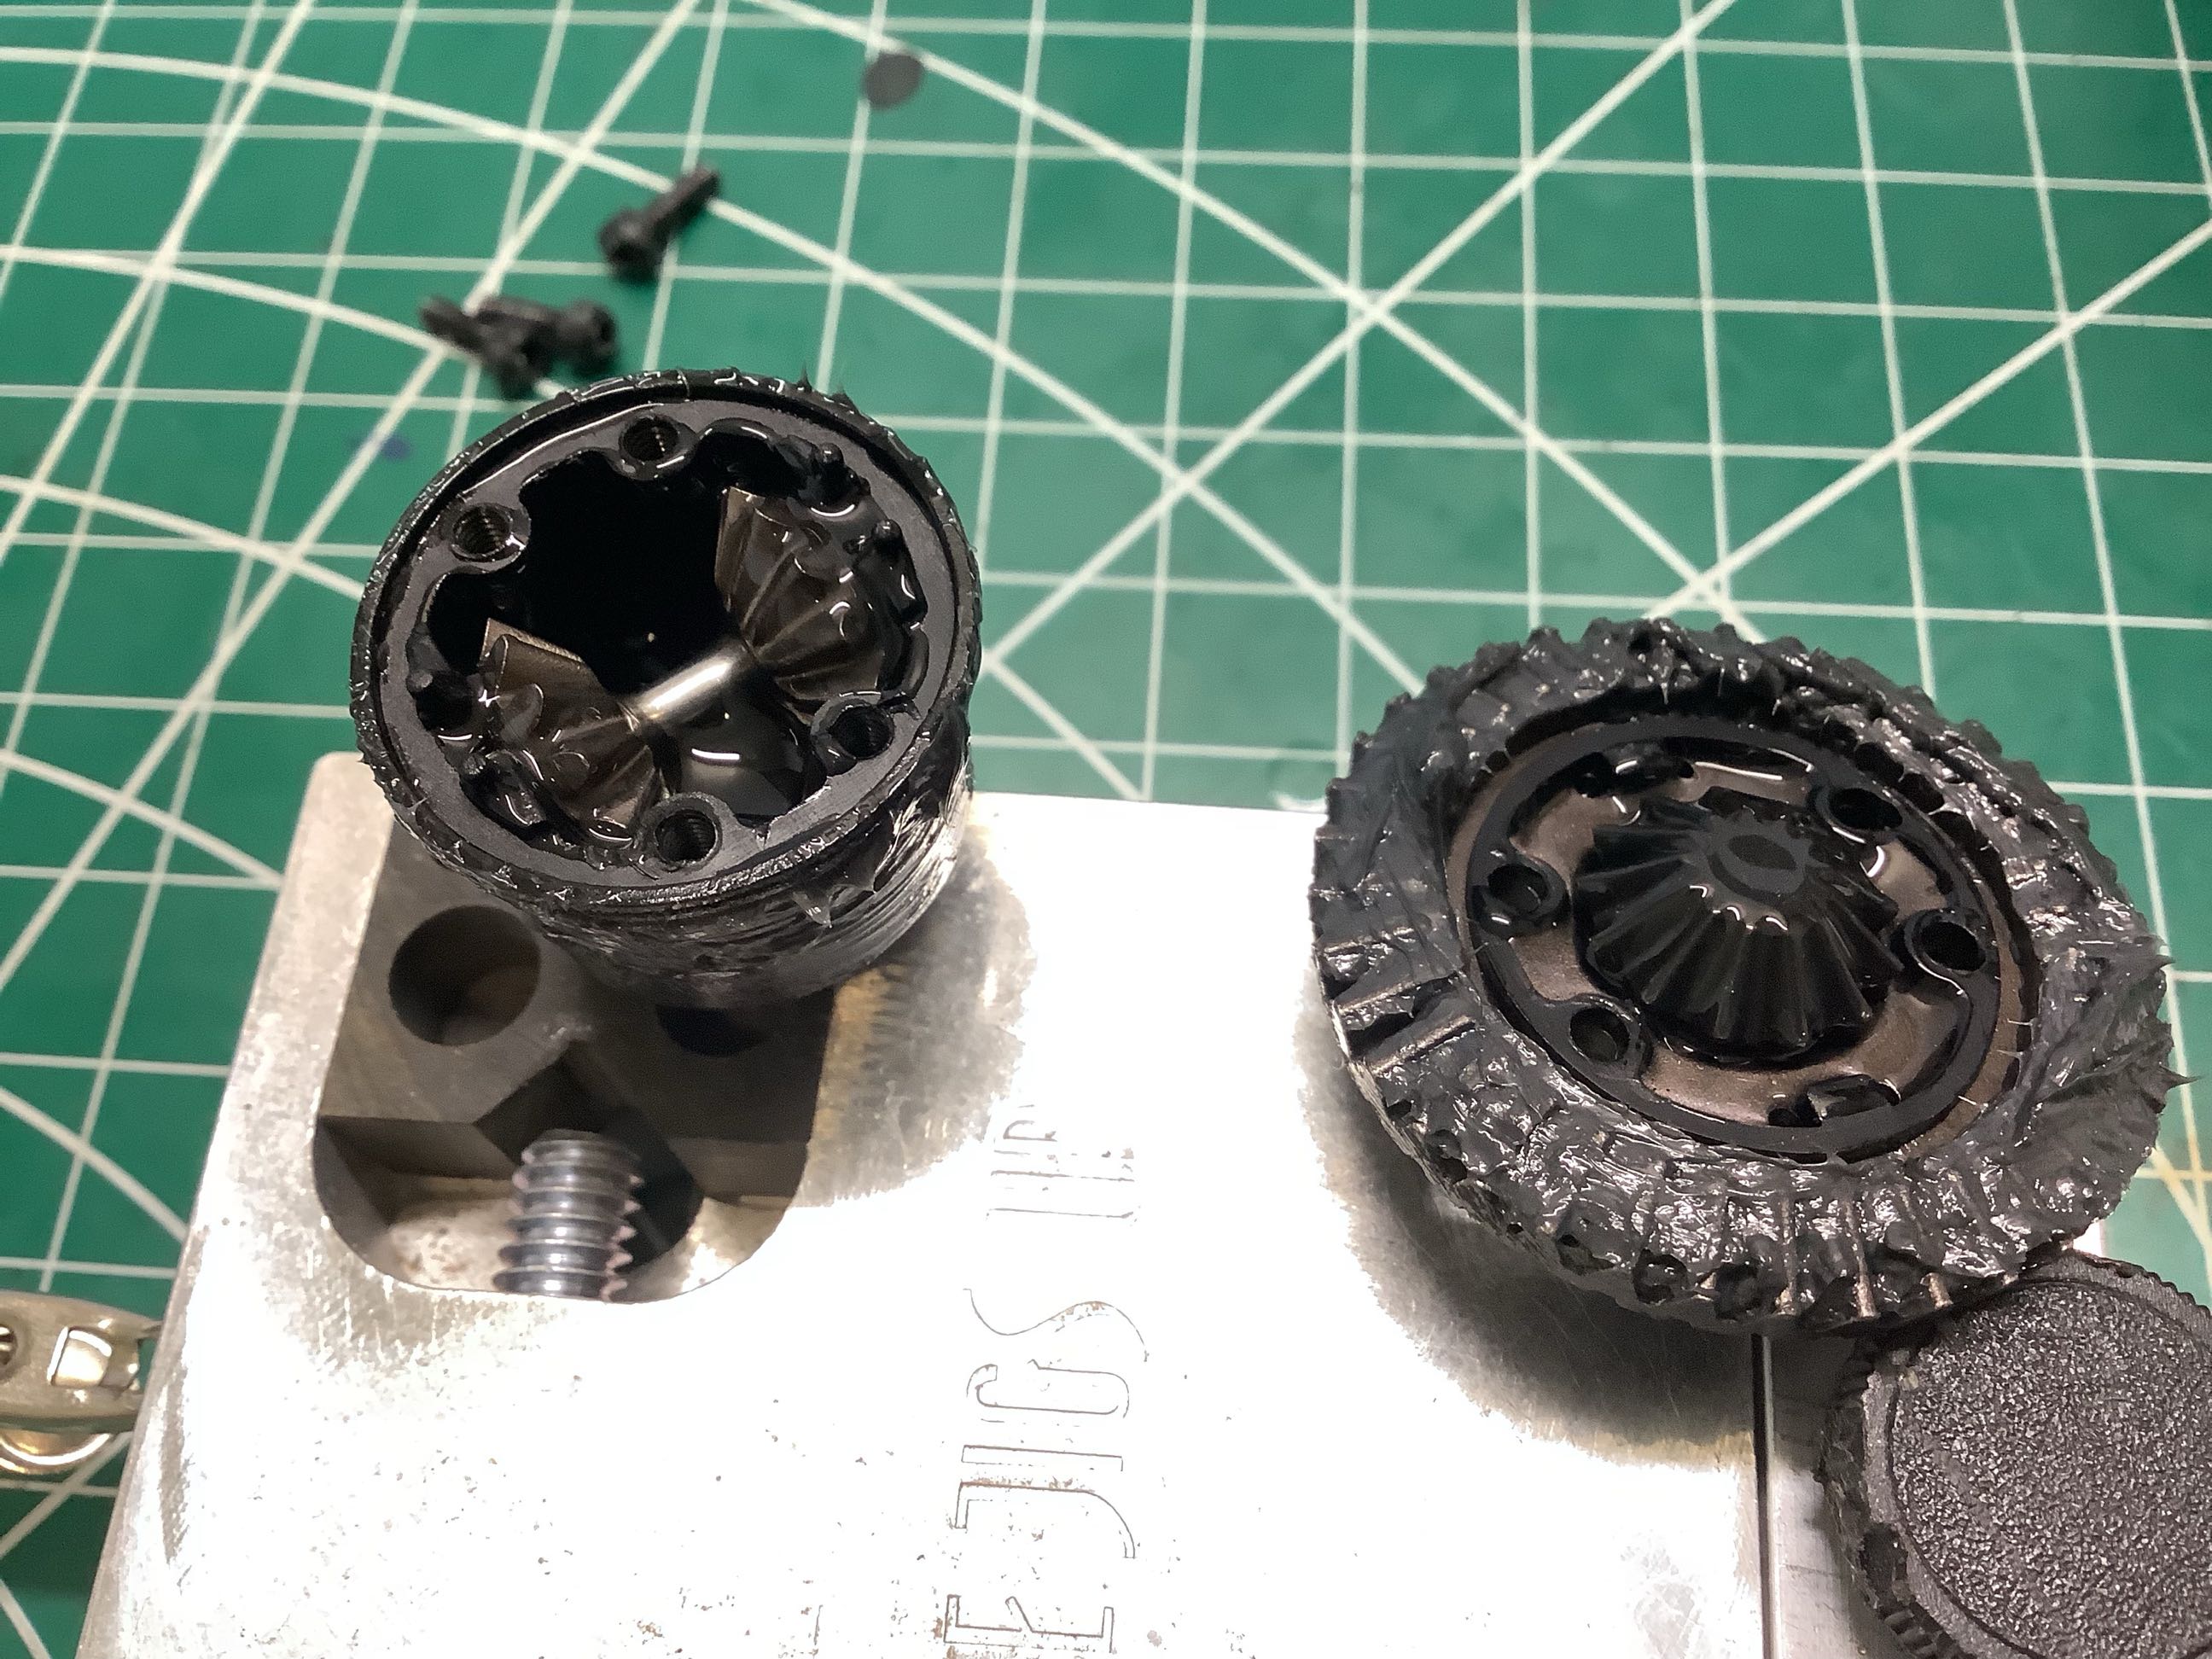
This gear differential is common to the brushless edition and uses bigger teeth and a different ratio than the brushed version (37 vs 47 teeth on the ring gear, 2.84:1 vs 3.92:1 ratio), but doesn't cost any more. Presumably the brushless motor turns much faster so needs a lower ratio. An optional set of spiral cut gear cost 3 times as much. I'm not sure what the benefit on the spiral gears is supposed to be apart from noise. These metal gears are particularly noisy. Even though this is a sealed diff, it appears to be greased rather than filled with oil. Apparently, from the factory, the rear diff is filled with grease and the front with 30k oil. I didn't realize the distinction when I was building (no instructions), so luckily this one ended up in the rear by chance. Murphy's Law suggests than shouldn't have happened, so I'm sure something else will come back to bite me and even things out.

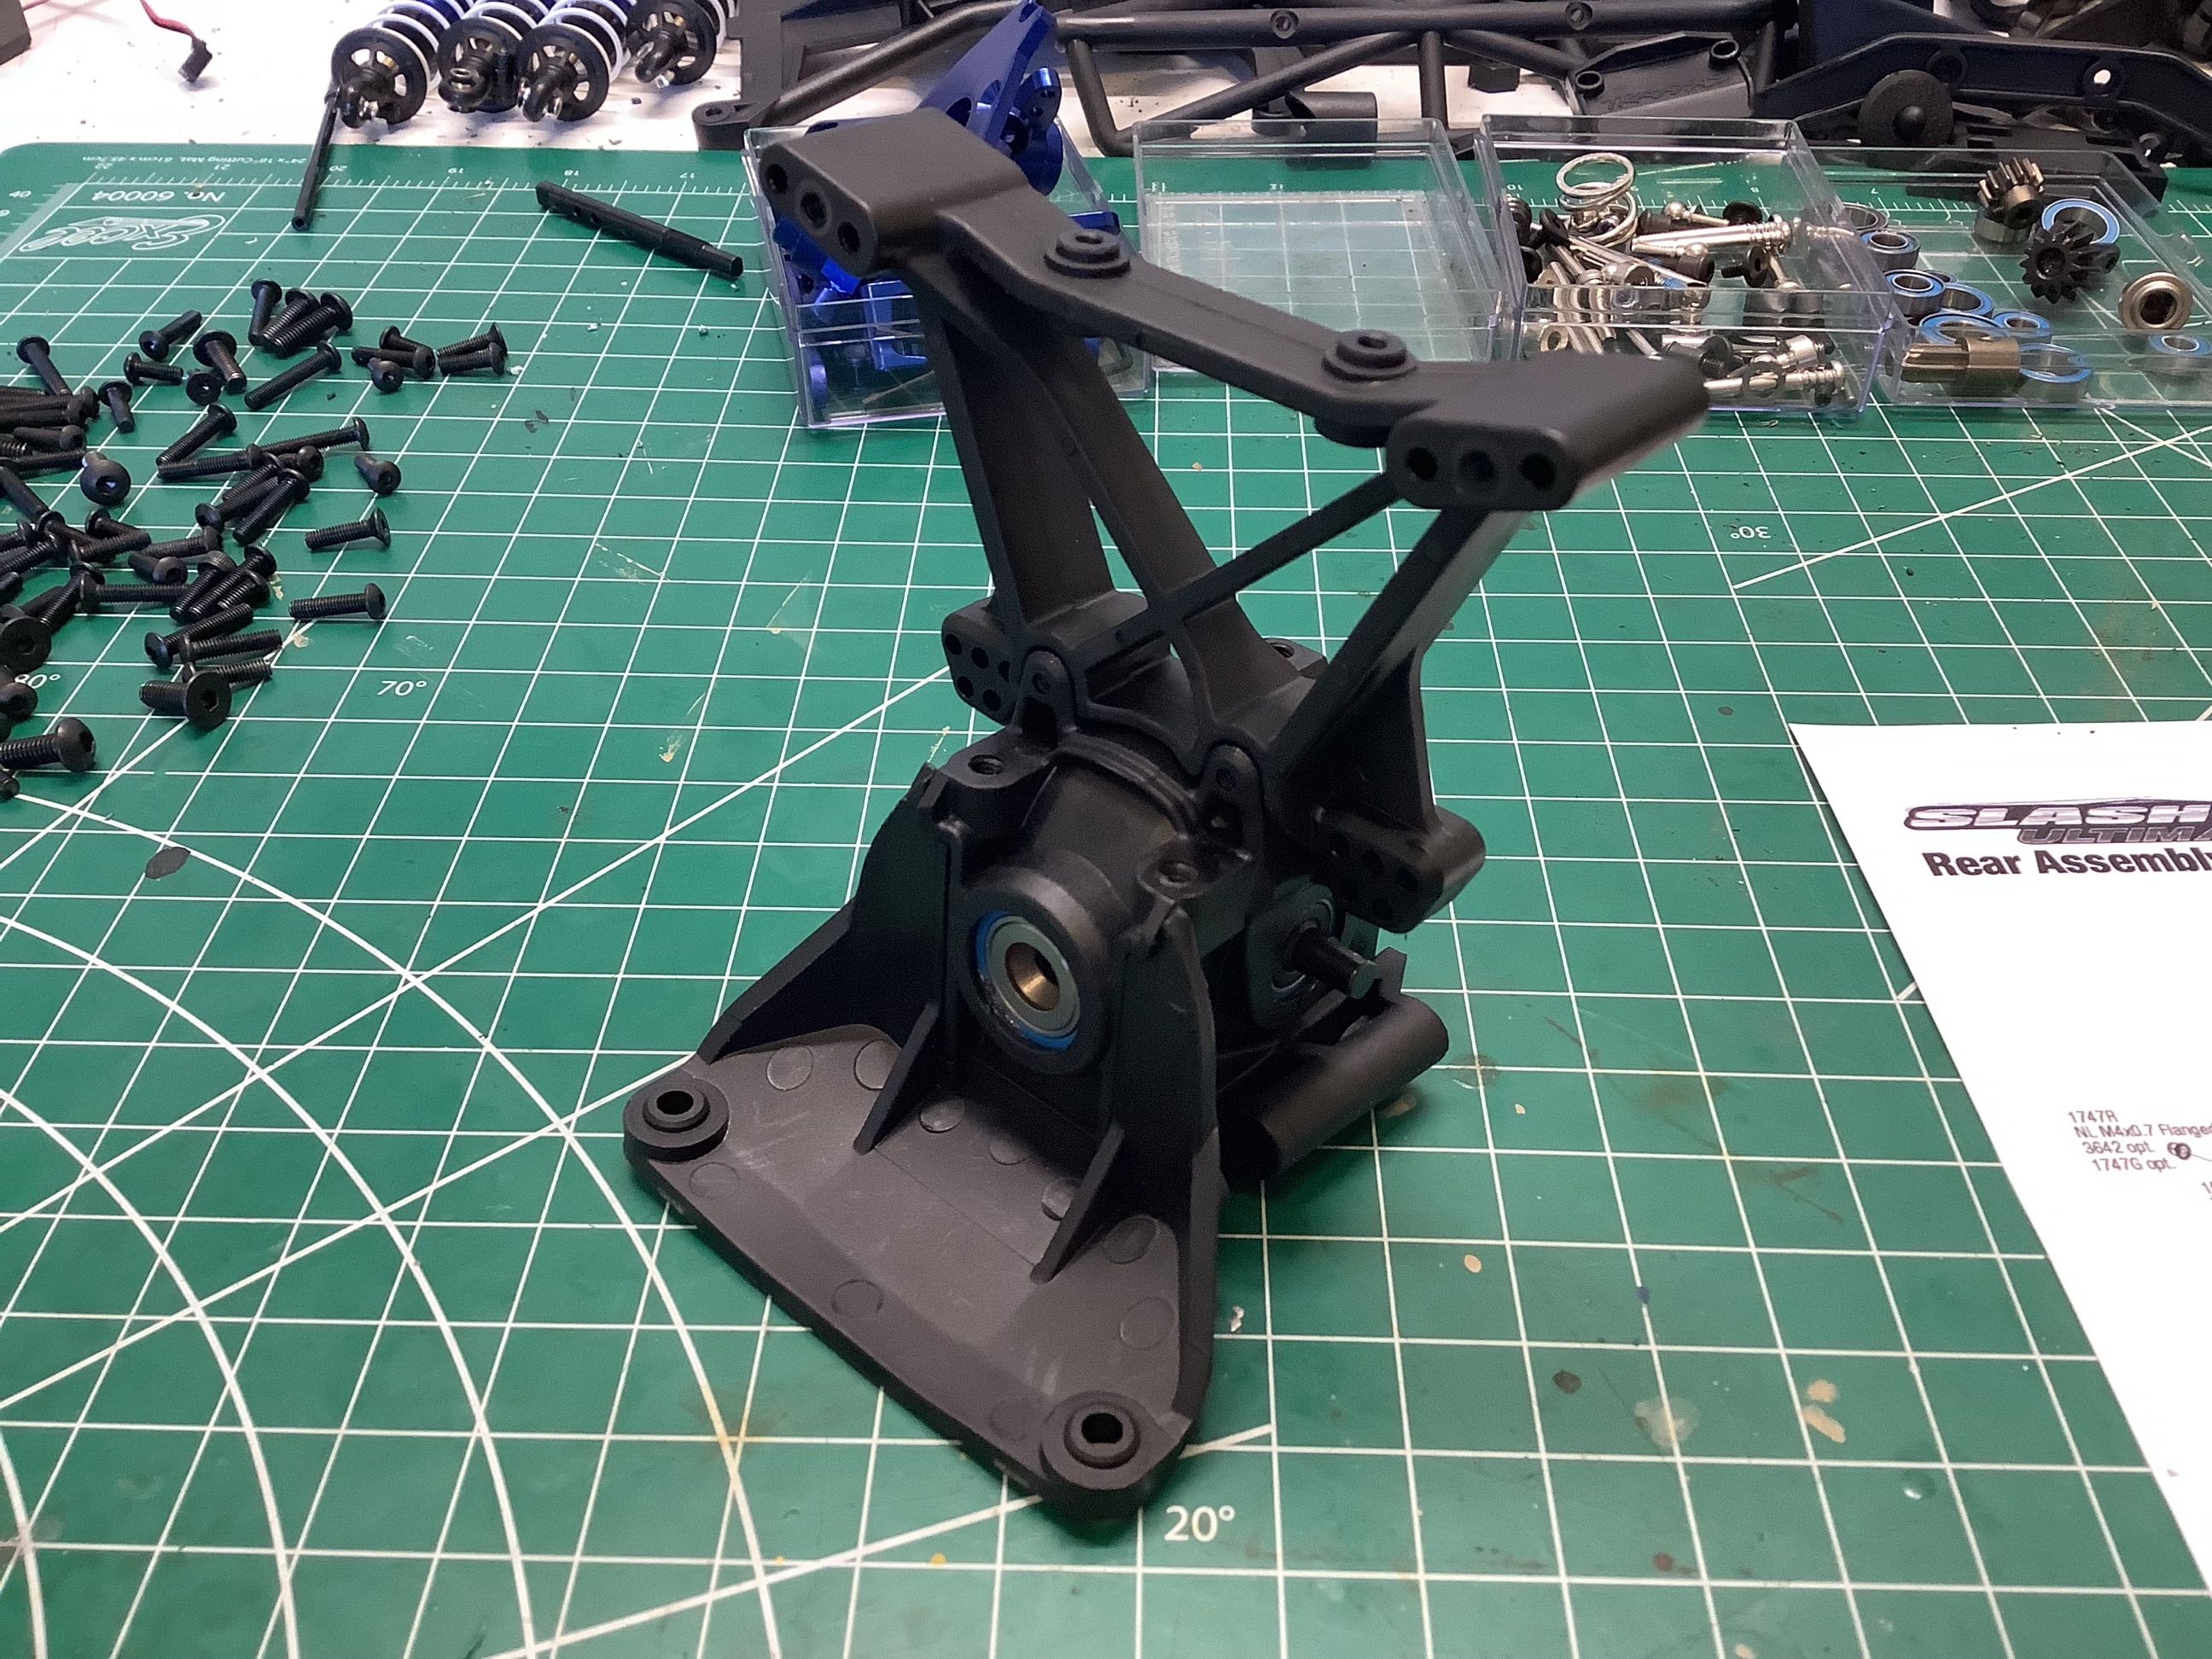
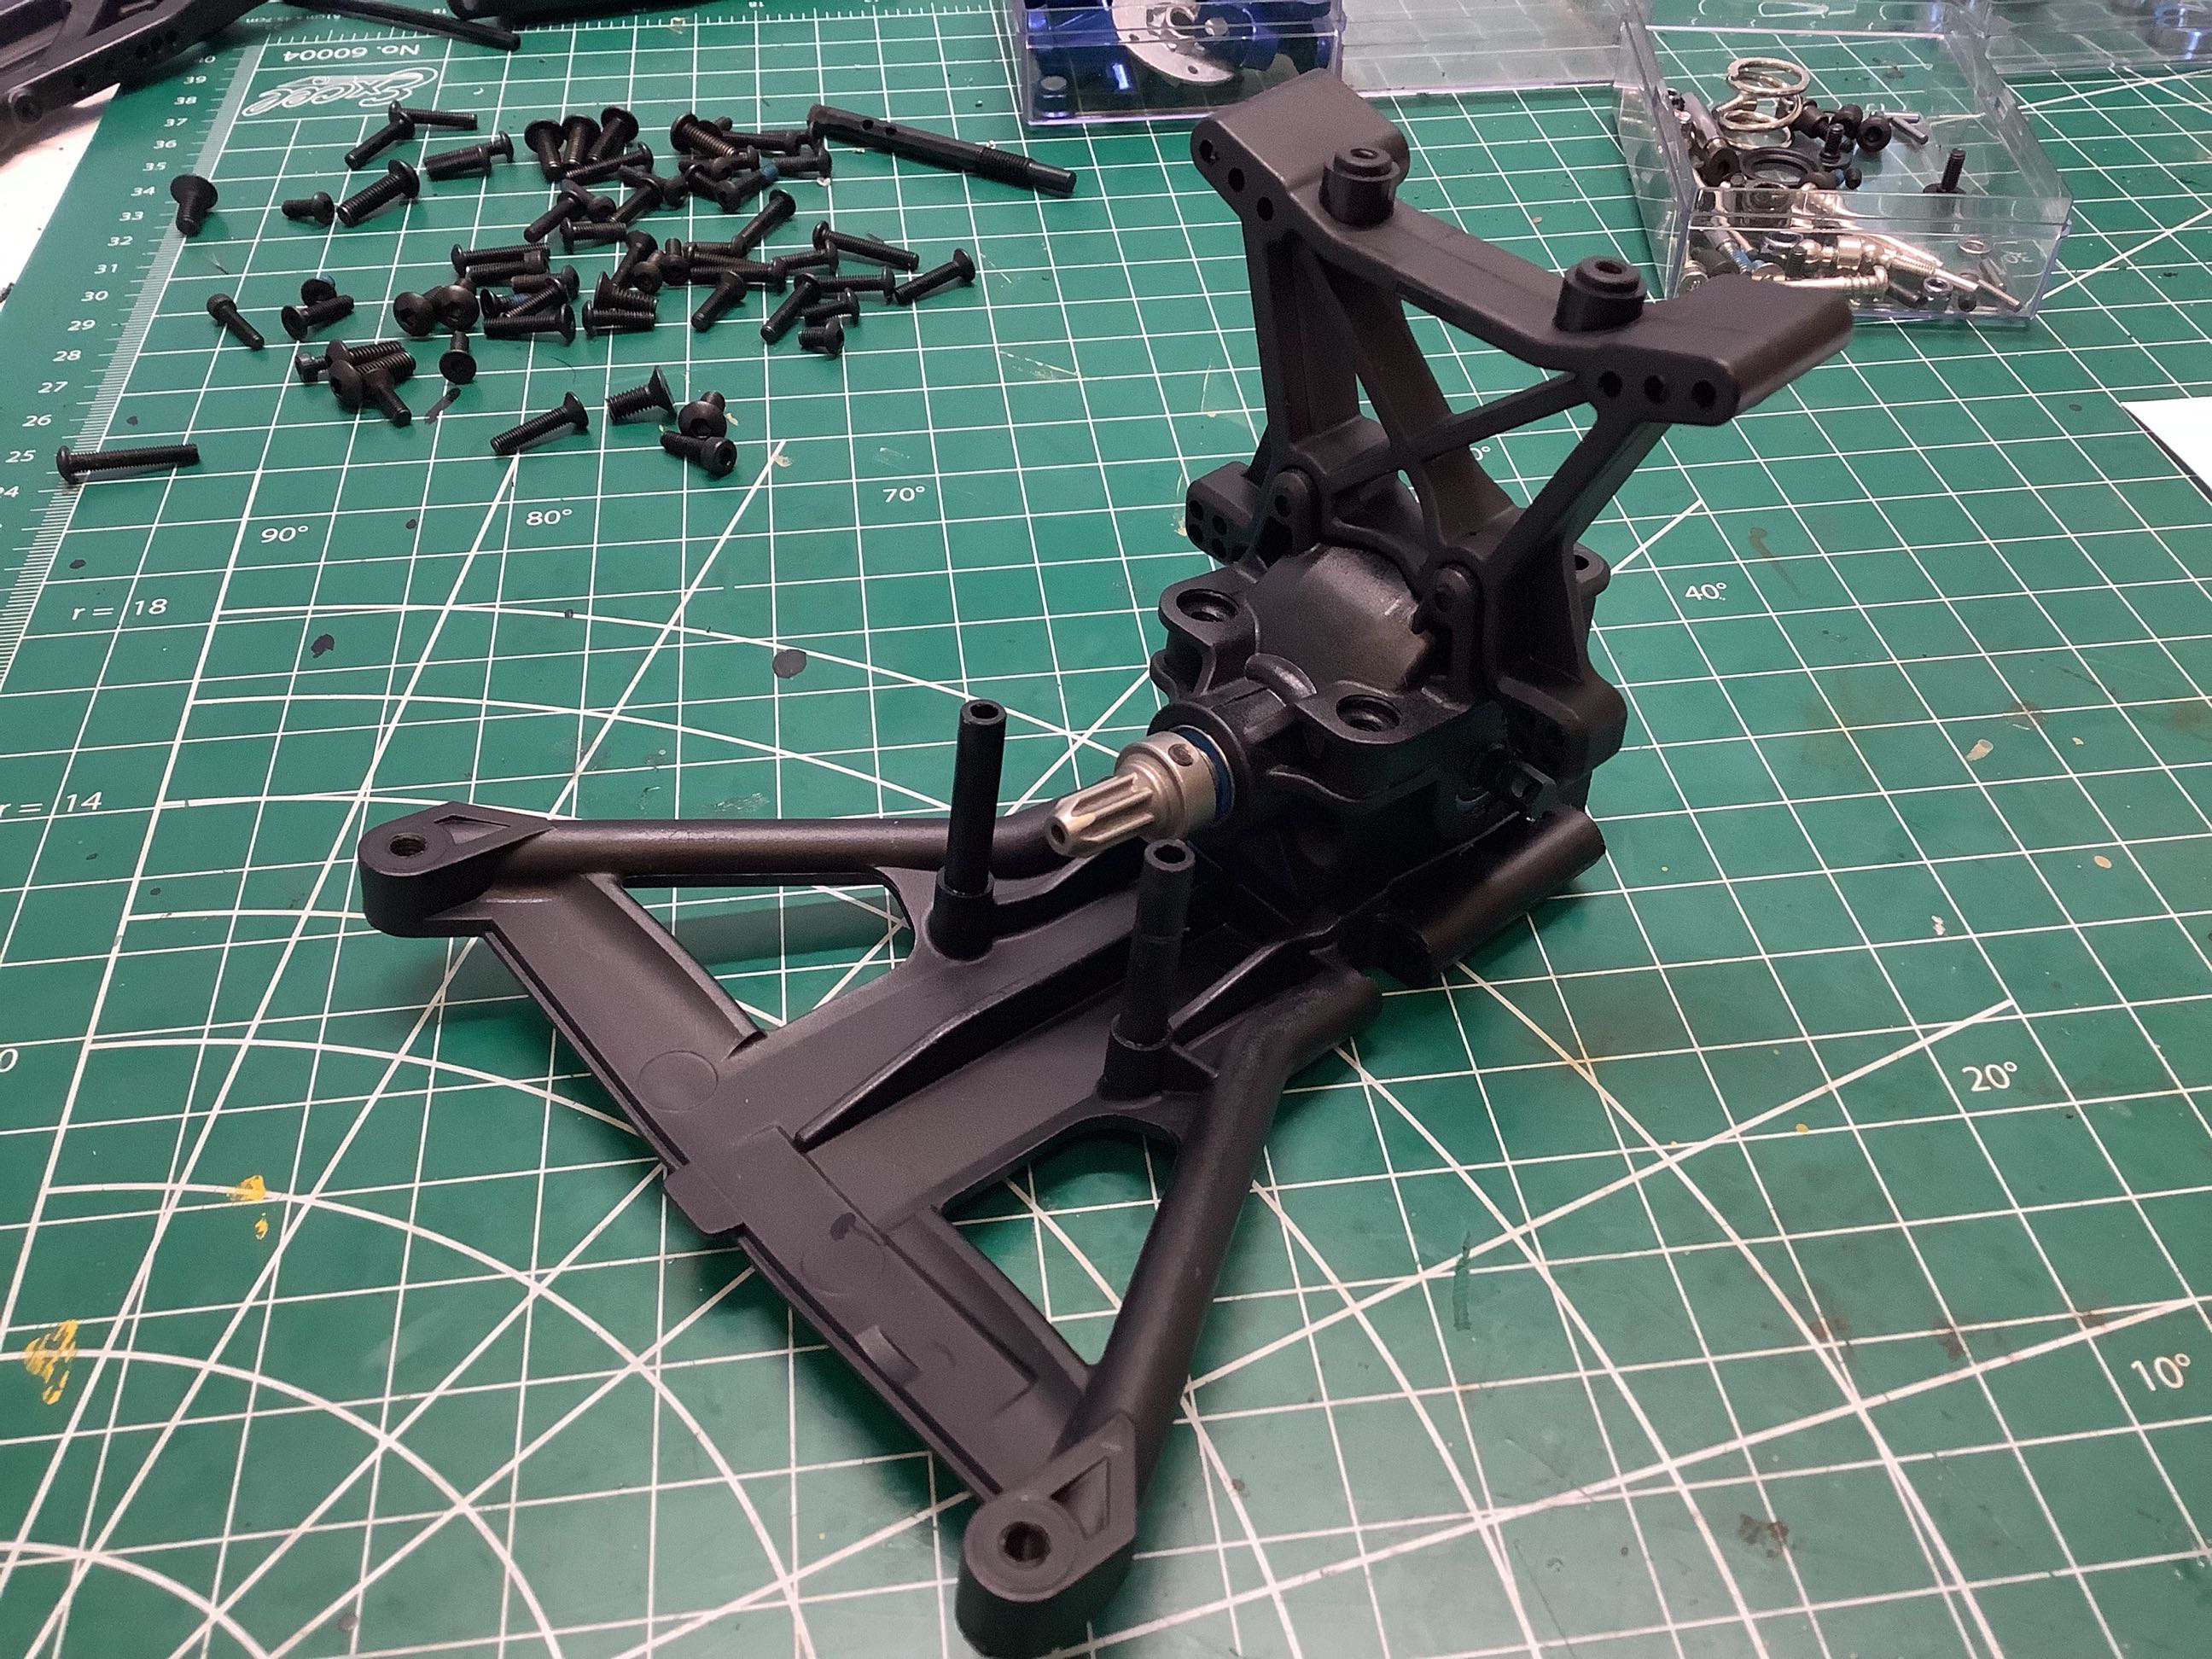
Here I'm installing the rear differential into the housing which then integrates with the shock tower as shown. Note how thick the top braces are on that shock tower. Even though the shocks install in single shear (like pretty much every other kit), I shouldn't have to worry about twisting.
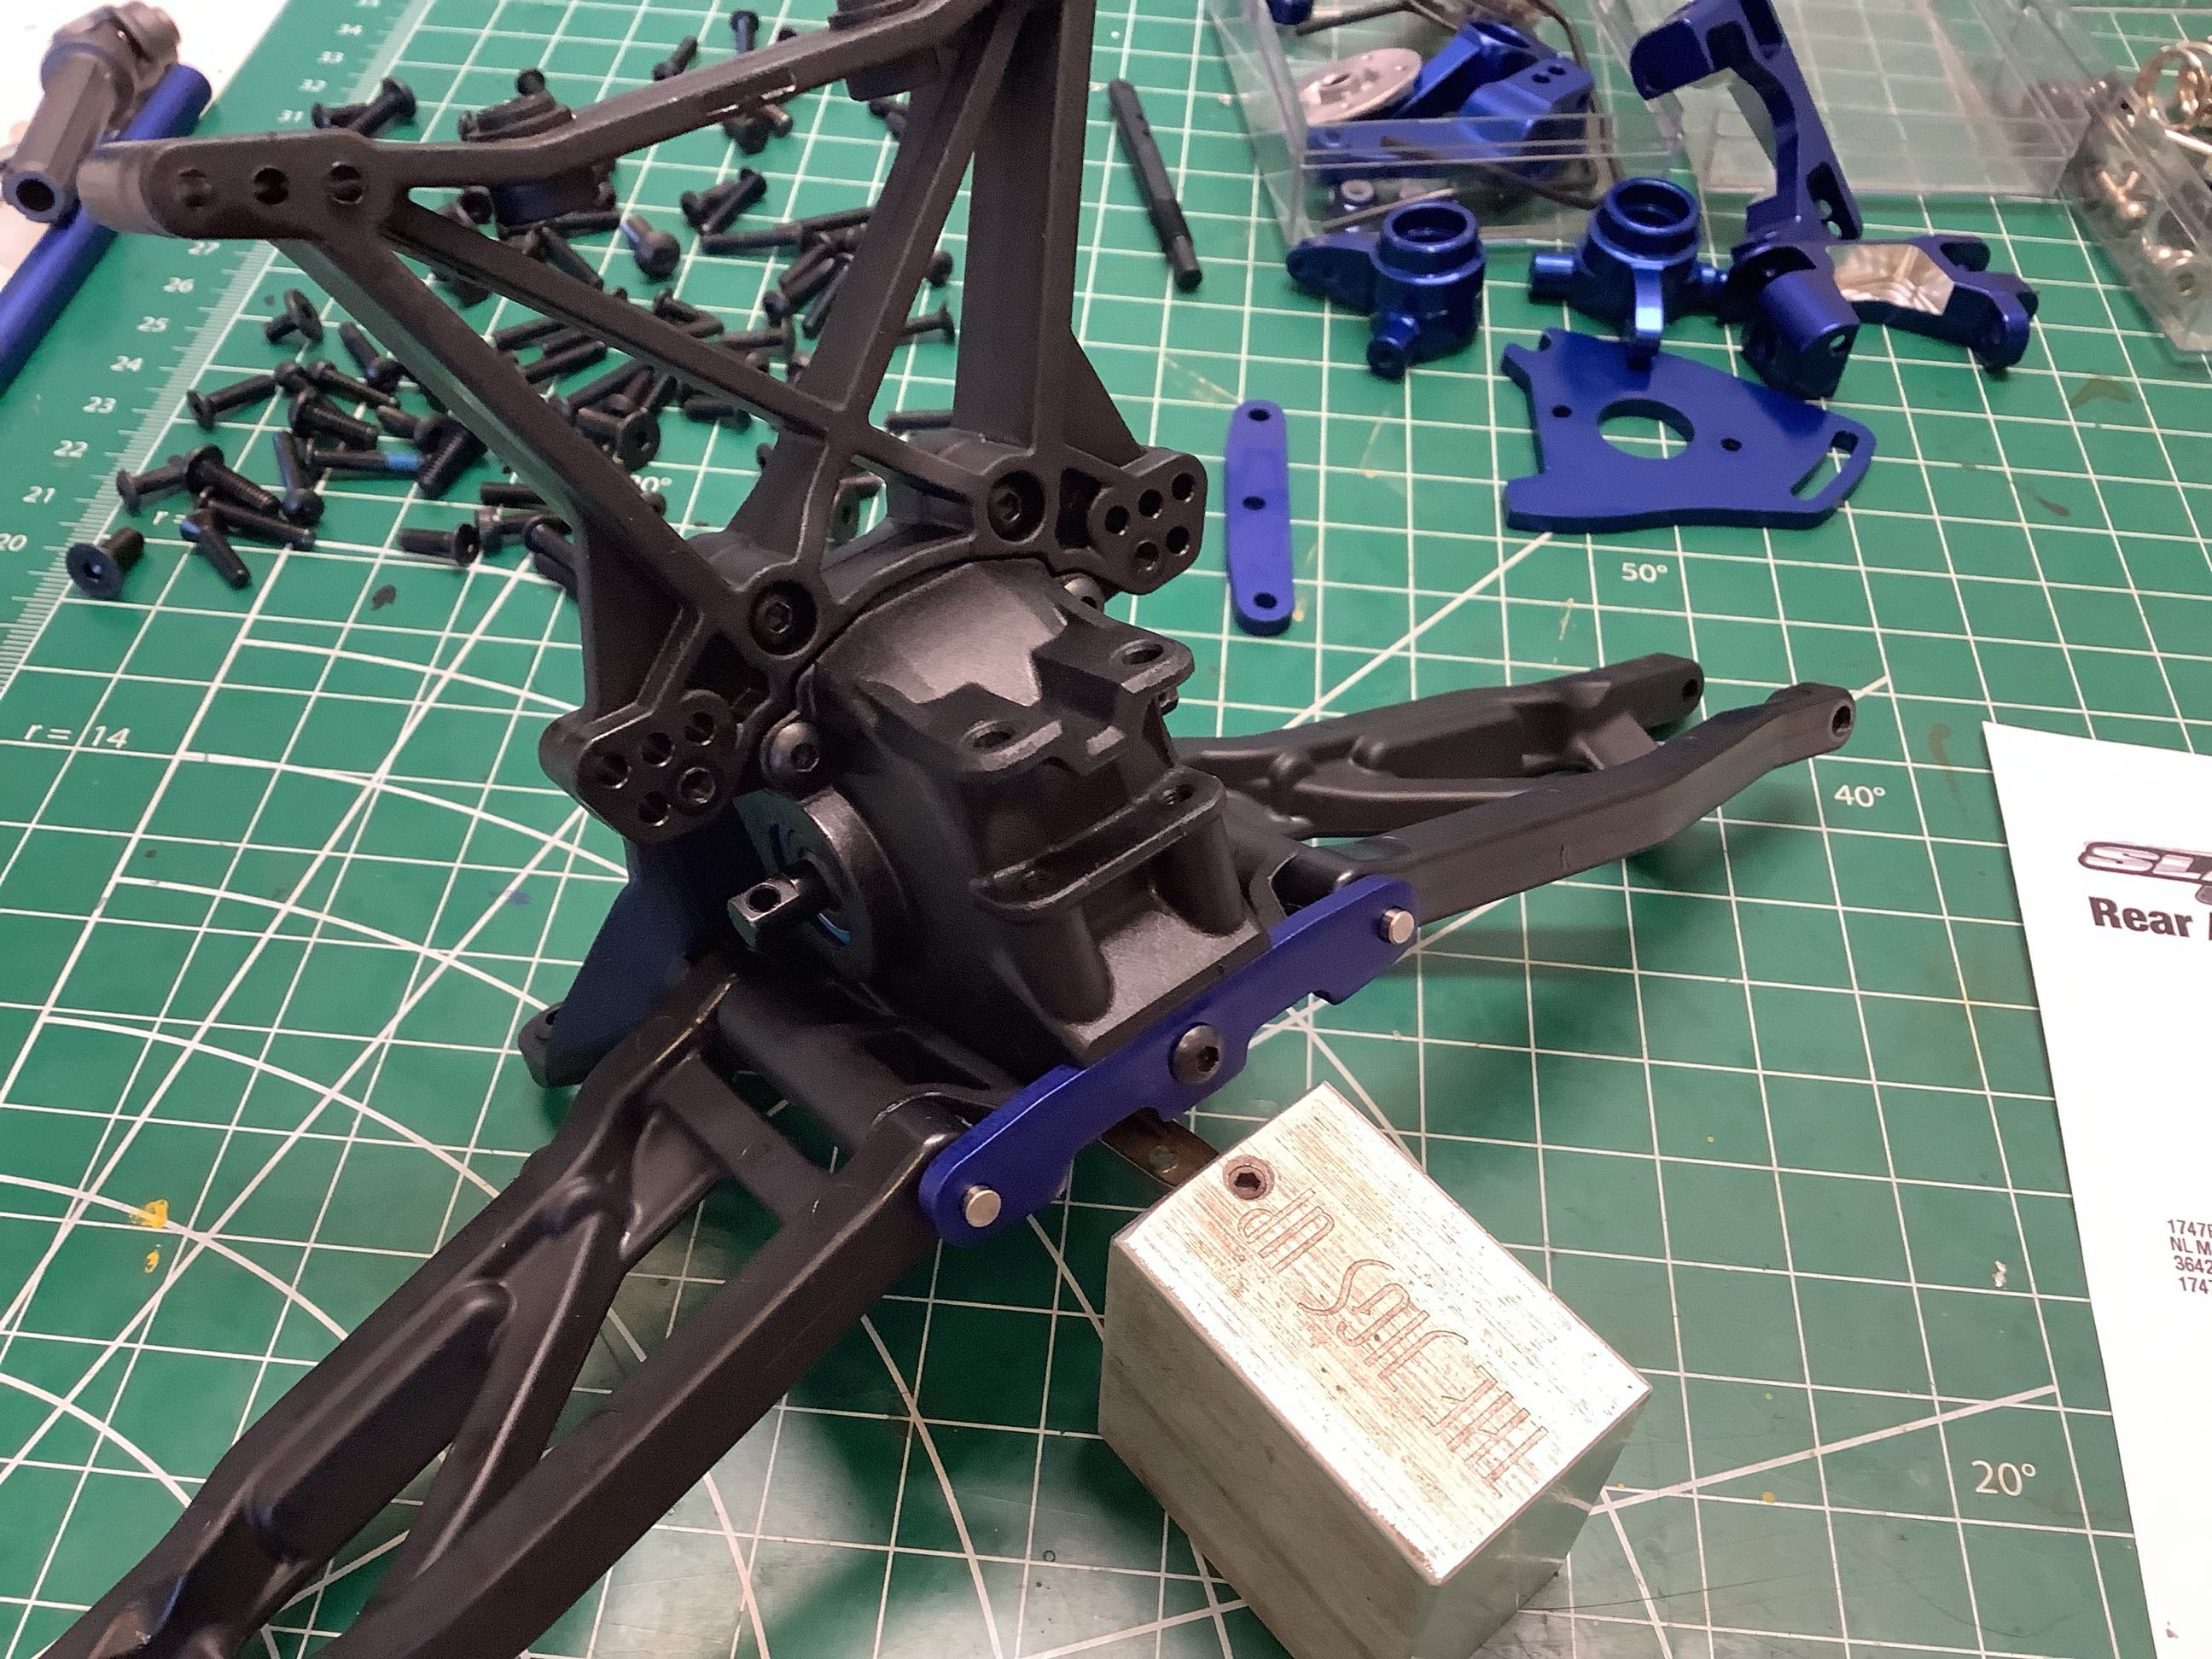
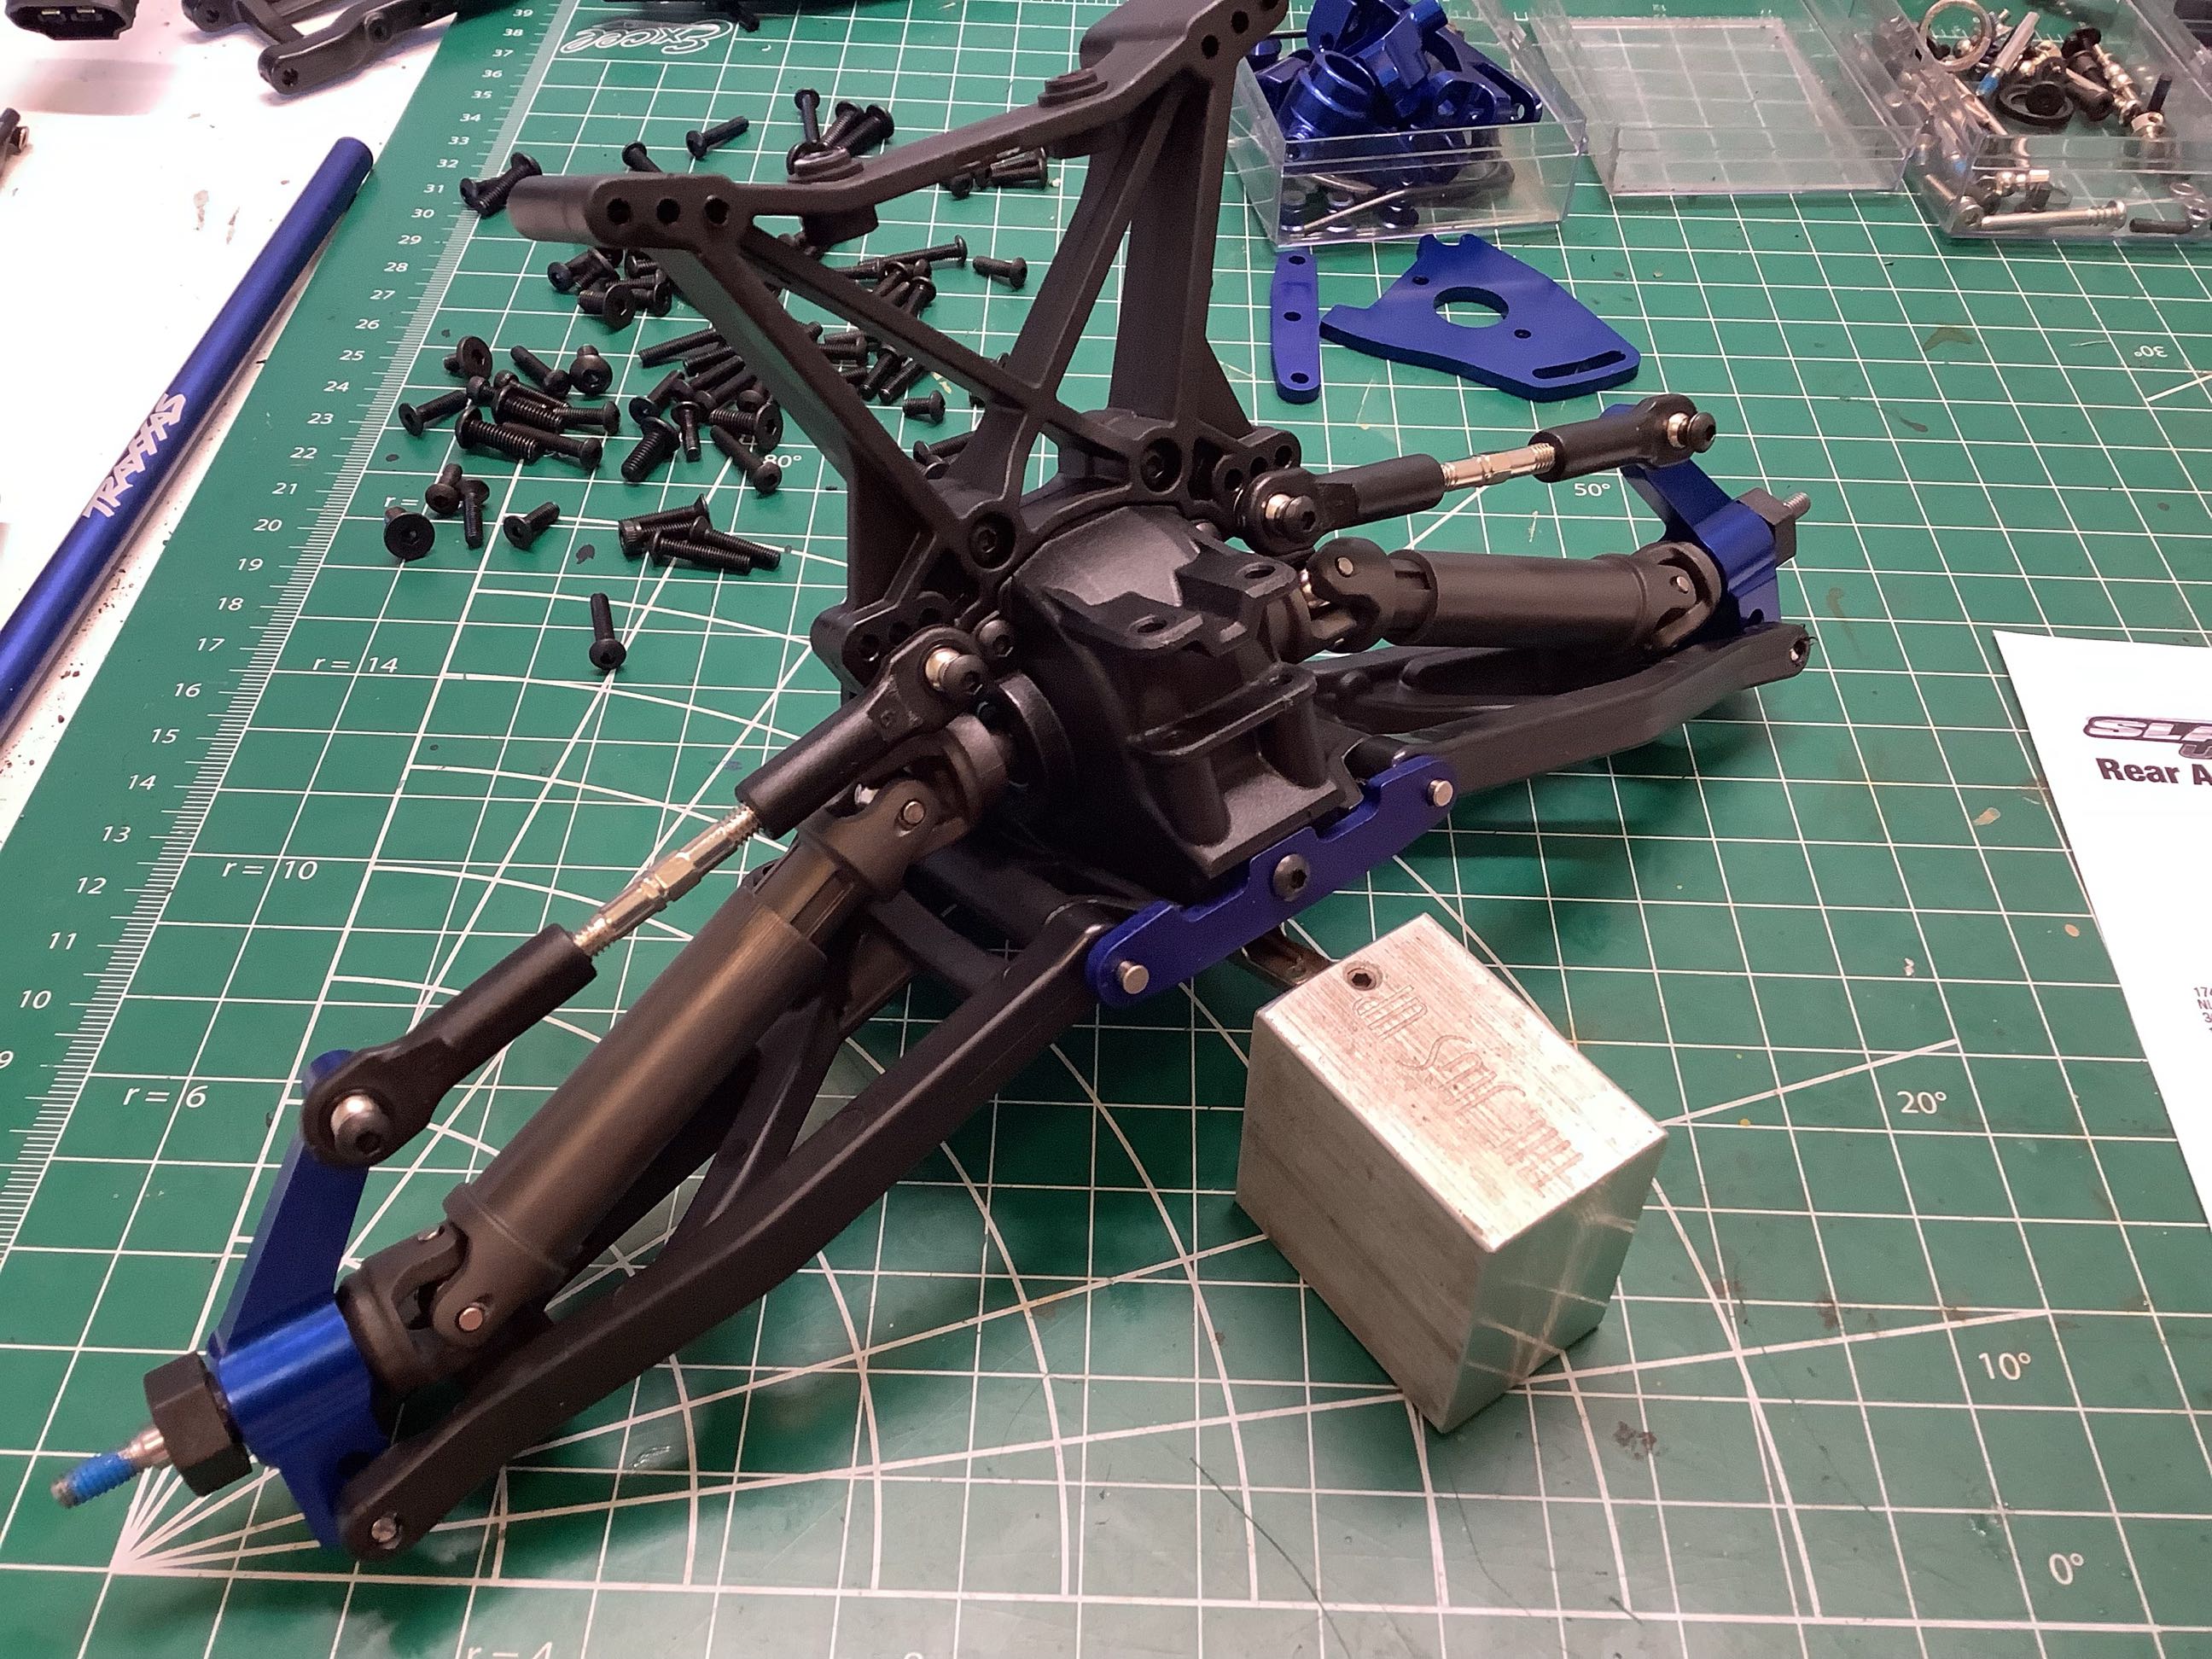
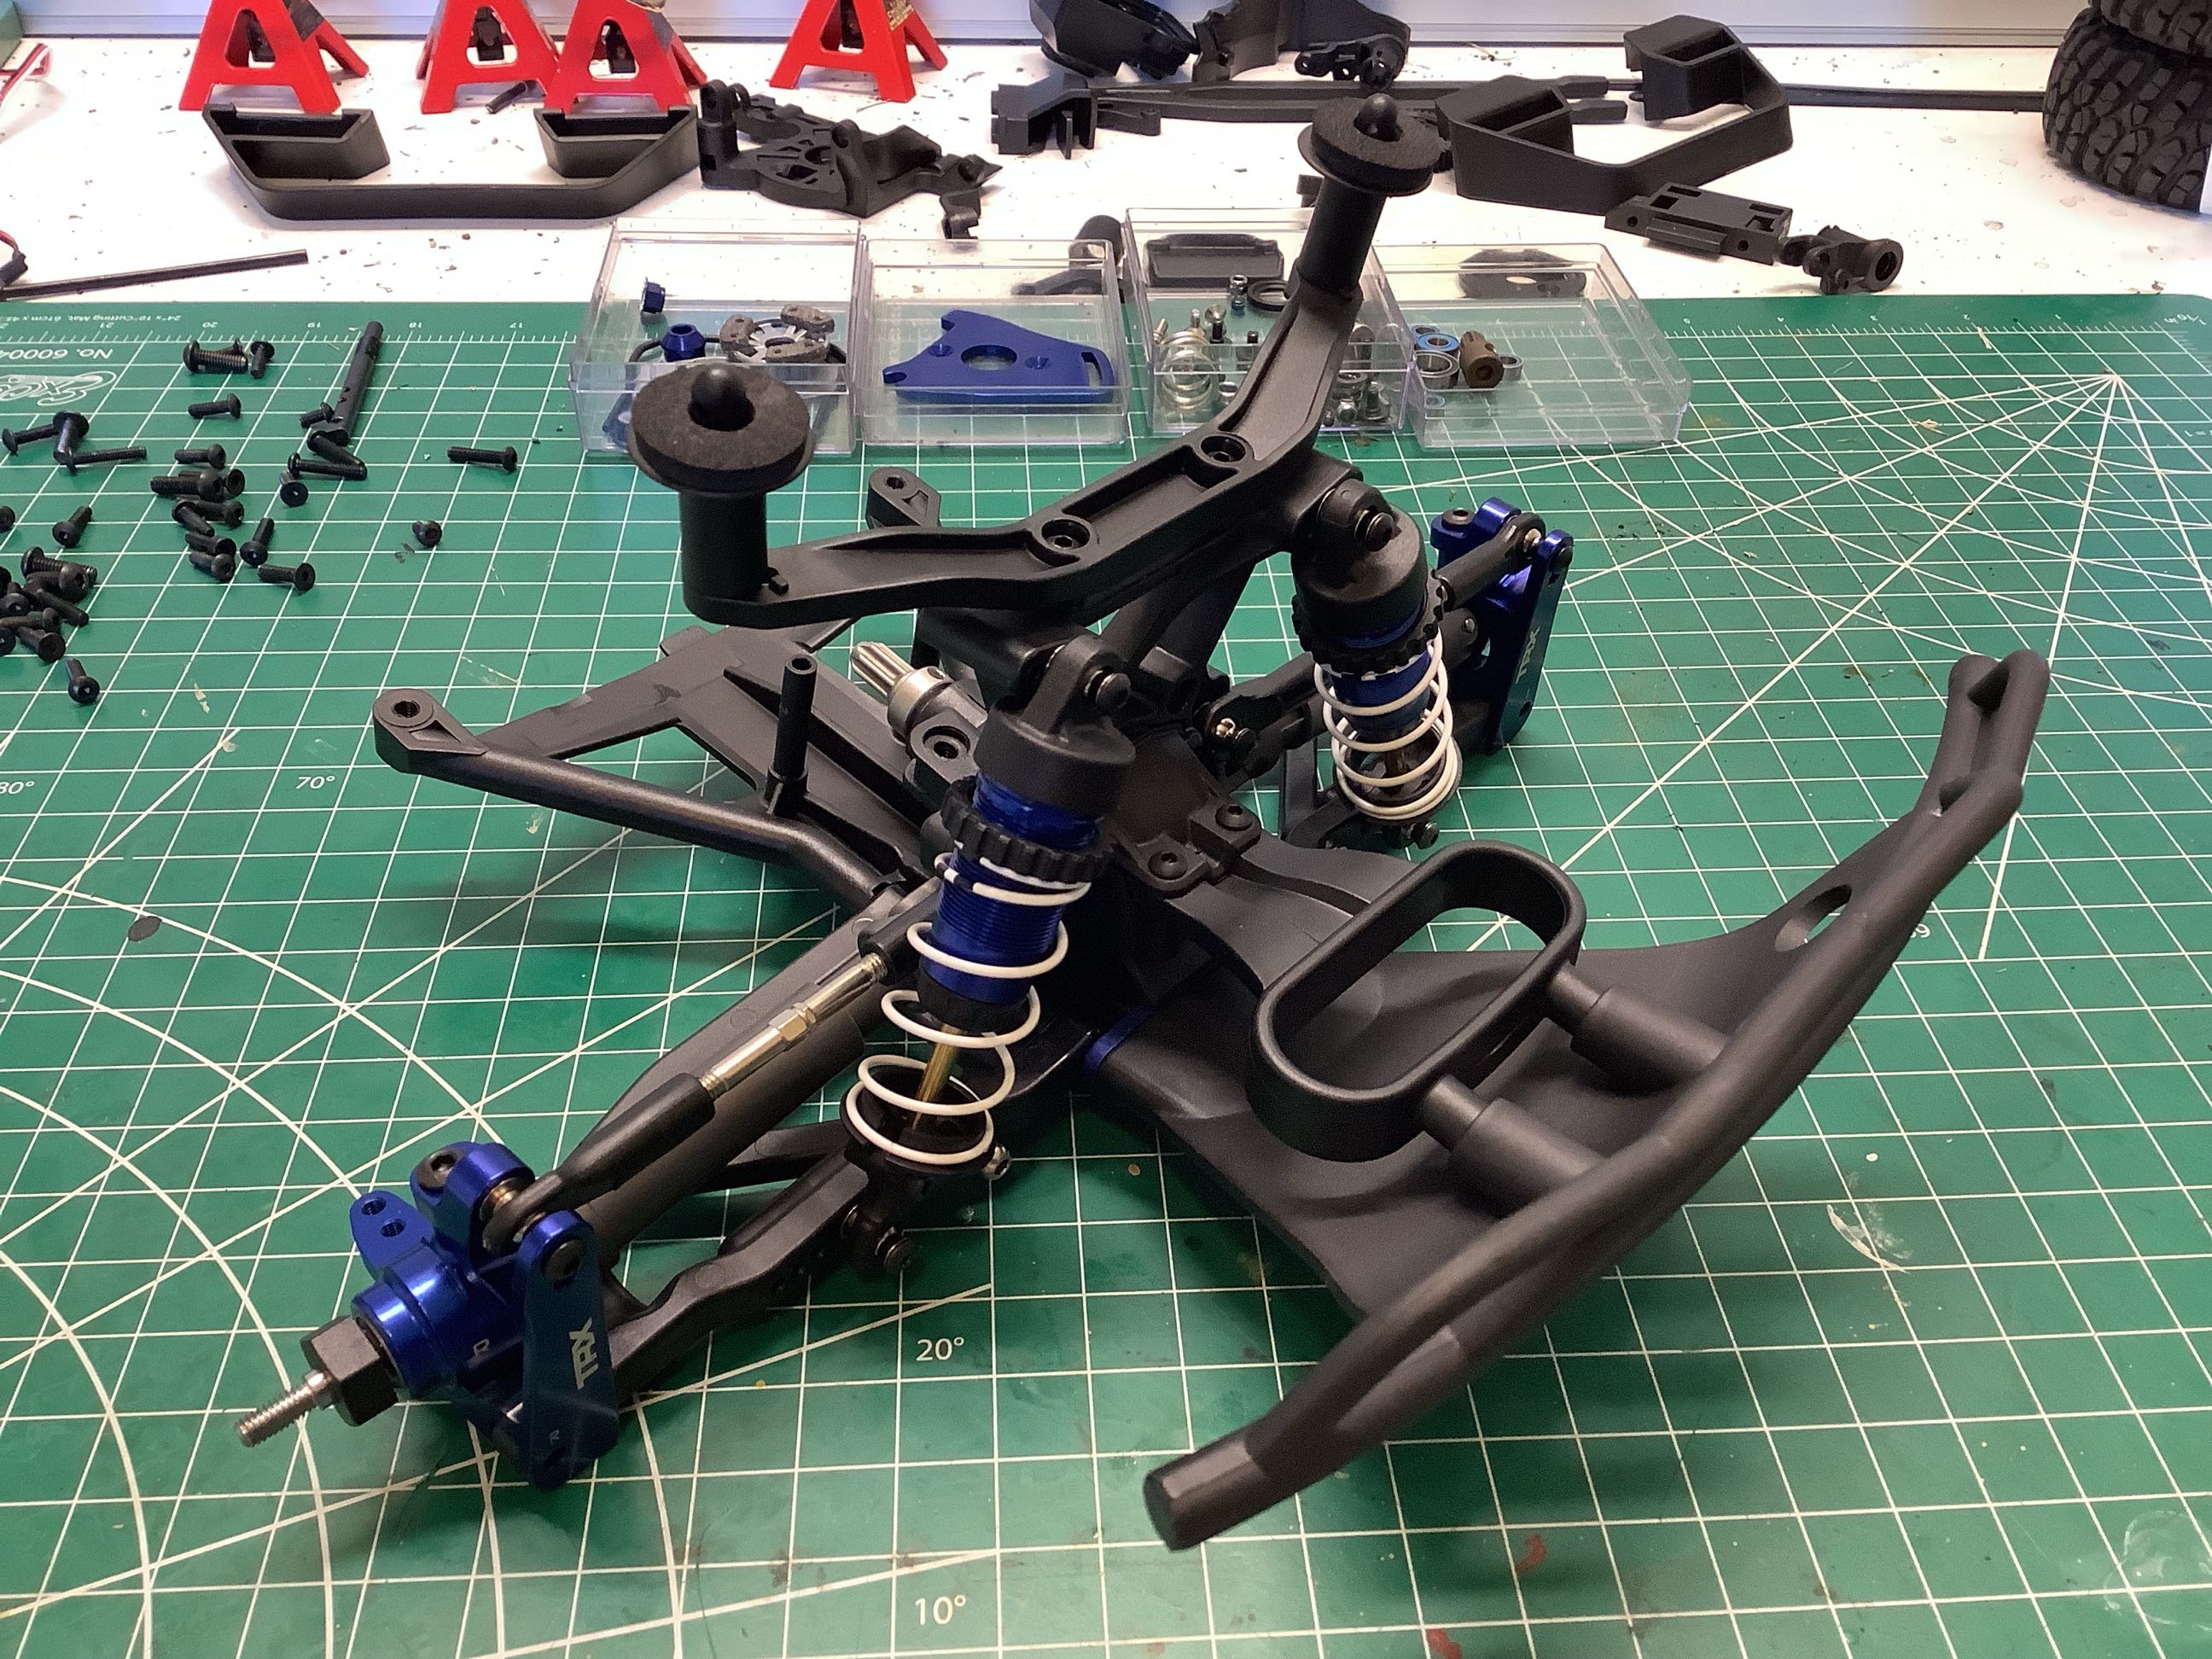
Believe it or not, even the basic version of the Slash uses these aluminum tie bars to support the lower control pivot shafts. The control arms themselves are a reinforced version worth an extra $2, only standard on the Ultimate. Those lovely machined uprights are also unique to the Ultimate and a $25 upgrade. 12mm aluminum wheel hexes are available but not standard. Note the large number of installation location choices for the inboard ends of the camber links.

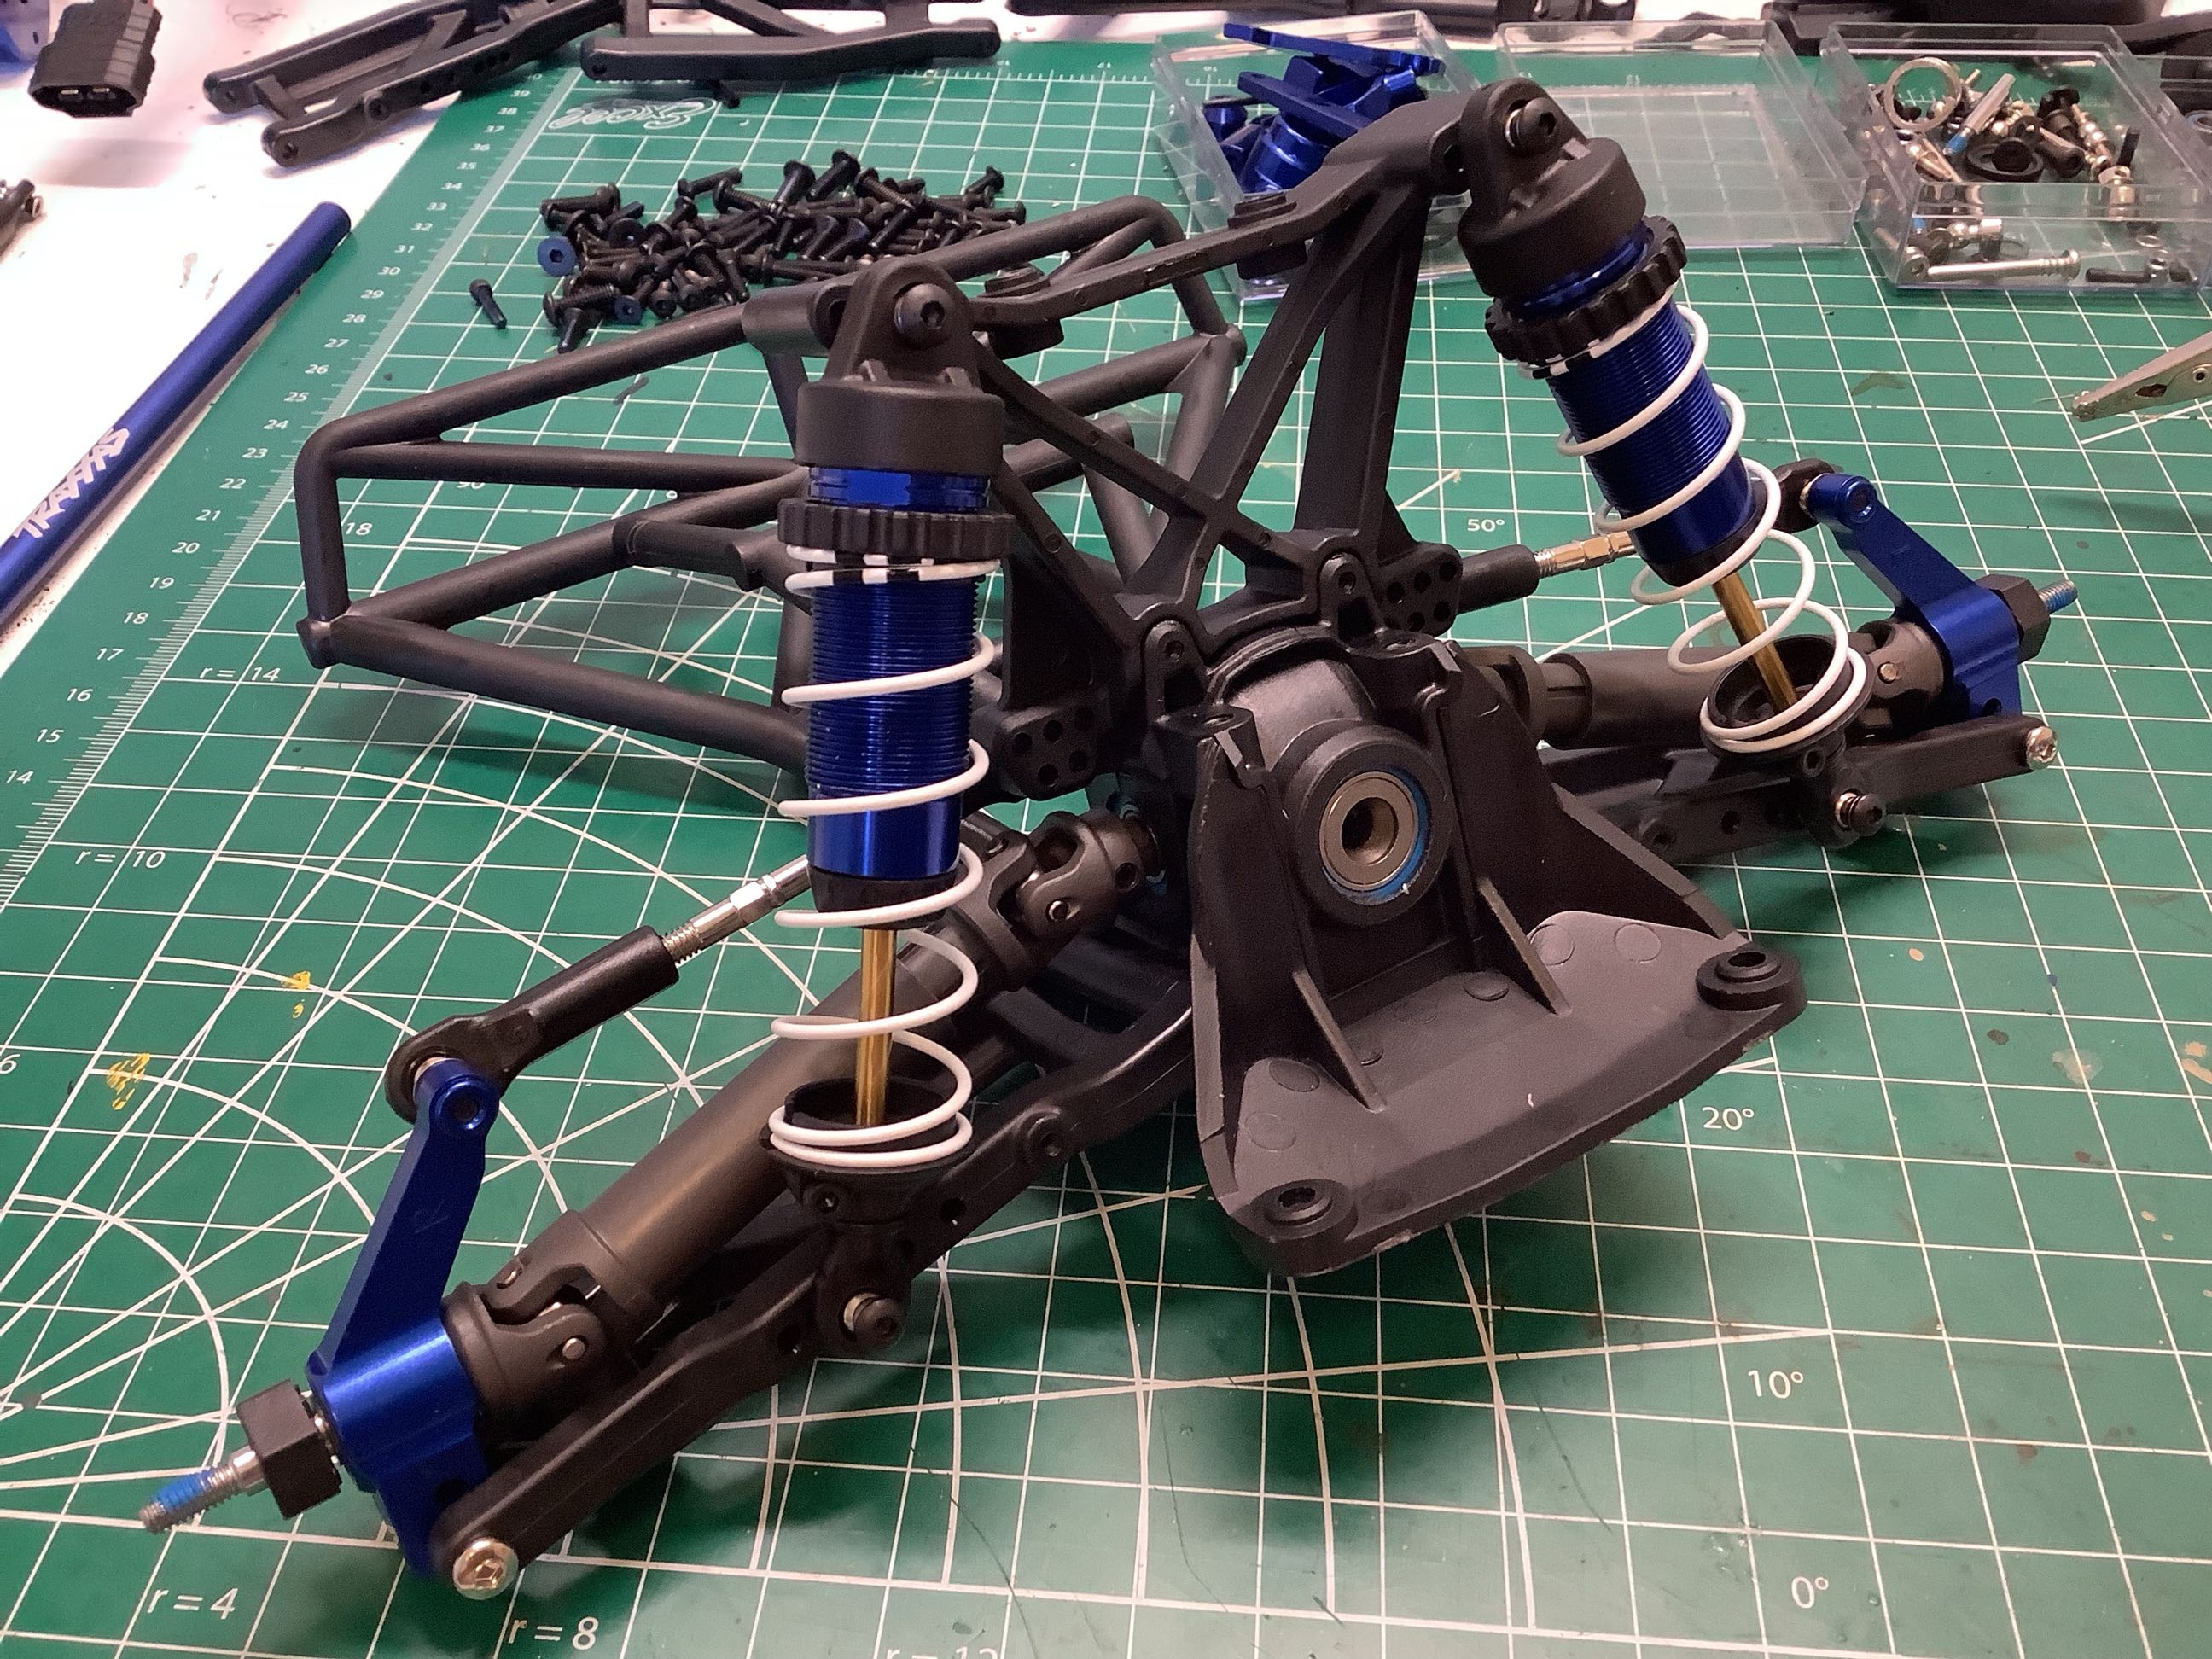
Now the massive rear bumper can be installed. This offers the rear gearbox a lot of protection from impacts, and also helps support the large overhanging body. On the right I've also installed those lovely blue GTR shocks.
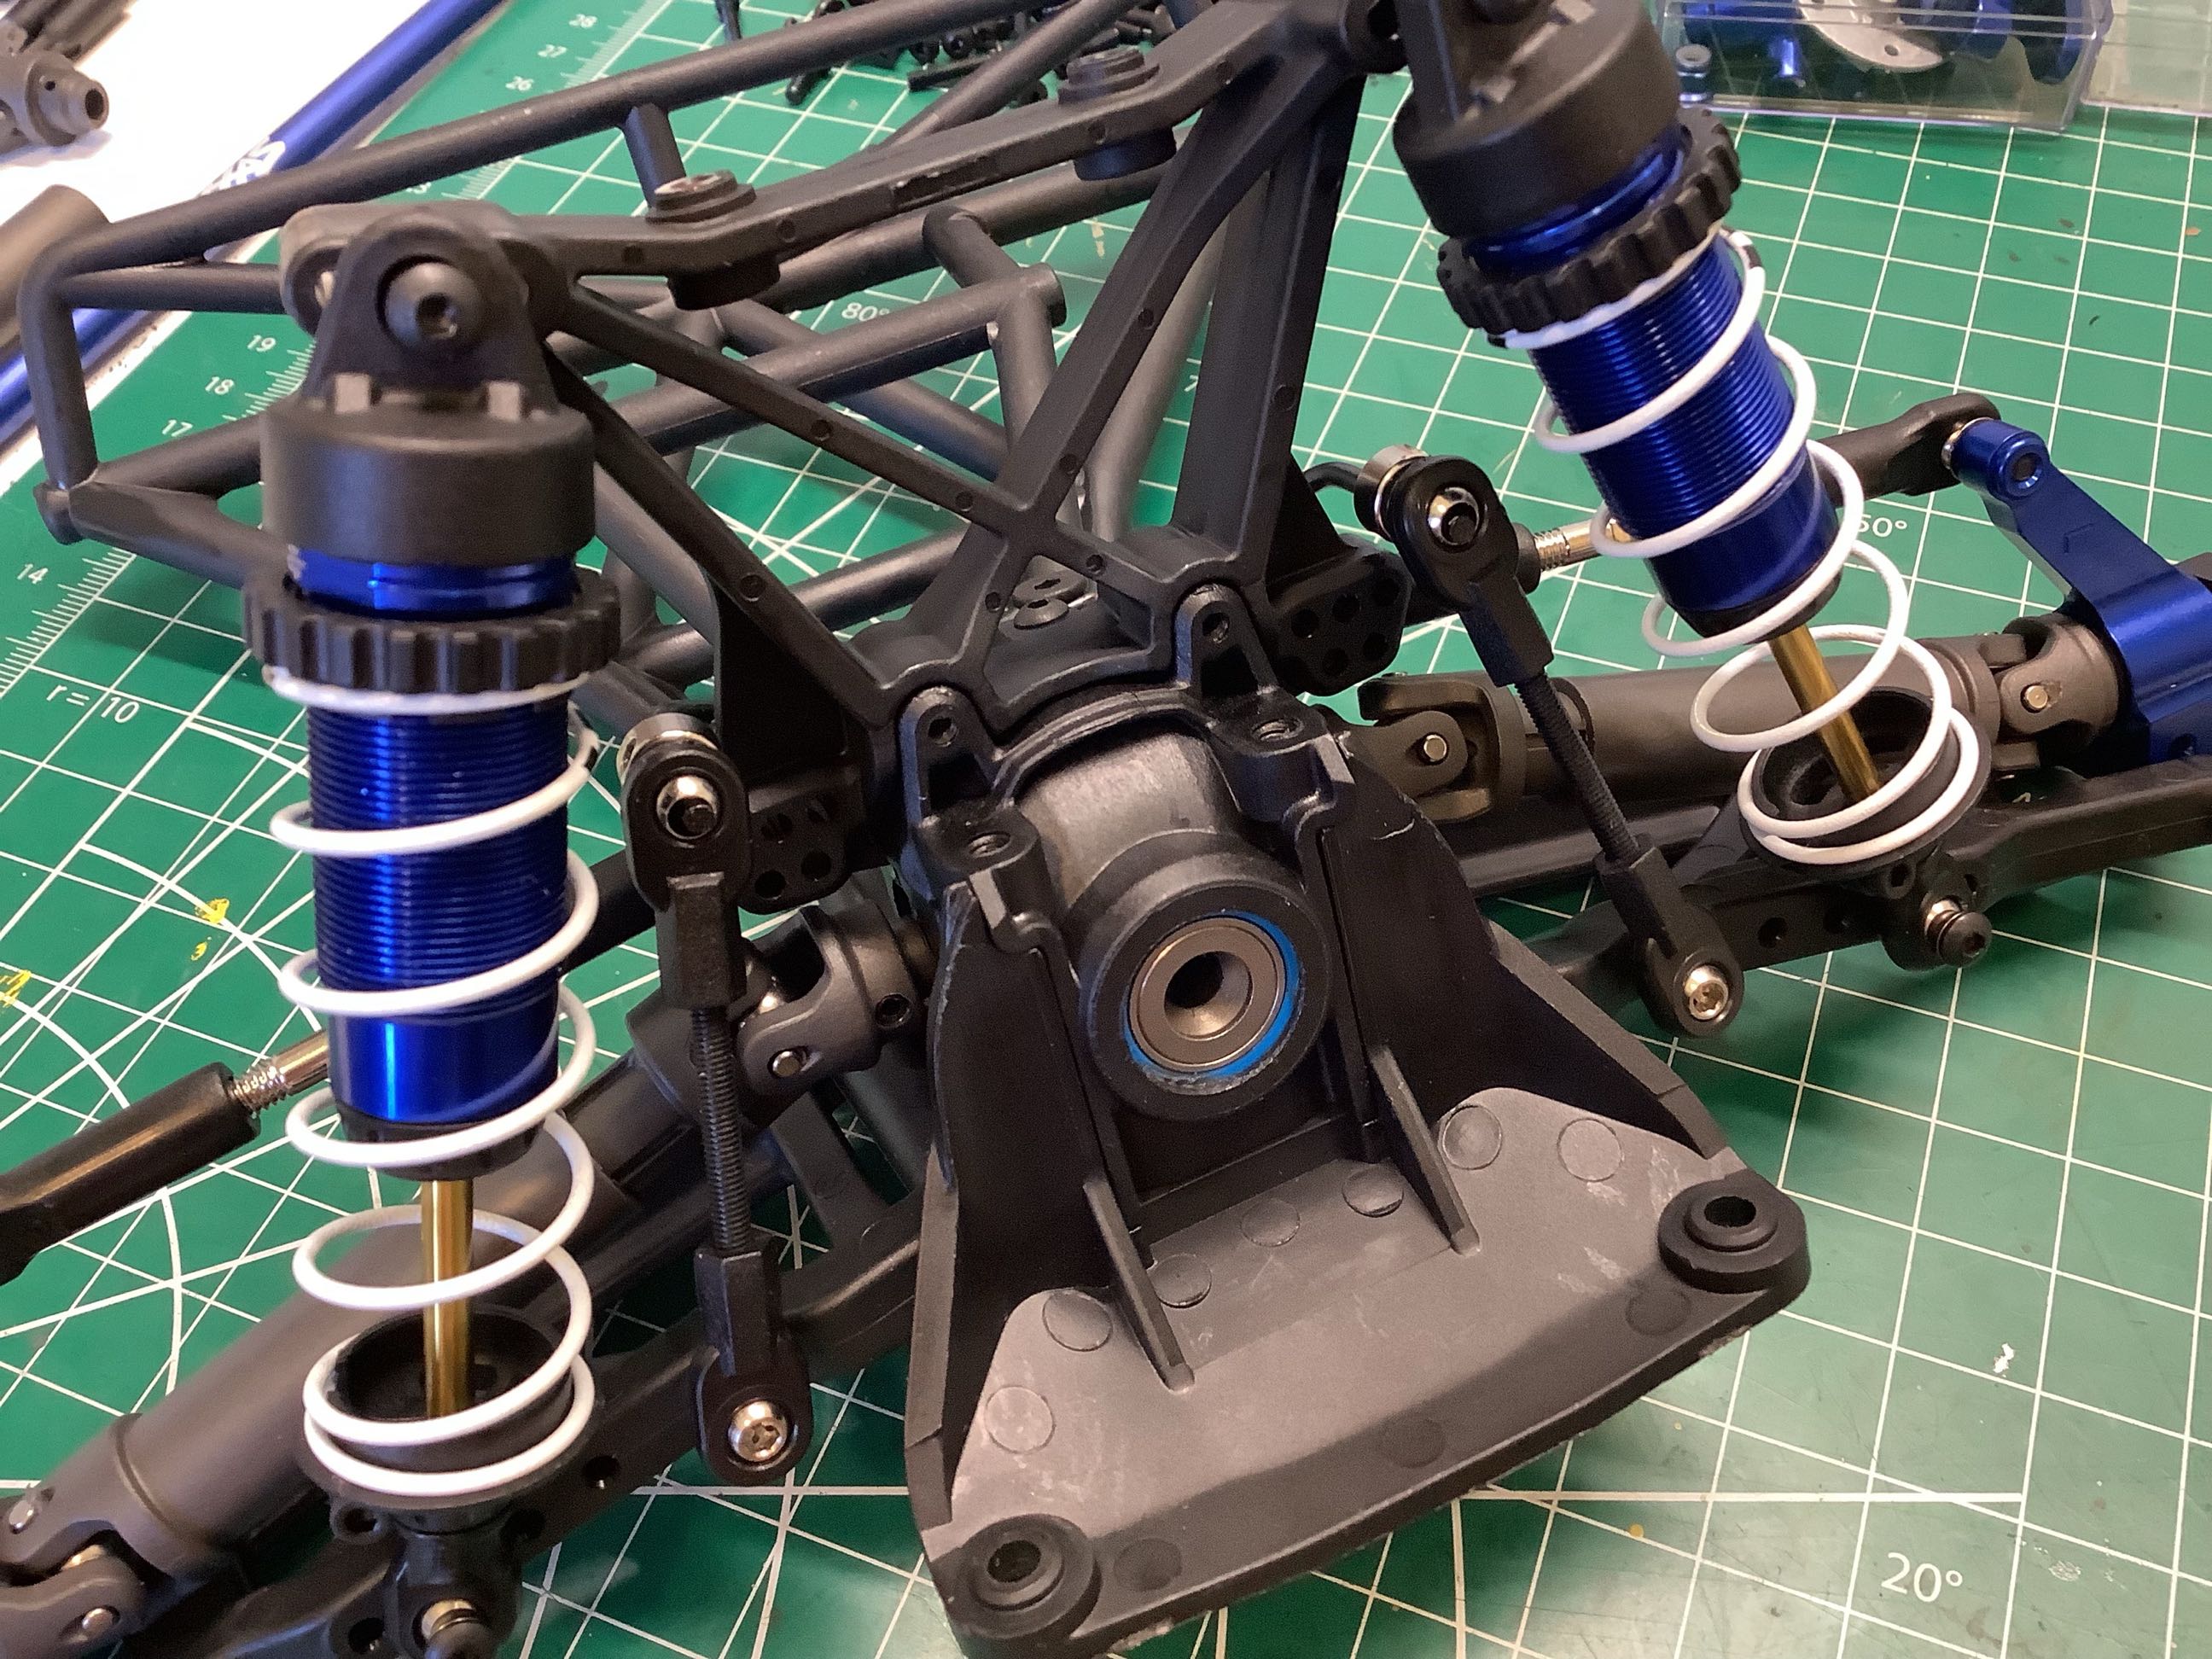
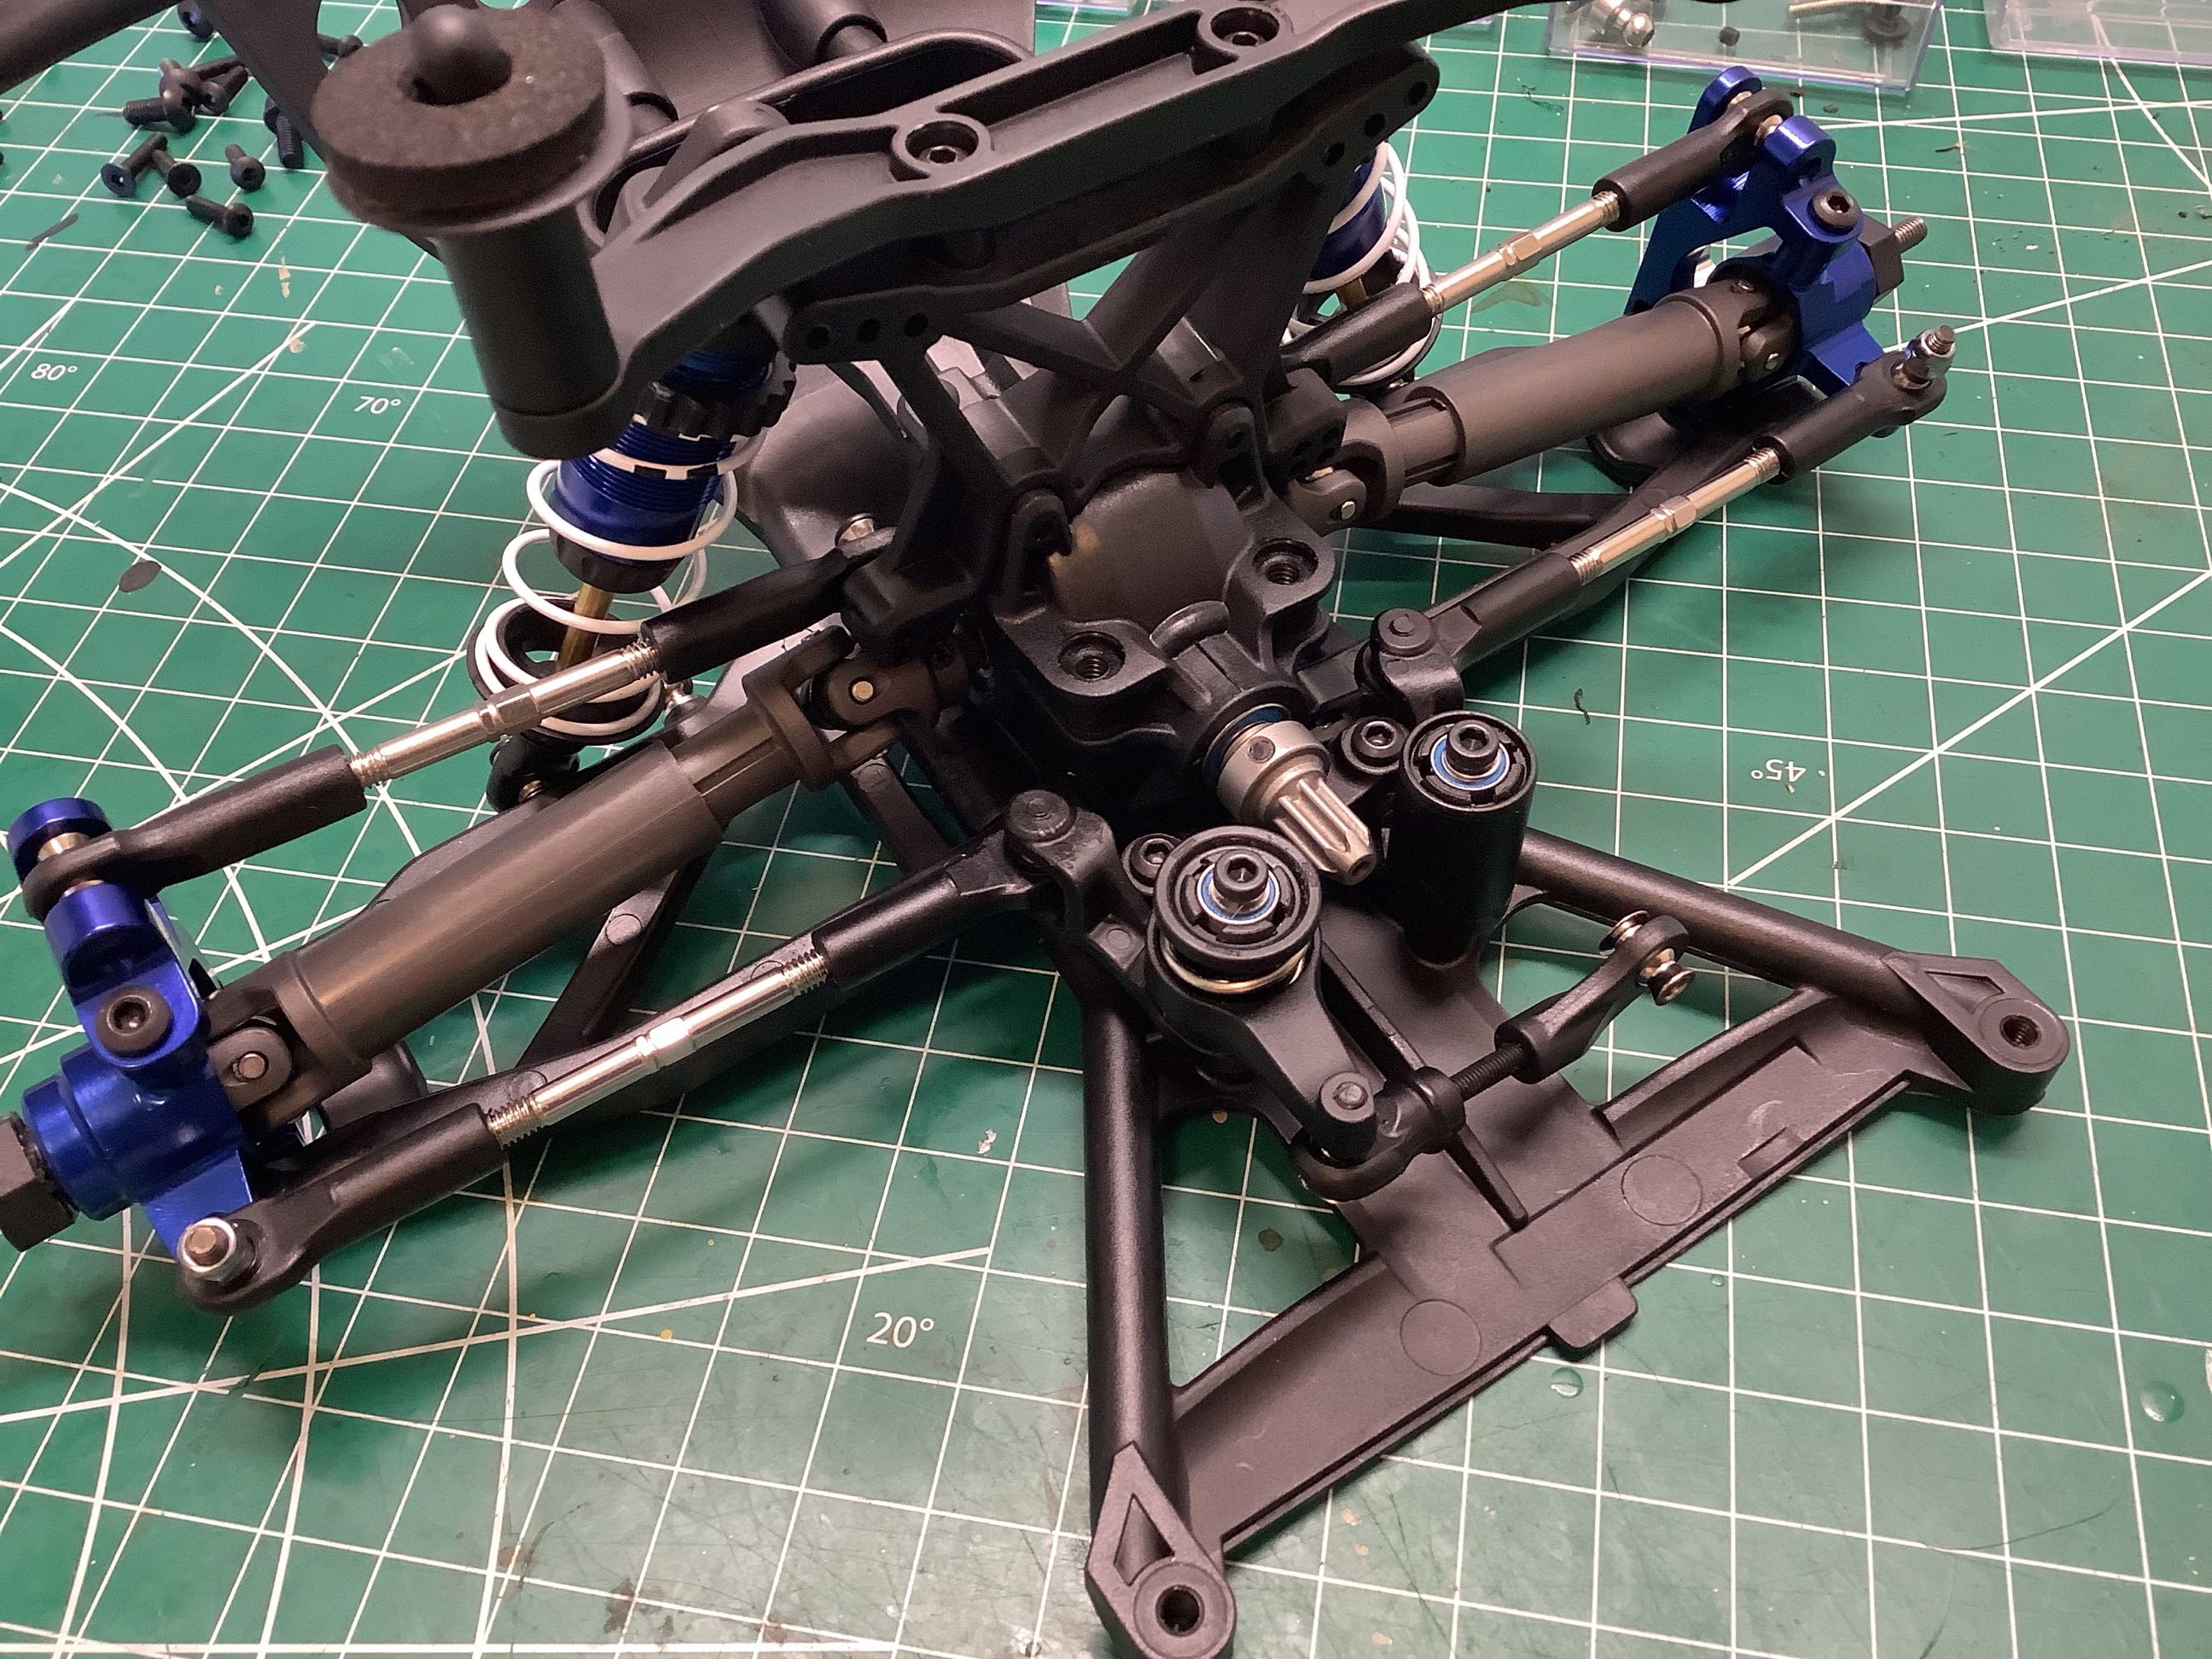
The rear sway bar installed here is unique to the Ultimate and a $25 value (front and rear sway bar come together for this price). The completed rear suspension module is shown on the right.
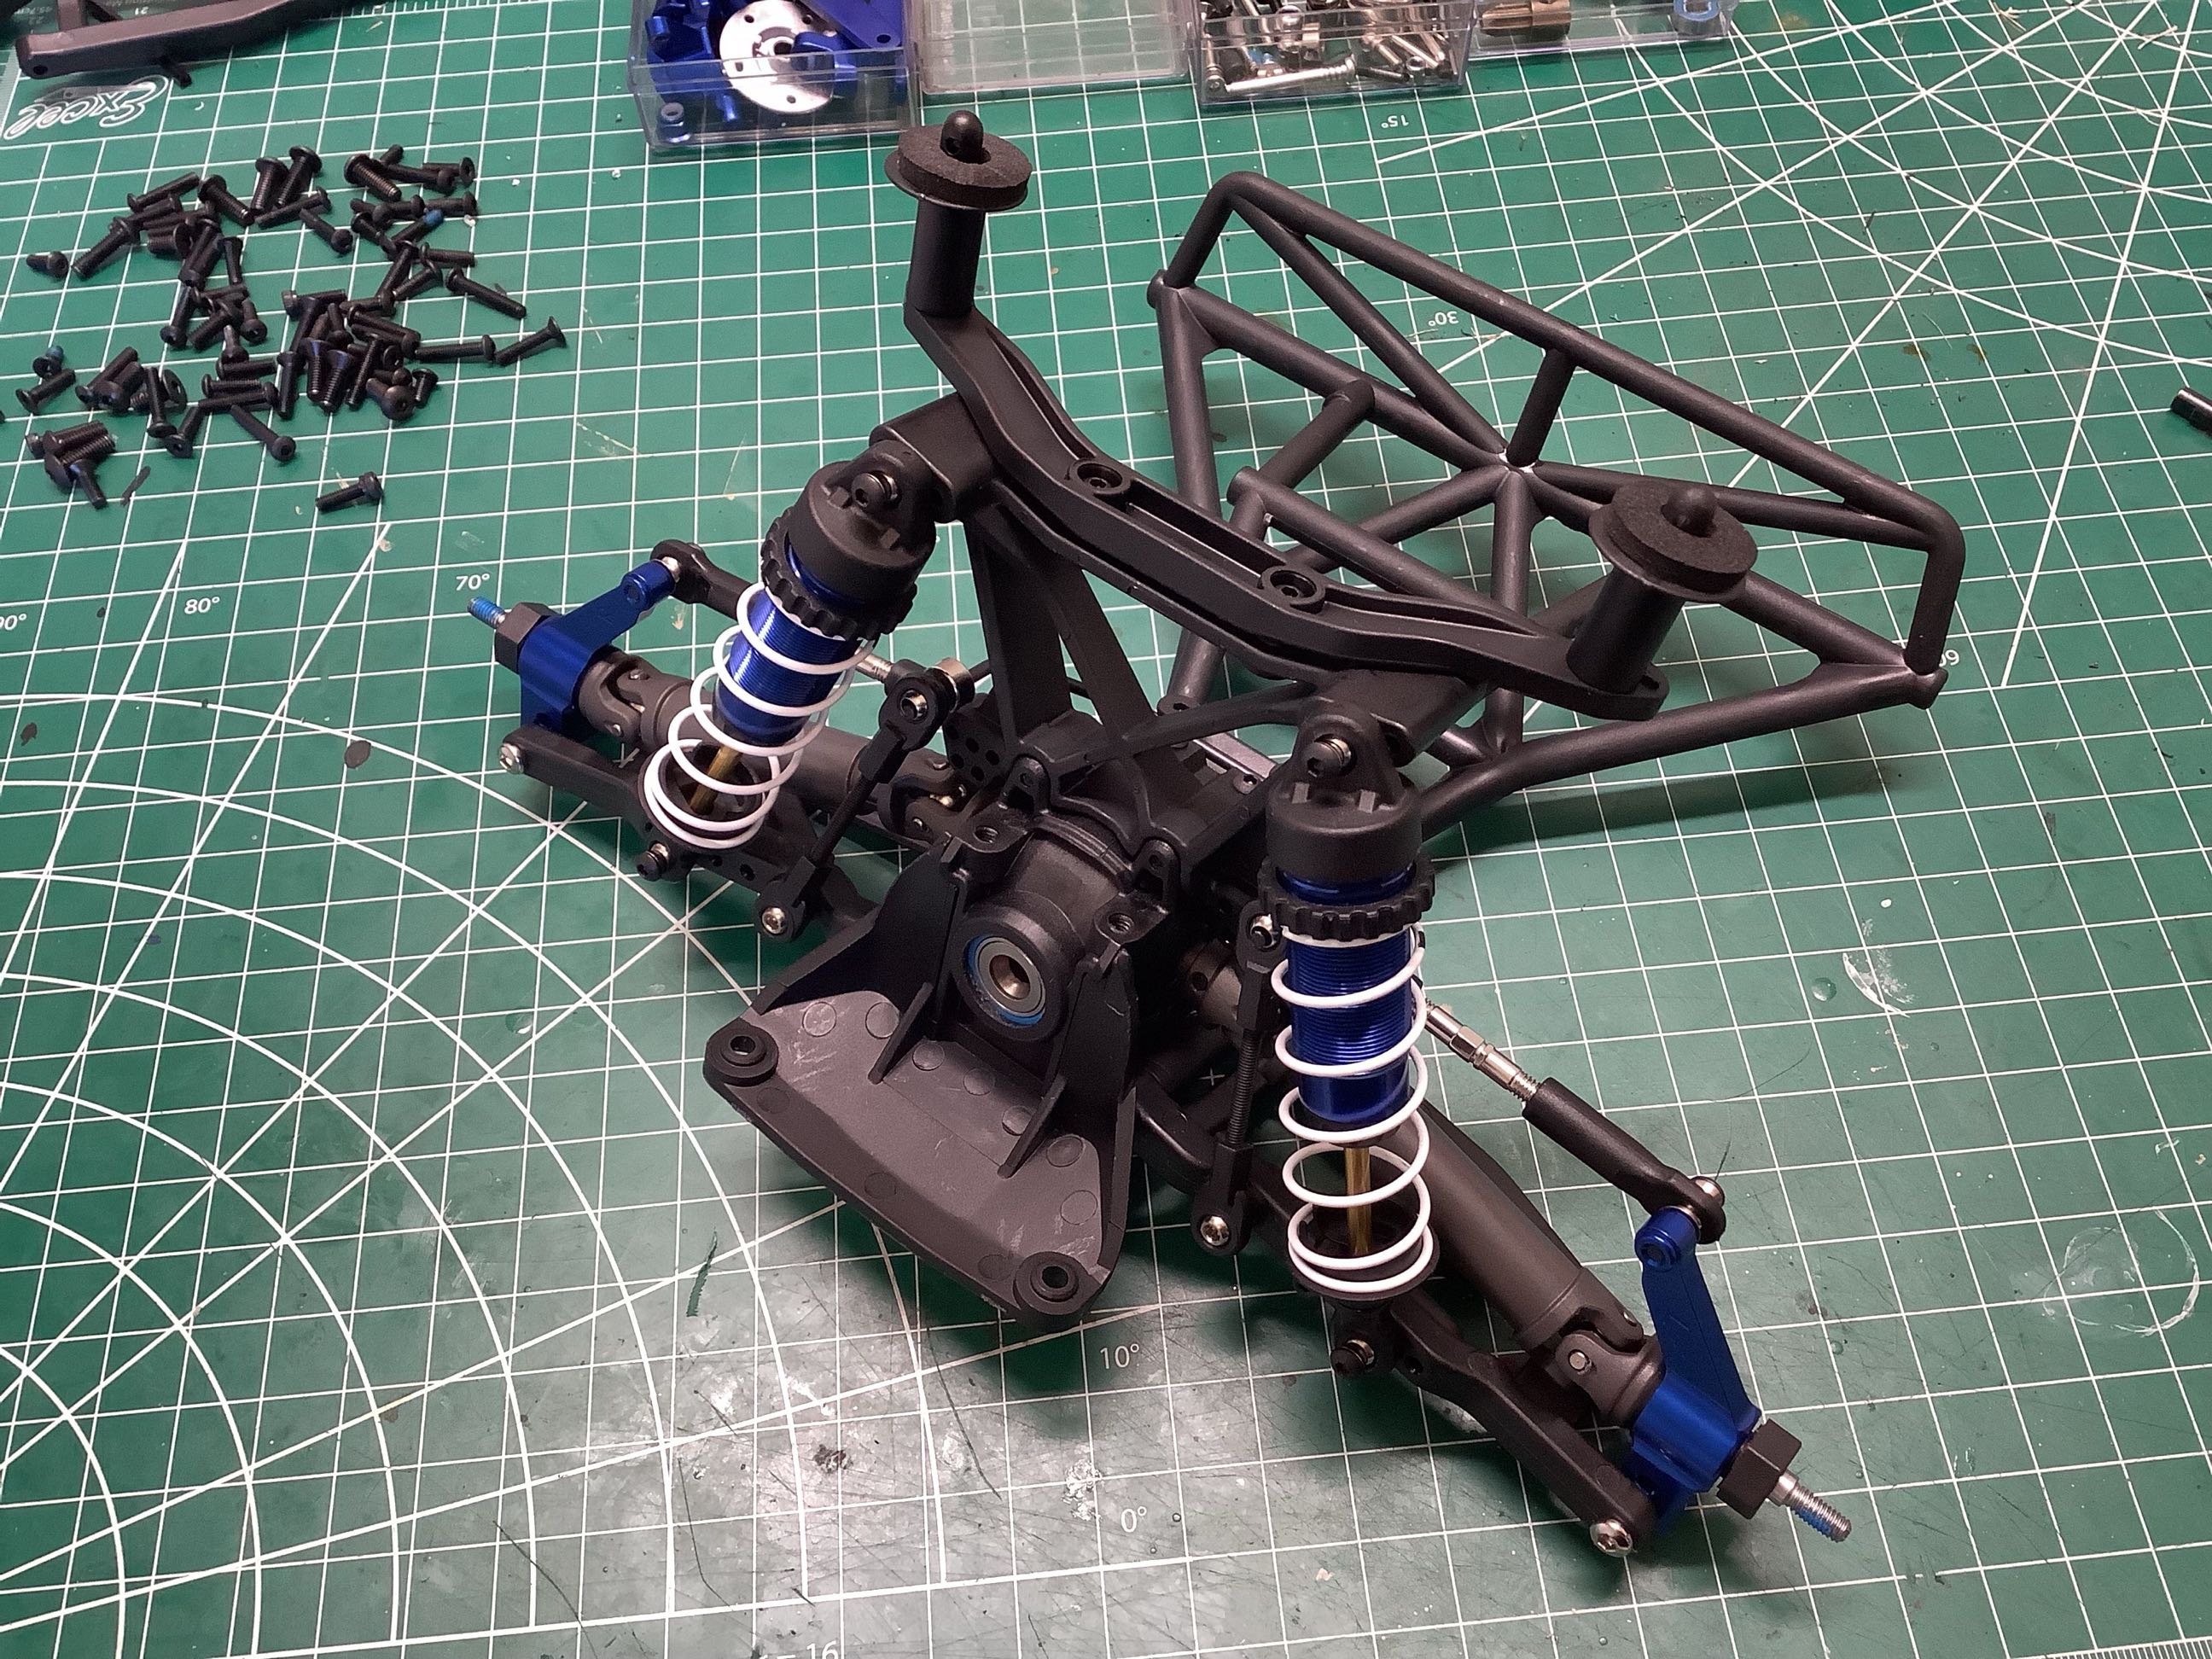
The front differential is build just like the rear except that it is filled with oil rather than grease. On the right the differential has been installed into the front housing and the shock tower attached.
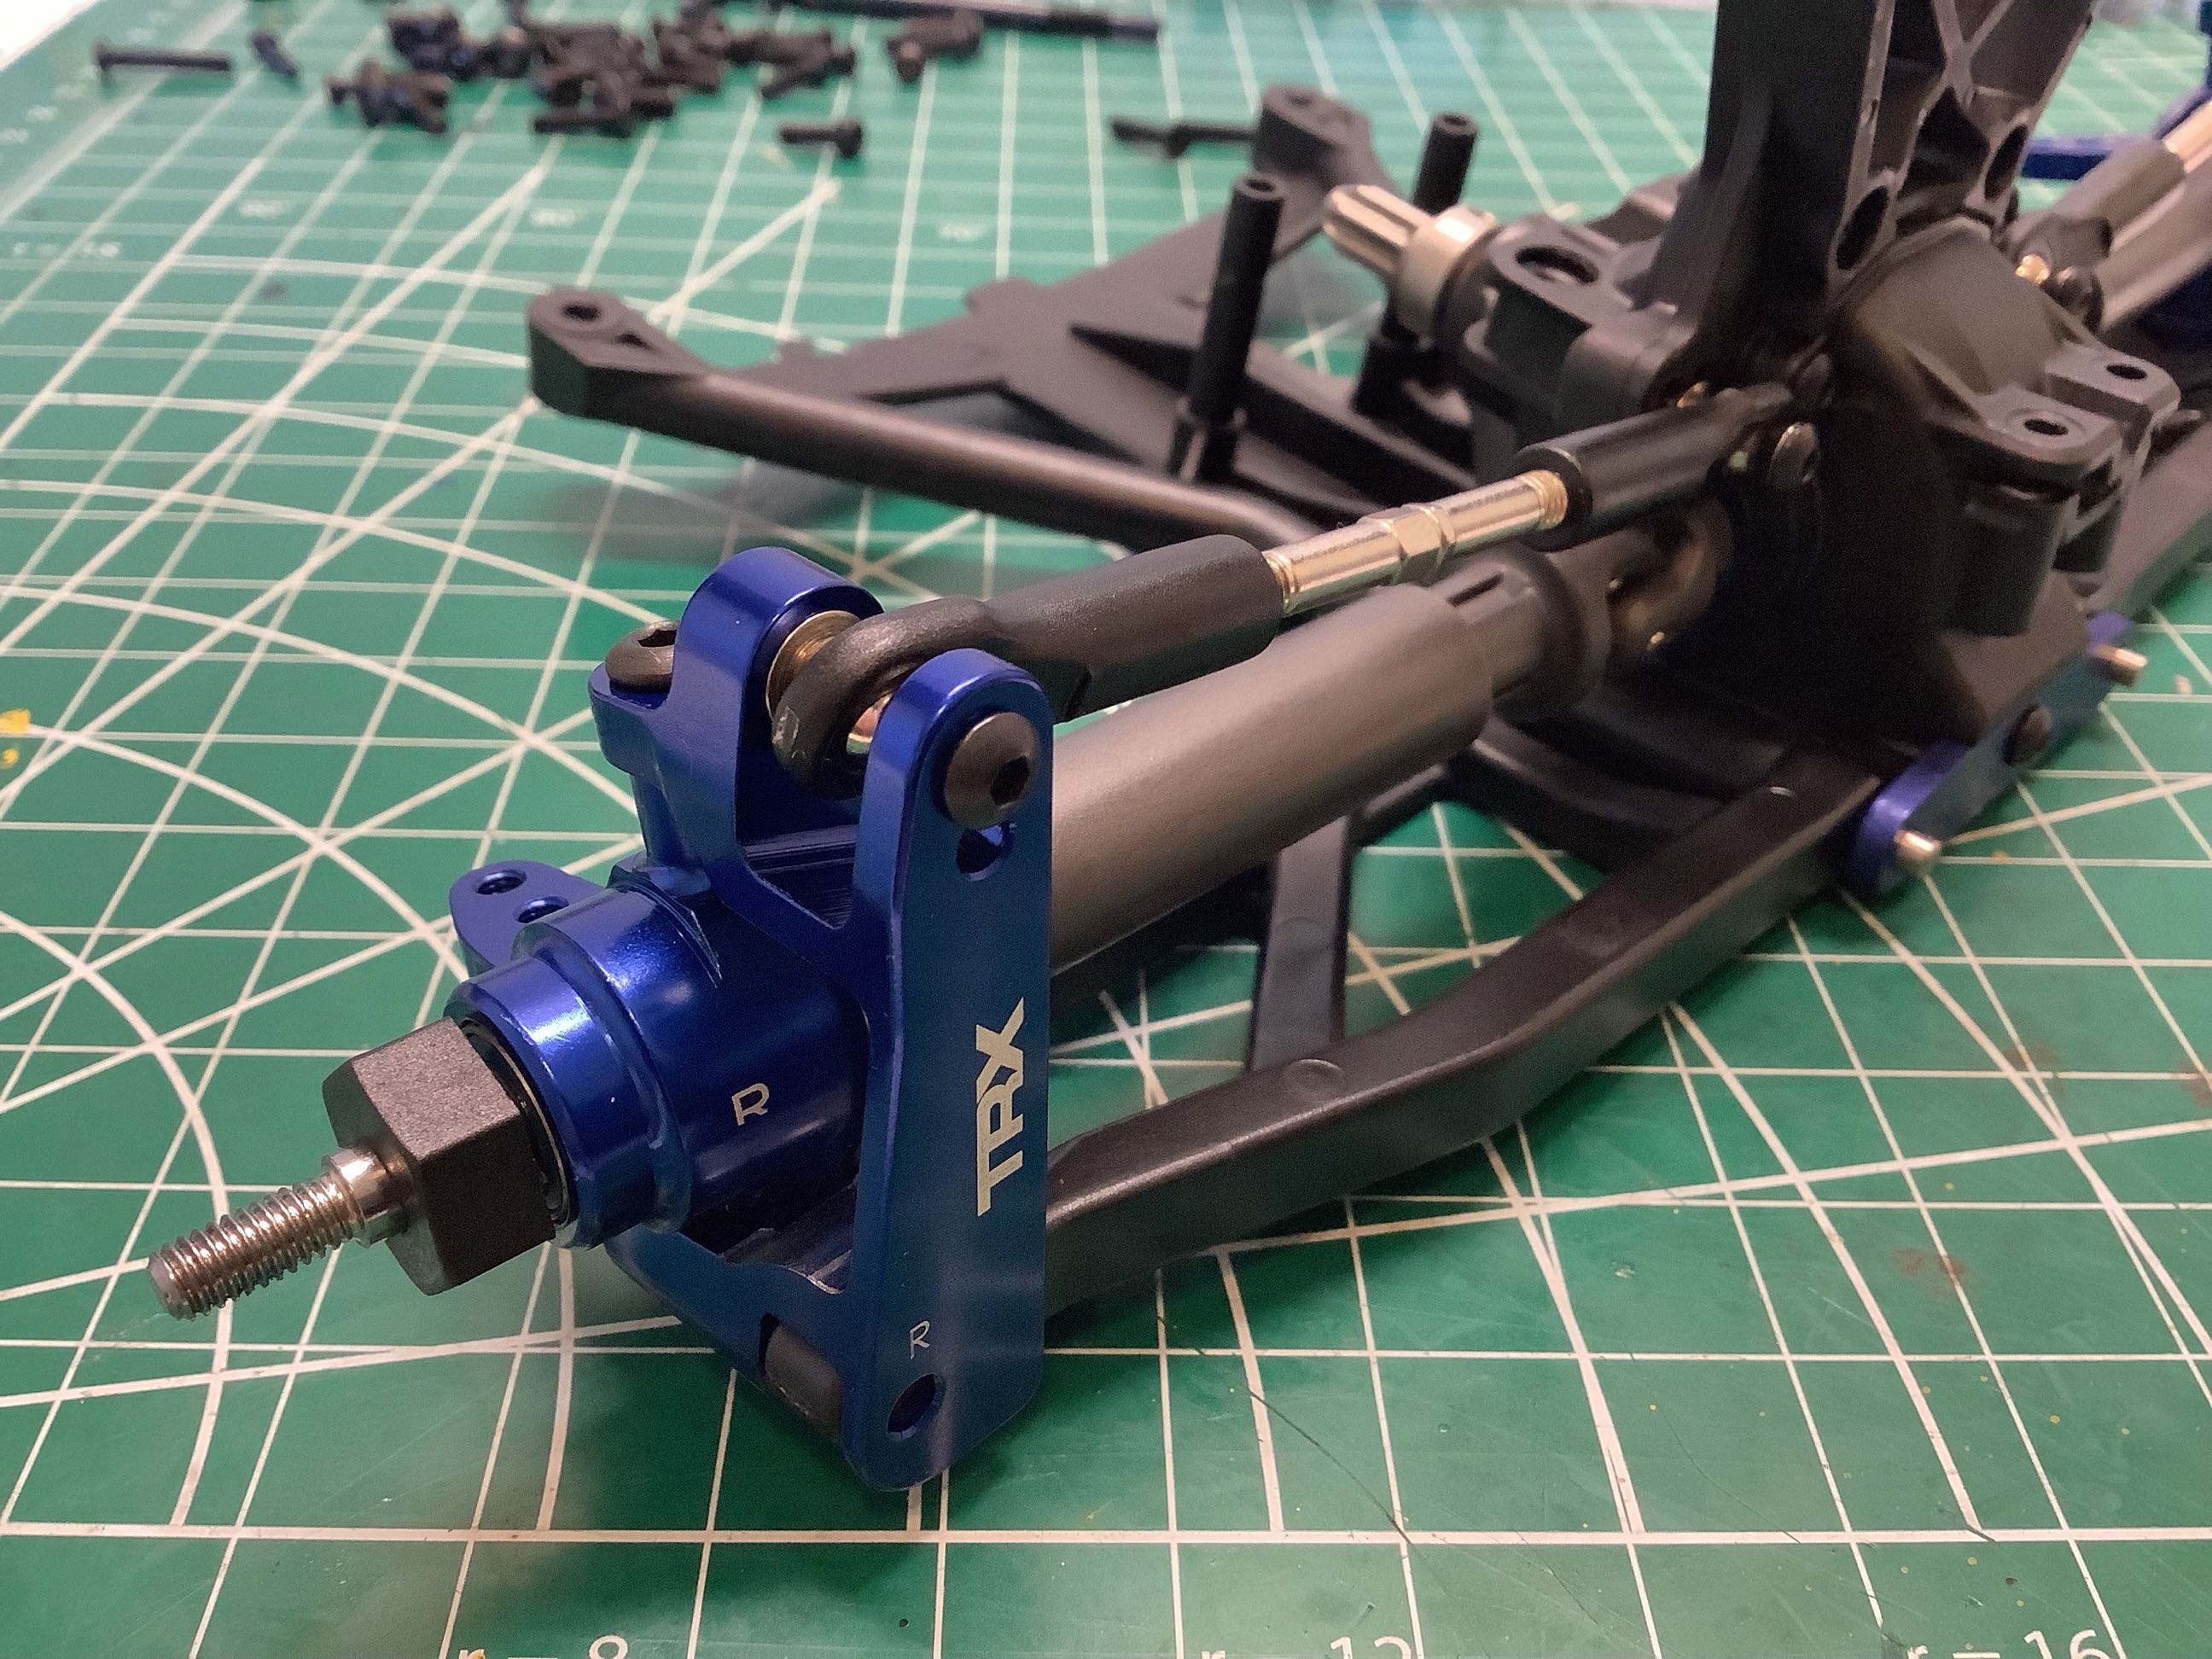
These lovely blue anodized, machined aluminum caster blocks and steering knuckles are upgrades unique to the Ultimate edition a $75 value. There's a good chance that plastic is actually a better choice here due the resilience of the material after an impact, but aluminum sure does look good. Like the rear, the front uses strengthened lower arms and steel turnbuckle camber links. On the right you can see the front bumper which uses an oval section as a crush zone to absorb impact. It works very well.
Time to install the shorter front GTR shocks and also the body posts.
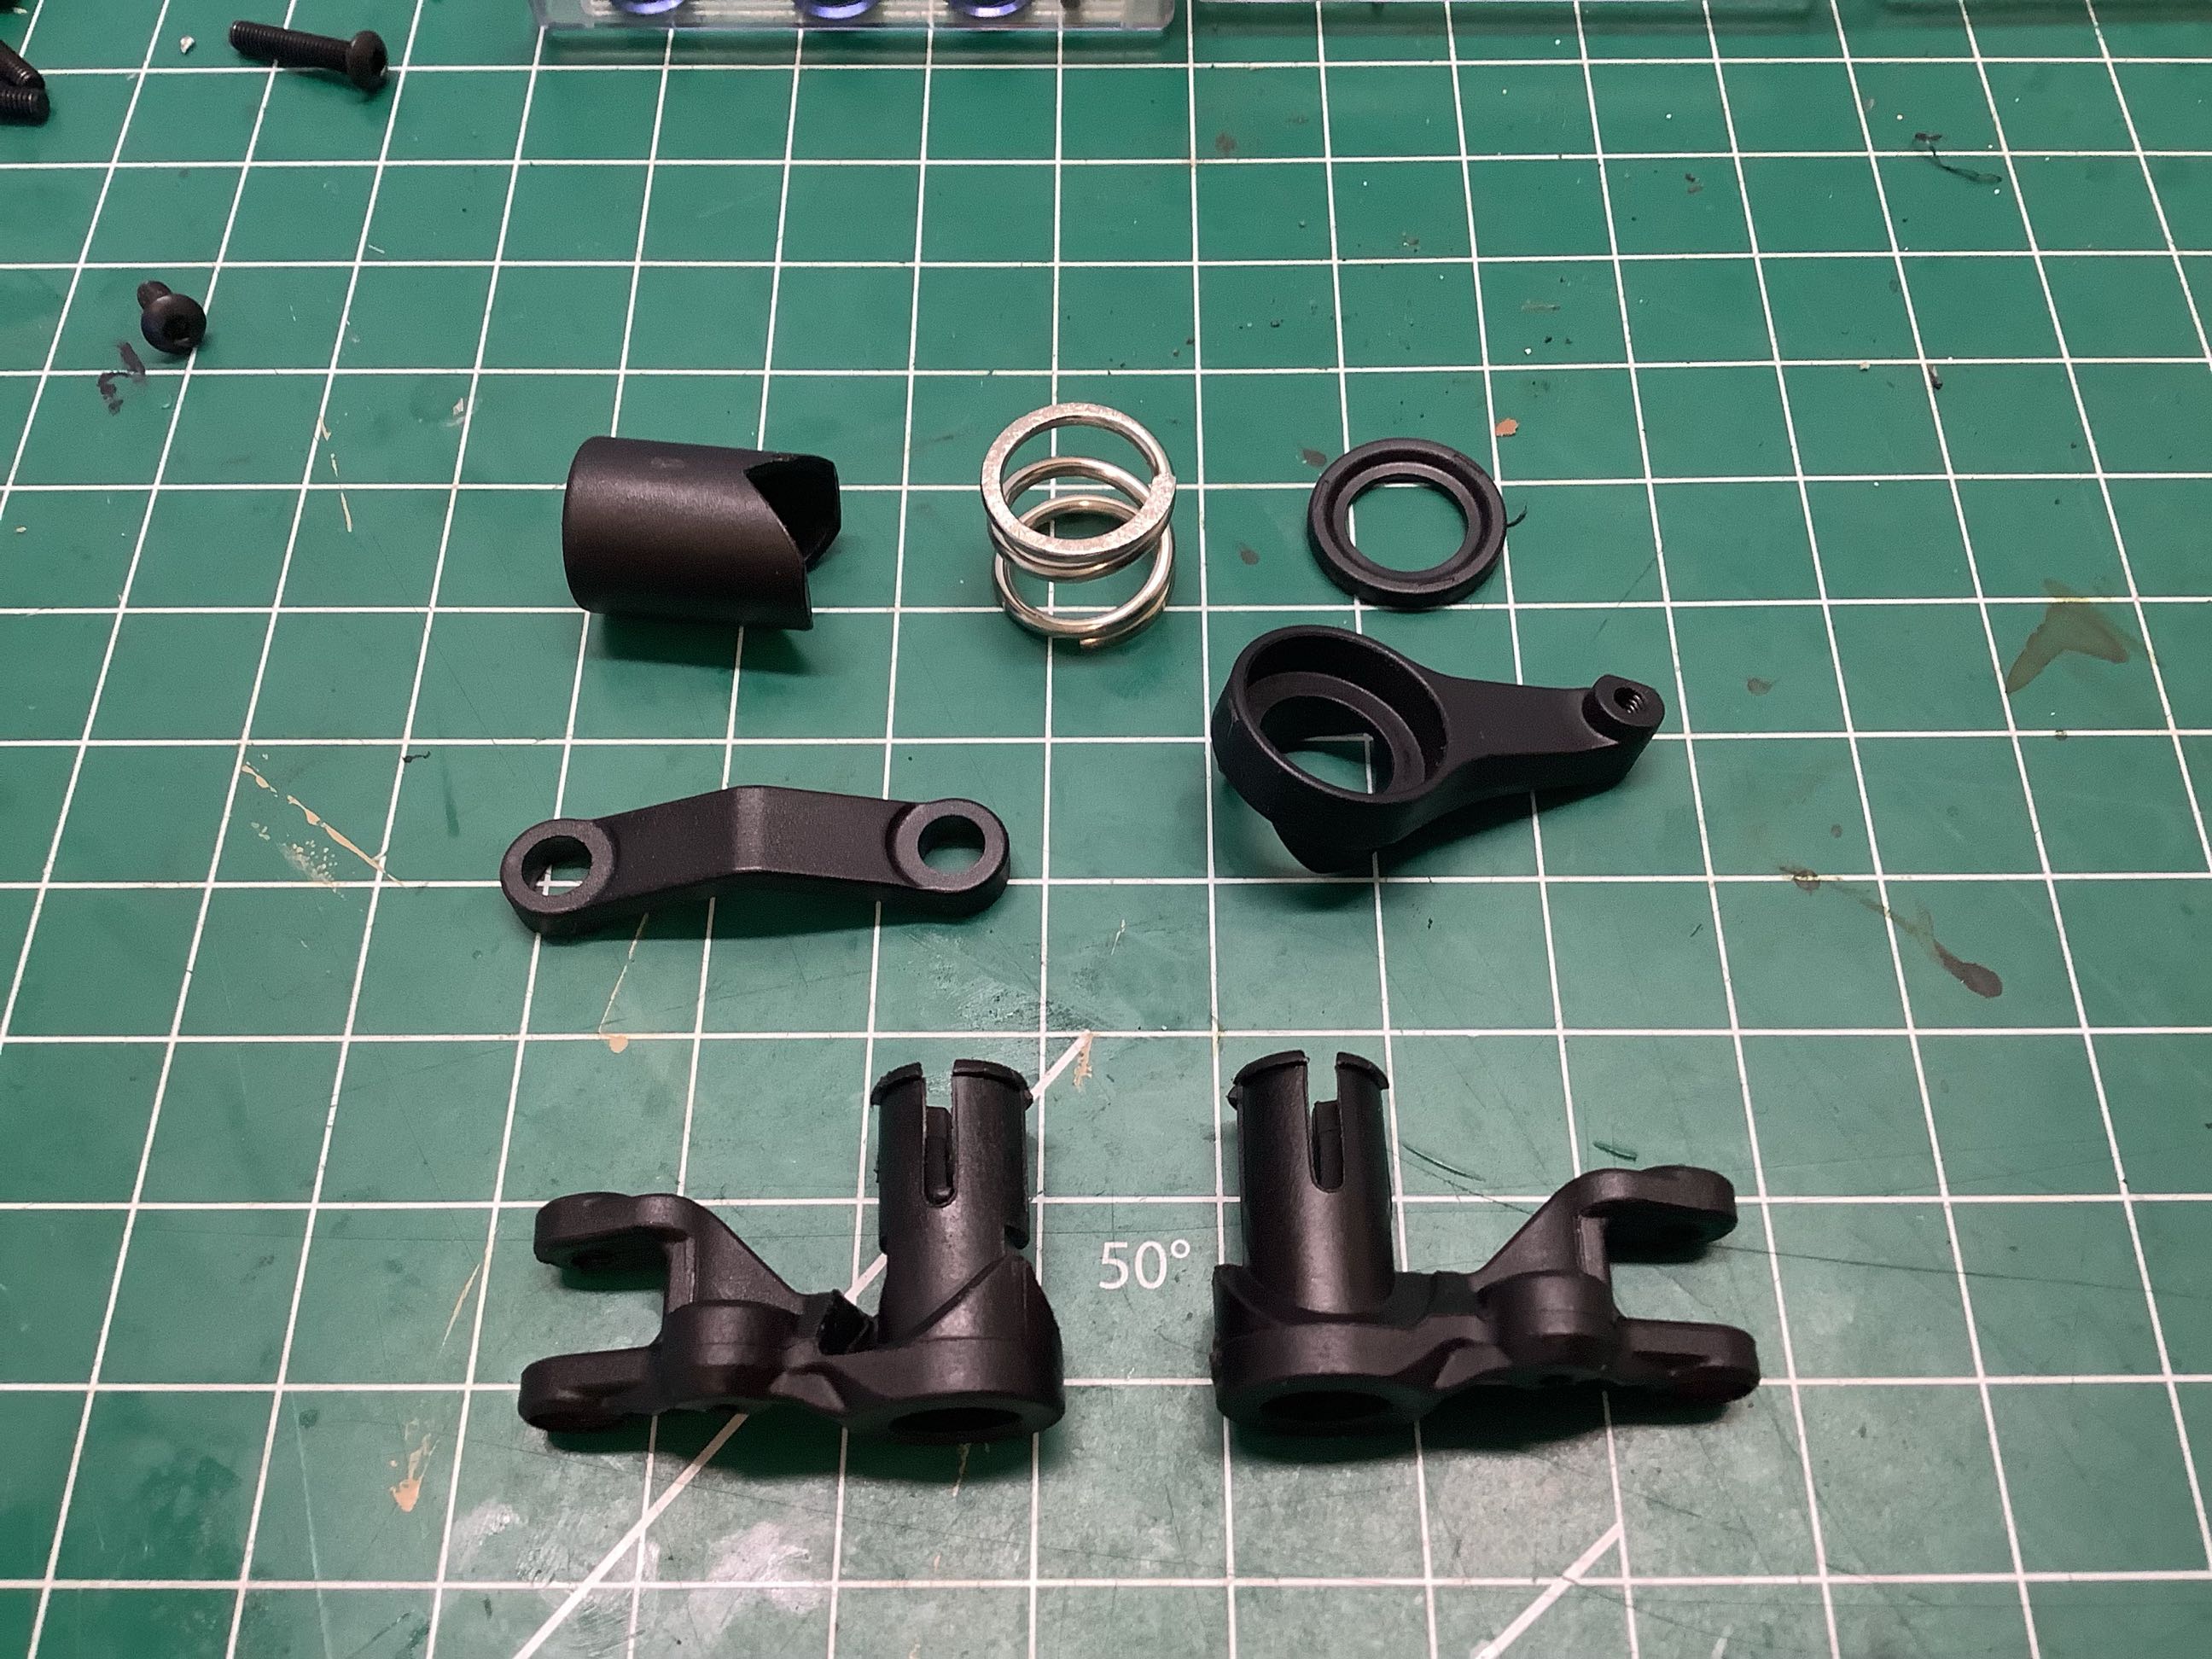
Here are the dual bellcranks and servo saver for the steering system. All of these parts are common across all the Slash 4x4 versions. The steering system is installed cantilevered from the bottom plate as shown on the right (no top support). This is done to keep the front assembly modular. The tops of the cap screws on the steering posts will later nest into pockets on the chassis which provides a bit of support.
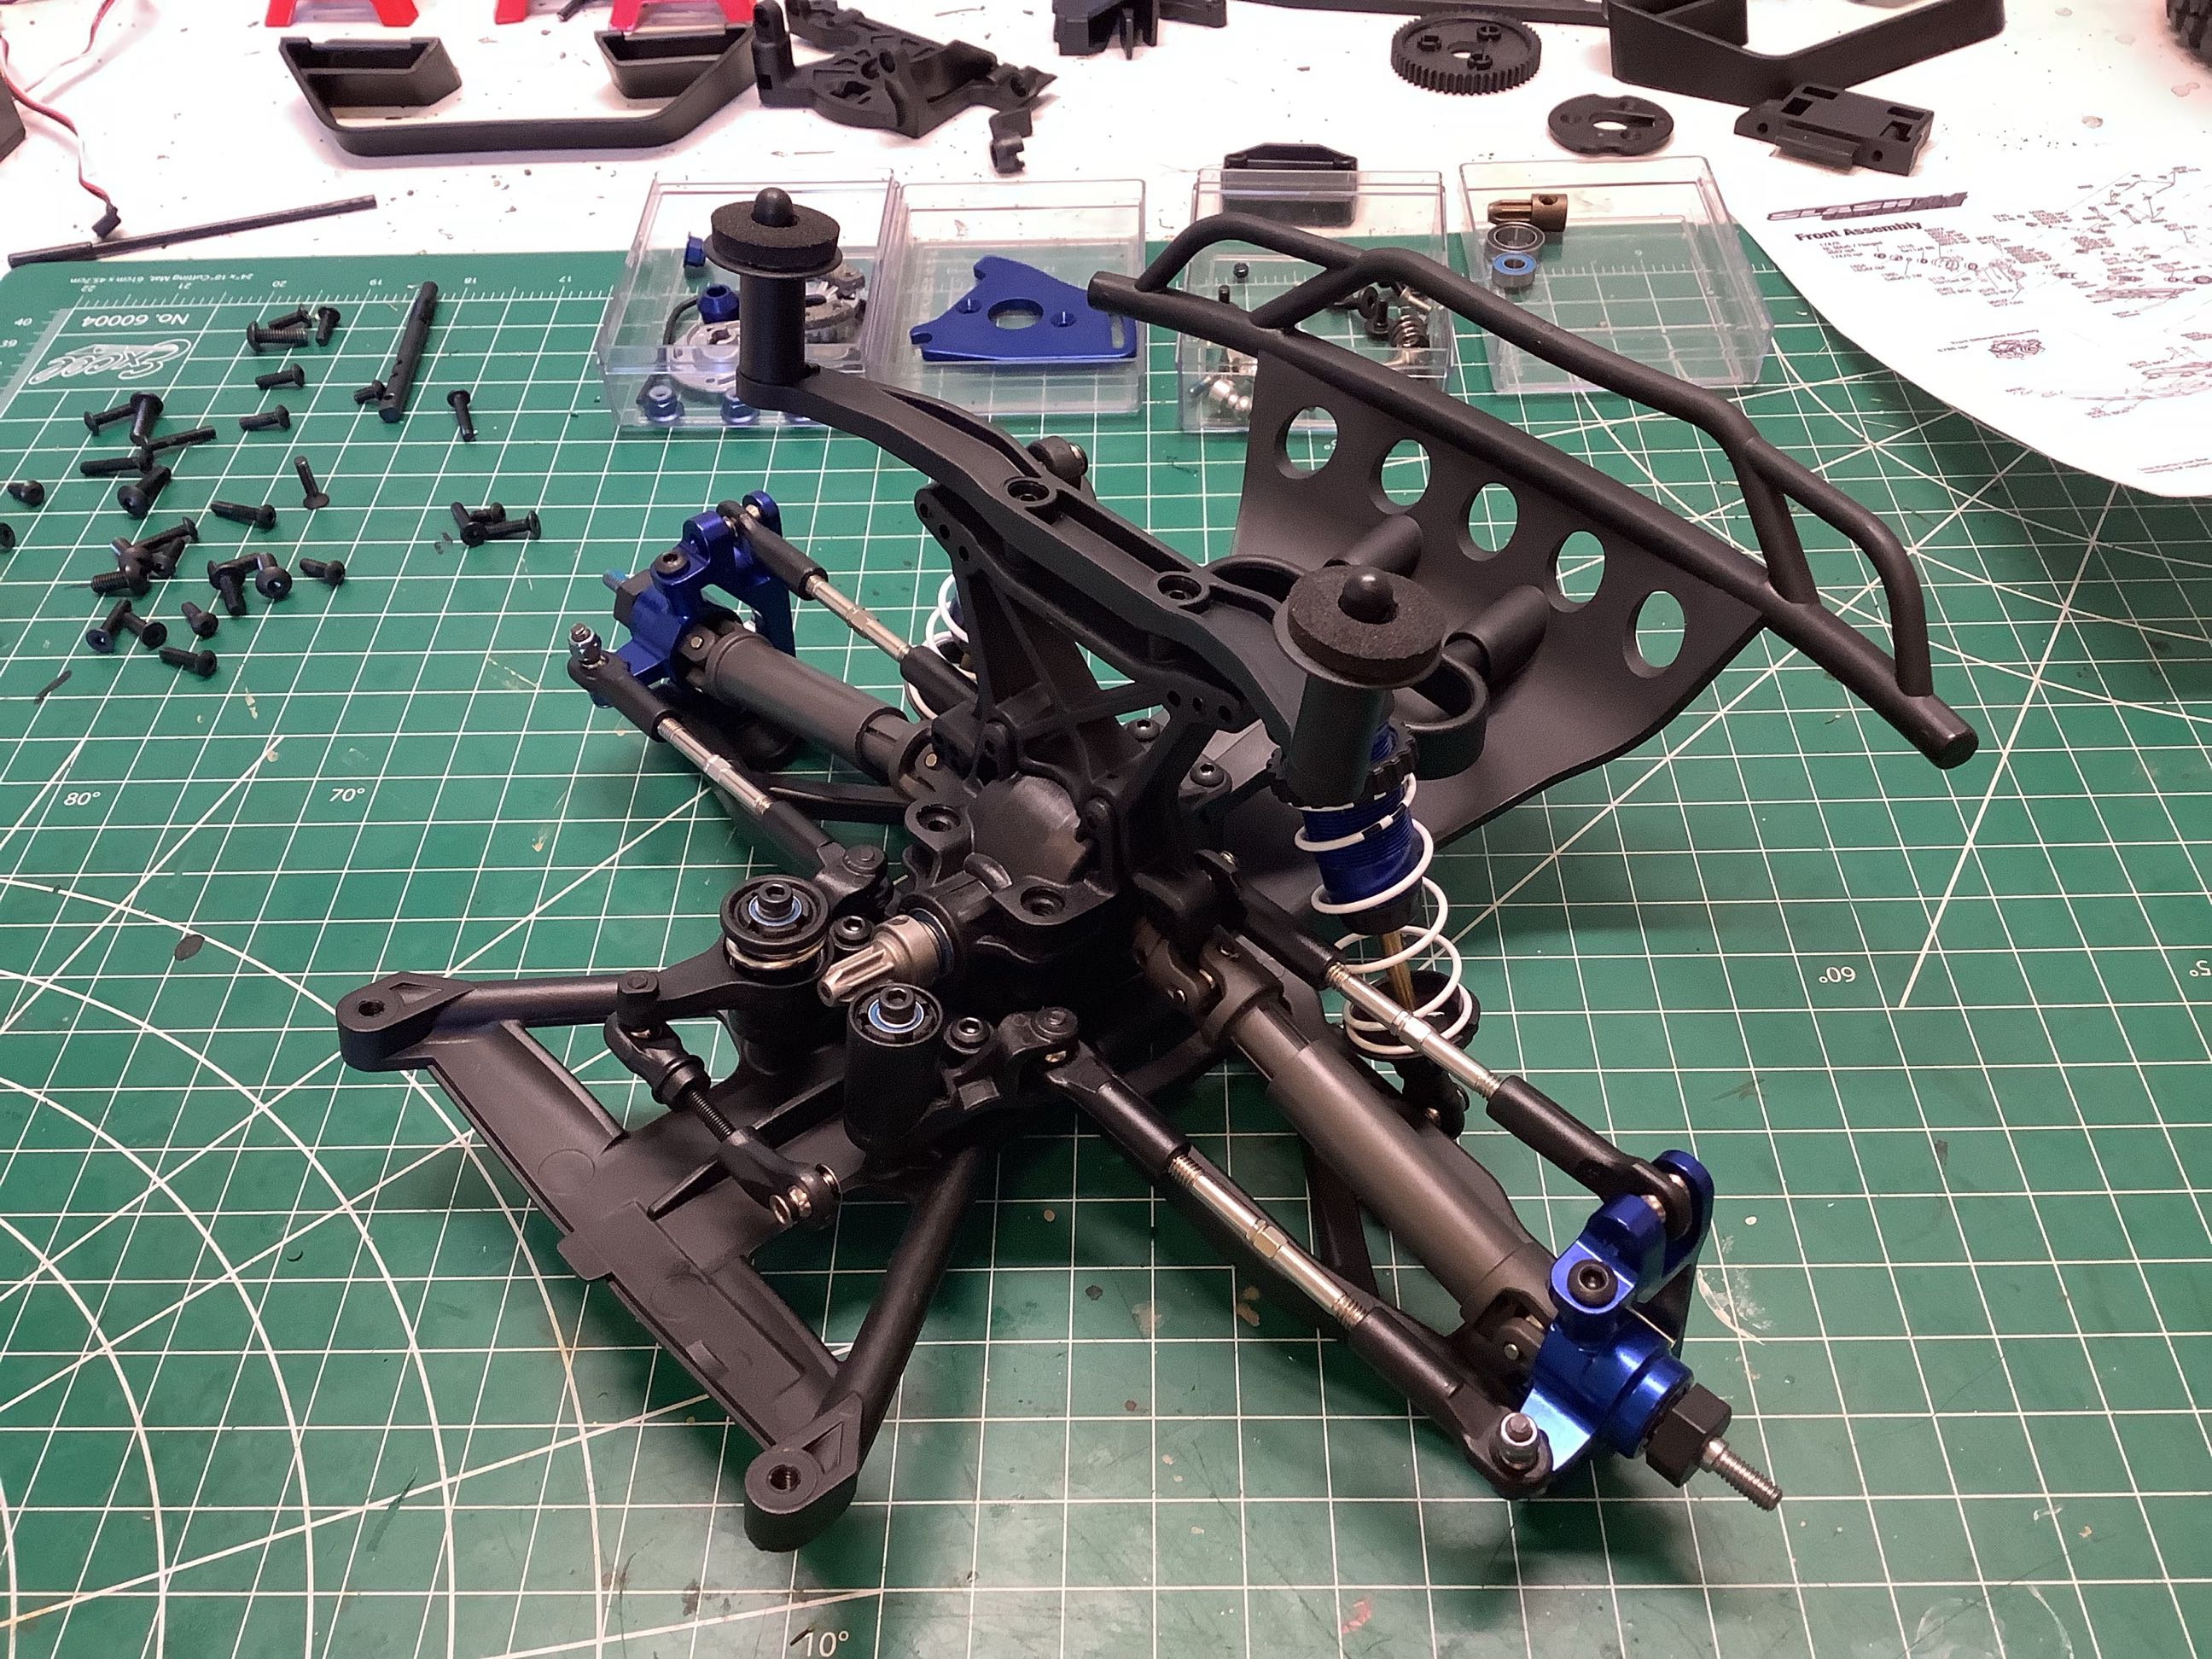
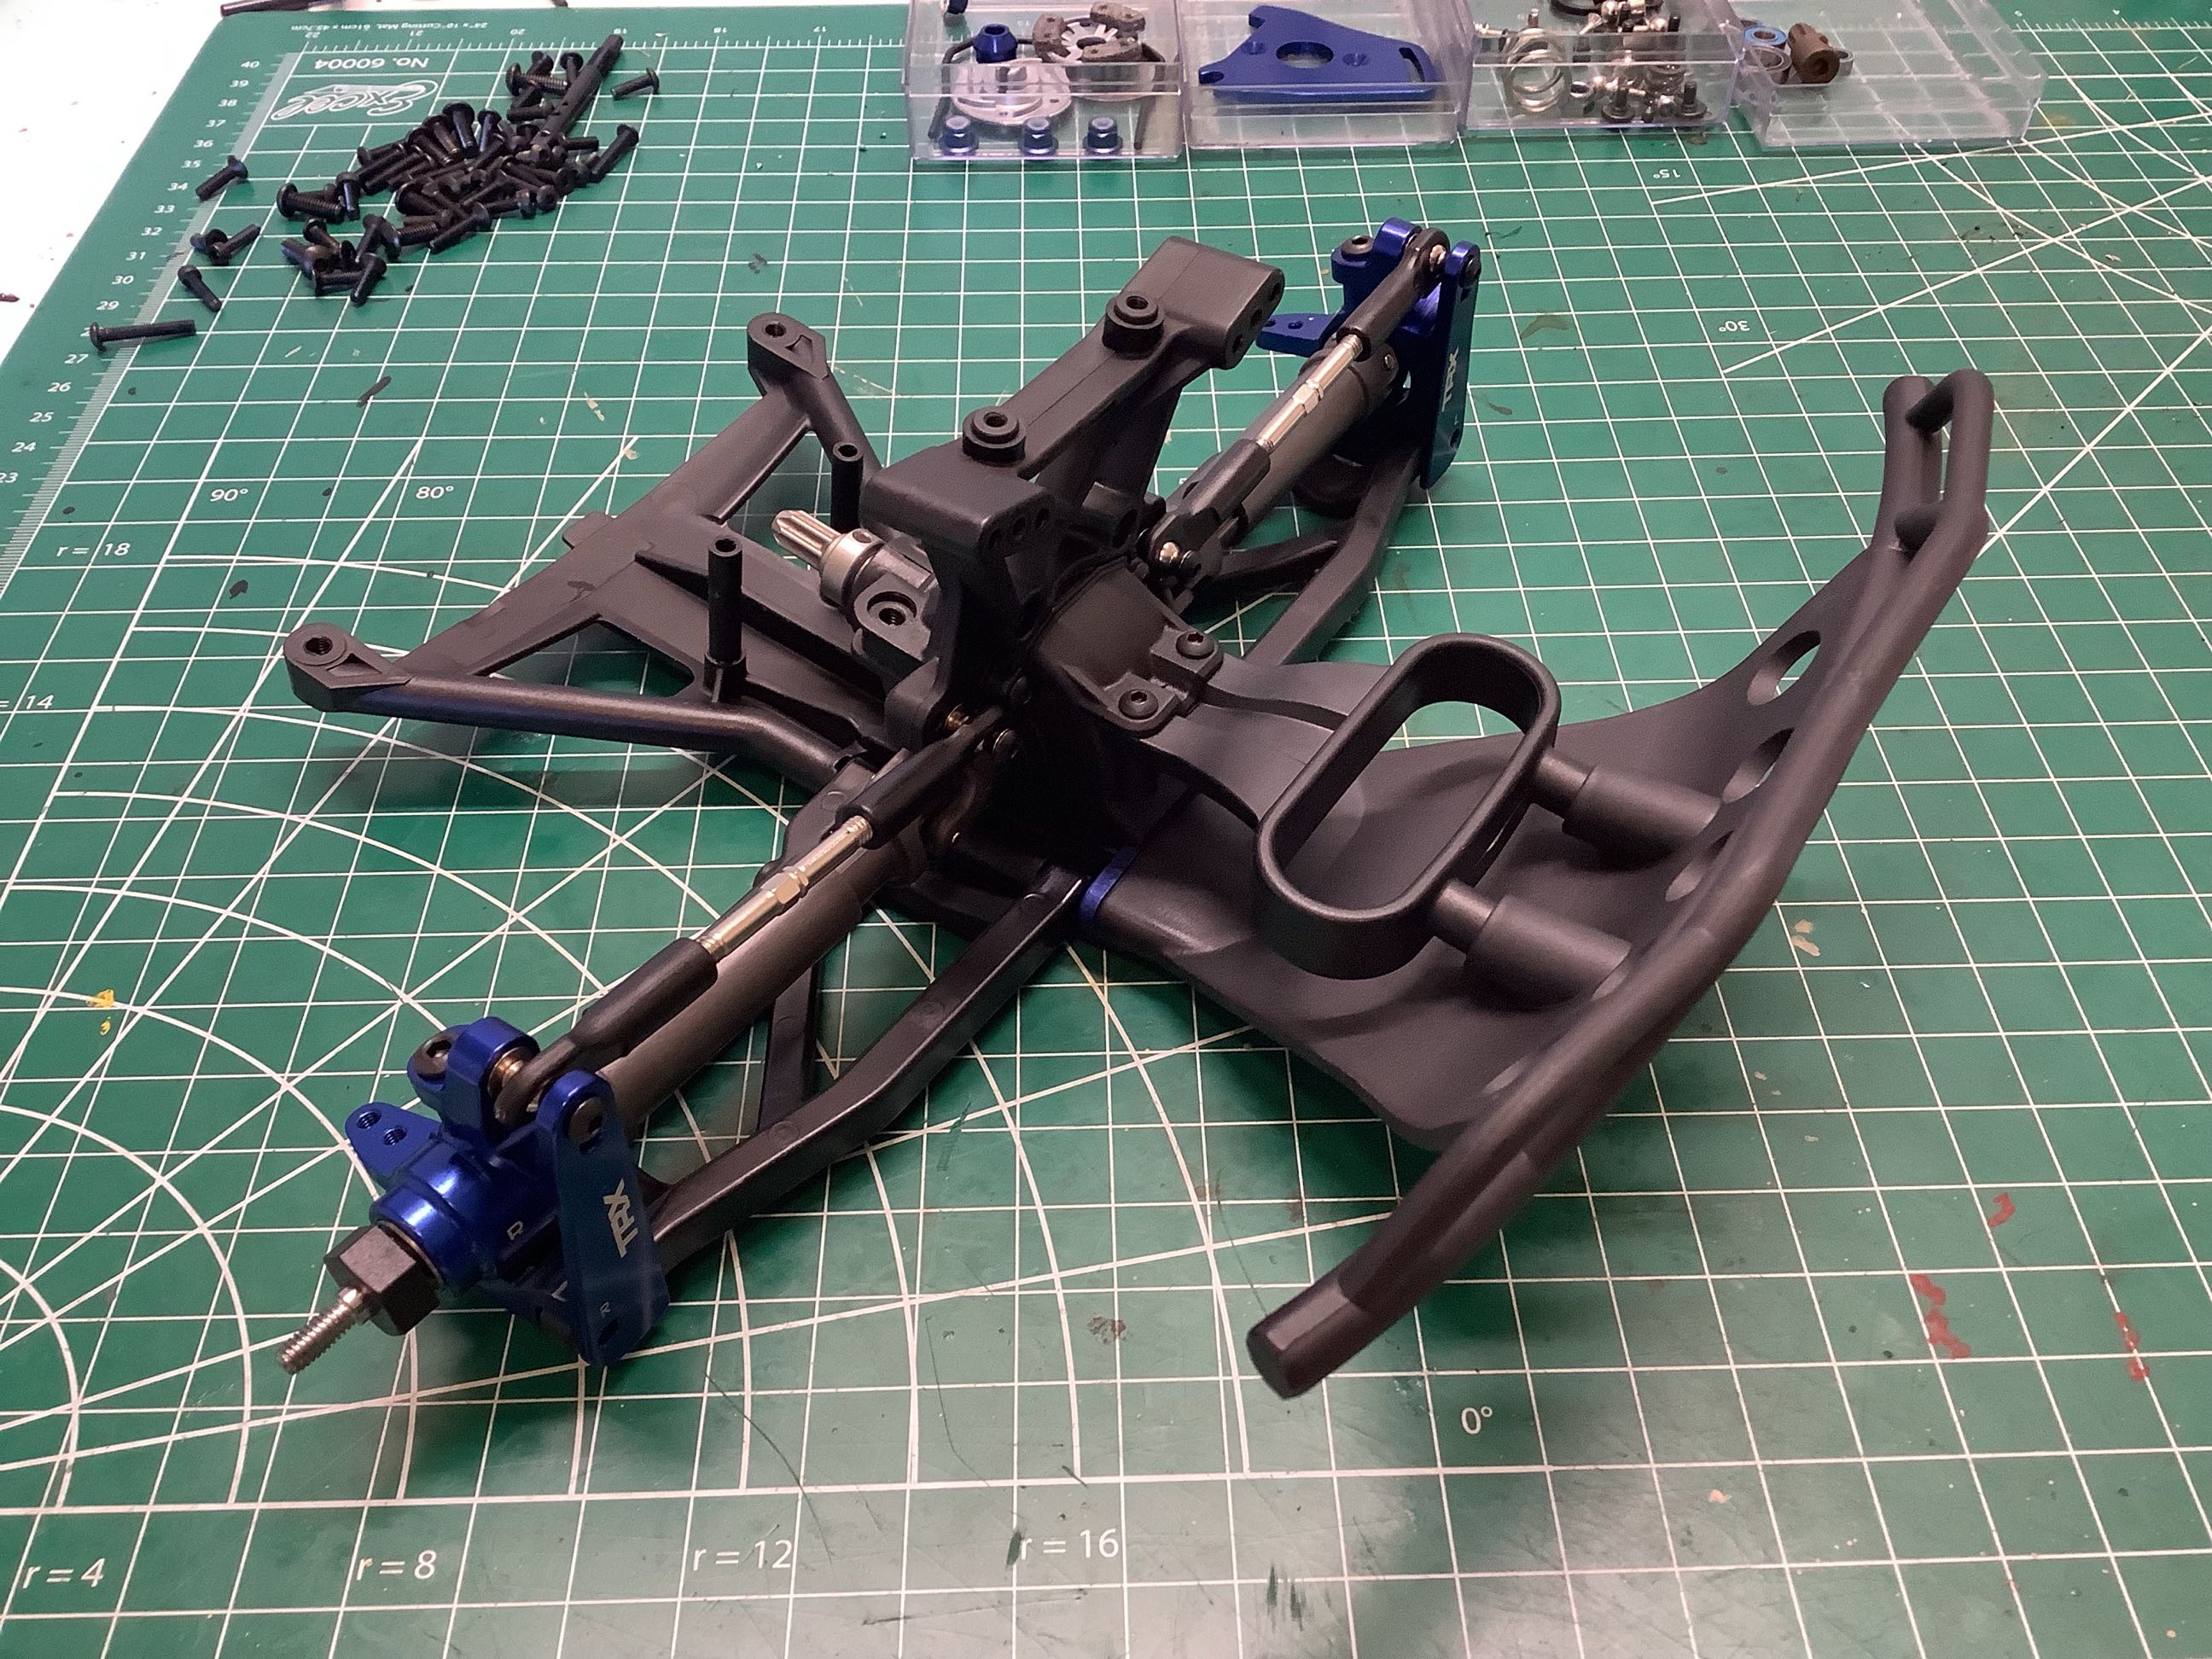
Now the front suspension and drive assembly is completed. The front sway bar does not get installed until after the suspension is joined with the chassis, ruining the modularity a bit.
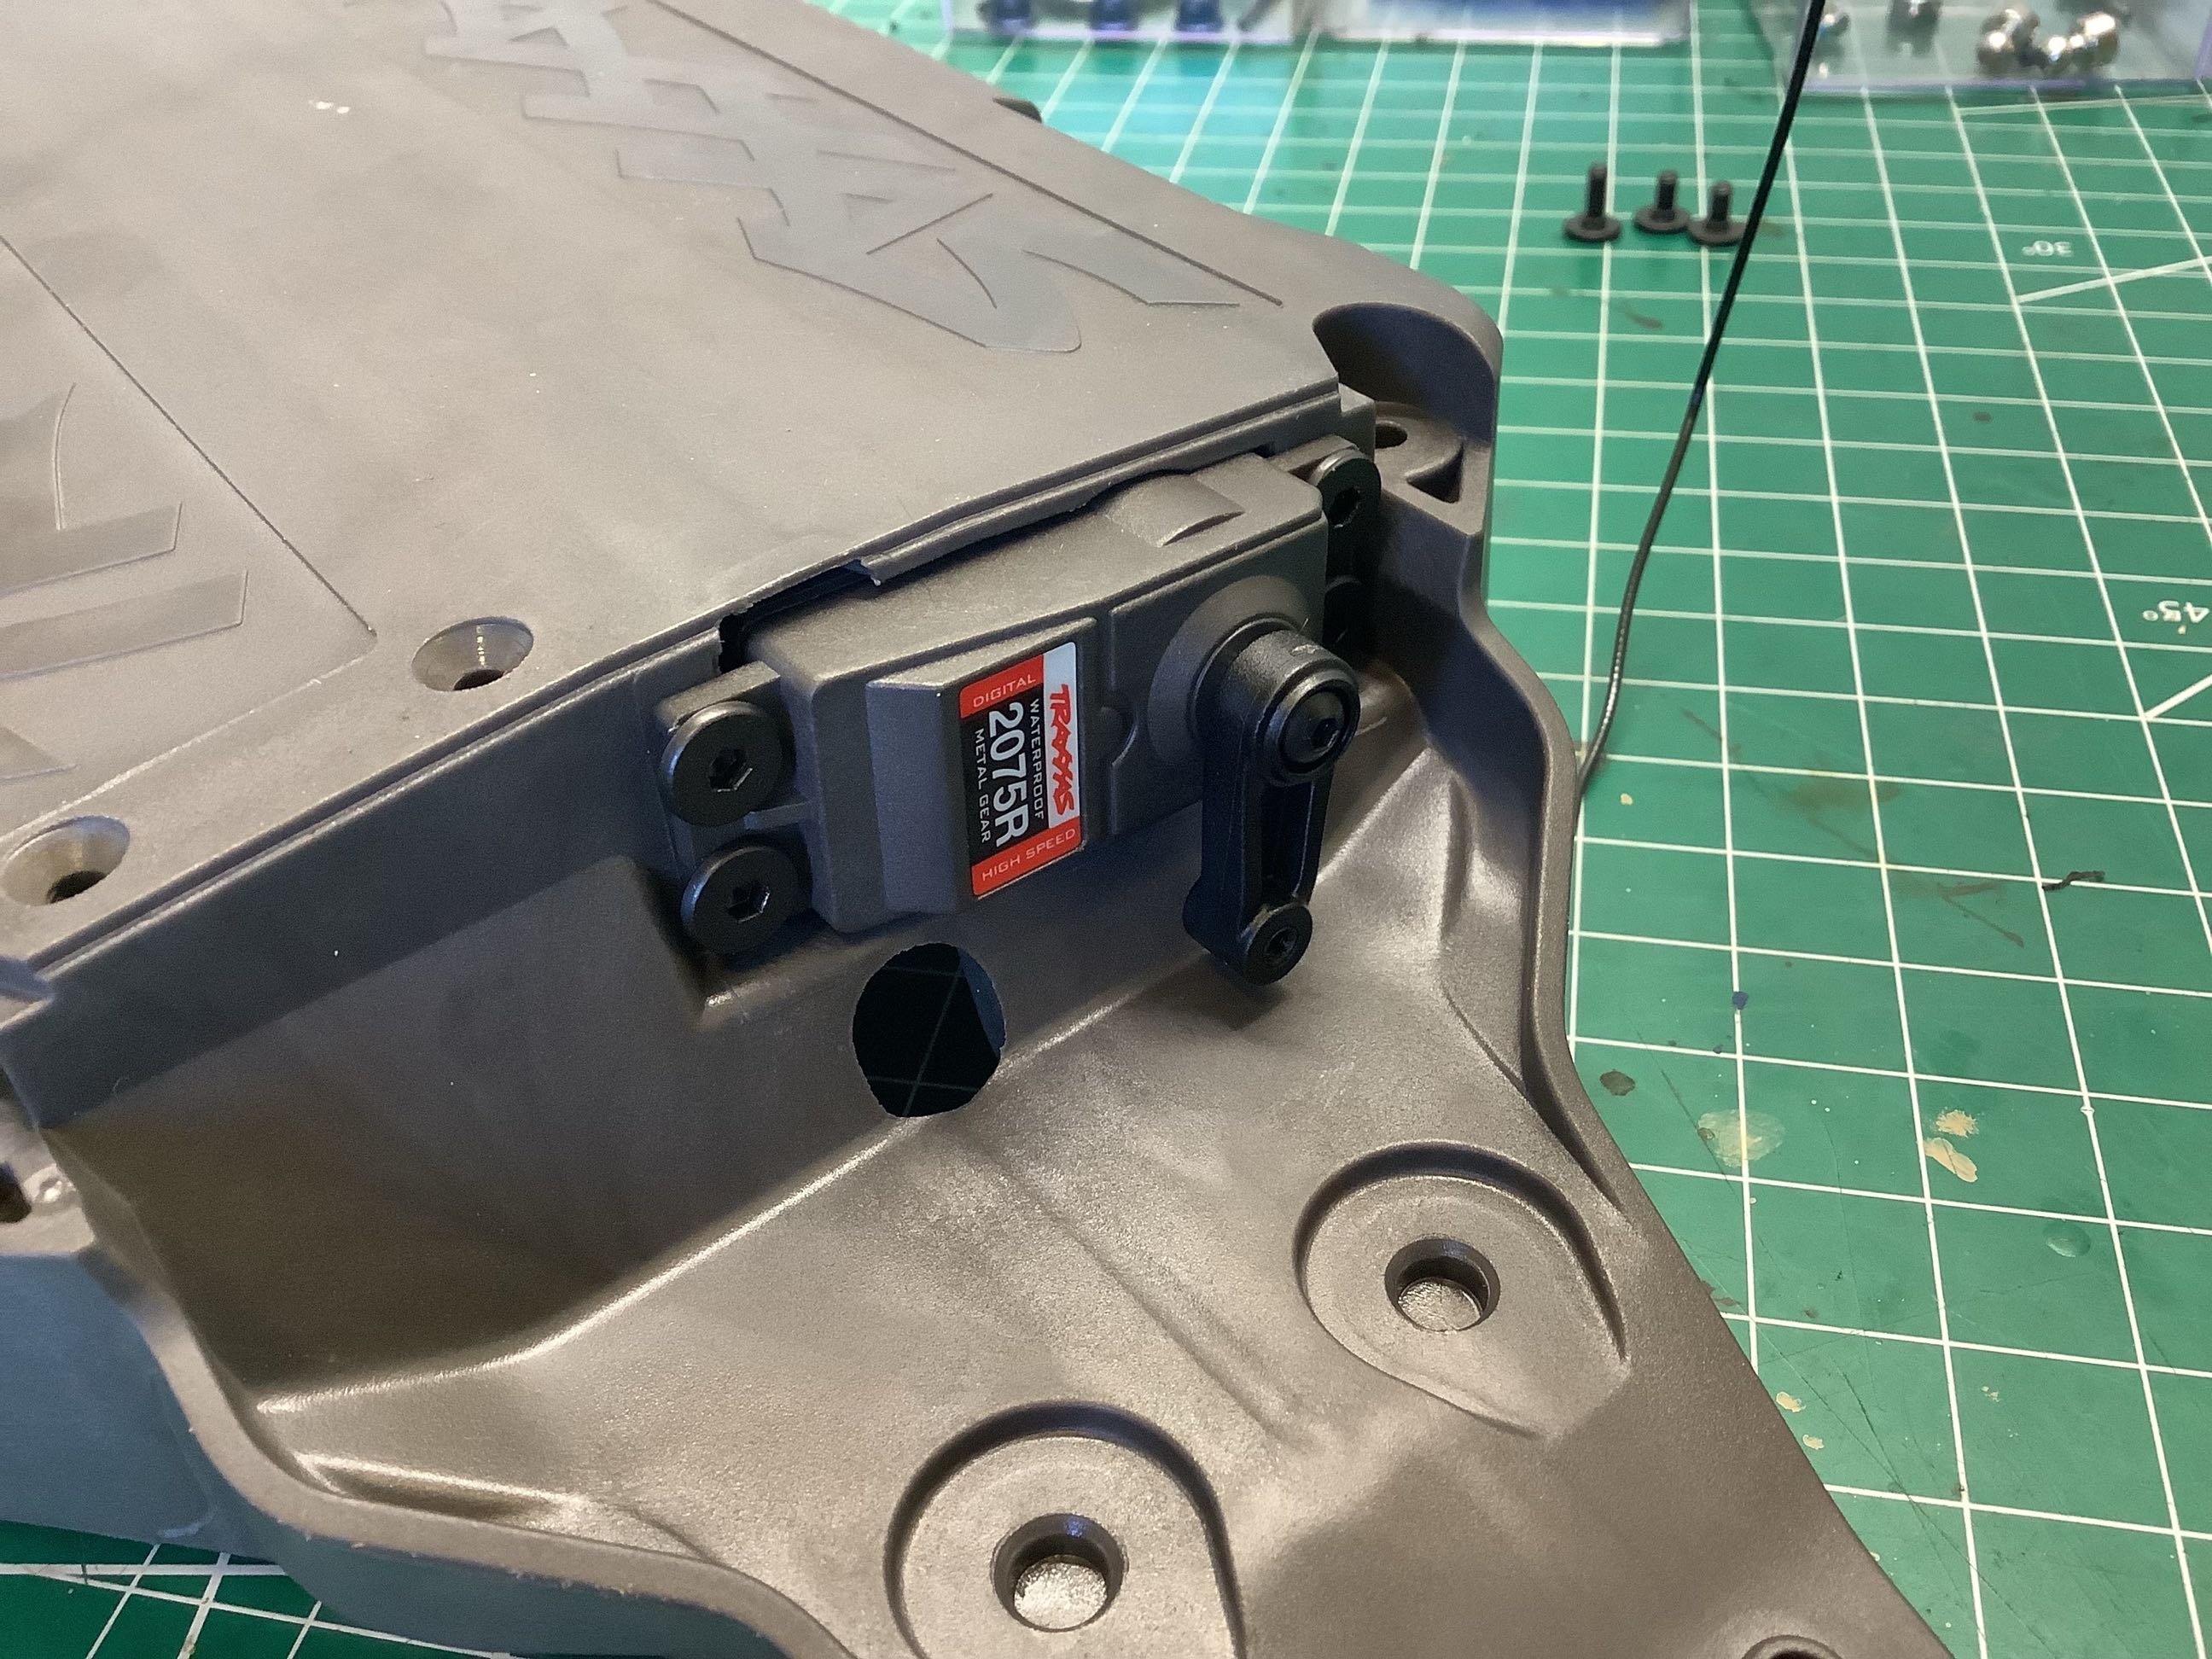
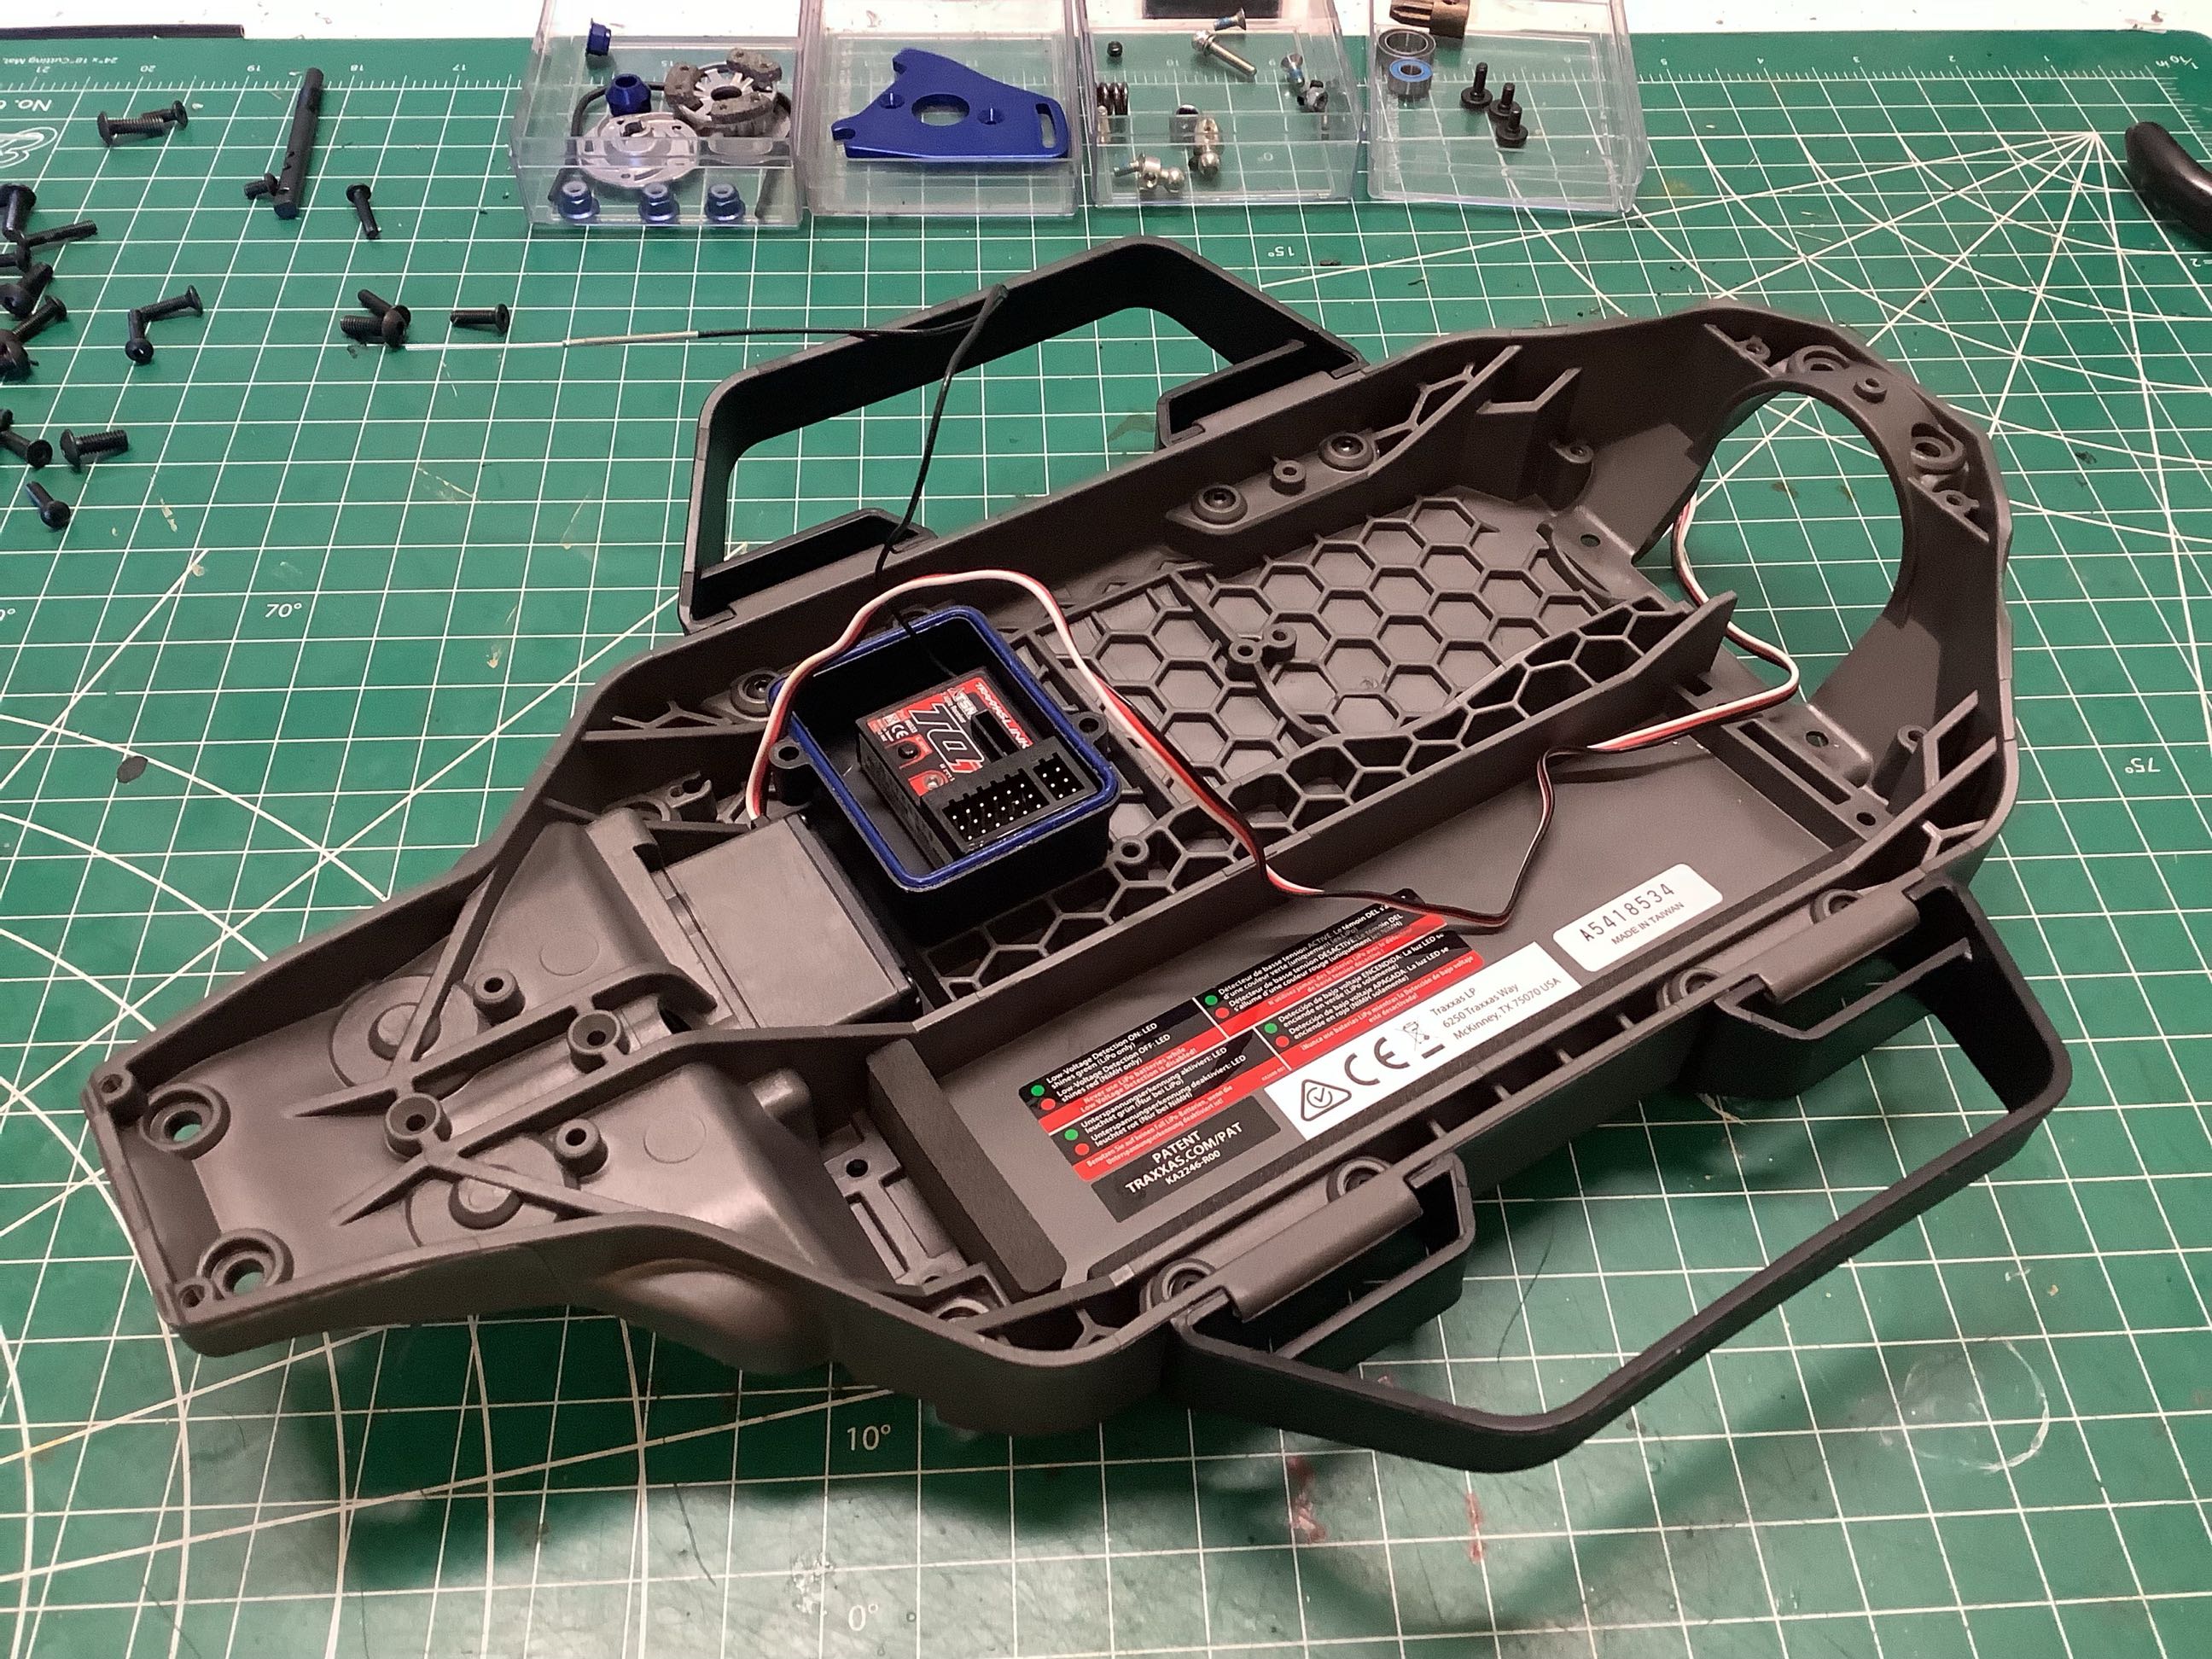
Now we can start on the center chassis module. Here you can see the upgraded metal gear steering servo installed in the chassis. You can also see the round slots for the tops of the steering posts that I mentioned earlier. On the right, you can see that I've installed the battery tray. This has a reversible top clip to allow a snug fit for batteries of different thicknesses. Different lengths are accommodated with foam blocks. That honeycomb pattern you see all over the bottom of the chassis is there to stiffen it without adding too much weight.
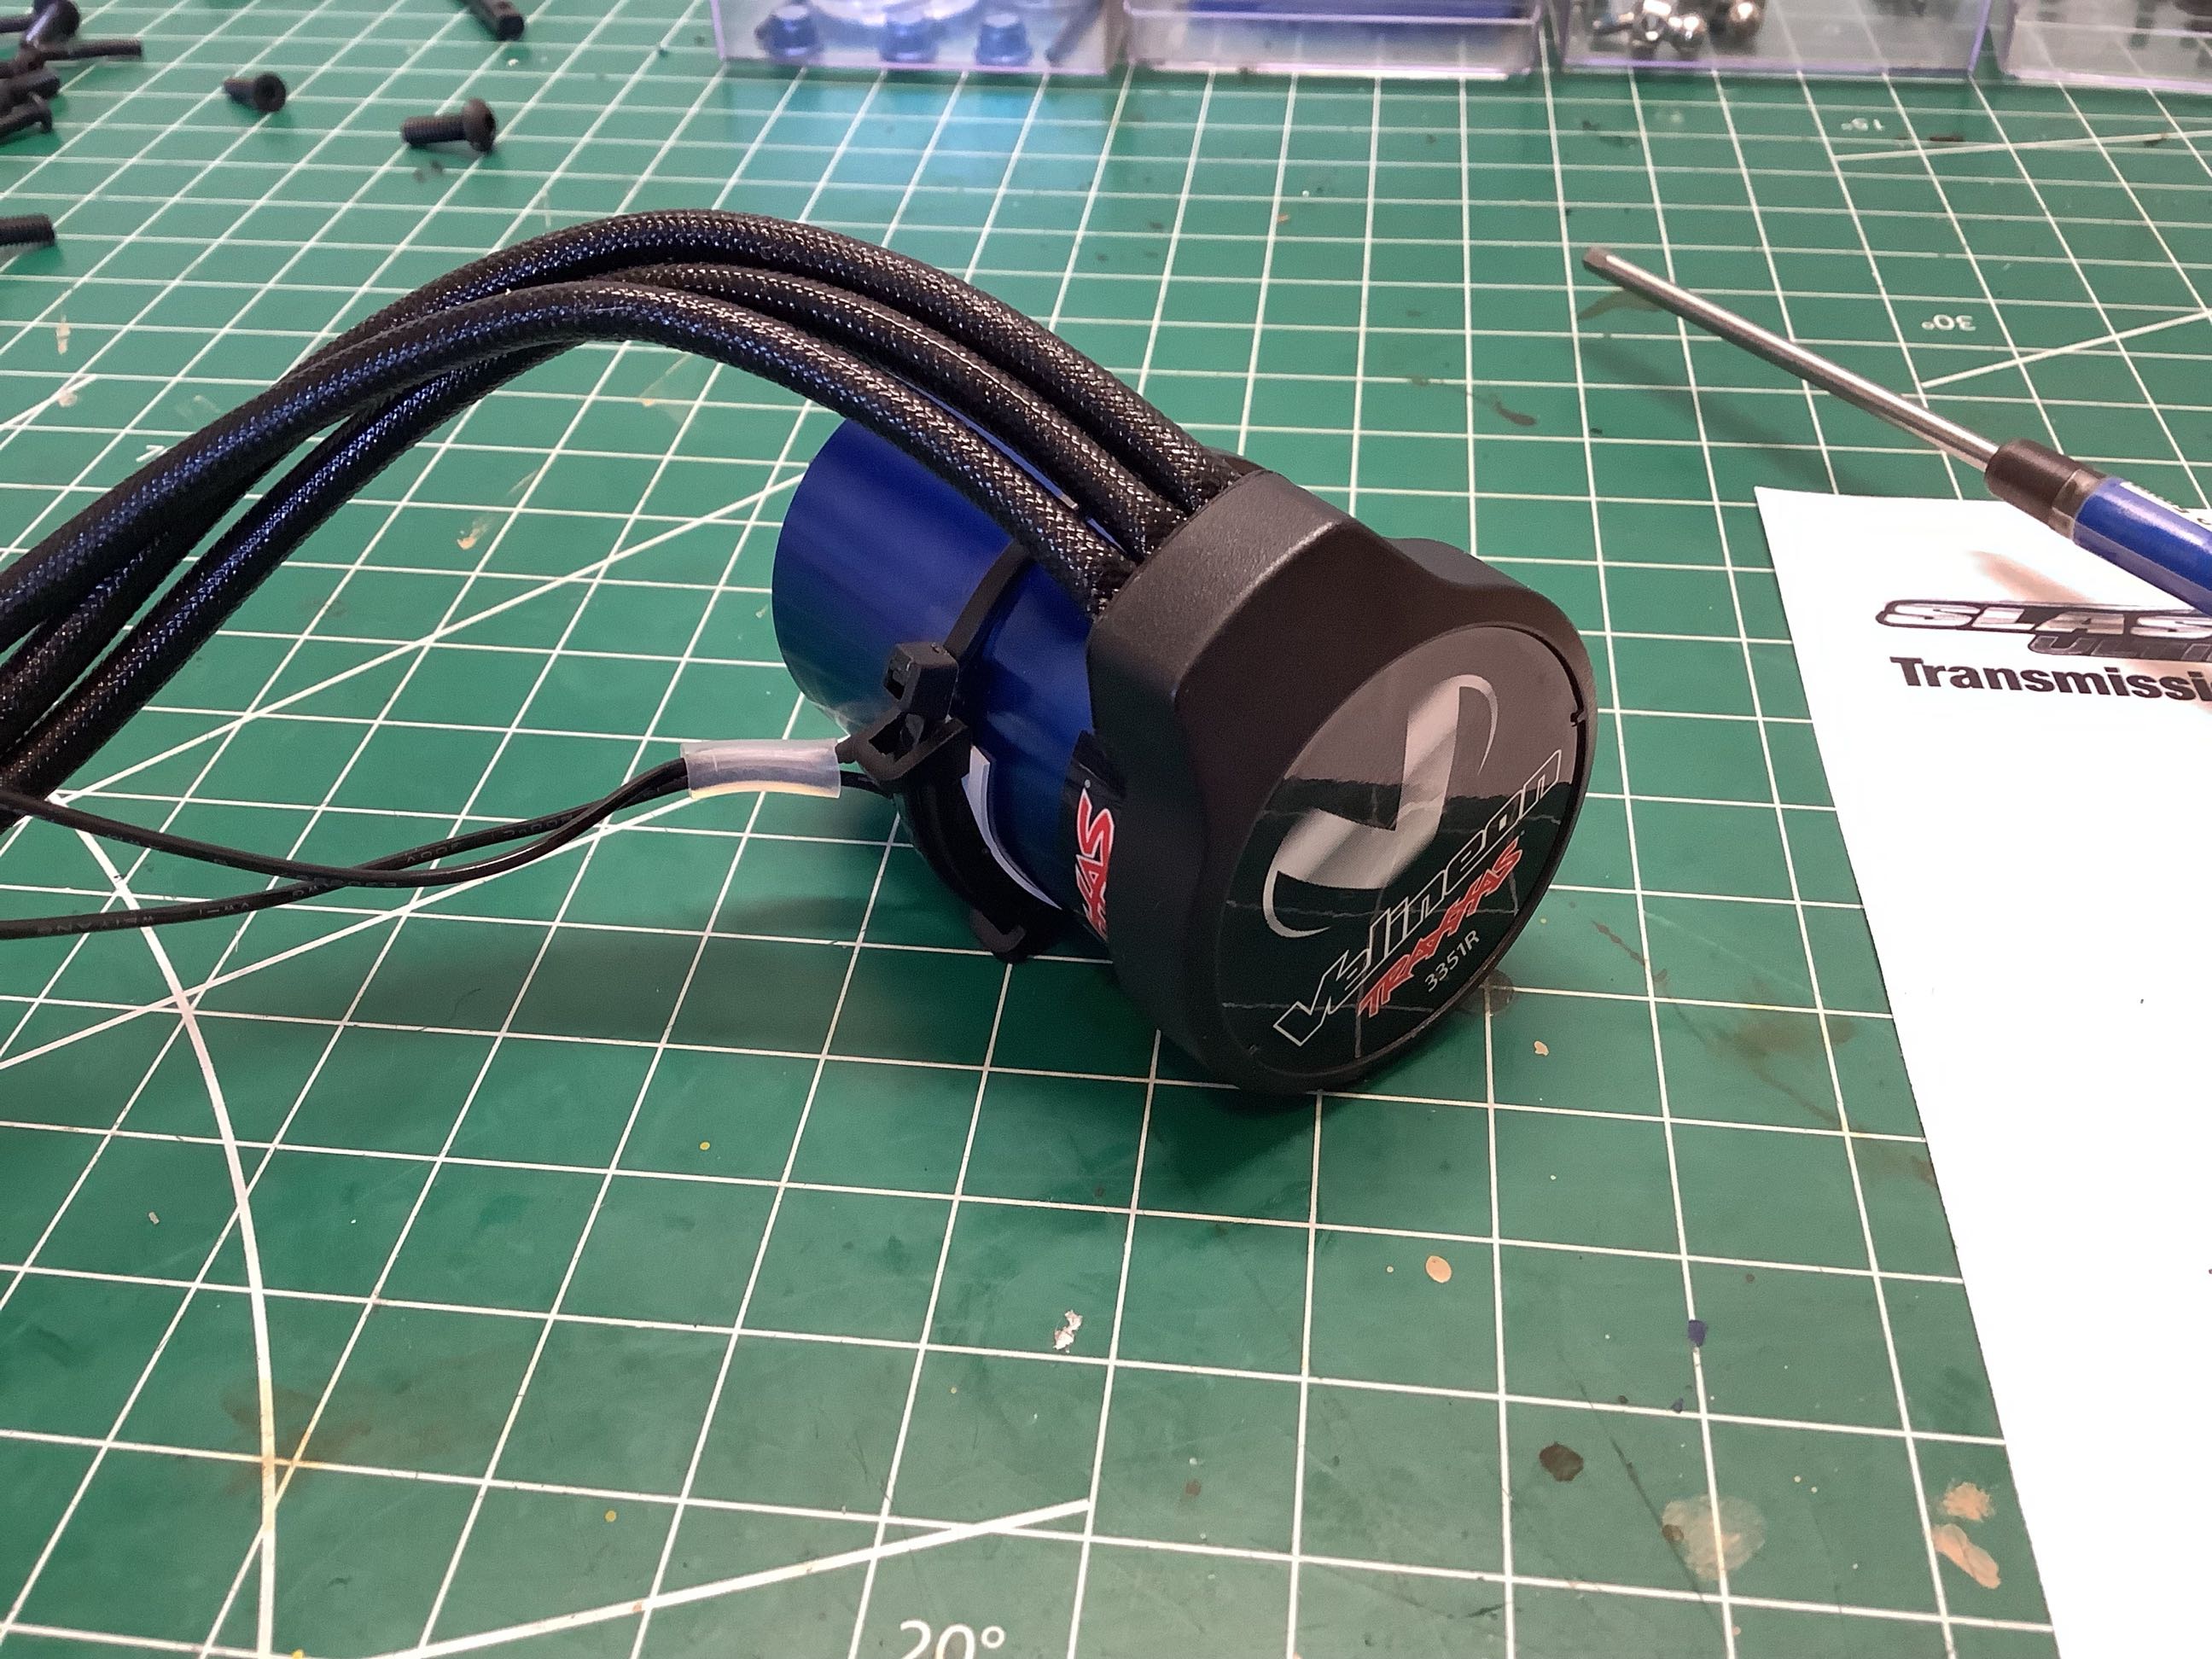
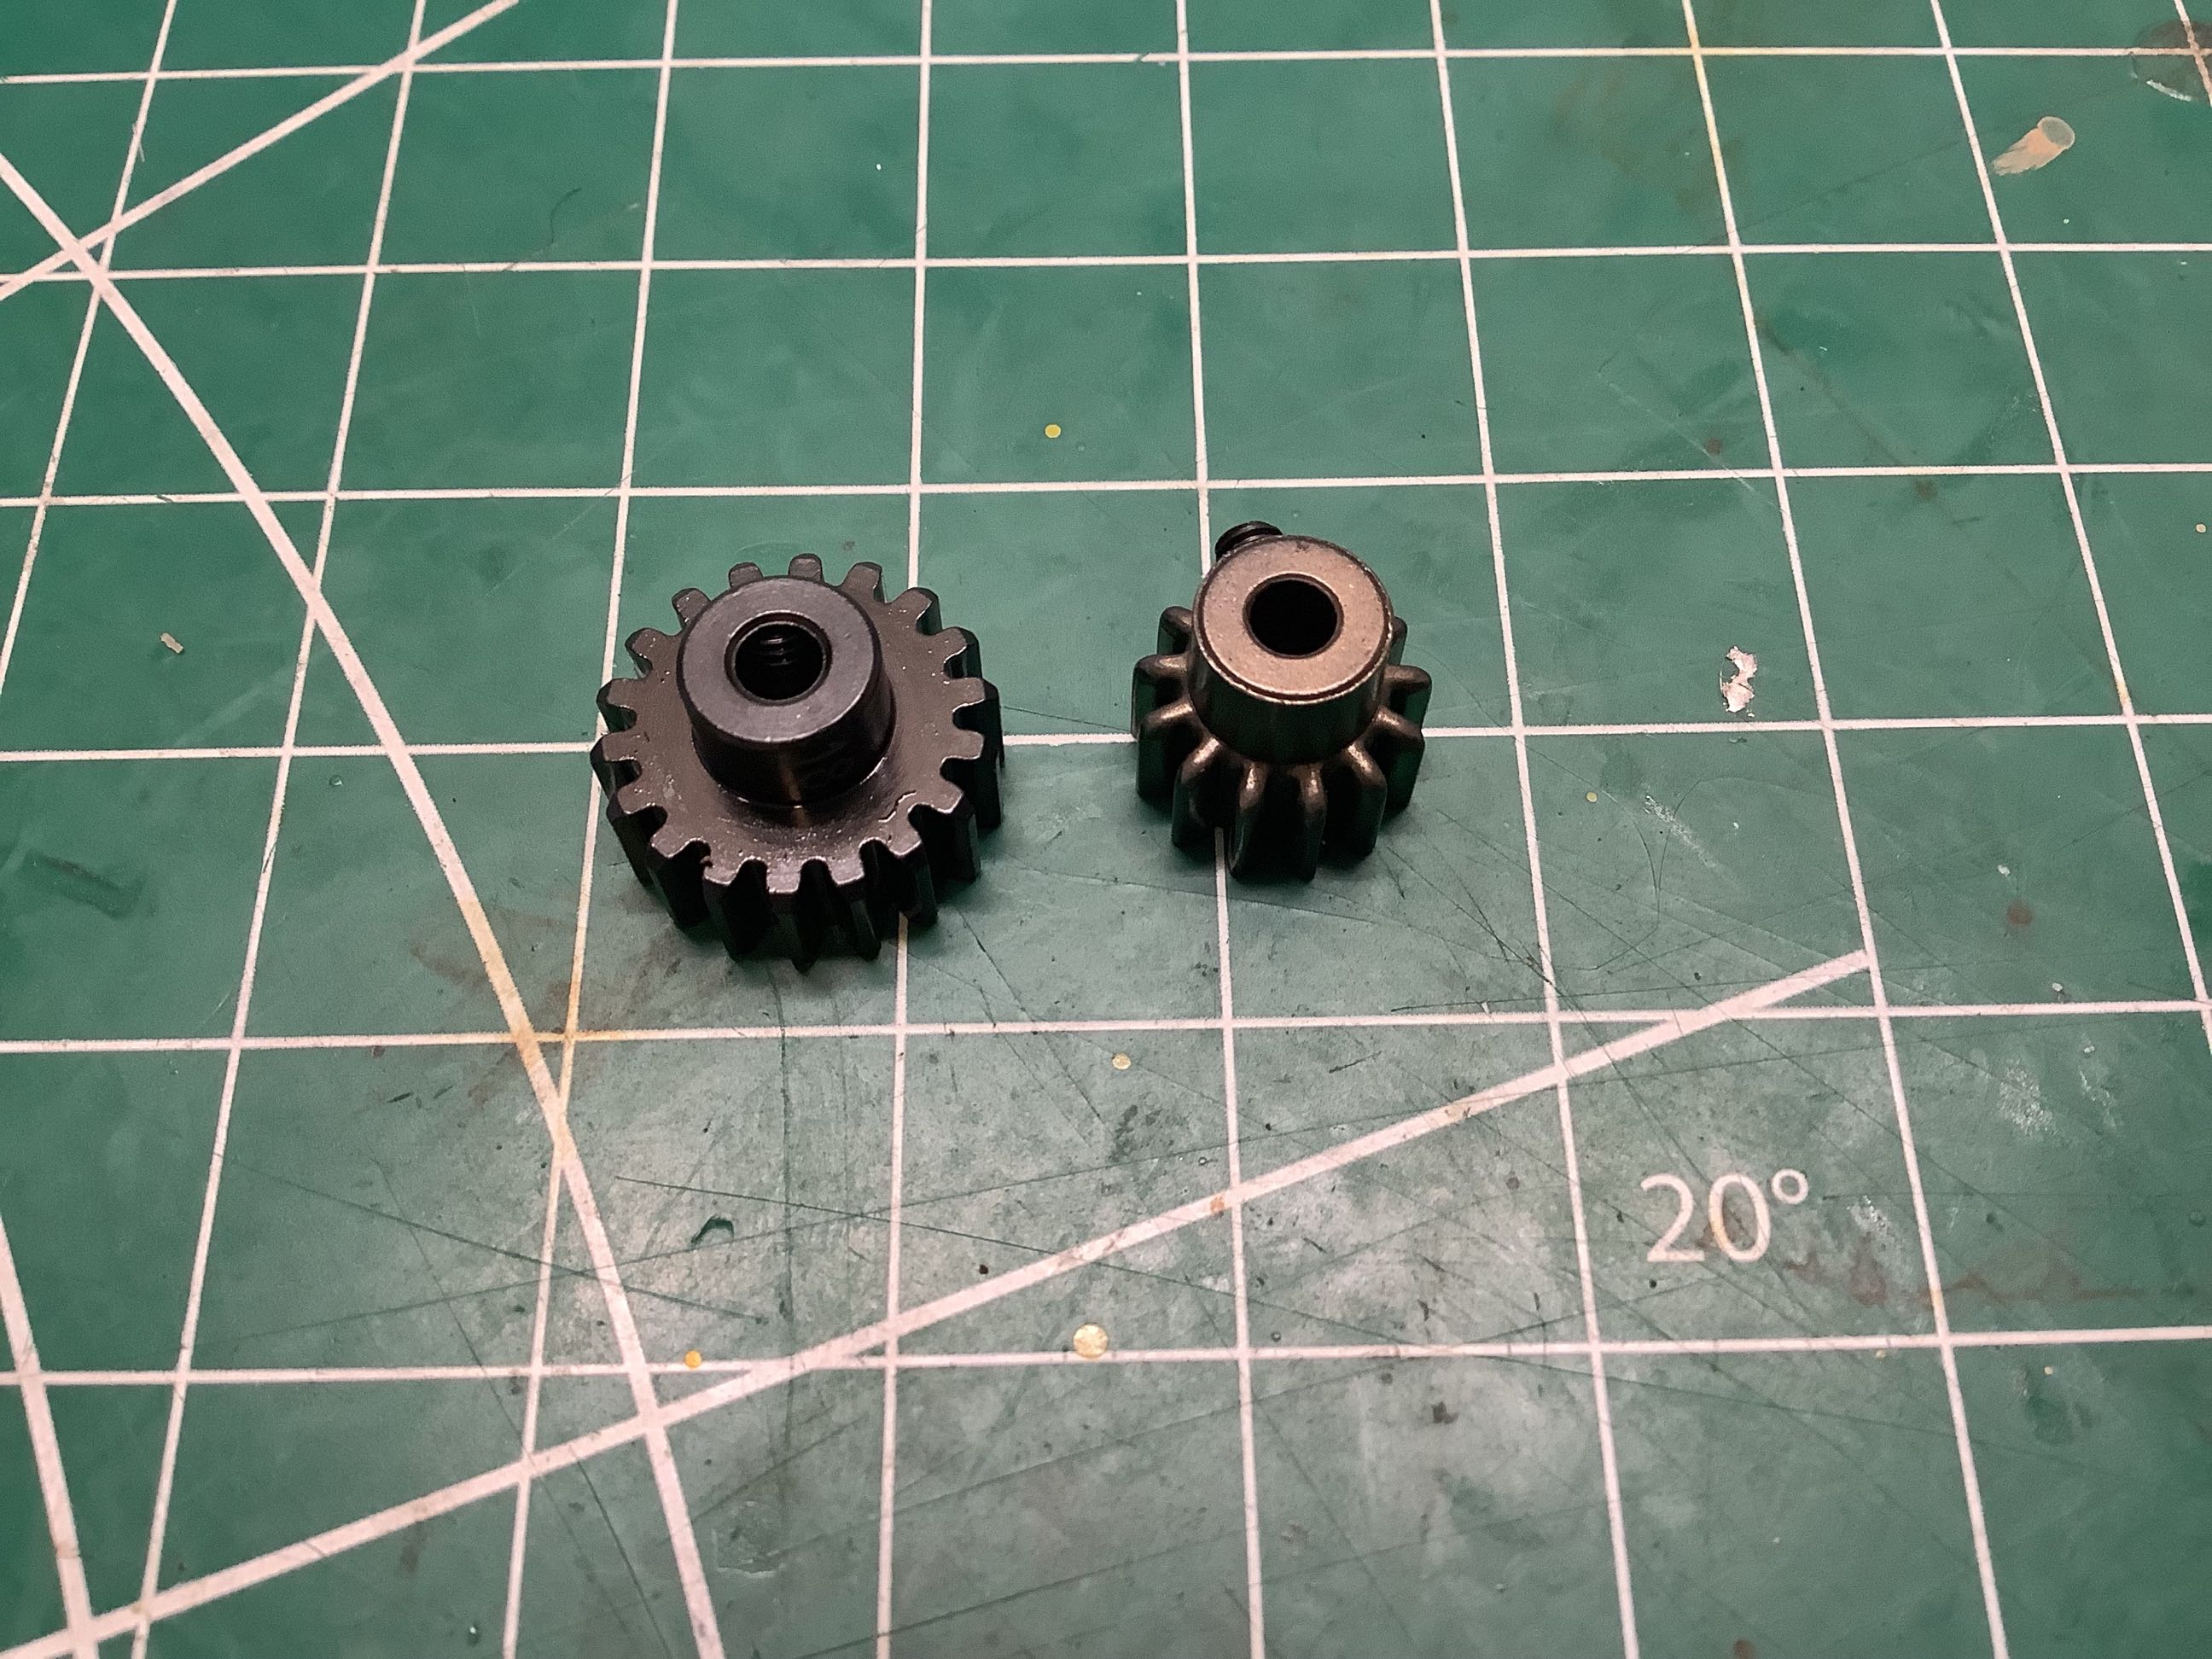
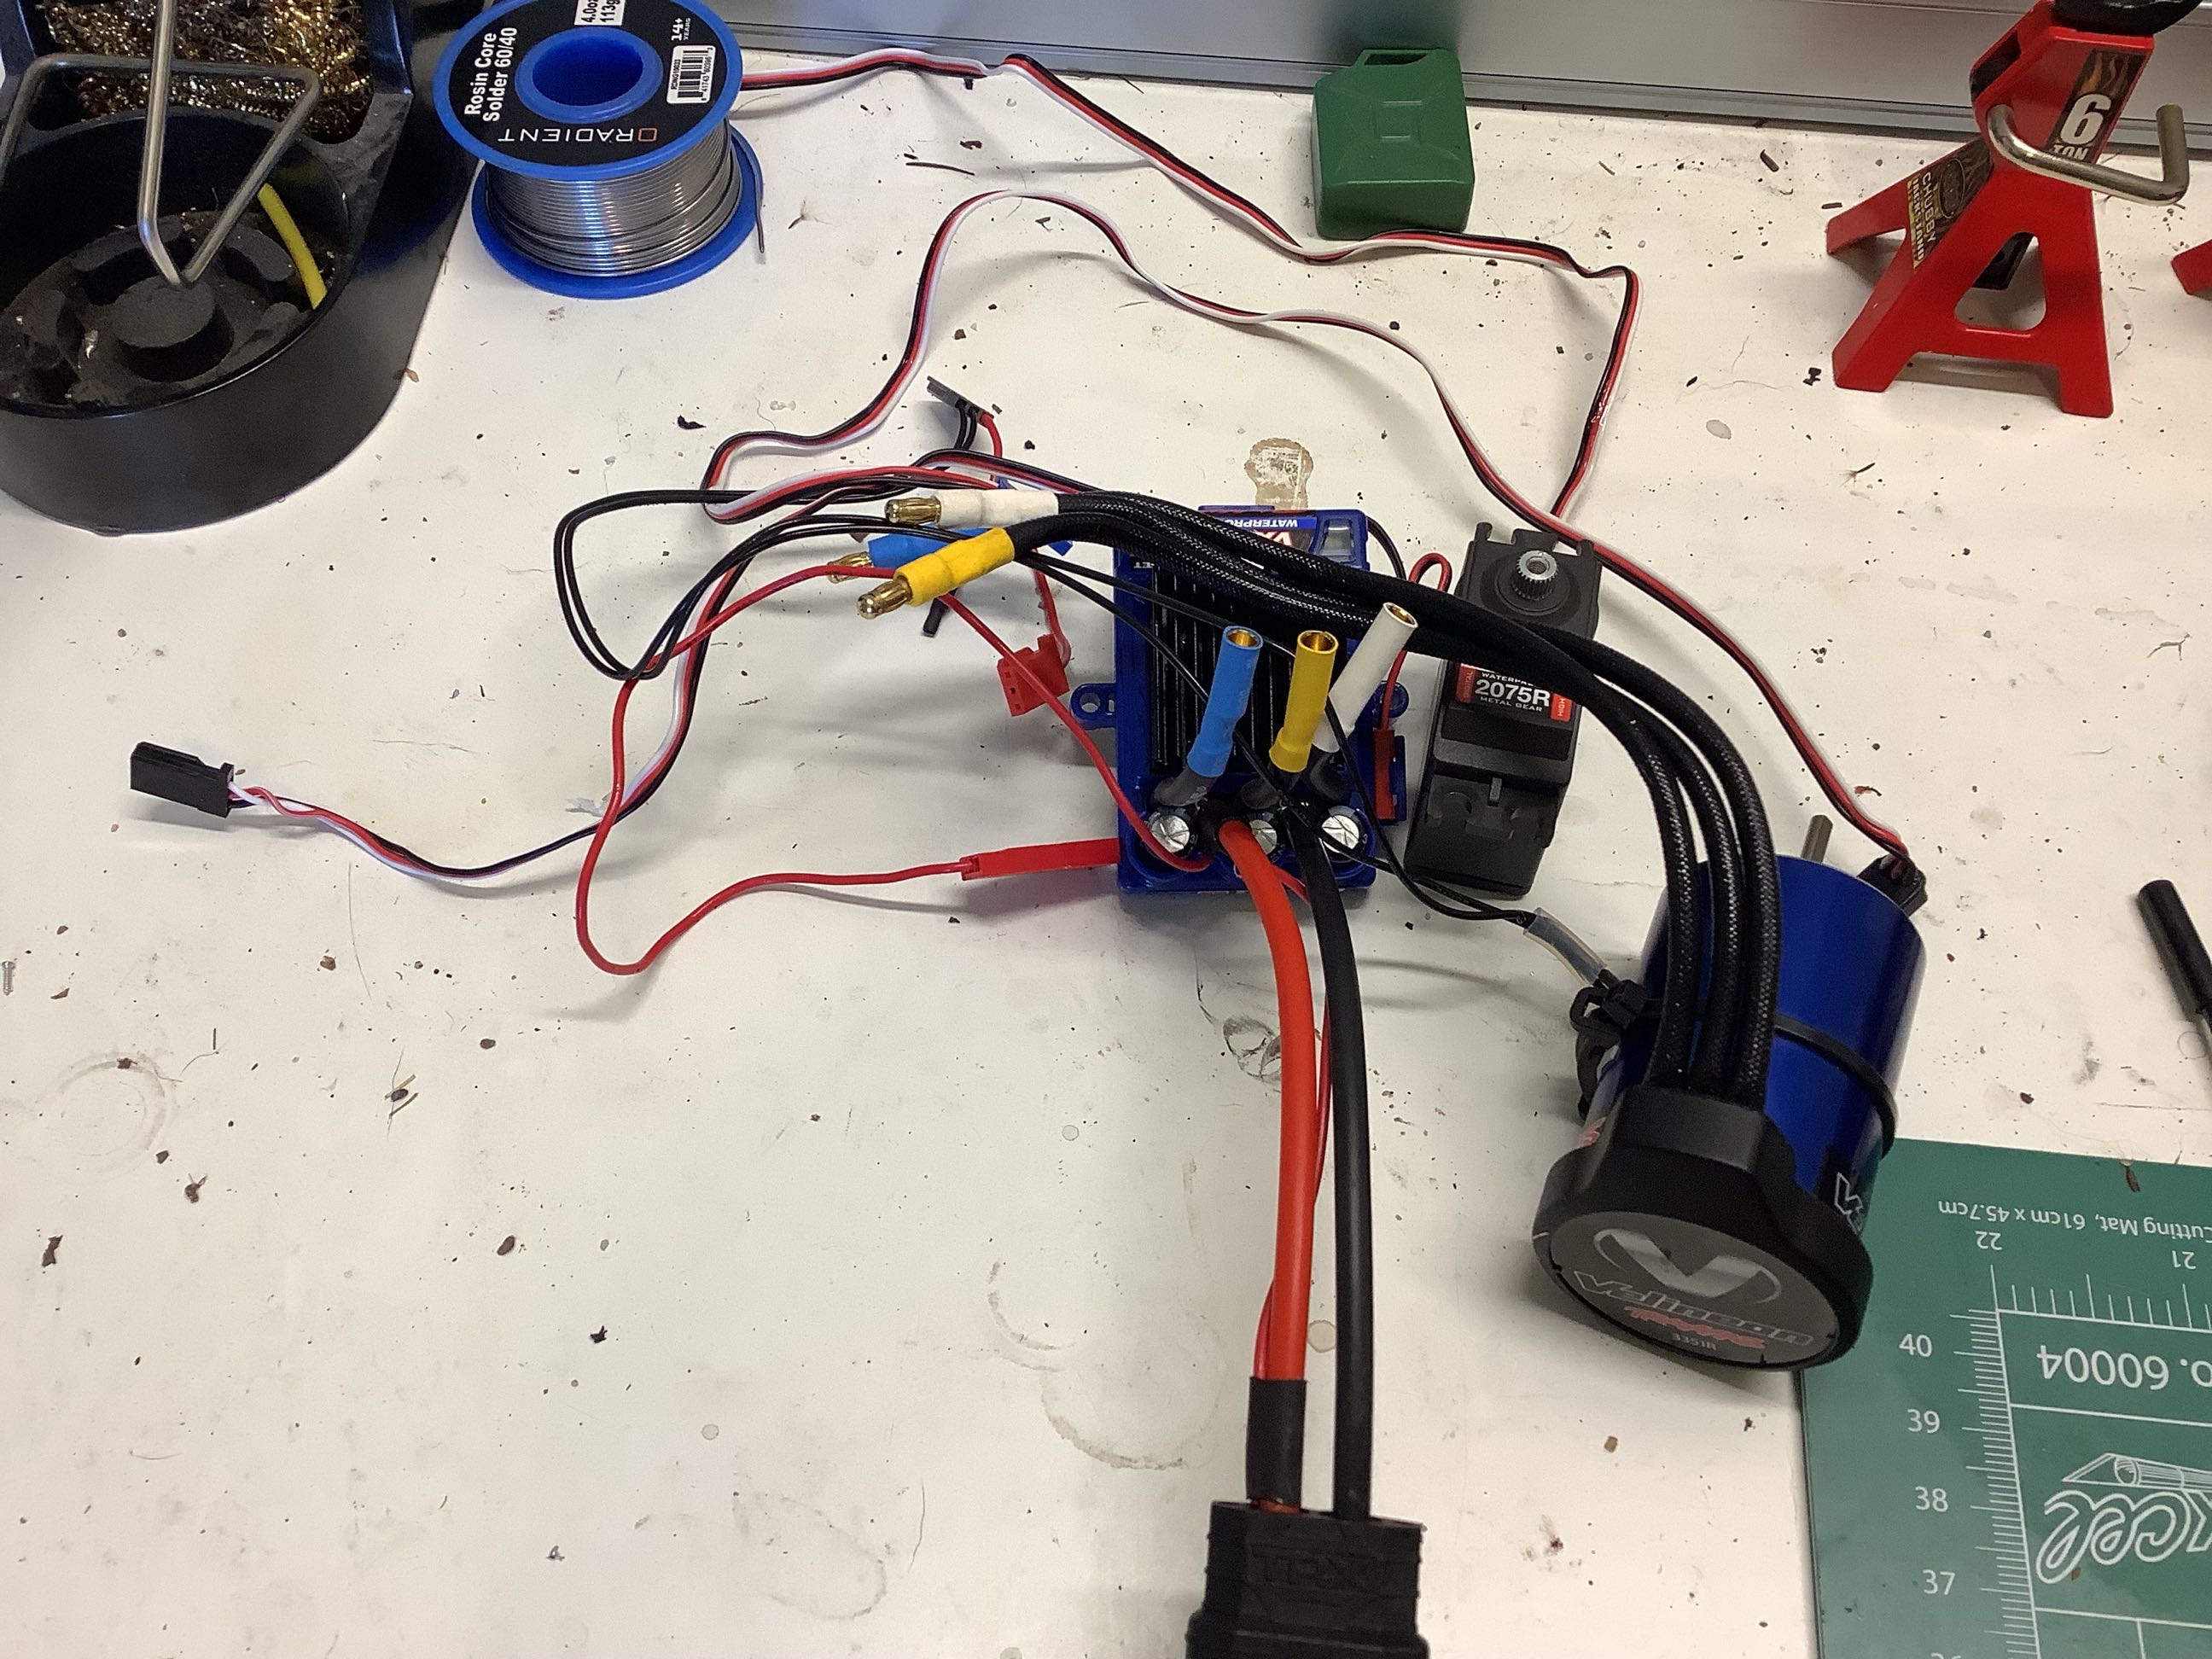
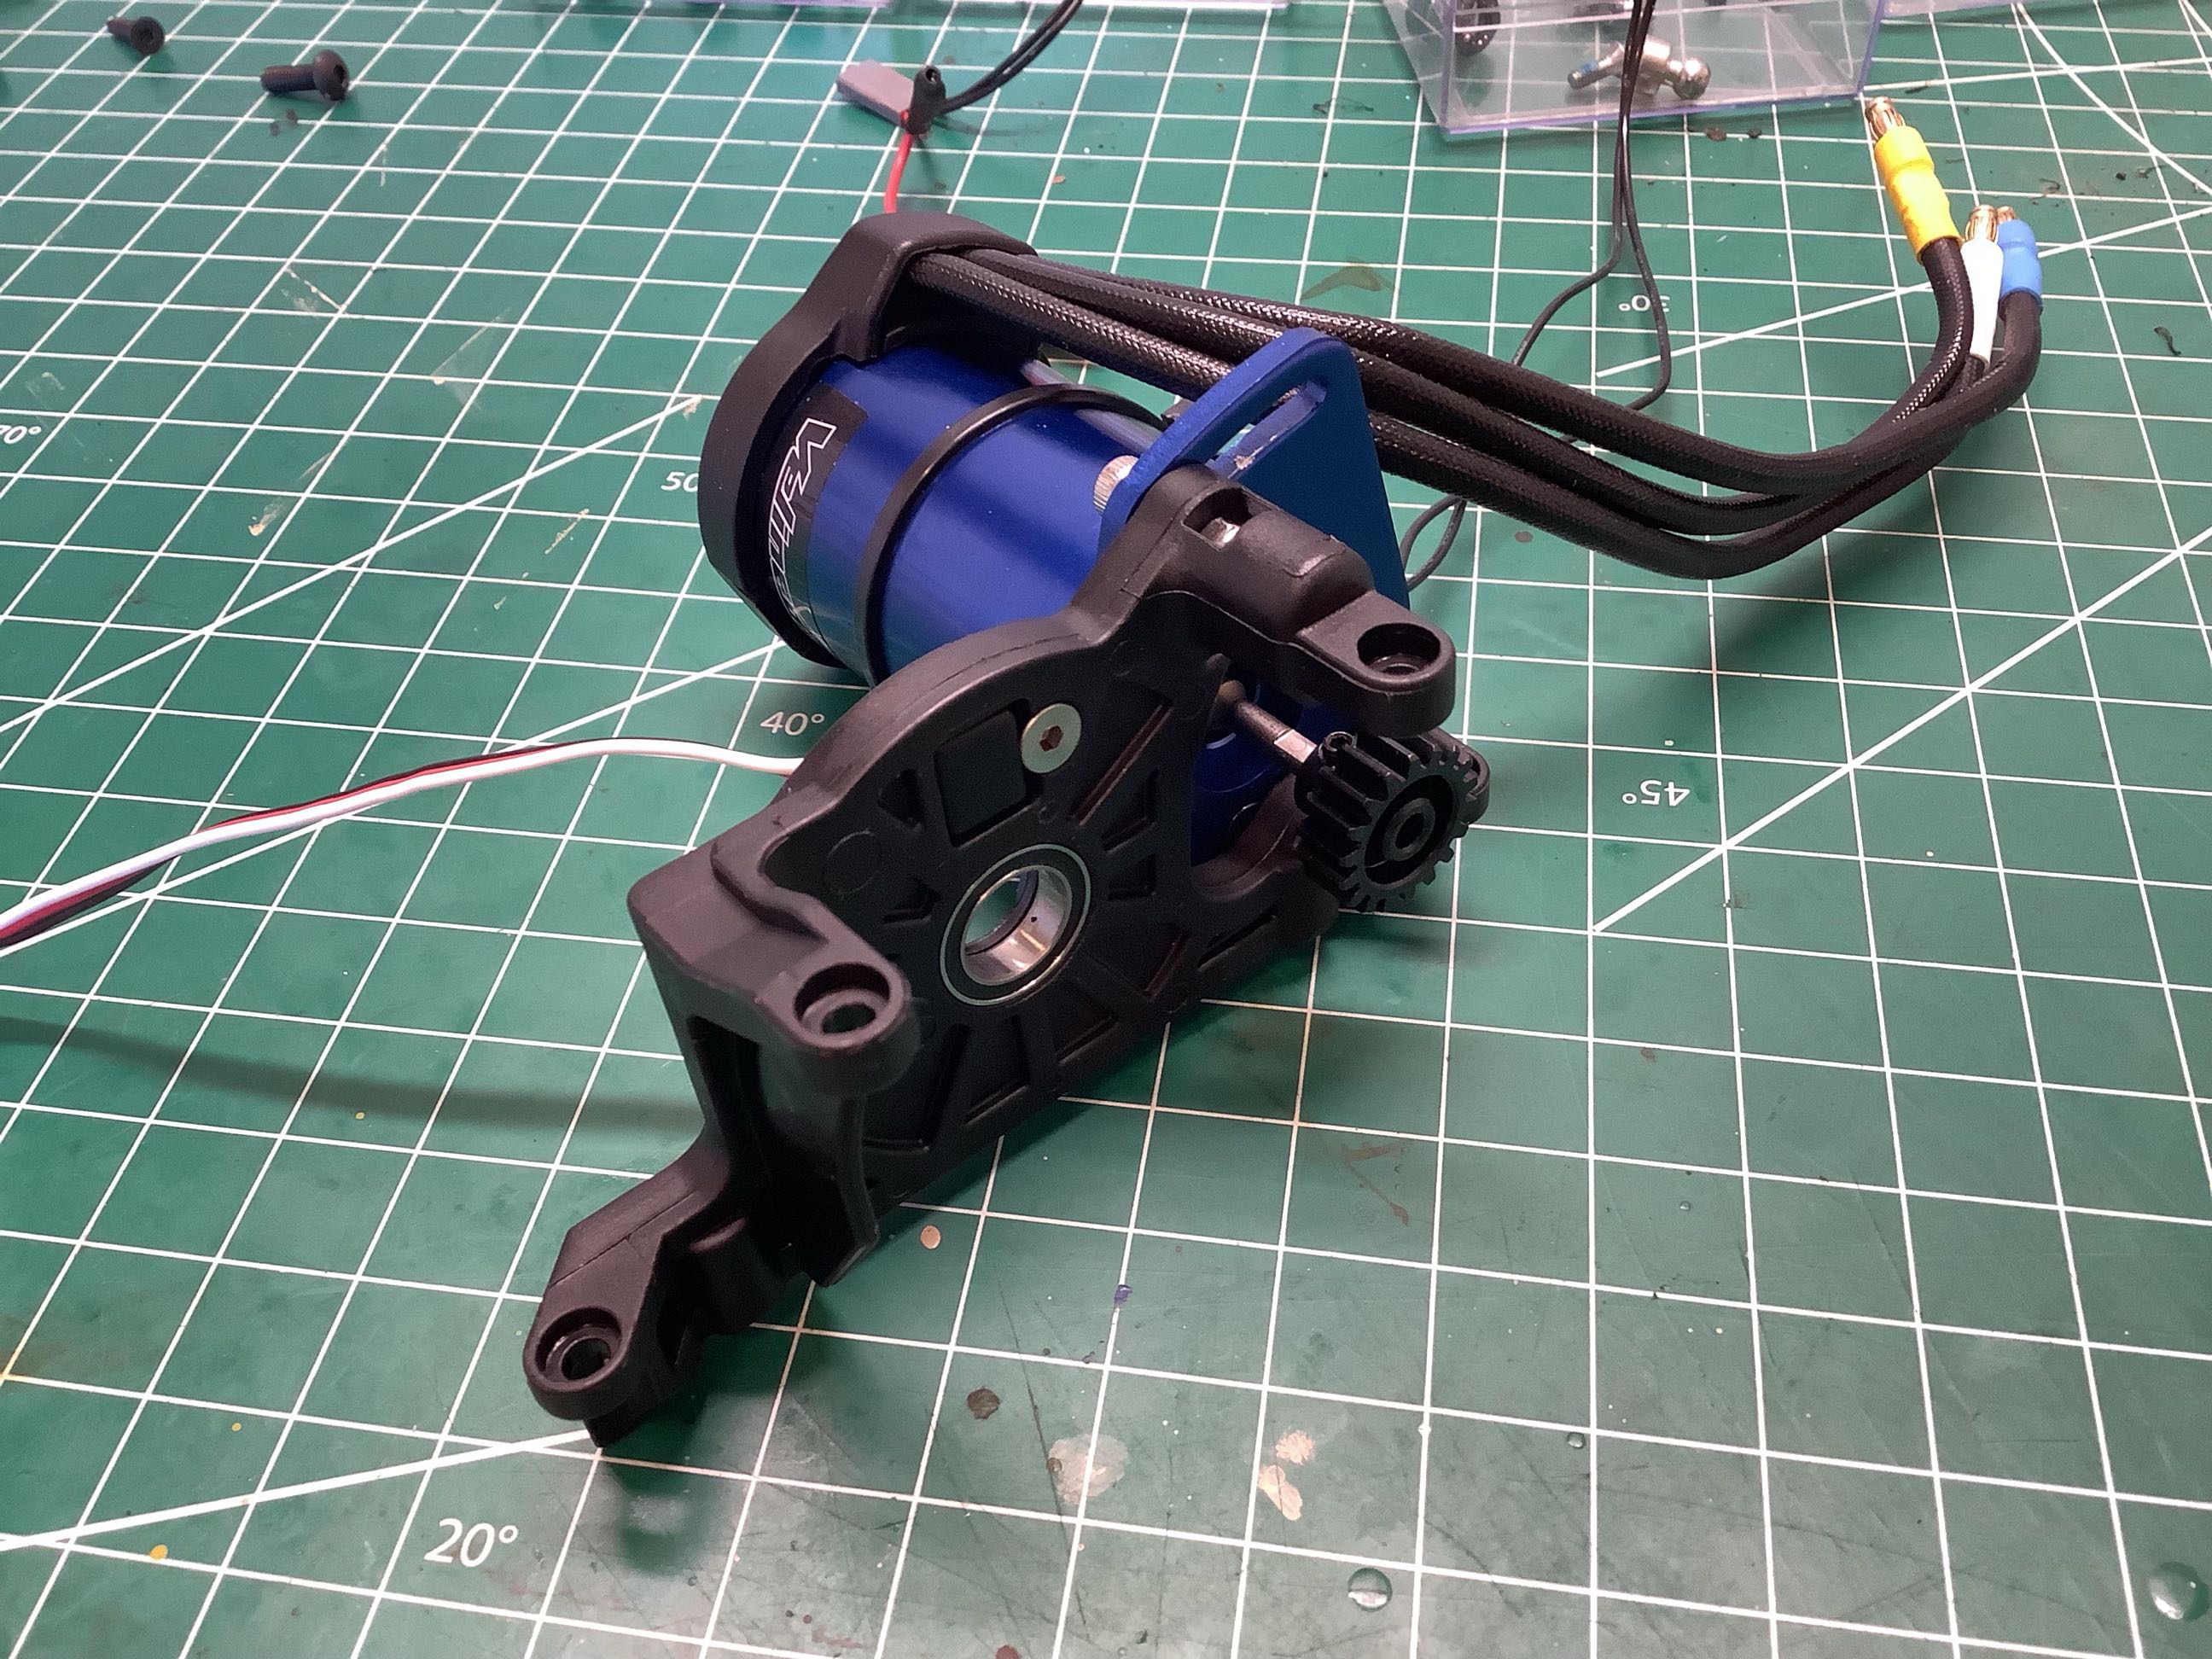
Here is the 3500kV Velineon brushless motor (sensorless). That small wire you see wrapped around the can is a temperature sensor. The temp does not show up on the transmitter, but if you have a phone or tablet connected through Bluetooth, you can see the temperature on a dashboard. On the right you can see the two pinions which came with the model. The smaller 13T pinion is used on the stock build. The larger 19T pinion is for high speed running on smooth surfaces only. Theoretically the larger pinion should give you a ~50% faster truck, but in reality the motor runs out of power before that, so I found that it is really not that much faster with the high speed pinion. It does get a lot hotter though. For both of those reasons, I decided to stick with the smaller pinion for my model.
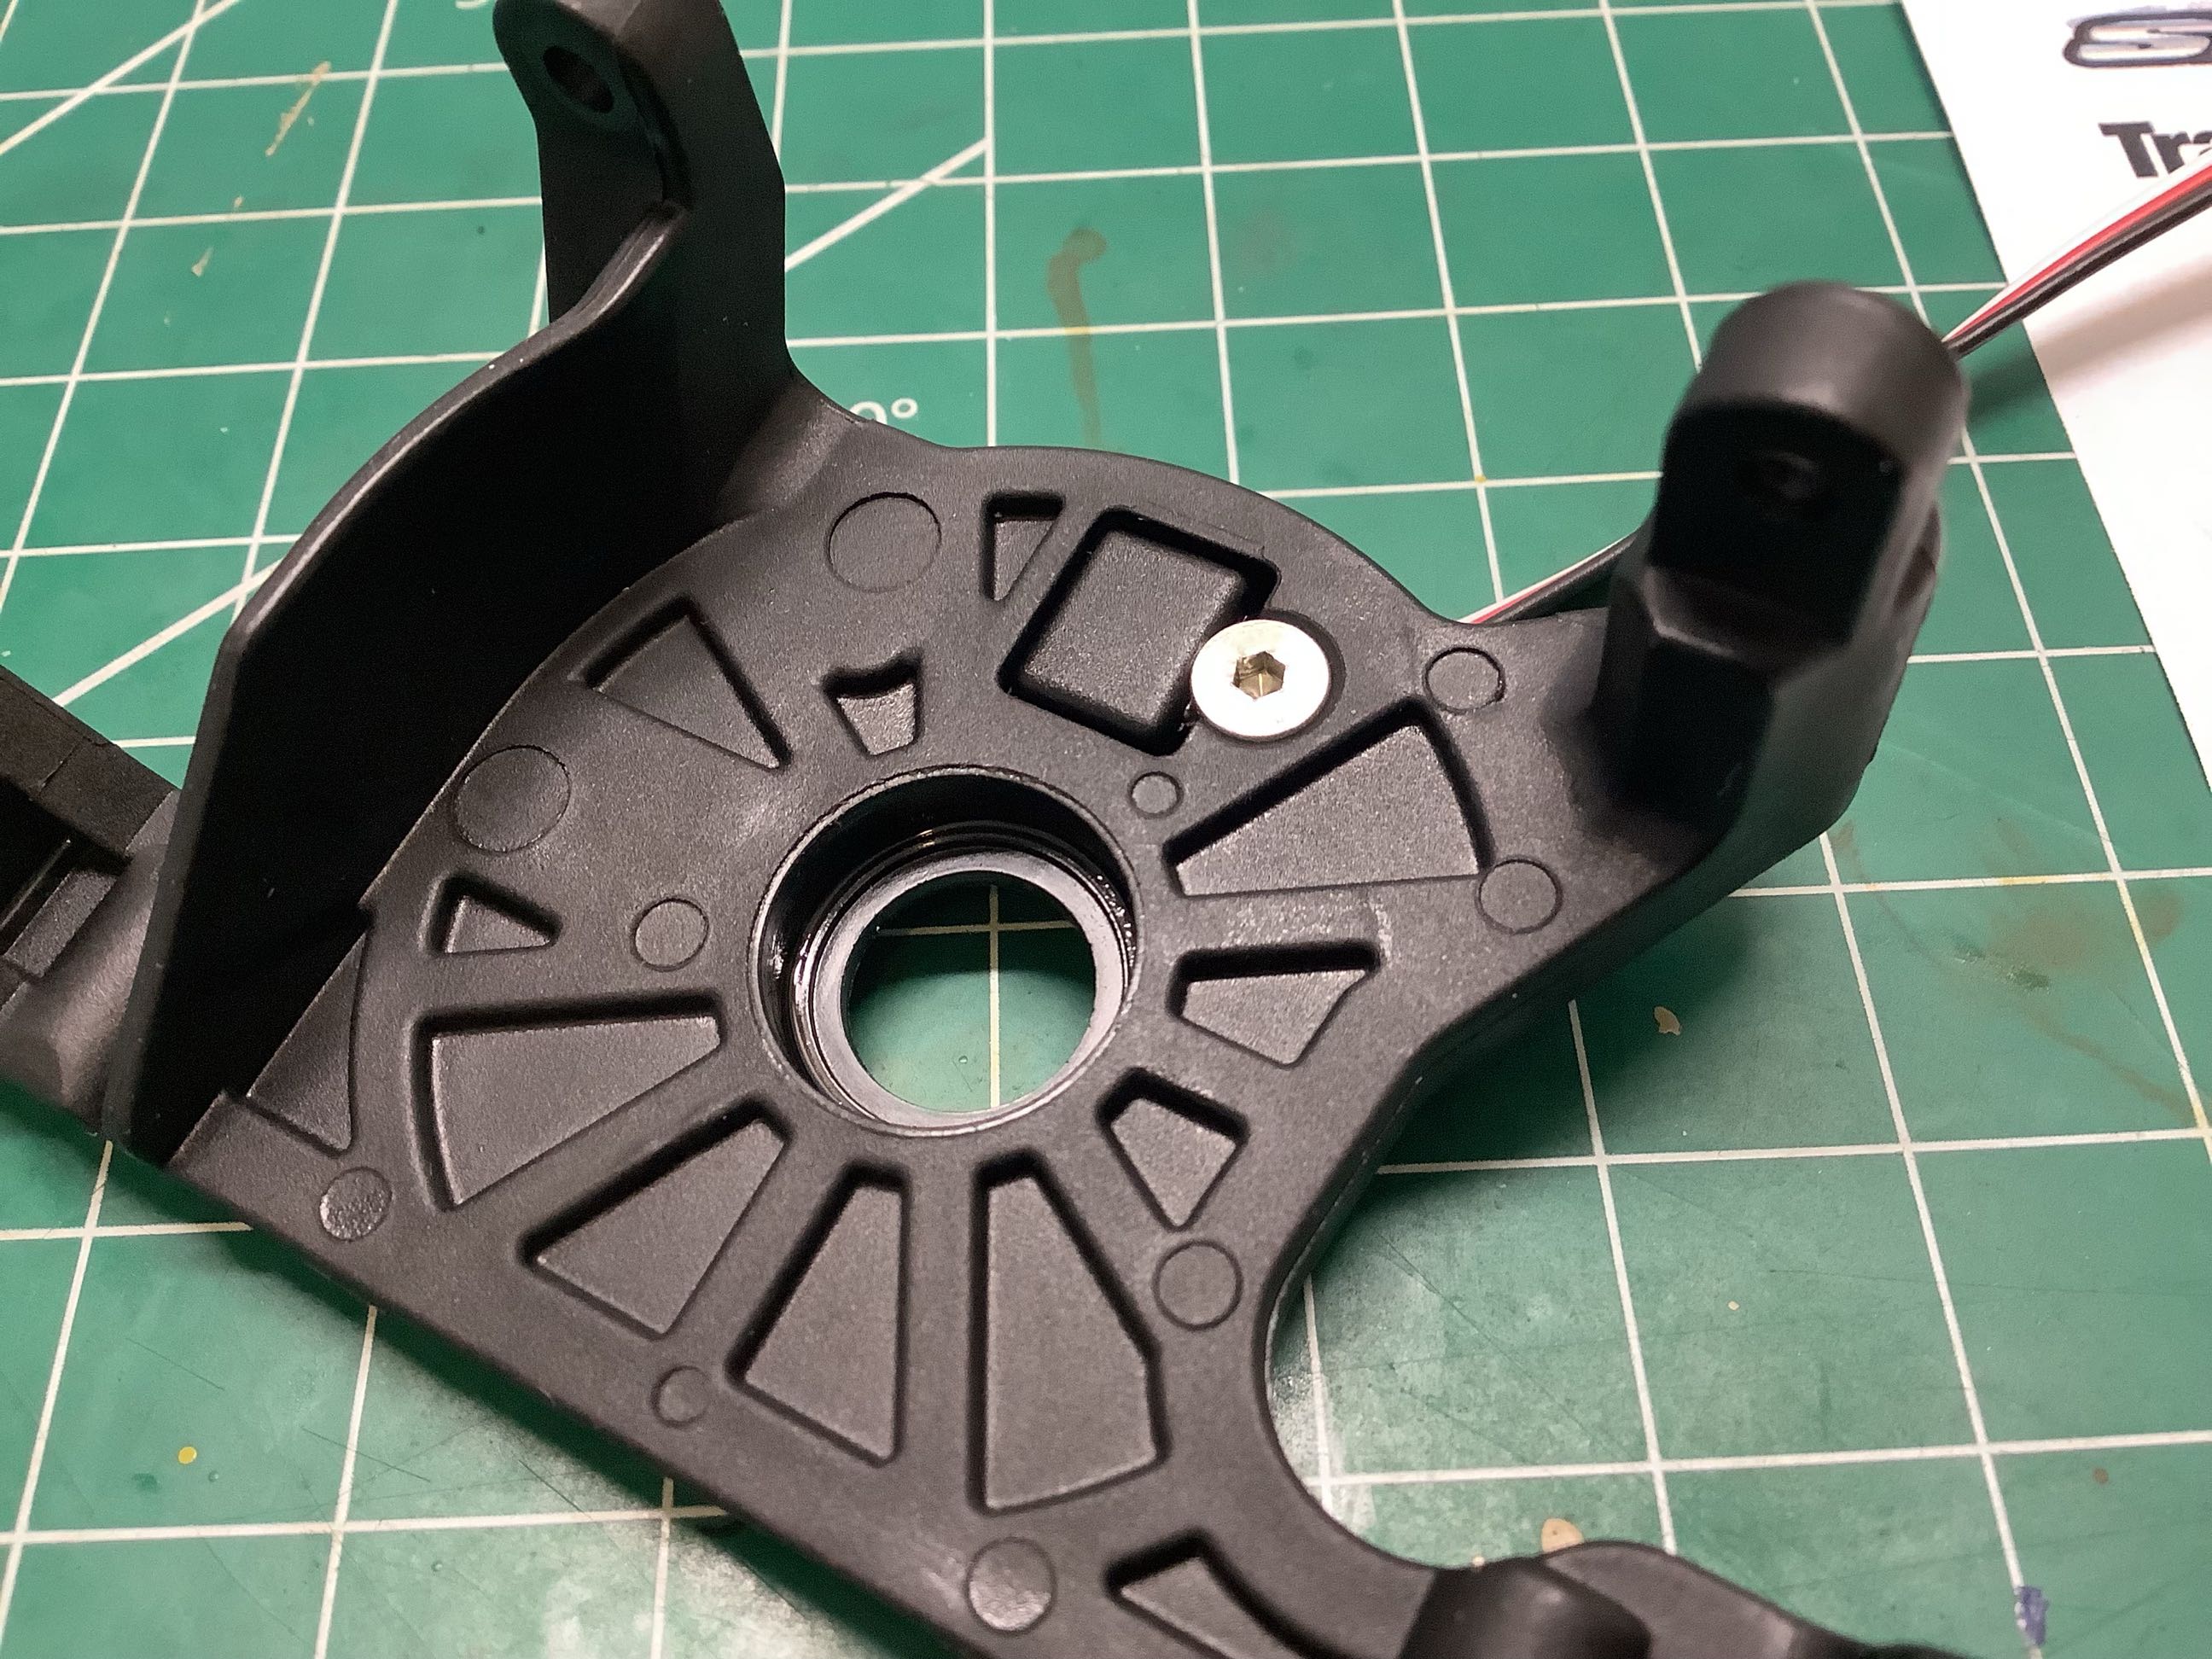
This bulkhead has something tricky going on. See the little black rectangle just to the left of the shiny screw? That's a magnetic sensor. The aforementioned screw is aluminum so that it will not interfere with the sensor. This sensor will count the frequency with which the magnet on the slipper clutch passes it, thereby counting rpm. Not motor rpm, and not wheel rpm either. This angular velocity is different from either of those because of gearing, so to find either motor rpm or vehicle speed a bit of math is required. This math is done inside the app for you so that the dashboard reads out vehicle speed in miles per hour (or metric units if you prefer). On the right you can see the bulkhead integrated with the metal motor mount. This motor mount is a different part number than that used on the other models, but it is not actually an upgrade. It is just shaped slightly differently to accommodate the telemetry bulkhead.
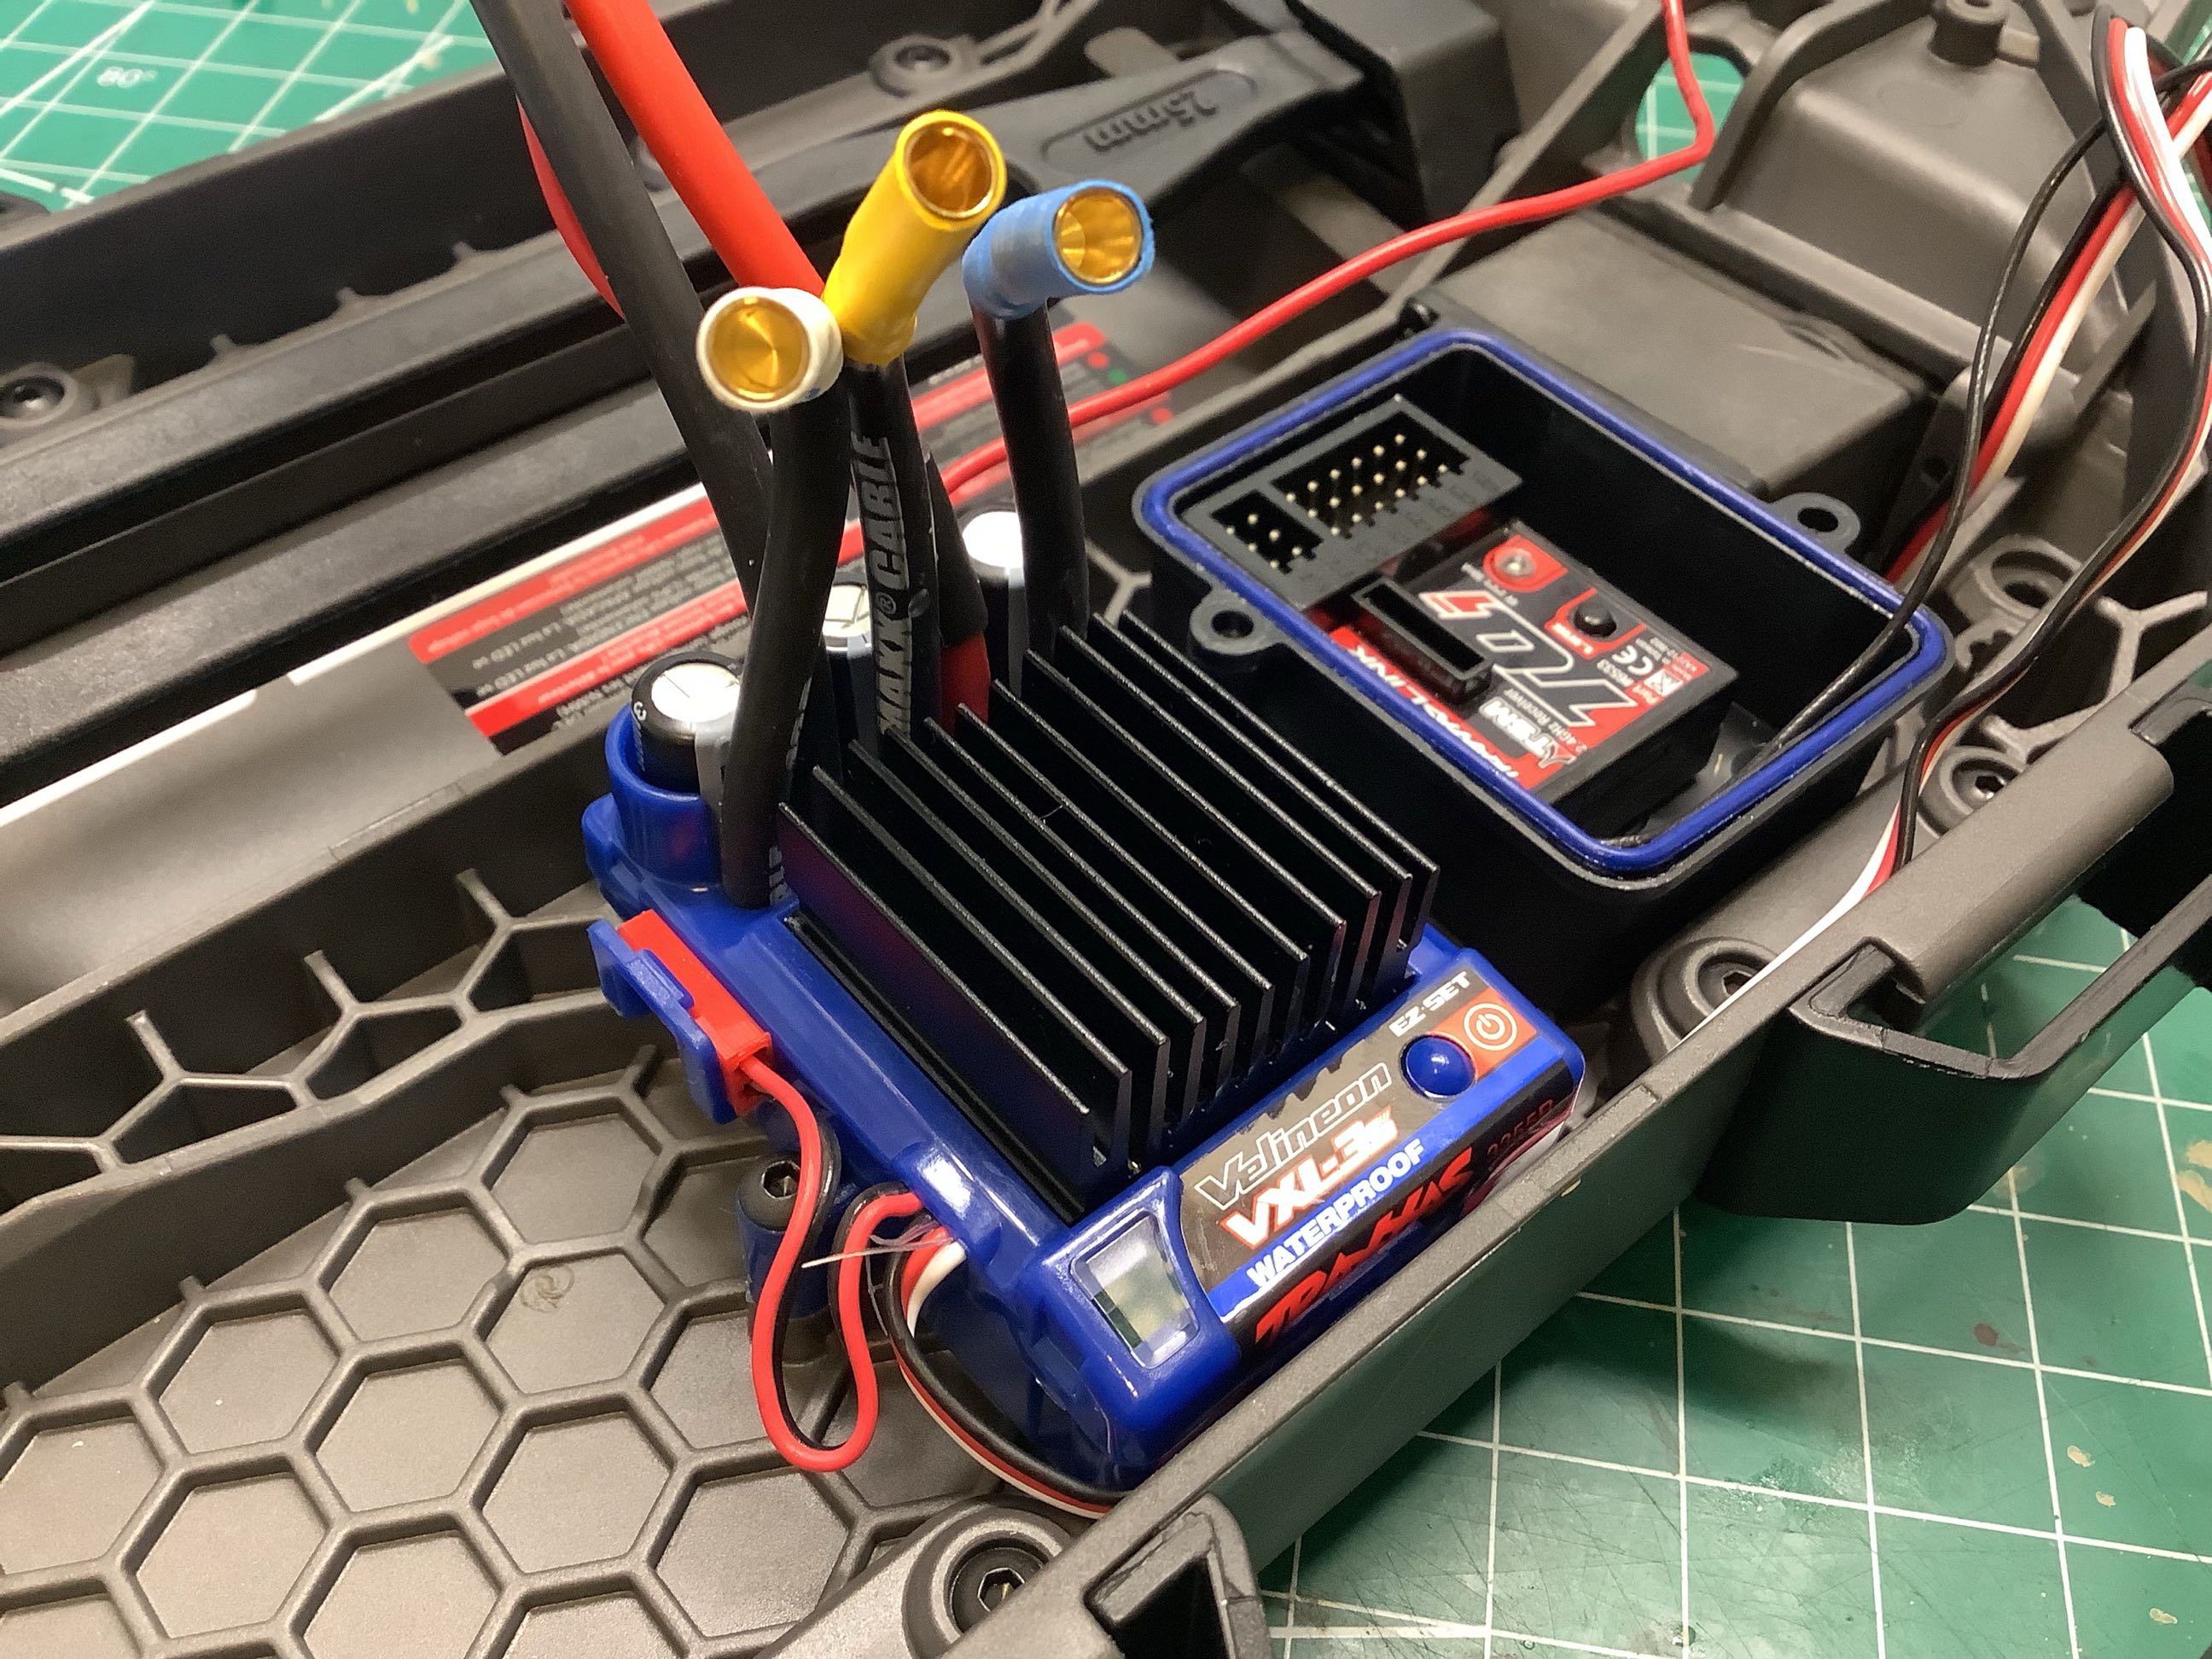
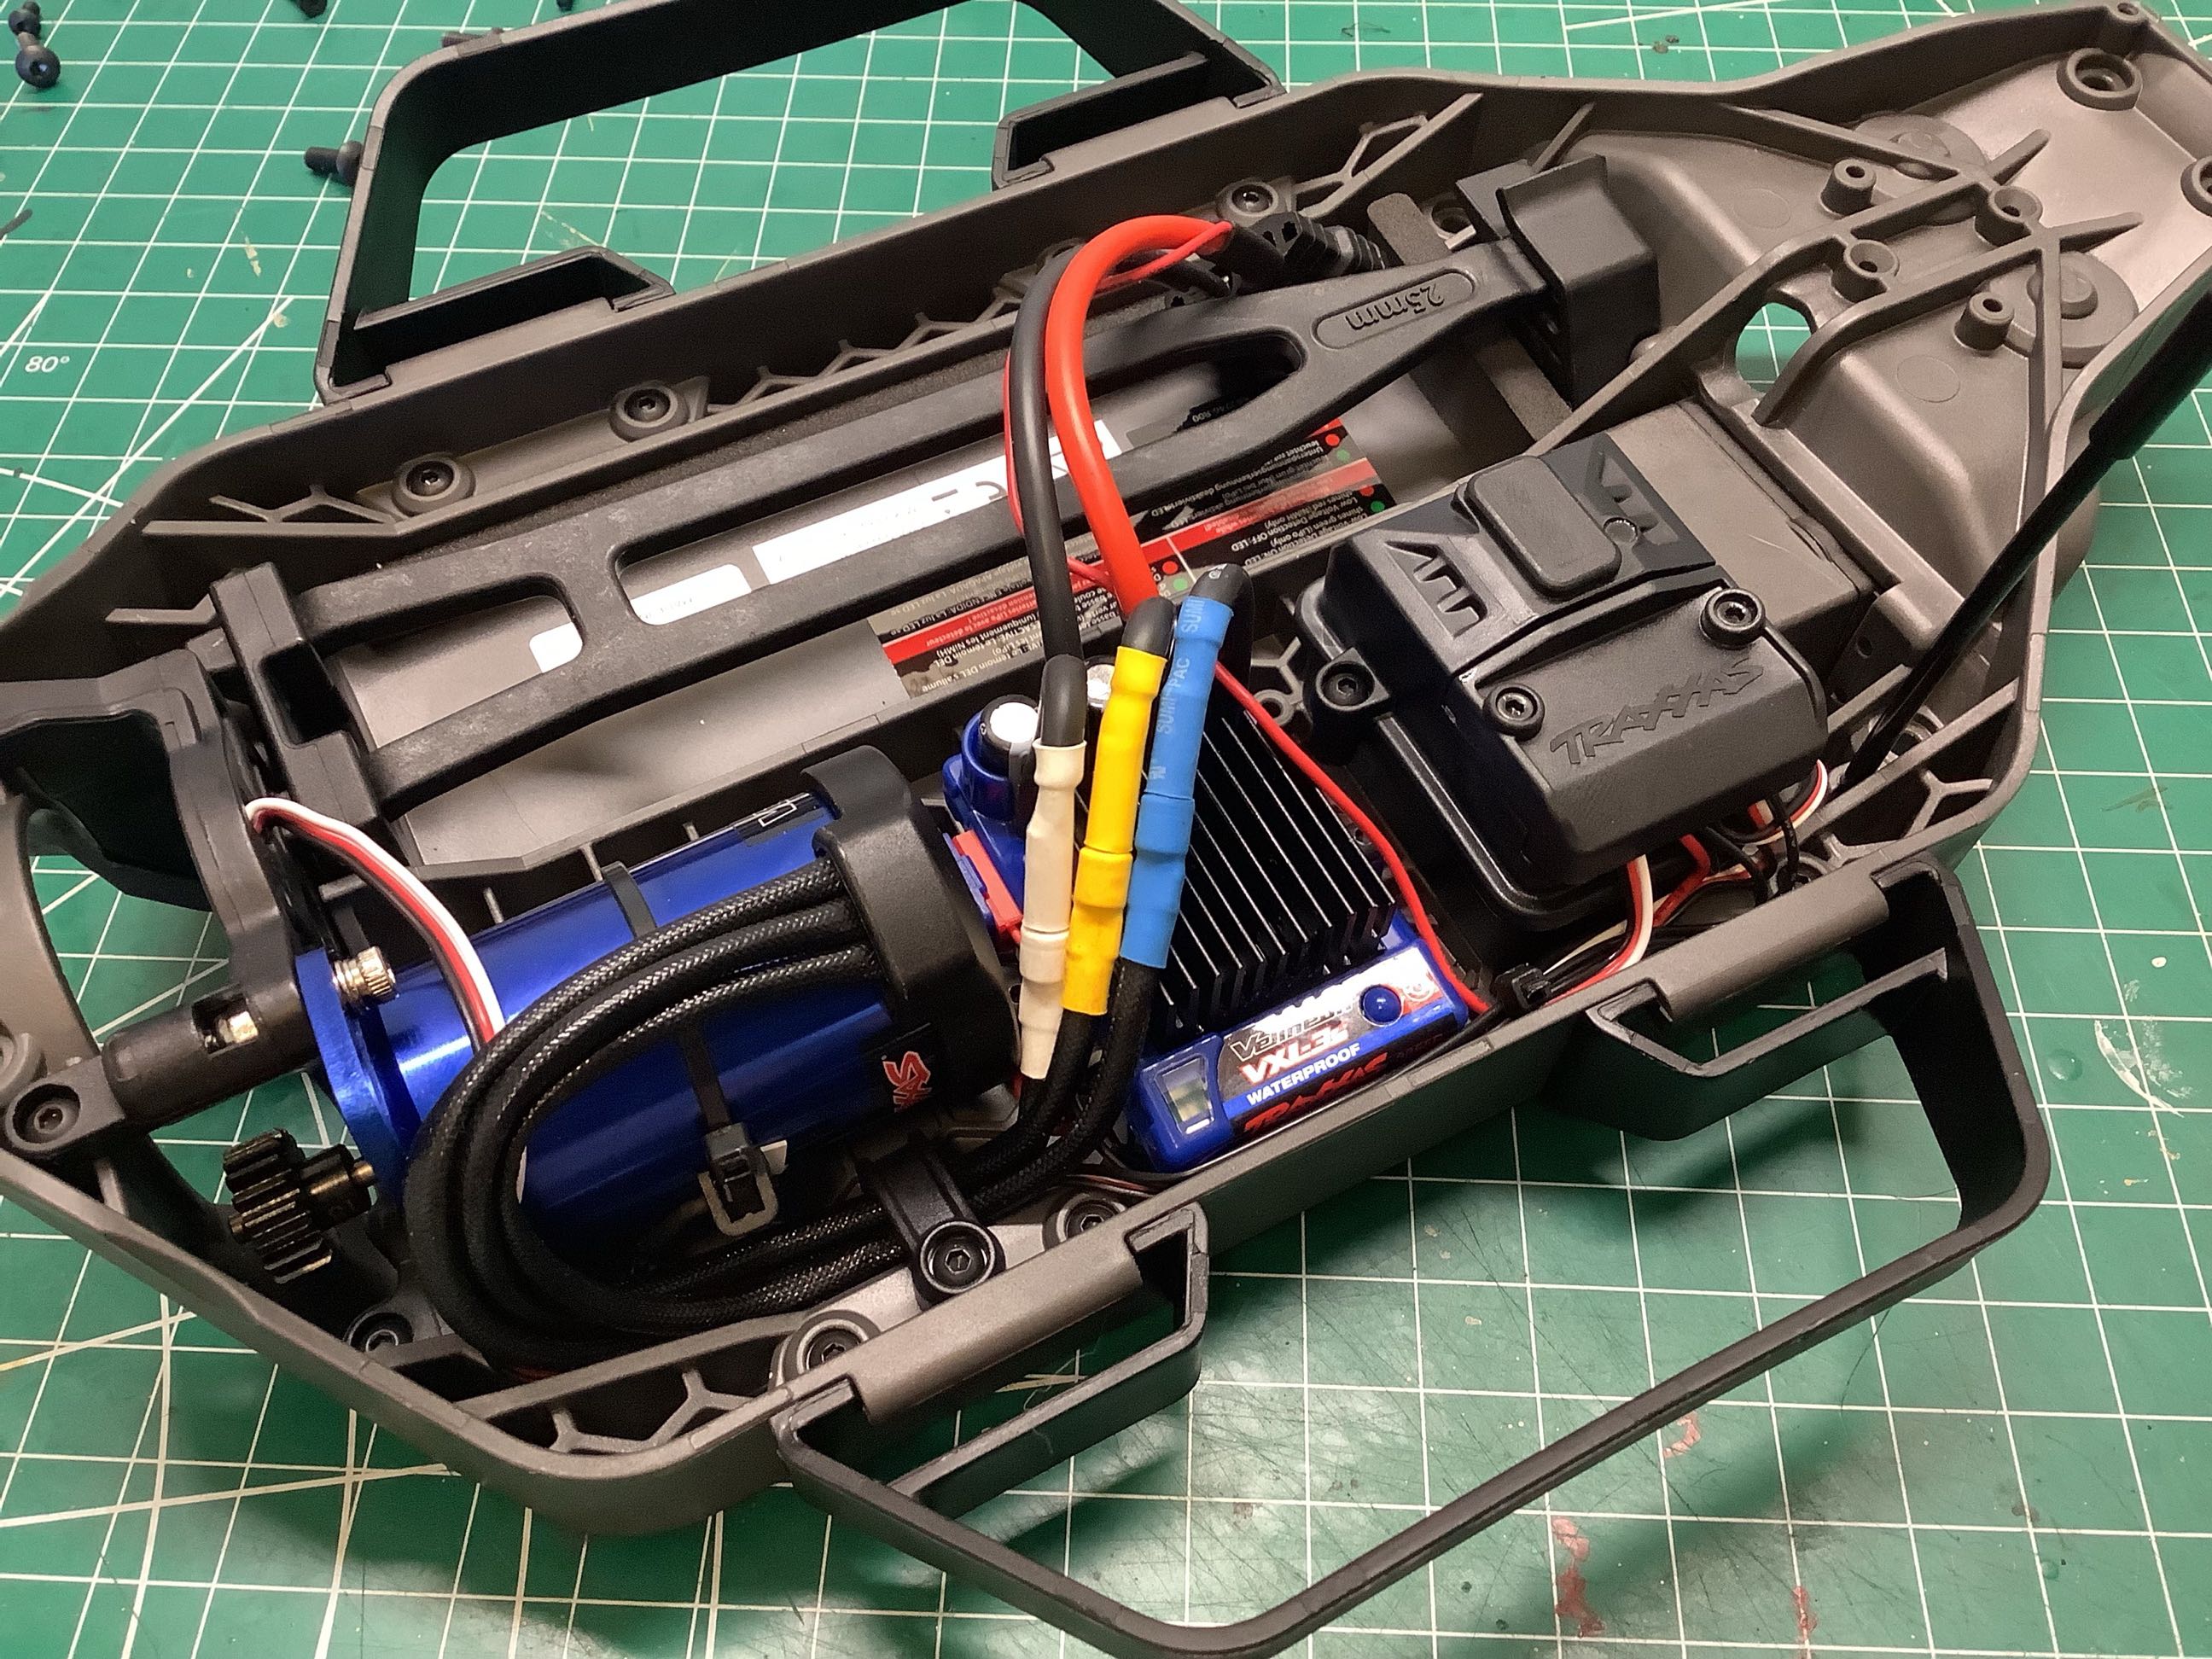
Here I've installed the Velineon VSL-3s speed controller. The extra JST connector can be used to power an optional fan or lights. It is unused on this model. On the right I've also installed the motor assembly and closed up the radio box which completes the installation of the electronics. I do appreciate the thought that Traxxas puts into ways to clip and stow the wiring to keep it neat. You can actually connect power and try out the model at this point, but the motor and steering servo aren't connected to anything.
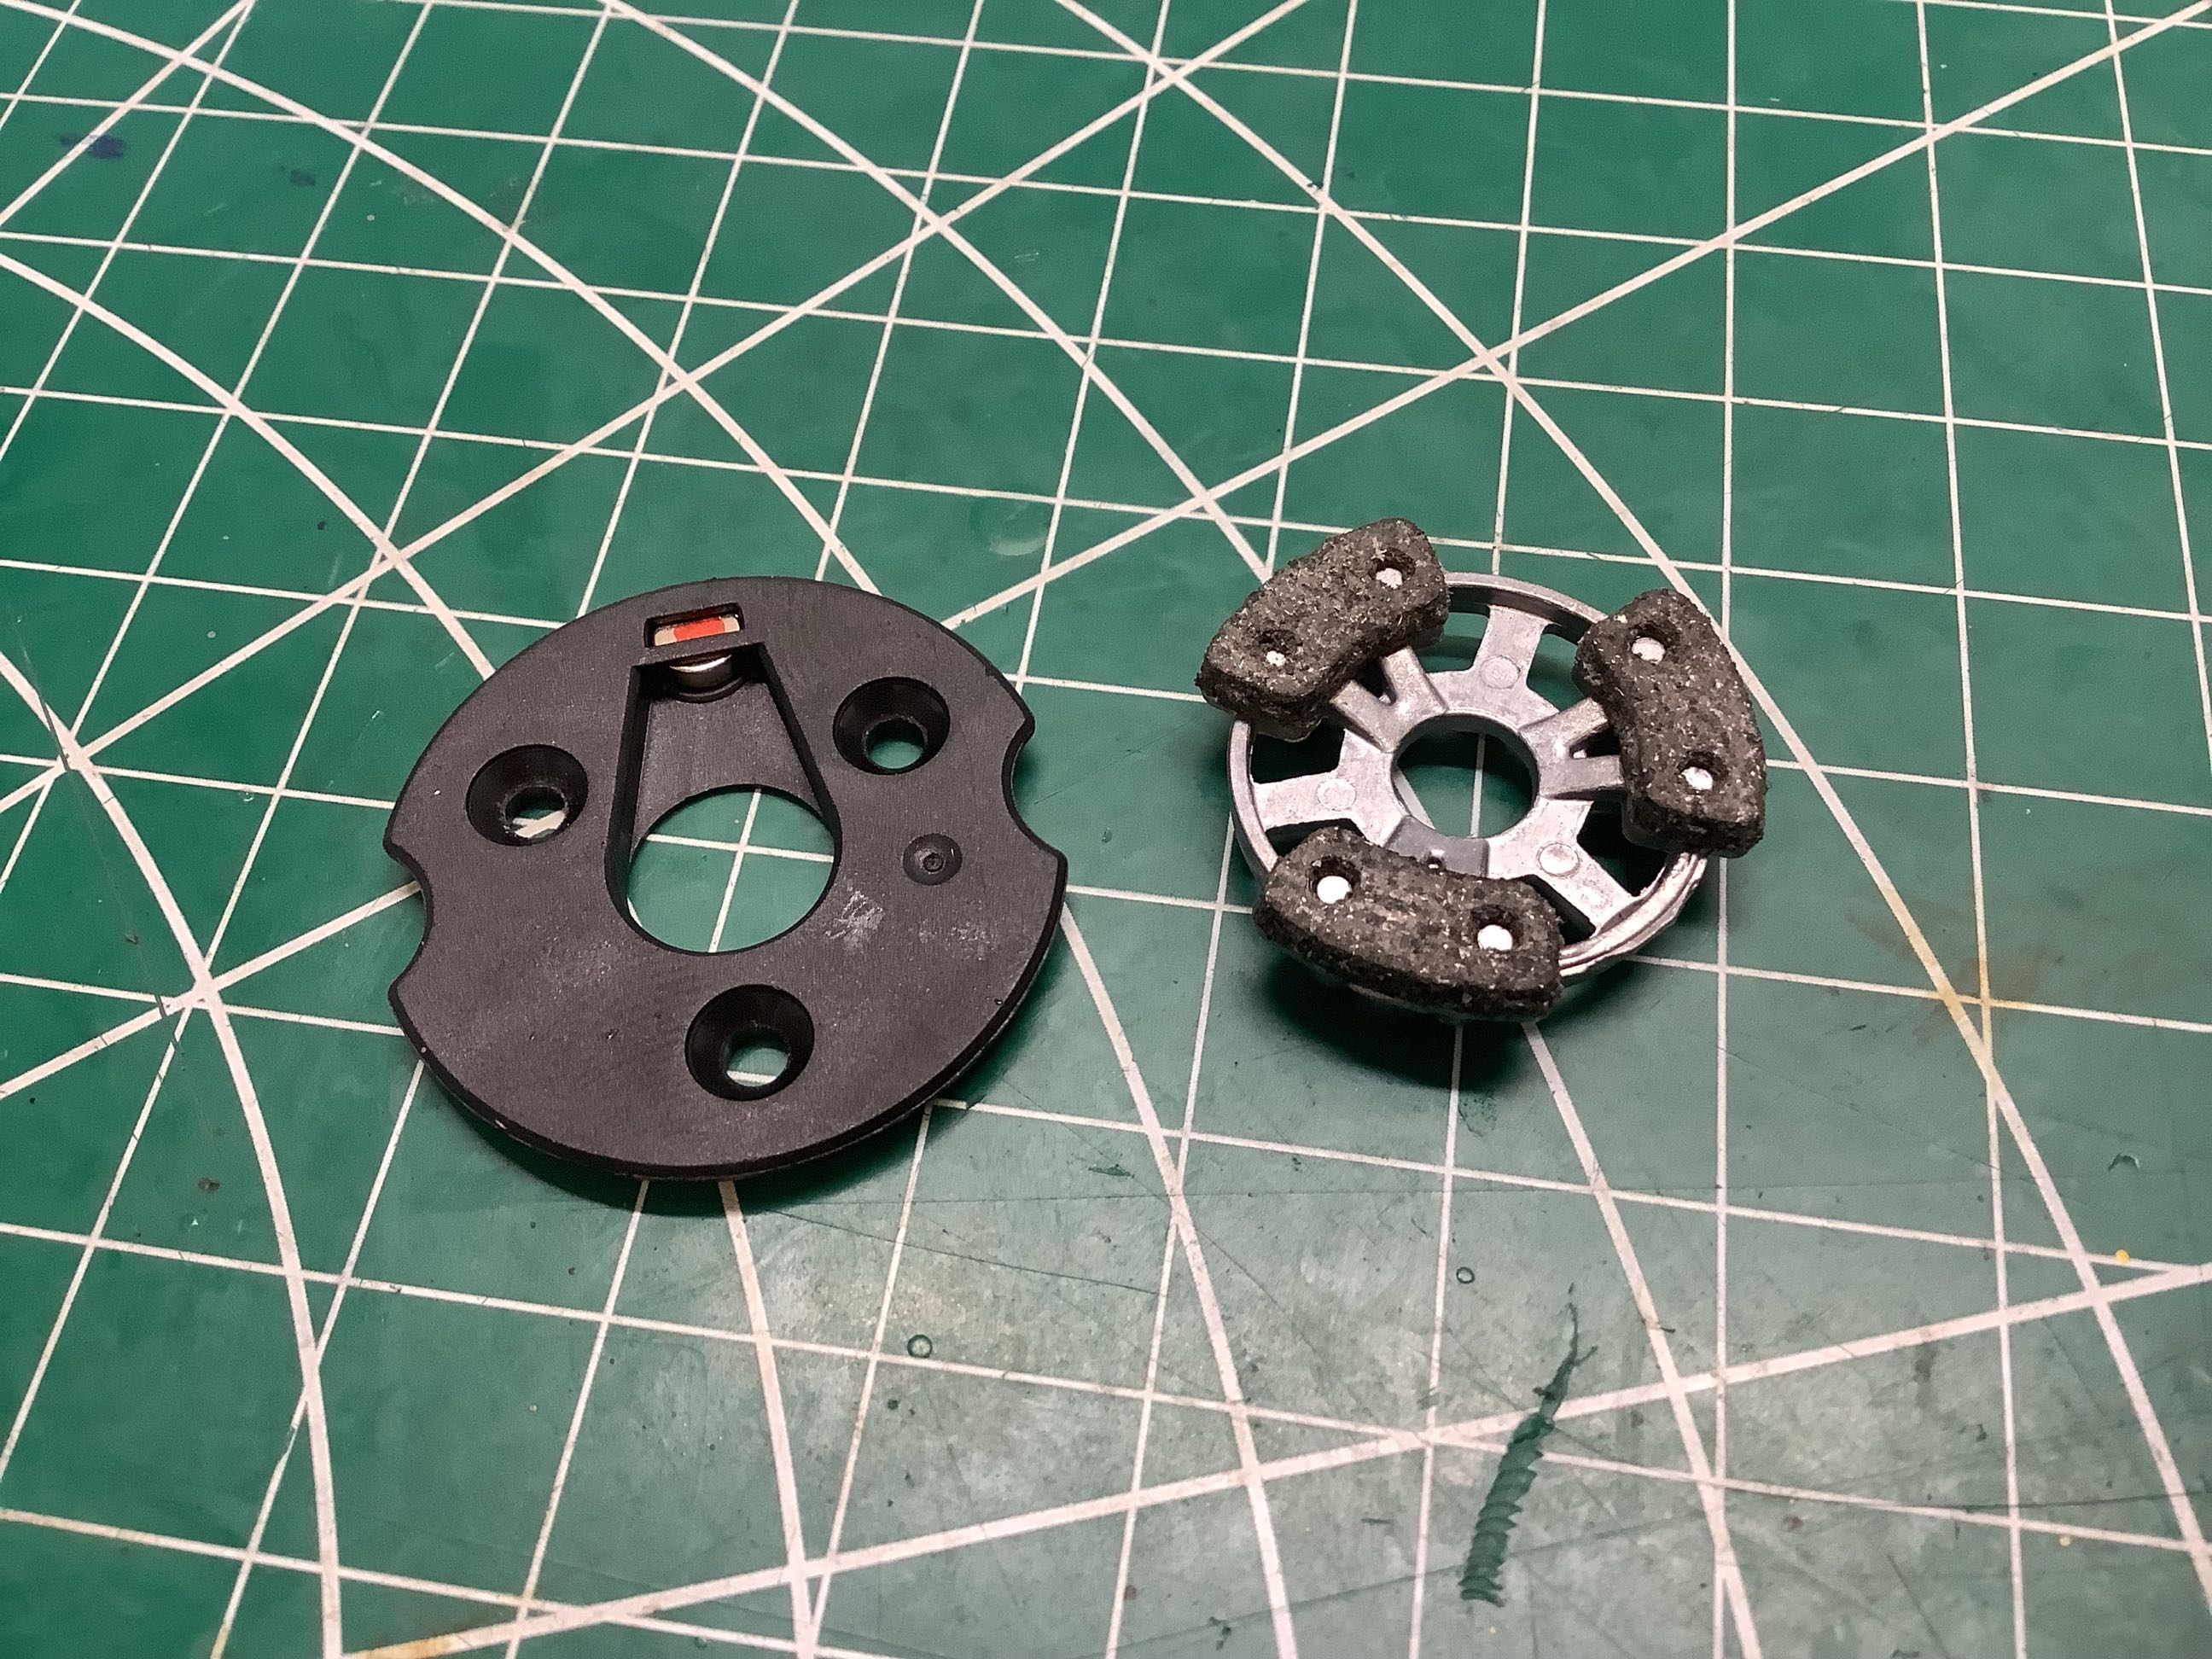
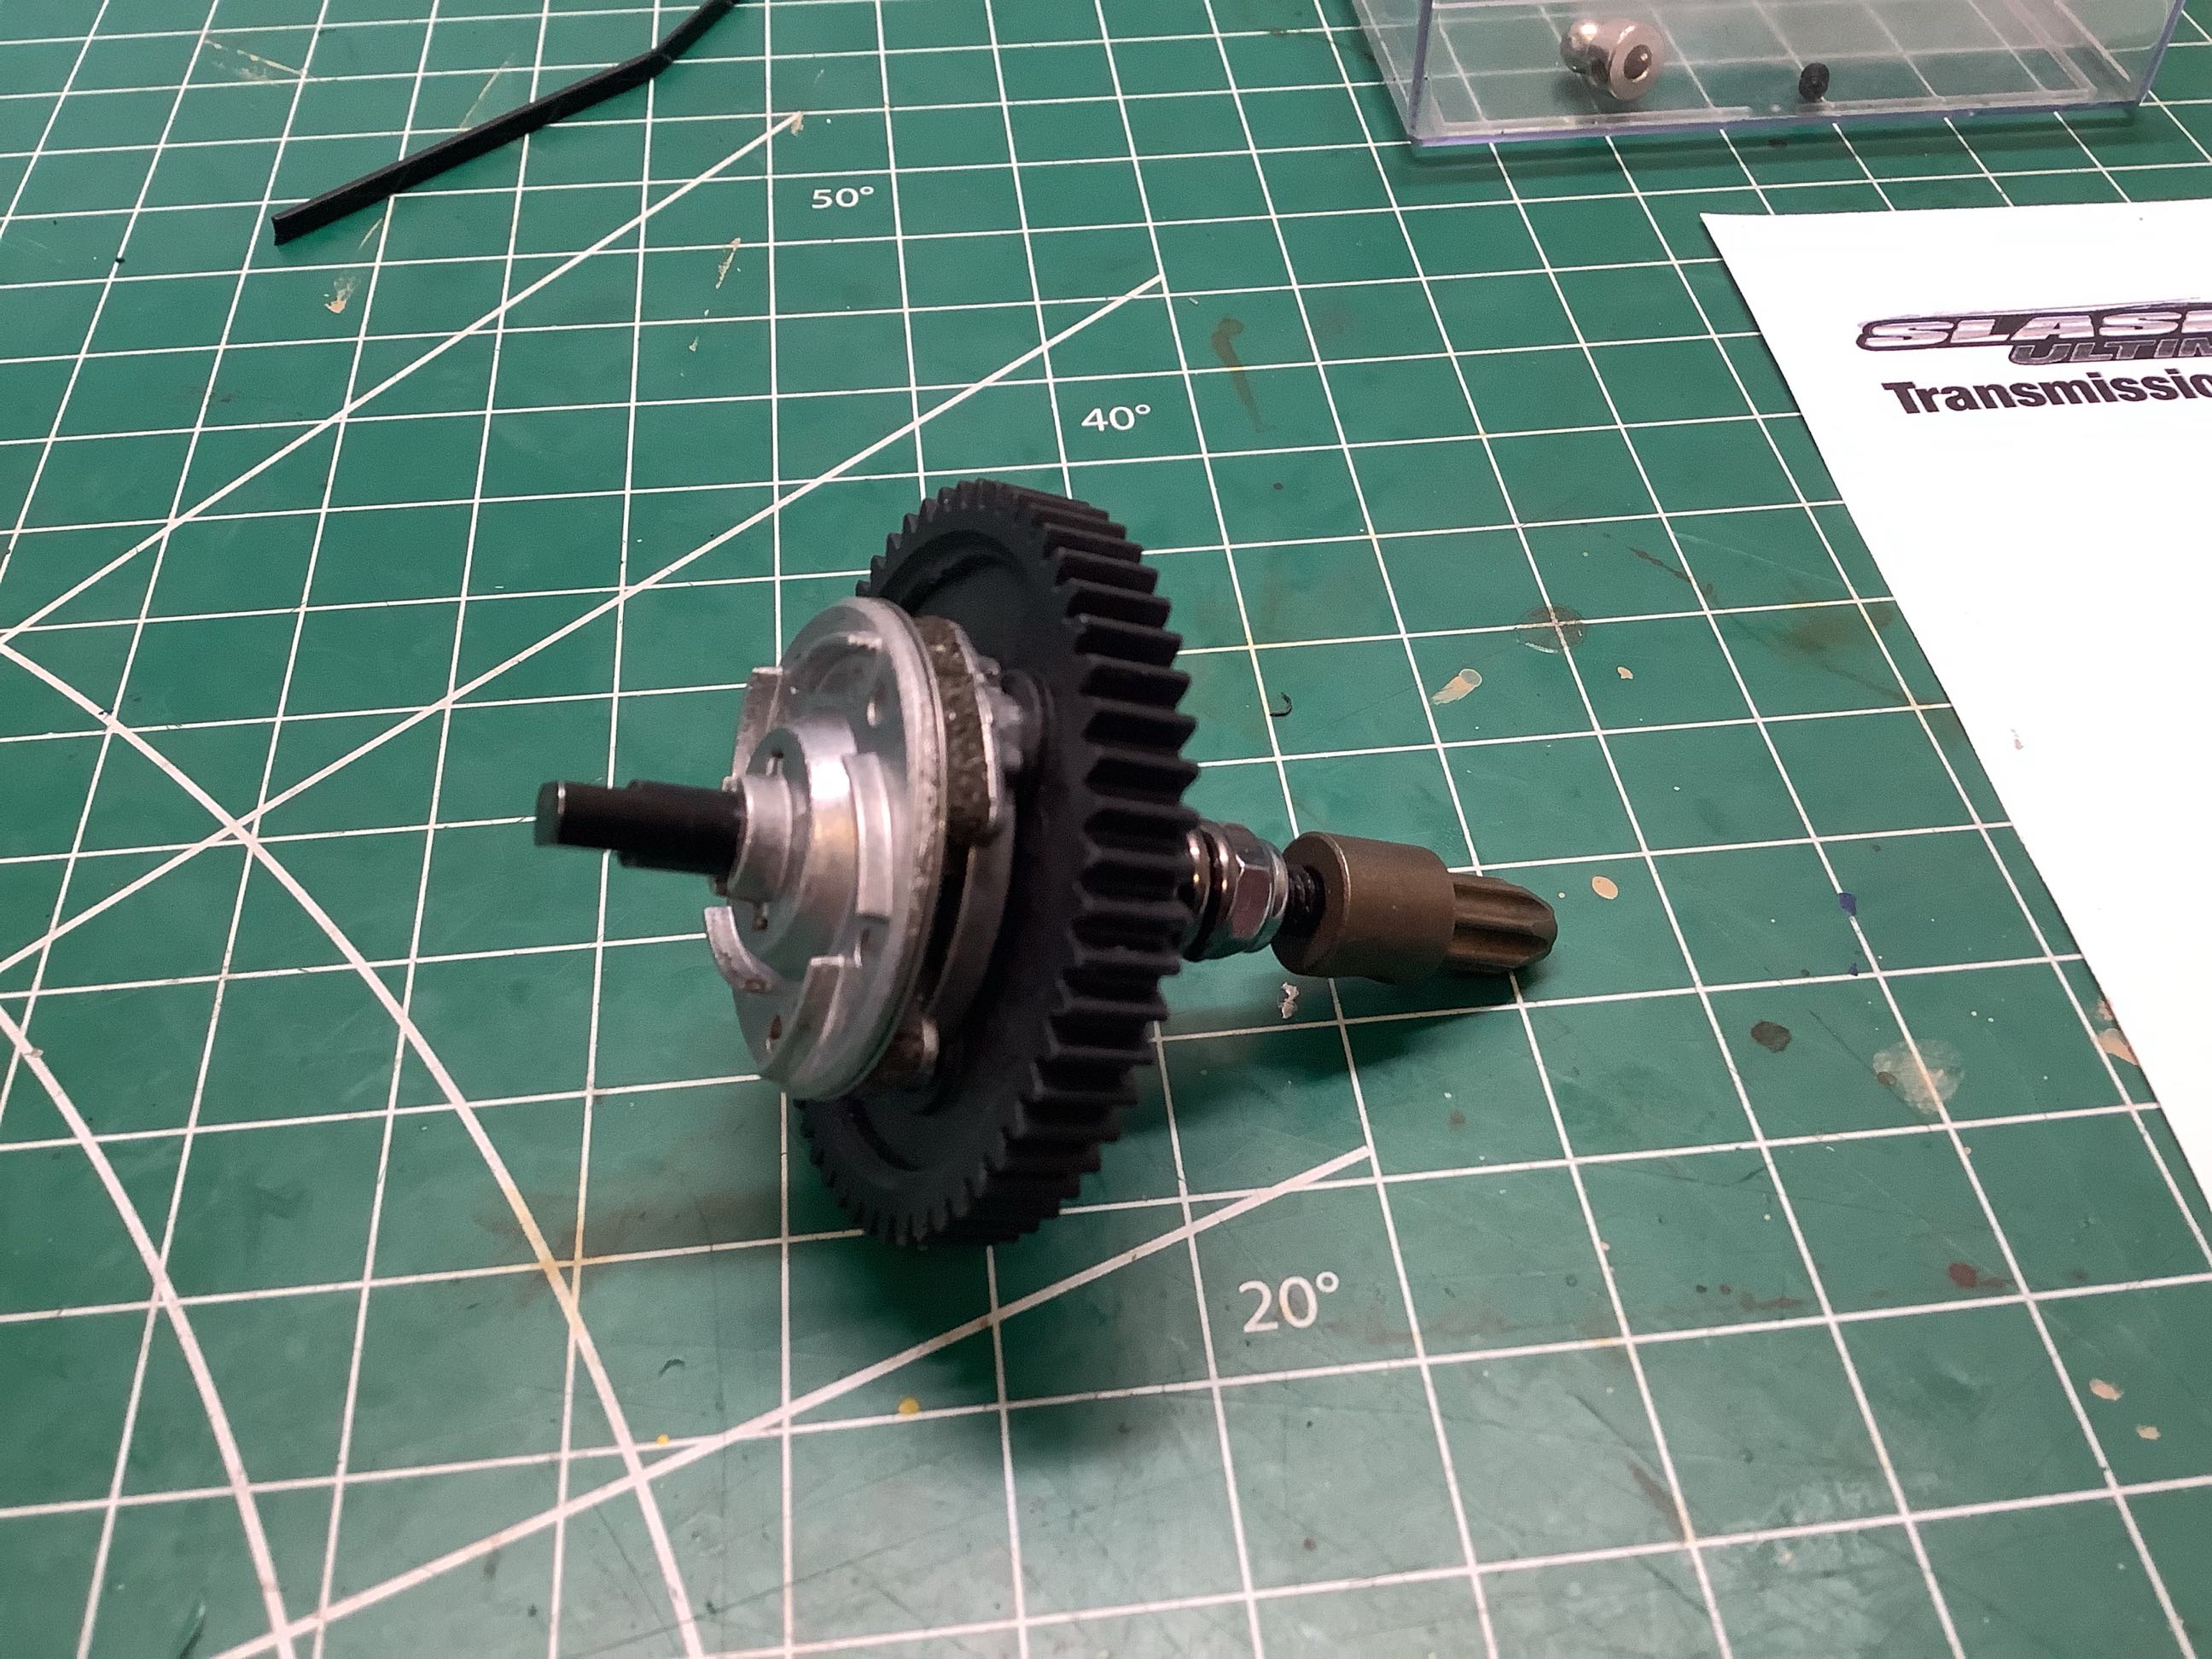
Most RC slipper clutches tend to use friction discs and metal plates, but this one uses 3 brake pads as shown on the left. This makes for a very sturdy clutch. That little red spot on the plastic part to the far left is a magnet. That's what will signal rpm to the sensor in the bulkhead. On the right you can see the completed slipper assembly which is integrated with the spur gear.
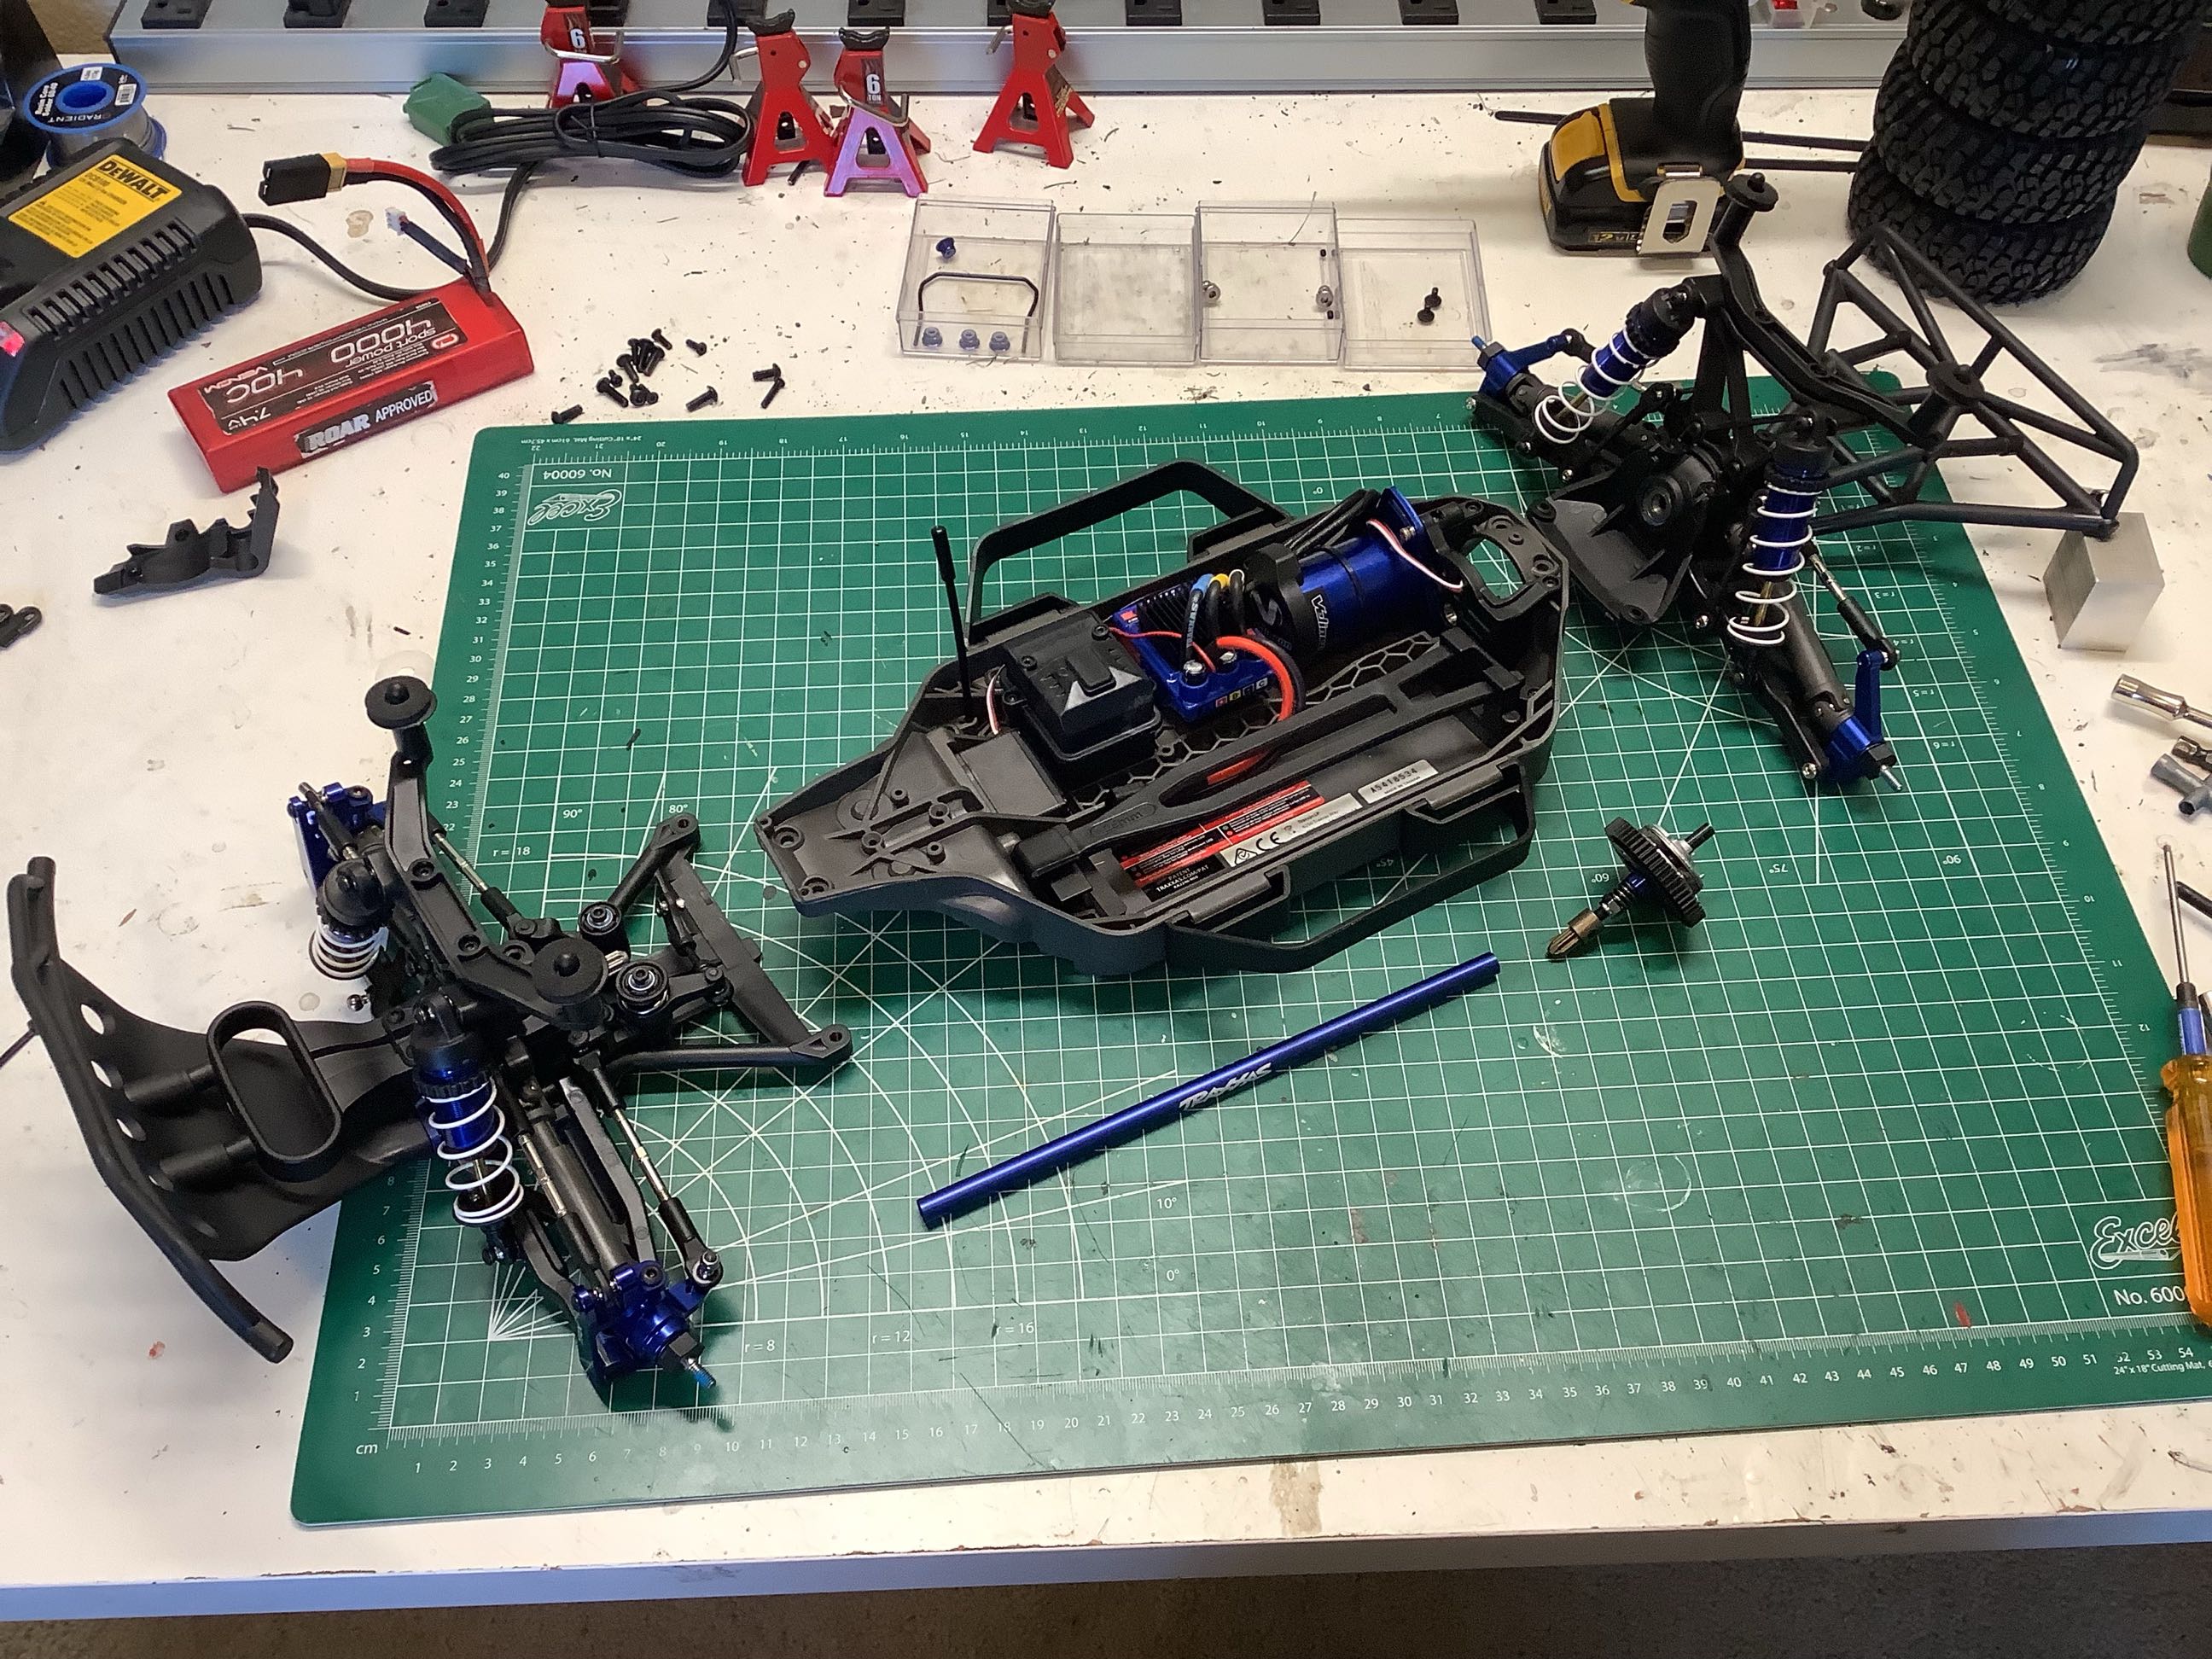
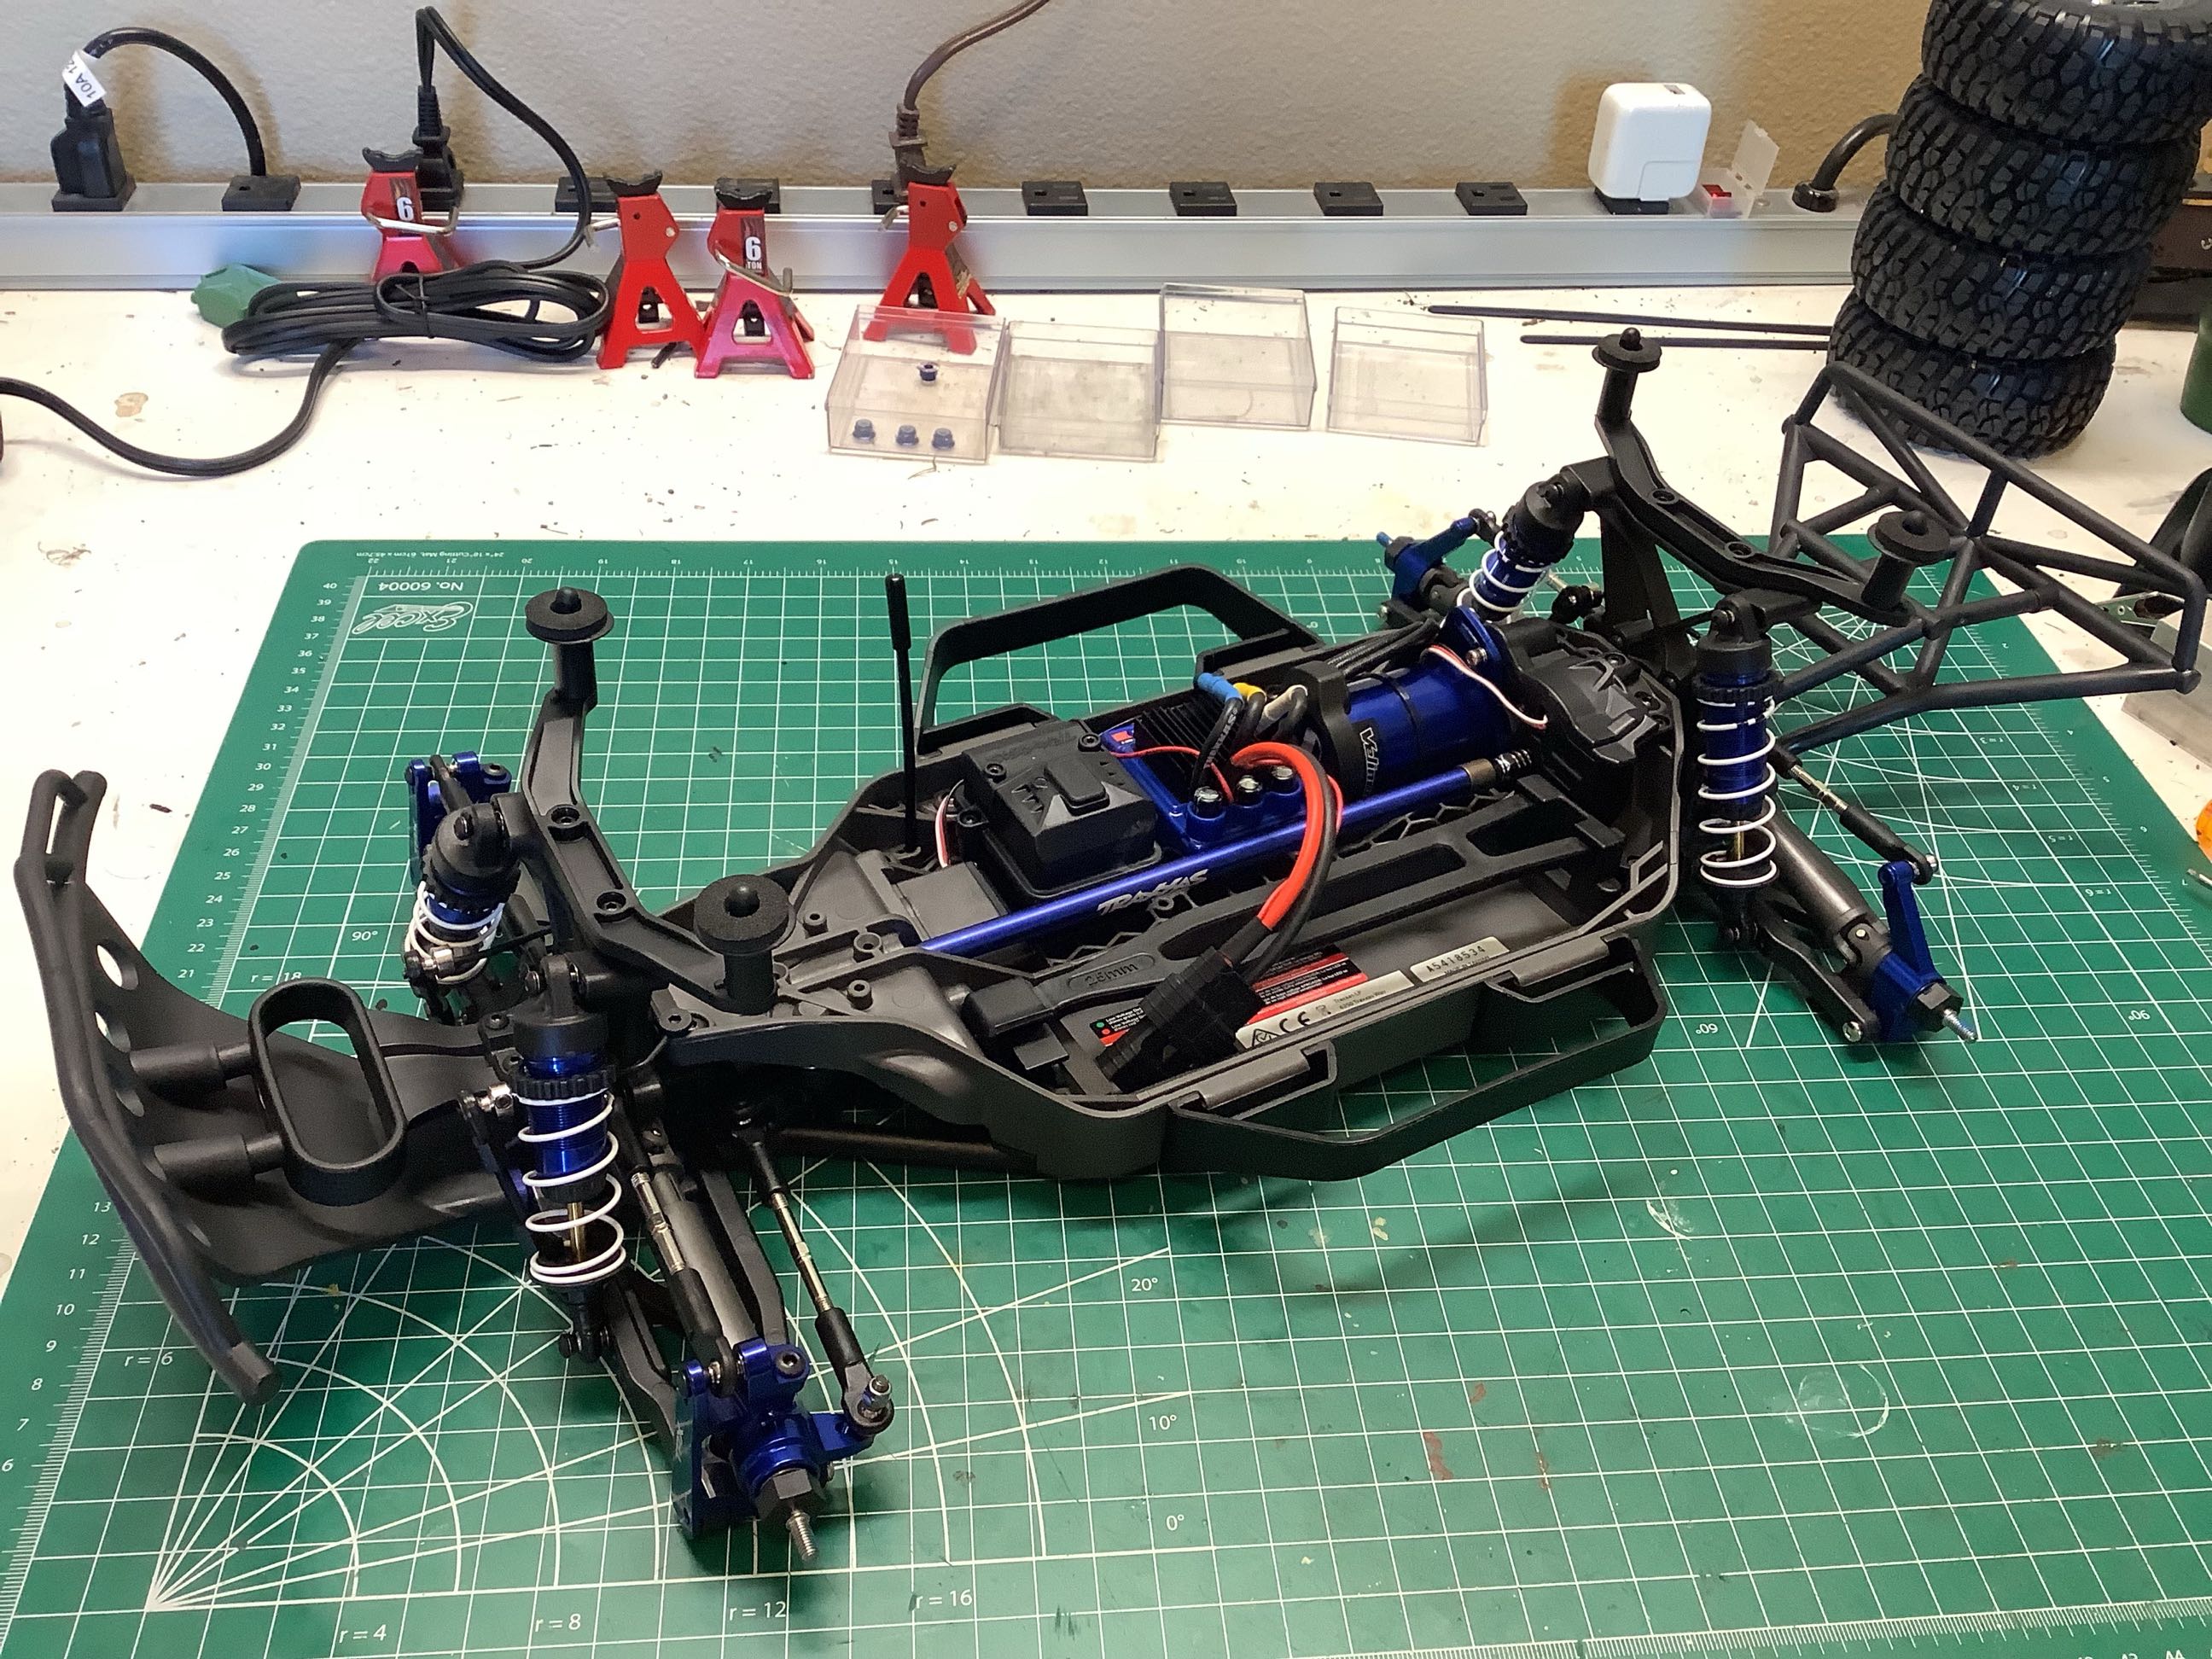
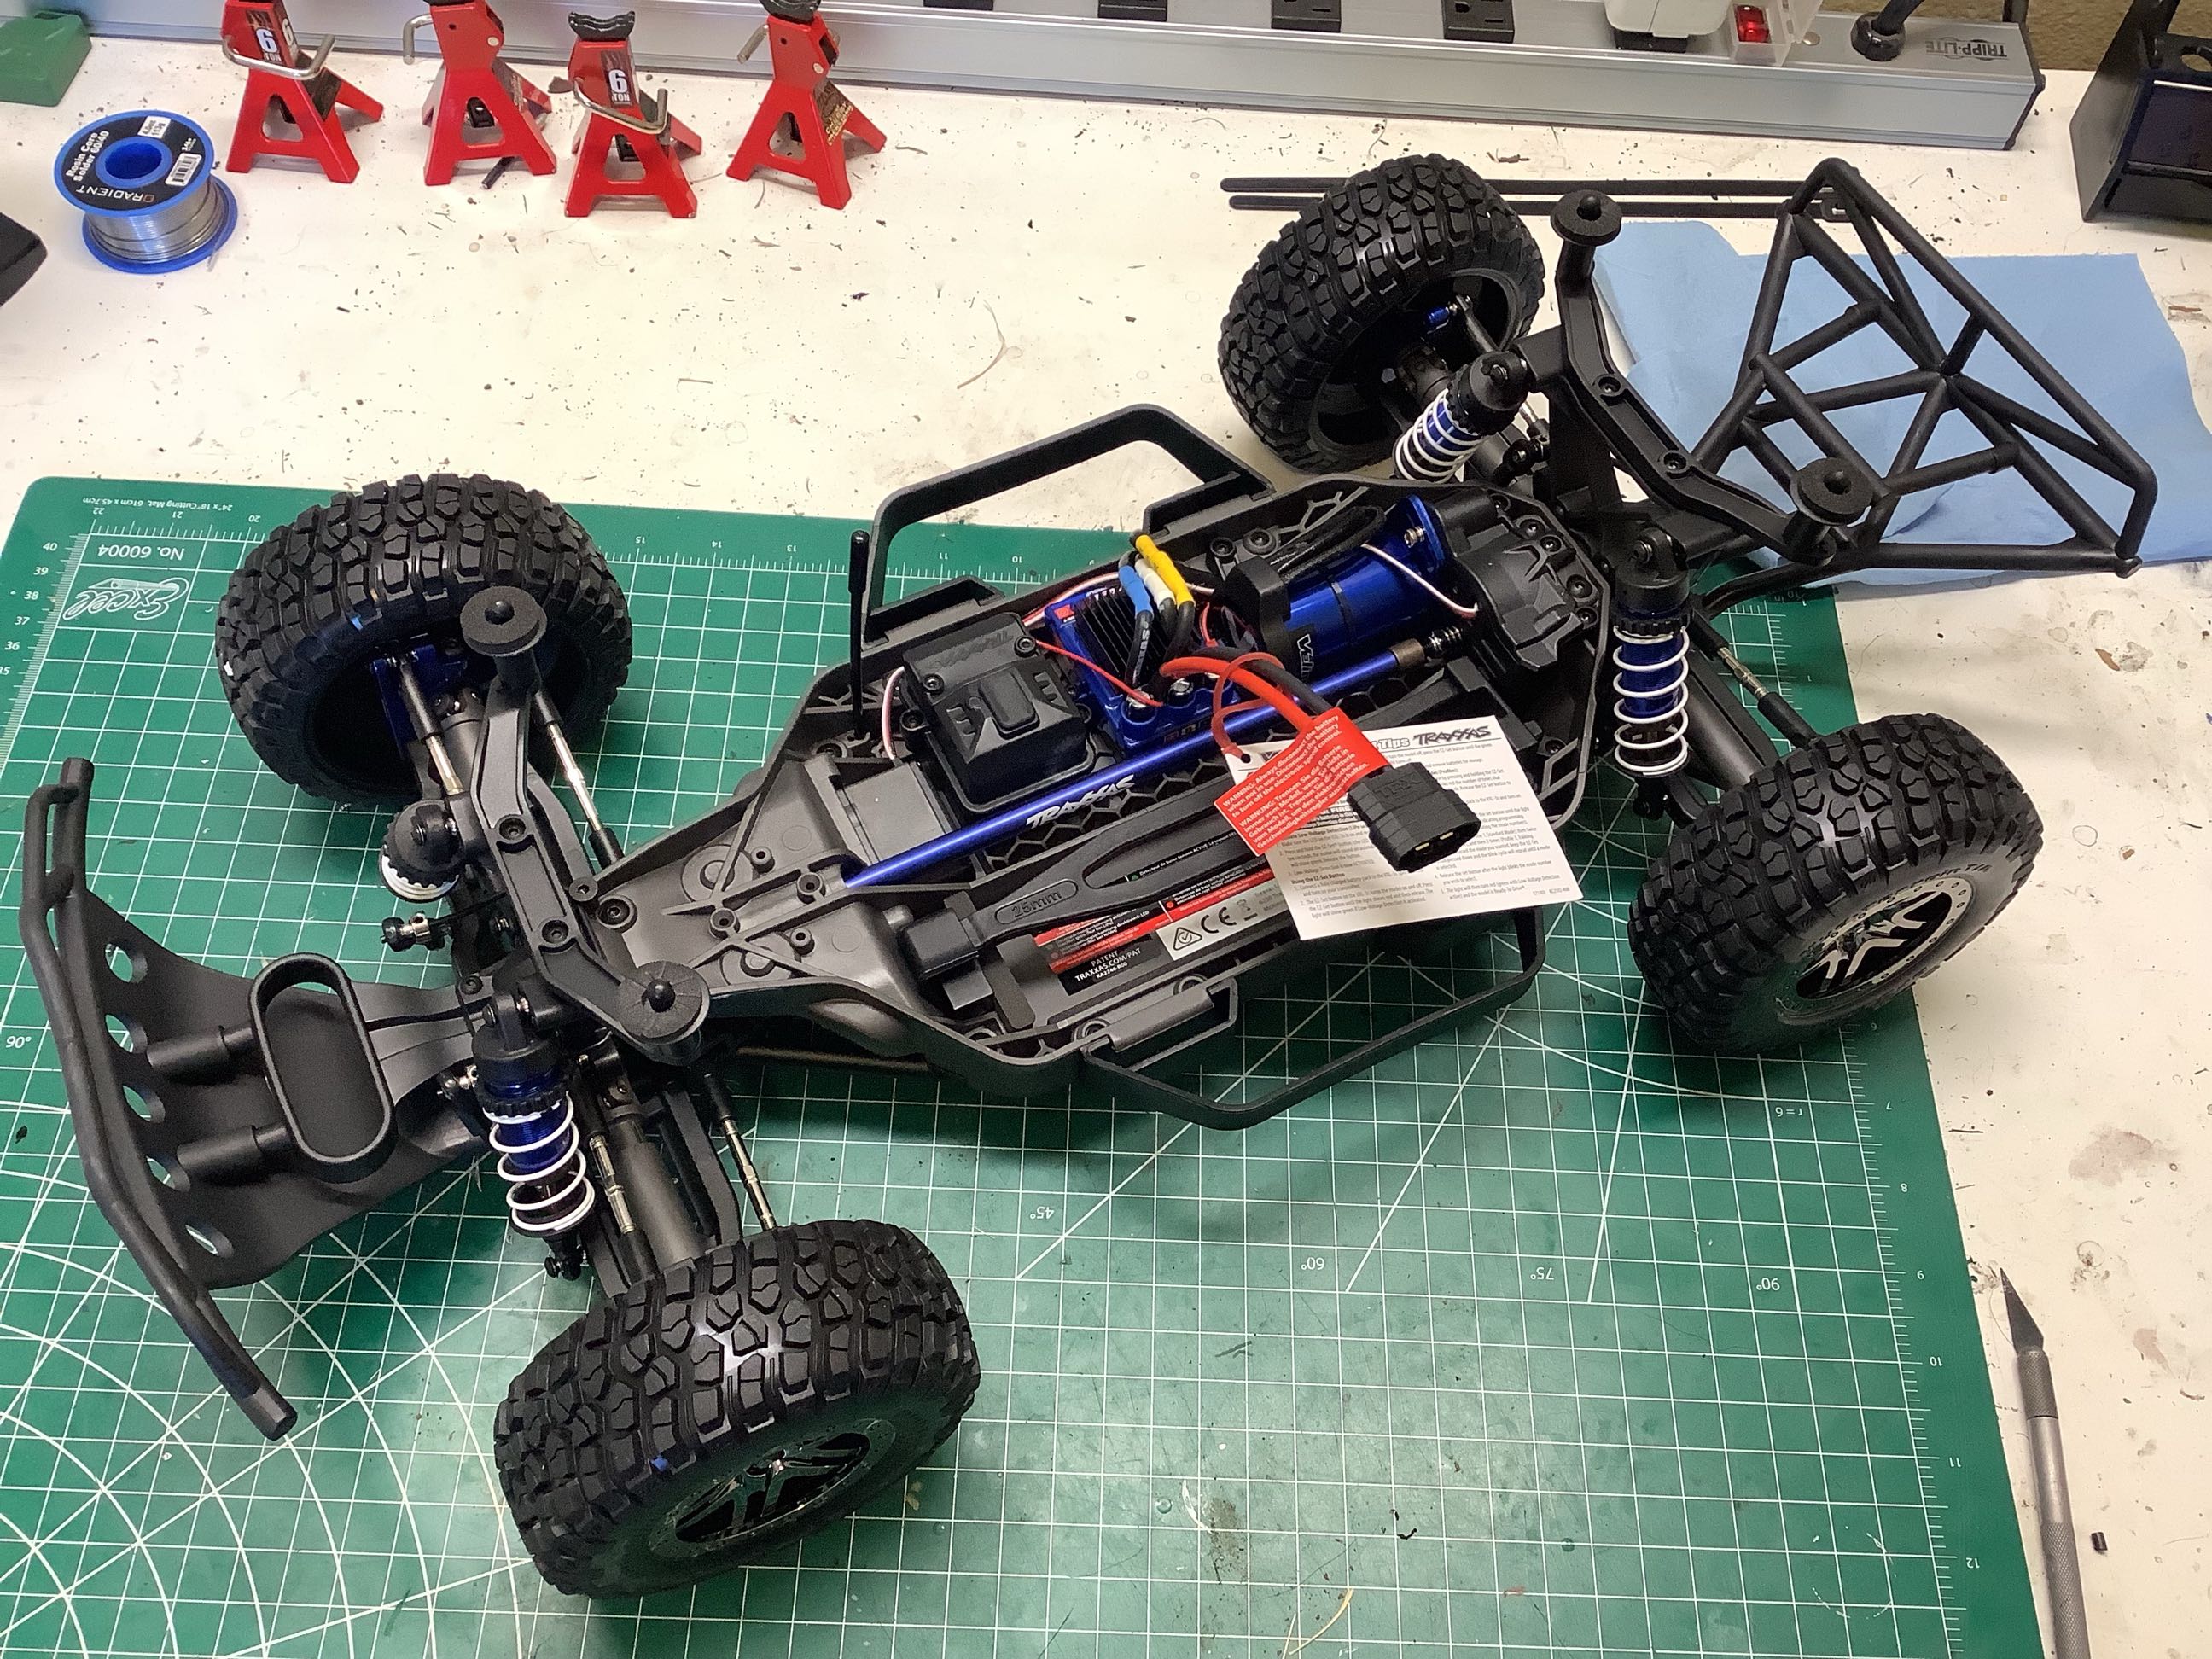
That's everything! The picture on the left shows an exploded view of the modules. There is a front suspension and steering assembly, a central chassis and electronic assembly, a rear suspension assembly, and the drive shaft and slipper clutch which pass between them. The completed chassis is shown on the right. Should be built back to the standard at which it came out of the box. The tires you see in the background are identical to those supplied on every other Slash 4x4.