Tamiya Porsche 935 Project
Page 1: Assembly
Because I have already built another GT-01, I did not record most of the build process here.
For those interested in more information about the build of this
chassis, a detailed build record of another GT-01 can be found on my Ferrari 288 GTO page.
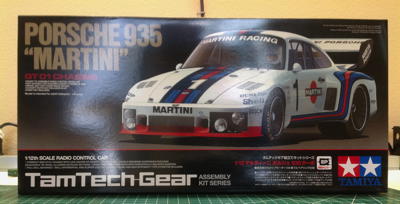
The box is just like the other Tamtech Gear boxes and about the same
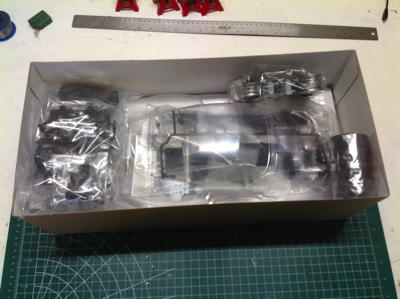
size as the box for a regular 1/10 scale chassis. Inside though,
the GT-01 has vastly more parts than a regular chassis.
Here are the parts arrayed on my building table. There are lot of tiny fiddly bits here.
Even though I've built and photographed it before, every time I build
one of these I marvel at the tiny and intricate complexity. Bask
in the glory. I said bask!
The wheels were a little tricky. They are molded in gray but the
middle needs to be black and it is important that the dividing line be
sharp but masking a perfect circle is impossible. I started by
roughly masking a polygon instead and then spraying the black. I
filled in the remaining areas with a black paint pen which allowed me to
get right to the edges of the inner rim. The black oil pen was a
little shinier than the other paint so then I went over it all with flat
clear. It worked pretty well.
A closeup of the mounds of tiny ball joints and then the completed
rolling chassis with painted wheels. Other than the wheels, this
is identical to my other GT-01 chassis.
I was able to set the entire body over the chassis before even trimming
it to see how it fit. On the right I've trimmed it out. The
other Tamtech Gear models I've built have come with a trimmed body but
this one did not.
Now I've test fit all of the plastic parts which will need to attach to
the body. There are a lot of them. You can see the
incredible complexity of the rear of the body. The polycarbonate
is completely open and all the bumper, wing, and tail light details are
hard plastic. The white part of the intercooler is the same part
used on the 934 which makes sense since a 935 body is just a 934 with a
body kit.
I used some of my new Tamiya masking sheets which come with plastic
attached to mask the area for the front red splitter. Everything
else will be white. The window masks are already trimmed on the
sheet.
That's a lot of stickers. A lot. This easily took as
long to decorate as any other model I've ever done. The left hand
sheet is all window trim. The middle sheet is for the spoiler and
is redundant with some stickers on the right sheet, but I think it was
included because it has thicker stickers which are more opaque and look
better on top of a black spoiler.
On the left you can see the stickers applied to all the plastic
parts. I did this first to break of the monotony of the long
sticker project. On the right I've also installed a simple light
kit which makes this model look much better and more real.
I didn't cover the whole model with masking when I painted the red
because I figured there was plenty of space between the bumper and
everything else so there wouldn't be any overspray. I was
wrong. The left hand side of the car has a large reddish blotch
which showed up after the white was sprayed as shown which was
devastating to me. The stickers partially hide it, but not
entirely.
Here is the completed body which looks great from every angle.
Some of the stickers go around corners which makes them very difficult
to keep smooth and even more difficult to align with adjacent stickers.
The only part used from this tree is the driver. Everything else is for the 934 and not used here.
Here's a look at the model with the lights on. Awesome.
Have to get one glory shot of this latest Tamtech model with my others. I really love these little things. Get them.
©2021 Eric Albrecht

