Tamiya Fire Dragon Project
Page 1: Assembly
The chassis of the Fire Dragon is almost identical to that of the
Thunder Shot which I've already documented in detail. Please see that page for more information. I'll only discuss the relevant differences here.
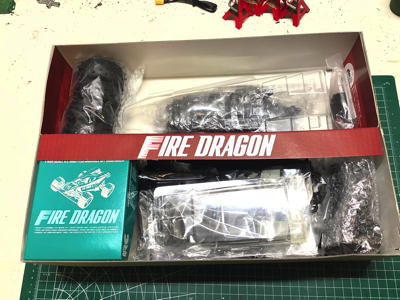
The re-release of the Fire Dragon has box art identical to that of the
original release, as far as I can tell. This is probably because
there are no licensed sponsor decals that need changing. On the
right you can see the contents of the box laid out as usual for a
Thundershot derived car.
The now familiar layout of parts for a Thundershot chassis. There
is nothing unique about the chassis on this buggy, it is totally derived
from previous releases. It does combine some of those previous
features in ways that didn't go together before though. Read on to
find out how.
These photos compare the rear suspension from the most recent release,
the Terra Scorcher (left), to the Fire Dragon (right). The Fire
Dragon uses the shock tower from the Terra Scorcher, but returns to the
fixed upper links and dogbones of the Thunder Dragon. The Fire
Dragon does not come with a rear sway bar, so it is like the Thunder
Dragon in that respect.
Let's do the same comparison with the front suspension. Like the
Terra Scorcher (and unlike the Thunder Dragon), there are two
independent front shocks instead of a lateral mono shock. Like the
rear suspension, the Fire Dragon returns to the fixed upper links and
dogbones of the Thunder Dragon. Everything else seems identical.
All of the other cars on the Thunder Shot chassis use the same chassis
cover with an integrated driver figure. Because the Fire
Dragon driver sits much further forward, this model uses a different
plain chassis cover as shown. The driver figure comes from the
Grasshopper and screws to the body through the top of his head.
This figure is simpler with no arms or steering wheel.
Here we can compare the Thunder Dragon chassis (left) to the Fire Dragon
chassis (right). The only differences are the front shocks, shock
towers, and position of the front body mount. My Fire Dragon came
with an ancient TEU-101BK speed controller so I had to install a
separate BEC. Once that is done, it works perfectly fine with no
obvious performance difference from a newer controller.
Unlike the Thunder Dragon body, the Fire Dragon body was not precut or
painted. On the left you can see the body as it came out of the
box. If you look closely you can see that the elongated body mount
holes are already cut, as is a rectangular slot between the rear
pods. On the right I've trimmed out all the excess
polycarbonate. The front wheel arches are a bit tricky, but not as
much as that rear area. The precut rectangular slot made it a lot
easier though.
There are no window masks included with the kit so I had to mask the
window manually. Because the transparency is all curved, masking
is not easy. The rest of the body is just a single color:
red. The PS red goes on pretty thin and ends up bearing
translucent. I backed it with silver which ended up giving it a
great metallic character. I then put black over the silver so
that's what you'll see through the window.
The addition of the stickers makes a huge difference to the
appearance. Some of them are very large making it difficult to
apply them straight and without bubbles. I think I did a decent
job. The completed model with driver is shown on the right.
©2022 Eric Albrecht

