Tamiya King Blackfoot Project
Page 1: Assembly
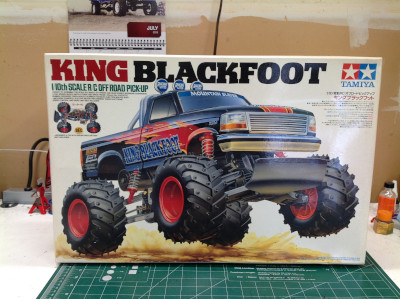
I purchased the King Blackfoot used, but it was still complete with a
box in great condition. Inside the parts trees were scattered
rather than bagged like they are new, and the tires were already stored
on the wheels. As far as I could tell, all the parts were new with
the notable exception of the body. Even though the model had
never been built, the body had obviously been used. It was
scratched and cracked, but it had never been painted and the stickers
were still new on the sheet.
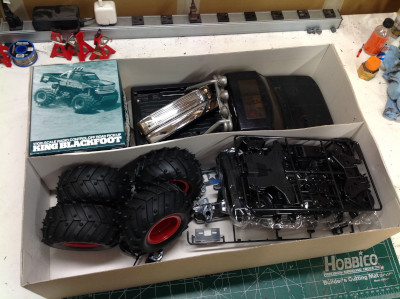
Here are the parts spread out on the table along with the original
manual and hardware bags. There are not very many parts. On
the right you can see the miscellaneous parts of the disassembled body
after I installed the stickers and painted the grille. They don't
look brand new but they are in pretty good shape. The chrome is a
bit dull and cloudy.
These photos show the condition of the body as it arrived in the
box. From afar it looks pretty good, but up close you can see some
scratches on the hood and there were even a few cracks. I was
able to repair the cracks and sand the scratches smooth. After
application of a layer of black paint, the body looks new.
The parts trees reveal that the Blackfoot is an interesting amalgamation
of prior sets. Obviously its DNA goes back to the original 58058
Blackfoot, but even before that the ORV chassis came from the 58037
Subaru Brat which is confirmed by the "A" space frame parts tree shown
on the left. The original Blackfoot gearbox was not too good but
was updated by the time of the 58110 Super Blackfoot. Even before
that though, the upgraded gearbox first showed up on the 58101 Bush
Devil. On the right you can see that the "D" parts tree for the
gearbox is from the Bush Devil.
As you can see on the left, the "X" friction dampers are from the 58082
Madcap. They were blue on the Madcap and are red here, but are
otherwise unchanged. Finally, on the right we see the "E" parts
tree for the shock towers which is new for this model.
This model uses a very sturdy gear differential housed in a giant ring
gear. The whole thing then sits inside the gearbox housing as
shown. There's only a single stage of additional gear reduction
given that the second gear in the photo also serves as the motor spur
gear.
The completed gearbox now has the drive cups installed as well as the
fixed length upper suspension arms which are pinned directly to the
housing. This is the same gearbox introduced with the Super
Blackfoot, but the upper arms are different. On the Super
Blackfoot the rear dampers connected to the lower arms, but here they
connect to the upper arms.
The photo on the left shows a completed rear lower suspension arm as
well as an exploded view of another to visualize the assembly
process. Each arm comes in two pieces which are screwed together
with an upright pinned at the end. The upright houses a pair of
bearings and a drive cup. On the right these lower arms have been
installed along with the dog bone axle and the stock motor. This
motor uses a very long 10 tooth pinion to reach inside far enough to
mate with the spur gear.
The steering is very simple. There is a single bell crank mounted
to a chassis cross member. The servo saver is not here, it will be
mounted to the servo horn.
Here you can see the space from chassis along with the front bulkhead
which differs substantially from the original Blackfoot and also from the Super Blackfoot. The lower
arms are 2-piece and the upper arms are fixed length.
This kit was designed in the early days of Electronic Speed Controls
and was intended to use Tamiya's C.P.R. unit but I don't have
one. I did, however, have an older TEU-104BK ESC. This is a
perfectly good ESC except that it does not have an integrated BEC
(voltage regulator) so it passes battery voltage directly through to the
receiver and servo. I installed a cheap 3A BEC to solve this
problem.
The shocks included in the kit are the dreaded "friction dampers".
I'll admit that these are better than some because at least they have a
rubber collar inside which does provide a certain amount of resistance
to motion. They are quite long as you can see.
Now I've installed the cover over the electronics, the bumper, and the
wheels and tires. The tires appear to be new and unused.
I've painted the body but have not yet installed the stickers or applied
the clear coat.
©2019 Eric Albrecht

